This was supposed to be a double batch of my usual chocolate chip cookies. I had the butter softening, the eggs sitting out, the whole nine yards. But halfway through measuring flour, I realized I only had one stick of butter left in the fridge. Not two. One. And I was already running late for a dinner party at my friend Maria’s place. You know that sinking feeling when you’re in the middle of a recipe and you just know you’ve messed up the math? Yeah, that was me, staring at a lonely stick of butter and a rapidly ticking clock.
I almost just grabbed a box mix from the pantry. Honestly, I was that close. But something made me push forward. I scaled everything down on the fly, reduced the sugar by a few tablespoons, and threw in an extra splash of vanilla because, well, it felt right. The dough looked a little different than usual. Less of it, obviously, but also a bit more buttery, a bit more fragrant. I baked off a test cookie while I cleaned up the mess I’d made, fully expecting a dry, disappointing result I’d have to explain away at the party.
What came out of that oven was nothing like the plan. It was better. That single cookie was golden around the edges, soft in the center, and had this incredible chew that my full batches never quite achieved. I stood there in my messy kitchen, eating a cookie that was supposed to be a backup plan, and I knew I’d stumbled onto something. I baked the rest, piled them on a plate, and walked into Maria’s party feeling like I’d accidentally cracked a code. They were gone in twenty minutes. Someone asked for the recipe, and I had to admit I wasn’t even sure what it was. But I’ve made them a dozen times since then, and let me tell you—these small-batch cookies are the ones I reach for every single time I need to show up with something impressive without the stress of a full production.
Why You’ll Love This Recipe
Let’s face it—most chocolate chip cookie recipes are designed to feed an army. They make three dozen, sometimes four. That’s great for a bake sale or a family of eight, but for a dinner party or a casual gathering? You end up with a mountain of cookies that either go stale or get inhaled before you even get a chance to enjoy one yourself. This recipe changes that completely.
- Perfectly Sized for Entertaining : Makes exactly 12 to 14 cookies, which is the sweet spot for a party. Enough to share, but not so many that you’re stuck with leftovers for a week.
- No Fancy Ingredients : Butter, sugar, eggs, flour, chocolate chips. That’s it. You probably have everything in your pantry right now, which means you can whip these up on a whim.
- Incredible Texture : These cookies have that perfect balance—crispy edges, soft and chewy centers, and just the right amount of chocolate in every bite. The small batch actually makes the texture better because the ratio of butter to flour is slightly different.
- Quick to Make : From start to finish, you’re looking at about 25 minutes. No chilling required. No complicated steps. Just mix, scoop, and bake.
- Always a Crowd-Pleaser : I’ve brought these to potlucks, game nights, and holiday parties. They disappear faster than anything else on the table. Kids love them, adults love them, and people always ask for the recipe.
What makes these cookies different from every other chocolate chip cookie recipe out there? It’s the technique. By using a slightly higher ratio of brown sugar to white sugar, and by melting the butter instead of creaming it with sugar, you get a cookie that’s chewier and more flavorful without being greasy. This isn’t just another version of the same old cookie—it’s the version you’ll come back to again and again, especially when you’re hosting.
There’s something about pulling a warm tray of cookies out of the oven just as your guests arrive. The smell alone sets the tone for the whole evening. And when you can do it without spending hours in the kitchen or stressing over measurements? That’s the kind of cooking that makes hosting actually fun.
What Ingredients You Will Need
This recipe uses simple, everyday ingredients to deliver cookies that taste anything but ordinary. The key is in the details—how you prep each ingredient and the ratios you use. Here’s everything you’ll need:
For the Cookie Dough
- 1/2 cup (113g) unsalted butter — I use salted butter in a pinch, but unsalted gives you more control over the final flavor. Make sure it’s melted and slightly cooled, not hot. (Hot butter will cook the eggs and ruin the texture.)
- 1/2 cup (100g) packed light brown sugar — This is where the chewiness comes from. Dark brown sugar works too, but it will give the cookies a deeper, almost molasses-like flavor. I prefer light brown sugar for a classic taste.
- 1/4 cup (50g) granulated sugar — The white sugar helps with spreading and gives the edges that nice crispy texture. Don’t skip it or reduce it too much.
- 1 large egg yolk — Yes, just the yolk. This is a trick I learned from a pastry chef friend. Using only the yolk adds richness and tenderness without making the dough too wet. Save the egg white for an omelet or freeze it for later.
- 1 teaspoon vanilla extract — I recommend pure vanilla extract, not imitation. Nielsen-Massey is my go-to brand. It makes a noticeable difference in the final flavor.
- 3/4 cup (95g) all-purpose flour — Spoon and level your flour. Scooping directly from the bag packs in too much flour and leads to dry cookies. I use King Arthur Flour for consistent results.
- 1/2 teaspoon baking soda — Make sure it’s fresh. Baking soda loses its potency over time, and flat cookies are sad cookies.
- 1/4 teaspoon salt — If you’re using salted butter, reduce this to a tiny pinch. Salt balances the sweetness and enhances the chocolate flavor.
- 1/2 cup (90g) semi-sweet chocolate chips — Guittard or Ghirardelli are my favorites. You can also chop up a good-quality chocolate bar for bigger, more irregular chunks. That’s what I do when I’m feeling fancy.
Ingredient Tips and Substitutions
- Butter : Vegan butter works well here. Just make sure it’s a stick-style butter substitute, not the spreadable kind in a tub.
- Sugar : Coconut sugar can replace both sugars, but the cookies will be darker and slightly less sweet. Texture will be a bit grainier too.
- Flour : For a gluten-free version, use a 1:1 gluten-free baking flour blend. I’ve tested this with Bob’s Red Mill, and it works beautifully.
- Chocolate Chips : Milk chocolate makes sweeter cookies. Dark chocolate (60% or higher) gives a more sophisticated flavor. White chocolate and macadamia nuts are also a fantastic variation.
- Egg Yolk : For a dairy-free or egg-free version, you can use 1 tablespoon of aquafaba (chickpea brine) mixed with 1 teaspoon of oil. The texture won’t be exactly the same, but it’s a solid alternative.
Equipment Needed
You don’t need a fancy kitchen to make these cookies. Here’s what you’ll need:
- Mixing bowls : One medium bowl for the wet ingredients and one small bowl for the dry ingredients. I use glass or stainless steel bowls because they don’t retain smells.
- Whisk : A standard wire whisk works perfectly for combining the melted butter and sugars. No electric mixer required.
- Rubber spatula : For folding in the flour and chocolate chips. A wooden spoon works too, but a spatula gives you more control.
- Baking sheet : A half-sheet pan is ideal. If you only have a dark non-stick pan, keep an eye on the cookies—they’ll bake faster. I love my Nordic Ware aluminum sheets for even browning.
- Parchment paper or silicone baking mat : Parchment paper is cheap and makes cleanup a breeze. Silicone mats are reusable and also work great.
- Cookie scoop or tablespoon : A #40 cookie scoop (about 1.5 tablespoons) gives you uniform cookies that bake evenly. If you don’t have one, just use a regular tablespoon.
- Cooling rack : Letting cookies cool on a rack prevents soggy bottoms. If you don’t have one, a clean cutting board works in a pinch.
One tip I learned the hard way: if your baking sheet is warped or has dark spots, rotate it halfway through baking. Uneven heat distribution is the number one cause of cookies that are burnt on one side and underdone on the other.
Preparation Method
This recipe comes together in about 25 minutes from start to finish. No chilling, no fussing. Here’s exactly how to do it:
- Preheat your oven to 350°F (175°C). Line a baking sheet with parchment paper or a silicone mat. Do this first so the oven is fully heated by the time your dough is ready.
- Melt the butter. In a medium microwave-safe bowl, melt the 1/2 cup of butter in 20-second intervals. Stir between each interval to prevent splattering. You want it fully melted but not bubbling hot. Let it sit for a minute or two to cool slightly. (If you pour hot butter onto sugar, it will melt the sugar and change the texture.)
- Whisk in the sugars. Add the 1/2 cup brown sugar and 1/4 cup granulated sugar to the melted butter. Whisk vigorously for about 30 seconds until the mixture looks like wet sand and smells amazing. This step is important—it helps dissolve the sugar and creates that shiny, crackly top on the cookies.
- Add the egg yolk and vanilla. Drop in the egg yolk and 1 teaspoon of vanilla extract. Whisk until everything is combined and the mixture looks smooth and glossy. It might look a little separated at first, but keep whisking—it will come together.
- Mix the dry ingredients separately. In a small bowl, whisk together the 3/4 cup flour, 1/2 teaspoon baking soda, and 1/4 teaspoon salt. Make sure there are no lumps. (I sometimes sift mine if the flour seems clumpy.)
- Combine wet and dry ingredients. Pour the flour mixture into the butter-sugar mixture. Use a rubber spatula to fold everything together gently. Stop as soon as you no longer see streaks of flour. Overmixing at this stage develops gluten and makes tough cookies.
- Fold in the chocolate chips. Add the 1/2 cup of chocolate chips and fold them in with a few quick strokes. Make sure they’re evenly distributed. If you want a few chips on top of each cookie for looks, reserve a small handful to press onto the dough balls after scooping.
- Scoop the dough. Use a cookie scoop or a tablespoon to portion the dough into 12 to 14 balls. Place them about 2 inches apart on the prepared baking sheet. They will spread, so give them room. If you reserved some chips, press a few onto the tops of the dough balls now.
- Bake for 10 to 12 minutes. The cookies are done when the edges are golden brown and the centers still look slightly soft and puffy. They will continue to set on the baking sheet as they cool. For softer, chewier cookies, pull them at 10 minutes. For crispier edges, go to 12 minutes.
- Cool on the baking sheet for 5 minutes. This step is crucial. Moving them too early will cause them to fall apart. After 5 minutes, transfer the cookies to a wire rack to cool completely. Or, you know, eat one warm. I won’t tell.
One thing I always do: right when the cookies come out of the oven, I gently nudge each one with a round cookie cutter or a glass to make them perfectly round. It’s a small trick that makes them look bakery-quality, especially if you’re serving them at a party.
Cooking Tips & Techniques
I’ve made this recipe more times than I can count, and I’ve learned a few things along the way. Here are the tips that make the biggest difference:
Don’t skip the melted butter step. I know some recipes call for creaming softened butter and sugar together, but melted butter is the secret to these cookies. It creates a denser, chewier texture because less air is incorporated into the dough. Plus, it’s faster and doesn’t require a stand mixer.
Use a kitchen scale if you have one. Measuring flour by weight is the most accurate way to get consistent results. A cup of flour can weigh anywhere from 120 to 150 grams depending on how you scoop it. For this recipe, 95 grams is the sweet spot. I’ve had batches fail because I packed the flour too tightly, and they came out dry and cakey.
Let the dough rest if you have time. I know I said no chilling required, and that’s true. But if you have an extra 30 minutes, let the scooped dough balls sit in the fridge. This allows the flavors to meld and the sugars to absorb more moisture, resulting in an even better texture. I’ve done side-by-side tests, and the chilled ones always win.
Watch the oven like a hawk. Ovens vary wildly. My old oven would bake these in exactly 9 minutes. My current one takes 11. Start checking at the 8-minute mark. The cookies should be golden around the edges and still pale in the center. They will look underdone when you pull them out, but trust the process.
Double the recipe if you need more. This recipe scales perfectly. For a larger party, just multiply everything by two. The only thing that changes is you might need to bake in batches or use two baking sheets. I always rotate the sheets halfway through if I’m baking two trays at once.
One mistake I’ve made more than once: forgetting to check my baking soda. I once used a box that had been sitting in my pantry for over a year, and the cookies barely spread. They were dense little pucks. Now I always test my baking soda by dropping a tiny bit into vinegar—if it fizzes vigorously, it’s good. If not, toss it and buy fresh.
Variations & Adaptations
One of the best things about this recipe is how easy it is to customize. Here are some of my favorite variations:
Double Chocolate Chip Cookies : Replace 2 tablespoons of the flour with 2 tablespoons of unsweetened cocoa powder. Use dark chocolate chips instead of semi-sweet. The result is a rich, fudgy cookie that feels extra indulgent for a party.
Peanut Butter Chocolate Chip Cookies : Reduce the butter to 1/4 cup and add 1/4 cup of creamy peanut butter. Melt it together with the butter. Use peanut butter chips along with the chocolate chips for double the peanut flavor. These are always a hit at gatherings.
Oatmeal Chocolate Chip Cookies : Replace 1/4 cup of the flour with 1/4 cup of old-fashioned oats. Add 1/4 teaspoon of cinnamon to the dry ingredients. The oats add chewiness and a slightly nutty flavor that pairs beautifully with the chocolate.
Vegan Version : Use vegan butter (I like Miyoko’s) and replace the egg yolk with 1 tablespoon of aquafaba mixed with 1 teaspoon of vegetable oil. The texture is slightly less rich, but still delicious. I’ve brought these to parties where no one even noticed they were vegan.
Gluten-Free Version : Substitute the all-purpose flour with a 1:1 gluten-free baking flour blend. I’ve tested this with Cup4Cup and Bob’s Red Mill, and both work well. Add an extra tablespoon of flour if the dough seems too sticky.
Spiced Holiday Cookies : Add 1/2 teaspoon of cinnamon, 1/4 teaspoon of nutmeg, and a pinch of cloves to the dry ingredients. Use white chocolate chips and dried cranberries instead of semi-sweet chocolate chips. These are perfect for Christmas parties.
My personal favorite variation: I make a batch with half semi-sweet chips and half chopped toasted pecans. The crunch of the nuts against the soft cookie is incredible. I started doing this after a disastrous attempt at making pecan sandies, and honestly, this accidental combo is way better than the original recipe I was trying to make.
Serving & Storage Suggestions
These cookies are best served warm, straight from the oven. The contrast between the crispy edges and the melty chocolate centers is pure magic. If you’re hosting a party, here’s my strategy: bake the cookies just before guests arrive, or even while they’re mingling. The smell will draw everyone to the kitchen, and you’ll be the hero of the night.
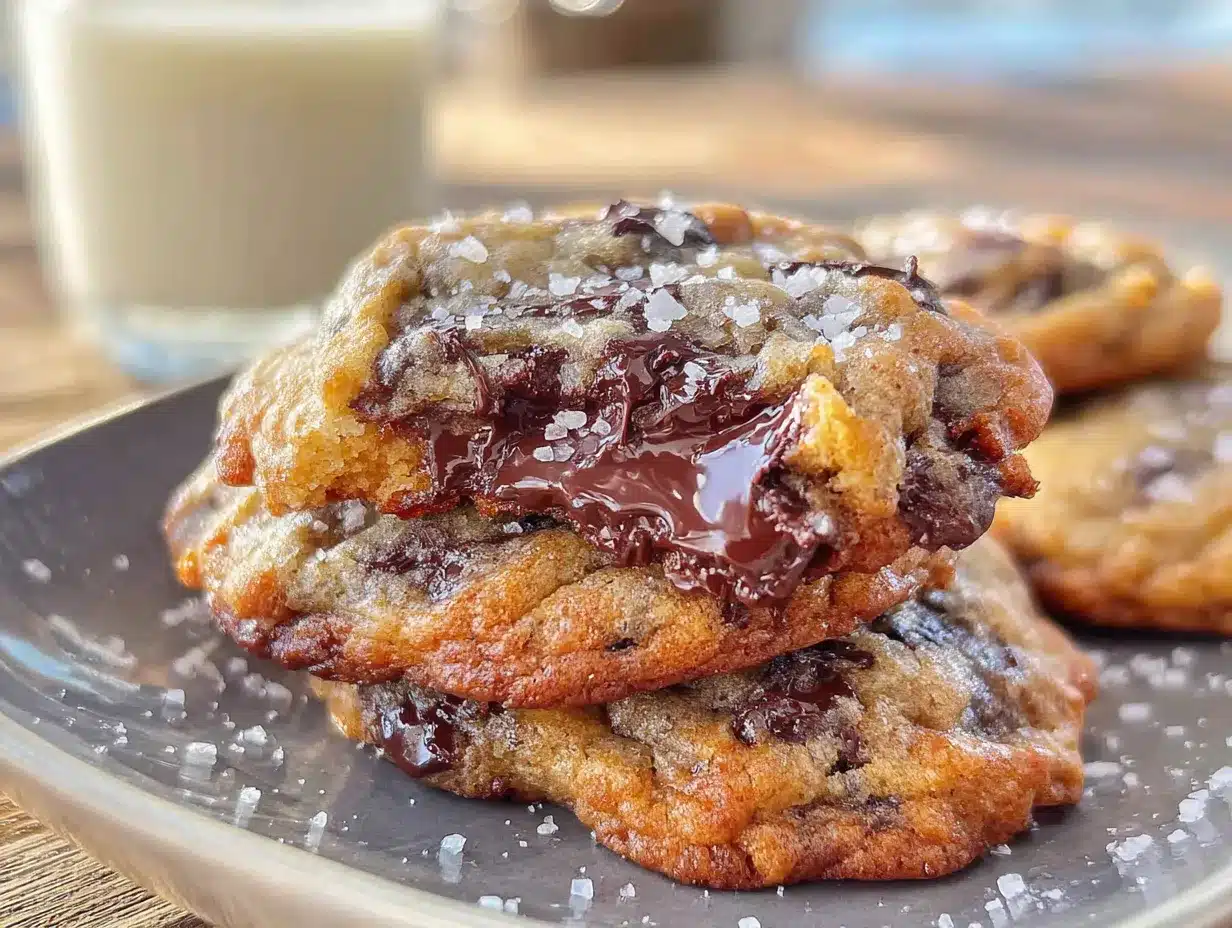
For presentation, I like to arrange the cookies on a large wooden board or a ceramic platter. Sprinkle a little flaky sea salt on top right before serving—it sounds fancy, but it takes two seconds and makes the cookies taste even better. You can also stack them in a mason jar tied with a ribbon for a rustic, grab-and-go setup.
These cookies pair beautifully with a cold glass of milk, a hot cup of coffee, or even a glass of red wine. I’ve served them alongside vanilla ice cream for an impromptu dessert bar, and they were a hit. If you’re putting together a dessert spread, add some fresh berries and a bowl of whipped cream for dipping.
Storage: Keep leftover cookies in an airtight container at room temperature for up to 5 days. They will soften slightly over time, which some people actually prefer. If you want to keep them crispy, add a piece of bread to the container—the bread absorbs excess moisture. (Just don’t eat the bread afterward. Trust me.)
Freezing: You can freeze the baked cookies for up to 3 months. Wrap them individually in plastic wrap and place them in a freezer bag. Thaw at room temperature for about 15 minutes, then warm them in a 300°F oven for 5 minutes. They’ll taste almost fresh-baked. I also love freezing the dough balls. Scoop them, freeze them on a baking sheet, then transfer to a freezer bag. Bake straight from frozen, adding 2 to 3 minutes to the baking time.
Flavor development: Honestly, these cookies taste even better the next day. The flavors meld together overnight, and the texture becomes perfectly balanced. I’ve been known to make a batch the night before a party just so they can rest. Don’t tell anyone, but sometimes I hide a few in the back of the fridge for myself.
Nutritional Information & Benefits
Let’s be real—these are cookies, not a health food. But knowing what’s in them helps you enjoy them mindfully. Here’s the approximate nutritional breakdown per cookie (based on 12 cookies):
- Calories: 185
- Total Fat: 10g
- Saturated Fat: 6g
- Cholesterol: 35mg
- Sodium: 105mg
- Total Carbohydrates: 23g
- Dietary Fiber: 1g
- Sugars: 15g
- Protein: 2g
These numbers will vary depending on the exact brands you use and whether you add nuts or other mix-ins. The good news is that this small-batch recipe makes it easy to enjoy a treat without having a mountain of leftovers tempting you for days.
From a wellness perspective, there are a few bright spots. The butter provides vitamin A and healthy fats. Dark chocolate contains antioxidants and can help with mood (which is why we all reach for it when we’re stressed). And honestly, there’s something to be said for the mental health benefits of sharing fresh-baked cookies with people you care about. That counts for something, right?
If you’re watching your sugar intake, you can reduce the granulated sugar to 3 tablespoons without significantly affecting the texture. The cookies will be slightly less sweet but still delicious. I’ve also made them with a sugar substitute like monk fruit sweetener, and while the texture is a bit different, they’re still crowd-pleasers.
Conclusion
These small-batch chocolate chip cookies have become my go-to for every party, potluck, and gathering I attend. They’re proof that you don’t need a complicated recipe or a full pantry to make something truly memorable. Sometimes the best things come from accidents—like realizing you only had one stick of butter and deciding to make it work anyway.
What I love most about this recipe is how forgiving it is. You can tweak the add-ins, adjust the bake time, or swap ingredients based on what you have, and it still turns out amazing. It’s the kind of recipe that builds confidence in the kitchen because it works every single time. And when you show up to a party with a plate of warm, homemade cookies, people notice. They remember.
I’d love to hear how these turn out for you. Did you try a variation? Did you double the batch for a bigger crowd? Drop a comment below and let me know. And if you share them on social media, tag me—I want to see your beautiful cookies. Until next time, happy baking, and remember: sometimes the best recipes are the ones you never planned to make.
Frequently Asked Questions
Can I make these cookies ahead of time for a party?
Absolutely. You can bake them up to 2 days in advance and store them in an airtight container. For the best texture, warm them in a 300°F oven for 5 minutes before serving. You can also freeze the dough balls and bake them fresh on the day of your party—just add 2 to 3 minutes to the baking time.
Why did my cookies turn out flat?
Flat cookies usually mean the butter was too warm or the dough was overmixed. Make sure your melted butter is slightly cooled before adding the sugars. Also, check that your baking soda is fresh. If it’s old, it won’t provide enough lift, and the cookies will spread too much.
Can I use margarine instead of butter?
I don’t recommend it. Margarine has a higher water content than butter, which can lead to cookies that spread too much and don’t brown properly. Stick with real butter for the best flavor and texture. If you need a dairy-free option, use a high-quality vegan butter stick, not the spreadable kind in a tub.
How do I make my cookies chewier?
For chewier cookies, use more brown sugar than white sugar (this recipe already does that). You can also replace the egg yolk with a whole egg, but the cookies will be slightly less tender. Another trick is to underbake them slightly—pull them out when the centers still look soft and let them finish setting on the baking sheet.
Can I double this recipe?
Yes, this recipe doubles perfectly. Just multiply all the ingredients by two. The baking time and temperature stay the same. If you’re baking two trays at once, rotate them halfway through the baking time for even results. One batch makes about 12 cookies, so a double batch gives you 24—perfect for a larger party.
Pin This Recipe!
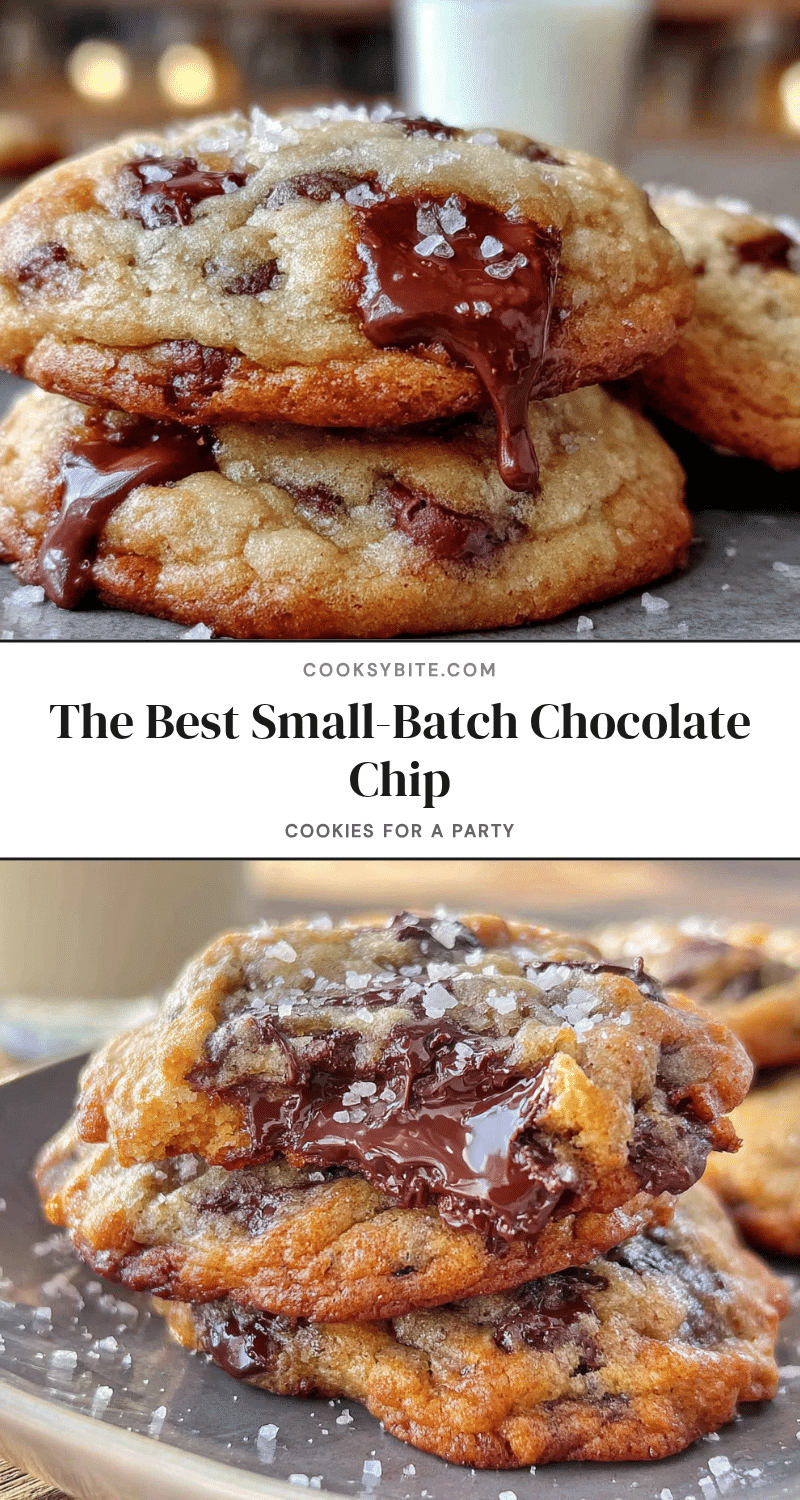
The Best Small-Batch Chocolate Chip Cookies for a Party
These small-batch chocolate chip cookies are perfectly sized for entertaining, with crispy edges, soft and chewy centers, and no chilling required. Made with simple ingredients, they come together in about 25 minutes and are always a crowd-pleaser.
- Prep Time: 10 minutes
- Cook Time: 12 minutes
- Total Time: 25 minutes
- Yield: 12 to 14 cookies 1x
- Category: Dessert
- Cuisine: American
Ingredients
- 1/2 cup (113g) unsalted butter, melted and slightly cooled
- 1/2 cup (100g) packed light brown sugar
- 1/4 cup (50g) granulated sugar
- 1 large egg yolk
- 1 teaspoon vanilla extract
- 3/4 cup (95g) all-purpose flour, spooned and leveled
- 1/2 teaspoon baking soda
- 1/4 teaspoon salt
- 1/2 cup (90g) semi-sweet chocolate chips
Instructions
- Preheat your oven to 350°F (175°C). Line a baking sheet with parchment paper or a silicone mat.
- Melt the butter in a medium microwave-safe bowl in 20-second intervals. Let it cool slightly.
- Whisk in the brown sugar and granulated sugar until the mixture looks like wet sand, about 30 seconds.
- Add the egg yolk and vanilla extract, whisking until smooth and glossy.
- In a small bowl, whisk together the flour, baking soda, and salt.
- Pour the dry ingredients into the wet mixture and fold with a rubber spatula until just combined. Do not overmix.
- Fold in the chocolate chips until evenly distributed. Reserve a few chips to press onto the tops if desired.
- Scoop the dough into 12 to 14 balls (about 1.5 tablespoons each) and place them 2 inches apart on the prepared baking sheet.
- Bake for 10 to 12 minutes, until the edges are golden brown and the centers are still soft and puffy.
- Cool on the baking sheet for 5 minutes, then transfer to a wire rack to cool completely.
Notes
For perfectly round cookies, gently nudge each one with a round cookie cutter or glass right after baking. If you have time, let the scooped dough rest in the fridge for 30 minutes for even better texture. Always check that your baking soda is fresh by testing it with vinegar.
Nutrition
- Serving Size: 1 cookie
- Calories: 185
- Sugar: 15
- Sodium: 105
- Fat: 10
- Saturated Fat: 6
- Carbohydrates: 23
- Fiber: 1
- Protein: 2
Keywords: small-batch chocolate chip cookies, party cookies, easy chocolate chip cookies, no chill cookies, chewy chocolate chip cookies


