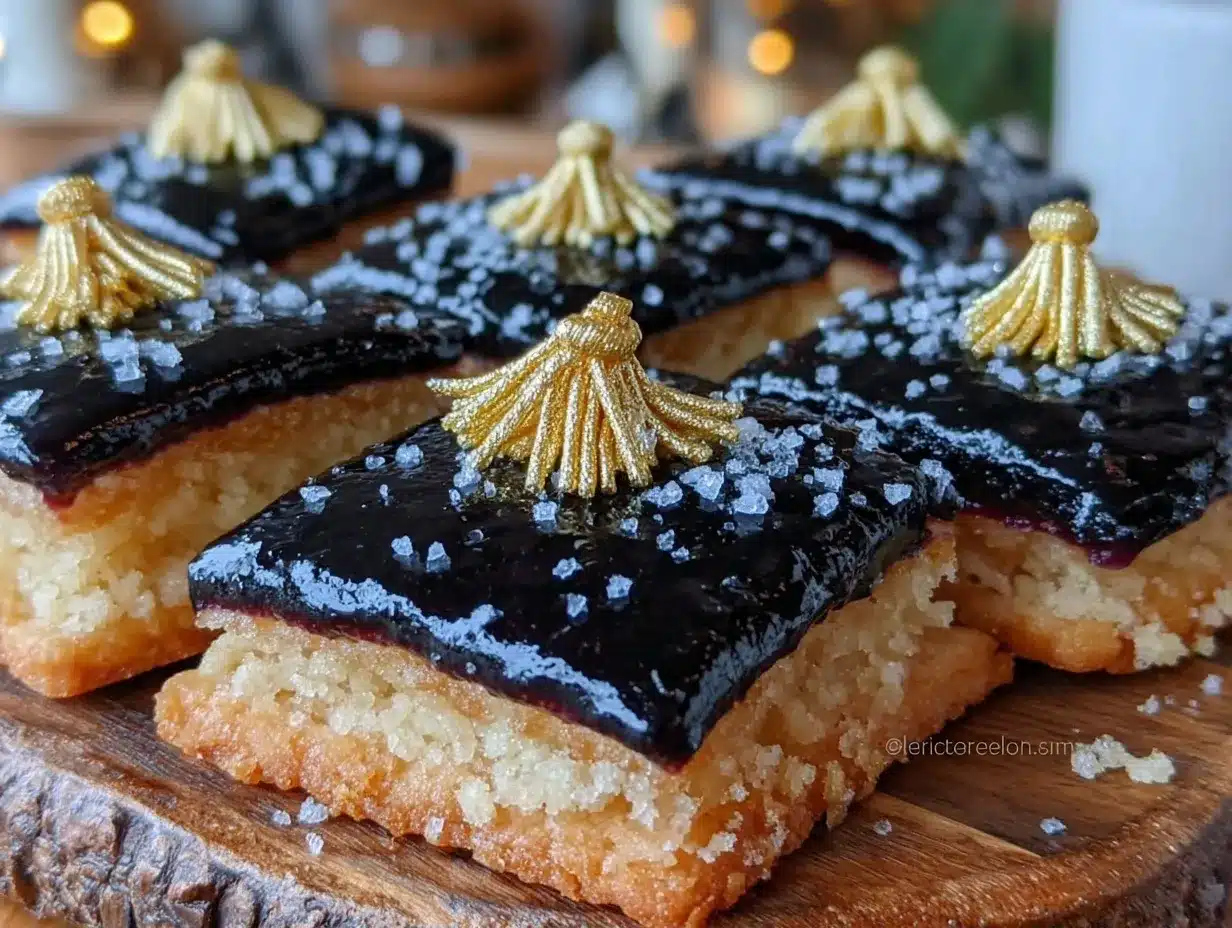
“Hey, do you think the cookies can actually look like little graduation caps?” my niece asked, eyeing the pile of royal icing tubes and sugar cookies spread out across the kitchen table. It was the kind of chaotic afternoon where you’re juggling a dozen things but somehow end up creating something unexpectedly delightful. Honestly, I wasn’t sure if the royal icing would behave or if the cookies would survive the decorating frenzy. But as the afternoon wore on, those flat sugar cookies transformed into tiny, edible mortarboards with bright tassels and sharp edges that even my perfectionist sister gave a nod to.
Making these perfect decorated graduation cap royal icing sugar cookies became more than just a craft project—it was a quiet celebration captured in frosting and sweet dough. The scent of vanilla and almond extract filled the air, mixing with the nervous excitement of a soon-to-be graduate. I remember thinking how these cookies, so simple in ingredients, held the weight of pride and accomplishment in every bite. And honestly, they turned out better than I imagined, with crisp edges, smooth, glossy icing, and colors that just popped.
It’s funny how something as humble as sugar cookies can become a centerpiece of a graduation party, triggering smiles and conversations. These cookies stuck with me because they’re not just pretty on the outside—they’re sturdy enough to hold up to handling, sweet but balanced, and decorated so you can customize each cap with a name or year if you want. After making them multiple times that spring, I realized anyone can nail these with a little patience and the right steps. So here’s my easy step-by-step tutorial to help you make perfect decorated graduation cap royal icing sugar cookies that will impress your guests and sweeten your celebration.
Why You’ll Love This Recipe
After testing and tweaking this recipe through a few graduation seasons, I’m confident this is the best way to make decorated graduation cap royal icing sugar cookies that look professional but are friendly for home bakers. Here’s why this recipe stands out:
- Quick & Easy: The dough comes together in about 15 minutes, and the icing is straightforward to mix and pipe. Perfect if you’re balancing party prep and other commitments.
- Simple Ingredients: No need to hunt down specialty items—most ingredients are pantry staples you probably already have.
- Perfect for Graduation Parties: These cookies serve as both dessert and keepsake, adding a festive touch to celebrations.
- Crowd-Pleaser: Kids love the sweet vanilla flavor, and adults appreciate that the sugar cookie base isn’t overly sweet or dense.
- Unbelievably Delicious: The royal icing dries to a smooth, glossy finish with a slight crunch—just the right contrast to the tender cookie beneath.
What makes this recipe different? Well, the dough is balanced so it won’t spread too much during baking, keeping those graduation caps sharp and defined. Plus, the royal icing recipe is tested for the perfect consistency—stiff enough to hold shapes but smooth enough to flood the cookie tops without frustrating clumps. And if you want to get creative, you can personalize the tassels or add graduation years with ease. Honestly, it’s the kind of recipe that makes you close your eyes after the first bite and think, “Yep, I nailed this.” It’s reliable, sweet, and just festive enough to make your party stand out without extra fuss.
What Ingredients You Will Need
This recipe uses simple, wholesome ingredients to deliver bold flavor and satisfying texture without the fuss. Most of these are pantry staples, and you can easily swap a few to suit your needs.
- For the Sugar Cookie Dough:
- 2 ¾ cups (345 g) all-purpose flour (I like King Arthur for consistent results)
- 1 teaspoon baking powder
- ½ teaspoon salt
- 1 cup (227 g) unsalted butter, softened (room temperature is key)
- 1 ½ cups (300 g) granulated sugar
- 1 large egg, room temperature
- 1 ½ teaspoons pure vanilla extract
- ½ teaspoon almond extract (optional, but adds a lovely depth)
- For the Royal Icing:
- 4 cups (480 g) powdered sugar, sifted (Wilton brand works well)
- 3 tablespoons meringue powder
- 7–8 tablespoons warm water (adjust for consistency)
- Gel food coloring (black for caps, gold or yellow for tassels, and any other colors you want for accents)
- Optional: lemon juice or vanilla extract for flavoring
If you want to make this gluten-free, swapping the all-purpose flour for a 1:1 gluten-free baking flour blend works pretty well—just be sure it contains xanthan gum for structure. For dairy-free needs, use a plant-based butter substitute, but keep in mind the flavor and texture will be slightly different. Also, if you don’t have meringue powder, you could use pasteurized egg whites, but meringue powder is more convenient and safer for parties.
Equipment Needed
- Mixing bowls (one large for the dough and one for the royal icing)
- Electric mixer (stand mixer or handheld) for creaming butter and mixing icing
- Rolling pin (a silicone one helps prevent sticking)
- Graduation cap cookie cutter (about 3 inches wide) or a sharp knife for cutting shapes by hand
- Parchment paper or silicone baking mats (keeps cookies from sticking and helps with easy cleanup)
- Piping bags and small round tips (sizes #1 or #2 work best for detailed icing work)
- Toothpicks or scribe tools (for smoothing icing and fixing small mistakes)
- Cooling rack (to cool cookies evenly)
If you don’t have piping bags, you can use resealable plastic bags with the corner snipped off, but piping bags give better control. For budget-friendly options, I’ve had good luck with reusable silicone baking mats instead of parchment paper. And if you want to keep your royal icing fresh, a bowl cover or plastic wrap pressed directly onto the surface will prevent it from drying out while you work.
Preparation Method
- Make the cookie dough: In a medium bowl, whisk together the flour, baking powder, and salt. In a large bowl, beat the softened butter and sugar with an electric mixer on medium speed until light and fluffy—about 3-4 minutes. Add the egg, vanilla extract, and almond extract; beat until combined.
- Combine dry and wet ingredients: Gradually add the flour mixture to the wet ingredients, mixing on low just until incorporated. The dough will be soft but not sticky. If it feels too sticky, add a tablespoon of flour at a time.
- Chill the dough: Divide the dough in half, flatten into discs, wrap in plastic wrap, and chill in the refrigerator for at least 1 hour. This step is key for sharp cookie edges and easier rolling.
- Roll and cut shapes: Preheat the oven to 350°F (175°C). On a lightly floured surface, roll one disc of dough to about ¼ inch (6 mm) thickness. Use the graduation cap cookie cutter to cut shapes, or carefully cut squares about 3 inches (7.5 cm) wide and trim the edges to form the cap shape.
- Prepare baking trays: Place the cut cookies on parchment-lined baking sheets about 1 inch (2.5 cm) apart. Chill the cut cookies in the fridge for 10 minutes—this helps prevent spreading.
- Bake: Bake the cookies for 10-12 minutes, or until the edges just start to turn golden. The centers should still be pale. Overbaking will make them dry and lose that tender crumb.
- Cool: Transfer the cookies to a wire rack to cool completely before decorating.
- Make the royal icing: In a large bowl, combine the sifted powdered sugar and meringue powder. Add 7 tablespoons of warm water and beat on medium speed for about 7-10 minutes until stiff peaks form. Adjust water quantity 1 teaspoon at a time to achieve the right consistency.
- Color the icing: Divide the royal icing into small bowls. Tint one large portion black for the caps and smaller portions gold or yellow for the tassels. Keep the icing covered with a damp towel or plastic wrap between uses to prevent drying.
- Decorate: Using piping bags fitted with small round tips, outline each cookie with black icing for the cap. Flood the inside area with thinned black icing (add a few drops of water to thin). Let dry for 15-20 minutes until set.
- Add tassels and details: Pipe tassels on one corner of the cap using the gold icing. You can add small details like the graduation year, initials, or dots using contrasting colors.
- Let dry fully: Allow the decorated cookies to dry uncovered for at least 4 hours or overnight to let the royal icing fully harden.
Pro tip: If your icing is too thick to flood, add a few drops of water and mix well. Too runny? Add a little more powdered sugar. When piping, steady your hands by resting your elbows on the table—it really helps with precision.
Cooking Tips & Techniques
Royal icing can be intimidating, but a few tricks help it behave:
- Consistency matters: For outlining, icing should hold its shape on a spoon. For flooding, it should flow slowly off a spoon and settle flat.
- Work quickly but patiently: Royal icing dries fast, so pipe outlines and flood sections in small batches to avoid crusting before you’re done.
- Use toothpicks: They’re your best friend for fixing bubbles or pulling icing into tight corners.
- Practice piping: Before decorating cookies, try piping on parchment paper to get comfortable with pressure and flow.
- Keep icing covered: Royal icing dries out quickly—cover bowls and unused portions tightly.
- Use gel colors: Gel food coloring won’t thin your icing like liquid colors, which is crucial for consistency.
I once tried piping tassels freehand without a tip and ended up with a sad blob. Lesson learned: a small round tip is worth the investment. Another tip—if your cookies start to spread too much in the oven, chilling the dough longer or chilling the cut shapes before baking really helps keep edges crisp. Also, multitasking by preparing icing while cookies cool saves time.
Variations & Adaptations
This decorated graduation cap cookie recipe is flexible and customizable:
- Flavor variations: Swap vanilla and almond extracts for lemon or orange zest to brighten the cookie flavor. I’ve also made a chocolate dough version by adding cocoa powder, which pairs well with white icing.
- Dietary adaptations: Use gluten-free flour blends for gluten sensitivity, and substitute butter with vegan margarine for dairy-free needs. For egg-free, you can try flax eggs, but the texture will be a bit different.
- Decorating styles: Instead of royal icing tassels, try edible glitter or sugar pearls for a glam touch. Or, pipe names and years with metallic edible markers once icing is dry.
- Size adjustments: Mini versions (about 1.5 inches) make great finger foods for parties, while larger cookies can be packaged as gifts.
One time, I swapped in a strawberry mousse filling between two cookies for a fun surprise—totally not traditional, but a hit at a party! And if you want to change up the look, pairing these cookies with a rich dessert like the decadent red wine chocolate cake creates a stunning dessert table contrast.
Serving & Storage Suggestions
These cookies are best served at room temperature so the royal icing isn’t too hard or sticky. Arrange them on a pretty platter or in a gift box with tissue paper for graduation parties or gift-giving.
They pair beautifully with light beverages like iced tea or even celebratory drinks like sparkling juice. For a sweet spread, serve alongside fresh fruit or a batch of pink champagne jello shots for a fun adult twist.
To store, place the cookies in an airtight container layered with parchment paper between each layer. They keep well at room temperature for up to 5 days. For longer storage, freeze the plain cookies (undecorated) in an airtight bag for up to 3 months and decorate fresh after thawing. Avoid freezing decorated cookies as the icing may crack.
Reheating isn’t necessary—just let frozen cookies thaw fully. The icing hardens beautifully over time, so if you decorate a day ahead, they’ll be perfectly set for your event.
Nutritional Information & Benefits
Each decorated graduation cap royal icing sugar cookie contains approximately:
| Calories | Fat | Carbohydrates | Sugar | Protein |
|---|---|---|---|---|
| 150 kcal | 7 g | 22 g | 12 g | 1 g |
While these cookies are a sweet treat, they do provide a small amount of energy and satisfy sugar cravings without being overly dense. The almond extract adds a hint of nutty flavor without nuts, making them safer for some allergies (though always check for cross-contamination). If you want a lighter version, consider reducing sugar slightly or using a sugar substitute suitable for baking.
From a wellness perspective, these cookies are better enjoyed in moderation, paired with balanced meals. The use of real butter and egg ensures a bit of natural fat and protein, helping the cookies feel more satisfying. The recipe can be adapted for gluten-free or dairy-free diets as needed.
Conclusion
Making perfect decorated graduation cap royal icing sugar cookies isn’t as tricky as it looks, and the payoff is a stunning, delicious treat that adds a personal touch to any celebration. The crisp edges, smooth icing, and customizable decorations mean you can tailor these cookies exactly how you want—whether it’s for a big party or a small family gathering.
I love how these cookies bring a little bit of joy and accomplishment into the kitchen, turning simple ingredients into a memorable keepsake. Plus, baking and decorating them is a fun way to slow down and focus on something creative amid the hustle.
If you try this recipe, I’d love to hear how your decorated graduation caps turned out or what special touches you added. Sharing your experiences helps make this community sweeter and more inspiring. Happy baking and congratulations to all the grads out there!
Frequently Asked Questions
Can I make these cookies ahead of time?
Yes! You can bake the cookies up to a week in advance and keep them in an airtight container. Decorate them a day or two before your event for the best icing texture.
What if I don’t have a graduation cap cookie cutter?
No worries! Use a square cookie cutter or a knife to cut a 3-inch square, then trim a small rectangle or triangle shape from one corner to mimic a cap shape.
How do I fix royal icing that’s too runny or too thick?
If too runny, add more powdered sugar a tablespoon at a time. If too thick, add a few drops of warm water until it reaches the right consistency for piping or flooding.
Can I use food coloring other than black and gold?
Absolutely! Feel free to customize with your school colors or add fun accents. Gel colors work best to keep icing consistency steady.
Are these cookies suitable for kids to decorate?
Yes, with supervision! Royal icing can be a bit sticky, so younger kids might enjoy simple flooding or adding sprinkles rather than detailed piping.
Pin This Recipe!
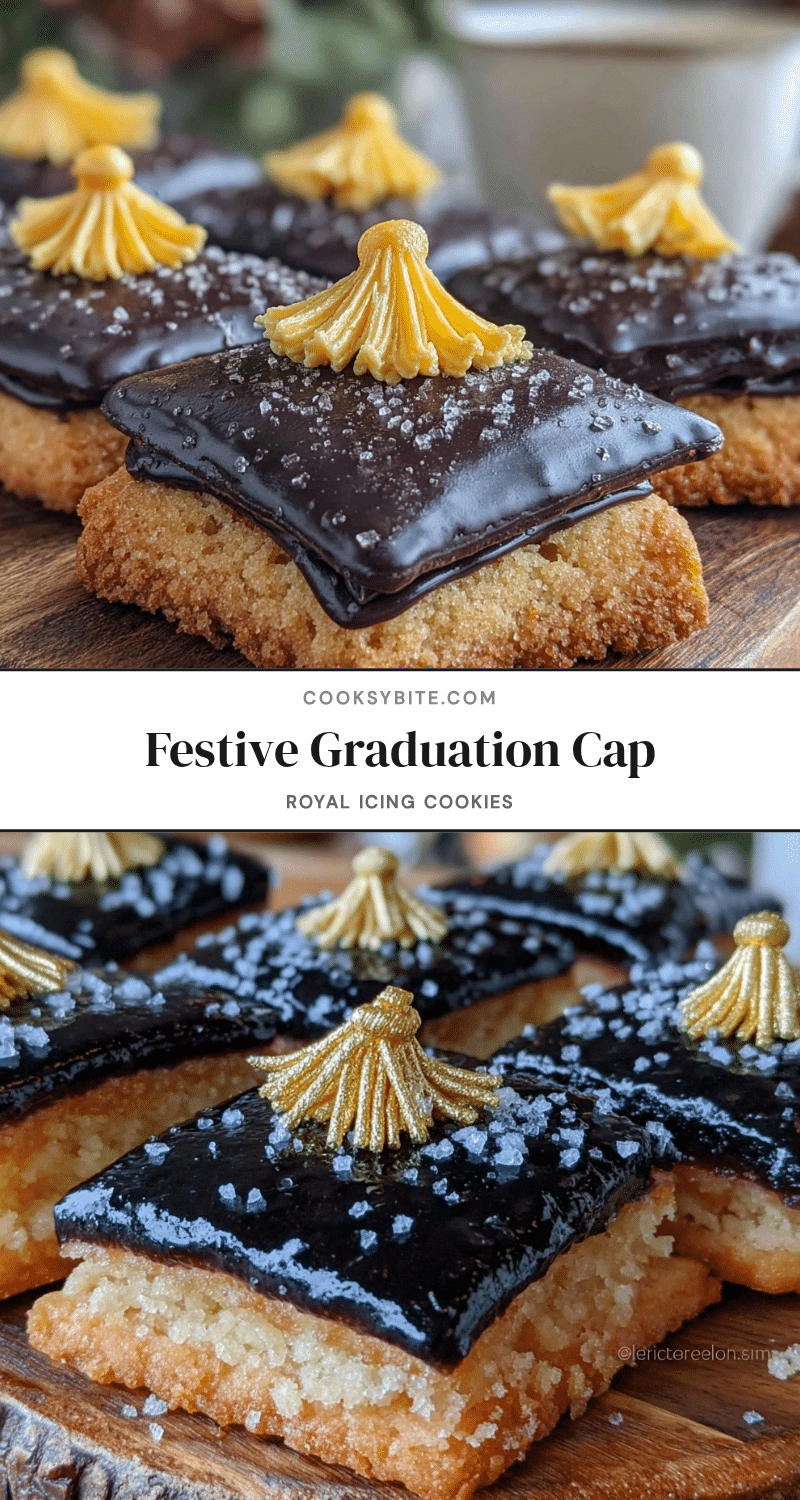
Perfect Decorated Graduation Cap Royal Icing Sugar Cookies

These decorated graduation cap sugar cookies feature a tender, crisp sugar cookie base topped with smooth, glossy royal icing. Perfect for graduation parties, they are easy to make and customizable with names, years, and colorful tassels.
- Prep Time: 15 minutes
- Cook Time: 12 minutes
- Total Time: 1 hour 30 minutes
- Yield: 24 cookies 1x
- Category: Dessert
- Cuisine: American
Ingredients
- 2 ¾ cups (345 g) all-purpose flour
- 1 teaspoon baking powder
- ½ teaspoon salt
- 1 cup (227 g) unsalted butter, softened
- 1 ½ cups (300 g) granulated sugar
- 1 large egg, room temperature
- 1 ½ teaspoons pure vanilla extract
- ½ teaspoon almond extract (optional)
- 4 cups (480 g) powdered sugar, sifted
- 3 tablespoons meringue powder
- 7–8 tablespoons warm water
- Gel food coloring (black, gold or yellow, and other colors as desired)
- Optional: lemon juice or vanilla extract for flavoring
Instructions
- In a medium bowl, whisk together the flour, baking powder, and salt.
- In a large bowl, beat the softened butter and sugar with an electric mixer on medium speed until light and fluffy, about 3-4 minutes.
- Add the egg, vanilla extract, and almond extract; beat until combined.
- Gradually add the flour mixture to the wet ingredients, mixing on low just until incorporated. If dough is too sticky, add flour a tablespoon at a time.
- Divide the dough in half, flatten into discs, wrap in plastic wrap, and chill in the refrigerator for at least 1 hour.
- Preheat oven to 350°F (175°C). Roll one disc of dough on a lightly floured surface to about ¼ inch thickness.
- Use a graduation cap cookie cutter or cut 3-inch squares and trim edges to form cap shapes.
- Place cut cookies on parchment-lined baking sheets about 1 inch apart. Chill in fridge for 10 minutes.
- Bake for 10-12 minutes until edges start to turn golden but centers remain pale.
- Cool cookies completely on a wire rack before decorating.
- Make royal icing by combining powdered sugar and meringue powder in a large bowl. Add 7 tablespoons warm water and beat on medium speed for 7-10 minutes until stiff peaks form. Adjust water as needed.
- Divide icing into bowls and tint black for caps and gold or yellow for tassels. Keep icing covered when not in use.
- Outline each cookie with black icing using piping bags fitted with small round tips. Flood inside with thinned black icing and let dry 15-20 minutes.
- Pipe tassels on one corner with gold icing and add details like graduation year or initials with contrasting colors.
- Allow decorated cookies to dry uncovered for at least 4 hours or overnight to fully harden.
Notes
Chilling the dough and cut cookies before baking helps keep edges sharp and prevents spreading. Use gel food coloring for best icing consistency. Cover royal icing when not in use to prevent drying. Practice piping on parchment paper to improve control. For gluten-free, substitute flour with a 1:1 gluten-free blend containing xanthan gum. For dairy-free, use plant-based butter. Meringue powder is preferred over pasteurized egg whites for safety and convenience.
Nutrition
- Serving Size: 1 decorated cookie
- Calories: 150
- Sugar: 12
- Fat: 7
- Carbohydrates: 22
- Protein: 1
Keywords: graduation cookies, royal icing sugar cookies, decorated cookies, graduation party dessert, sugar cookies, royal icing, easy cookie recipe


