“You really think it’ll hold together?” my friend asked, peering over my cluttered kitchen counter as I attempted to braid this strange mound of dough filled with bright yellow lemon curd. Honestly, I wasn’t sure either. I’d never been much of a baker—not the precise kind who measures flour with the reverence it demands. But that day, after stumbling upon an old recipe tucked in the back of a thrifted cookbook, I decided to go for it. The idea of a Perfect Cottagecore Lemon Curd Danish Pastry Braid had me hooked, even if the name felt a little fancy for my usual kitchen experiments.
That morning, the light spilled softly through the window, catching the flour dust on my sleeves and the tangy scent of lemon zest filling the air. I remember the dough felt sticky and a little rebellious, but as I carefully braided strips around the golden center, something shifted. It wasn’t just a braid—it was a little piece of cozy magic coming alive. When it finally came out of the oven, warm and smelling like sunshine wrapped in flaky layers, I realized this recipe wasn’t just about a pretty pastry. It was a quiet, simple pleasure that made the whole chaotic day pause for a moment of sweetness.
That’s why this Perfect Cottagecore Lemon Curd Danish Pastry Braid stayed on my list. It’s that unexpected treat you don’t plan for but are so glad you made. And hey, if you’ve ever wondered about crafting a bakery-worthy pastry at home without sweating over complicated steps, this is the one to try.
Why You’ll Love This Recipe
After baking this lemon curd Danish pastry braid more times than I can count (seriously, I made it three times last week alone), I’ve gathered some solid reasons why it’s become a household favorite:
- Quick & Easy: You can have this beauty ready to bake in under 30 minutes, making it perfect when you crave something homemade but don’t want to spend hours in the kitchen.
- Simple Ingredients: No need for fancy or hard-to-find items. Most are pantry staples, and the lemon curd can be store-bought or homemade.
- Perfect for Cozy Occasions: Whether it’s a weekend brunch, a gentle tea party, or a quiet morning treat, this pastry braid fits the mood effortlessly.
- Crowd-Pleaser: My family always asks for seconds, and it’s been a hit whenever I’ve brought it along to gatherings or paired it with other favorites like moist pink velvet bundt cake.
- Unbelievably Delicious: The flaky, buttery dough wraps the tangy lemon curd in a perfect balance of textures and flavors that’s downright addictive.
This isn’t just another lemon pastry. The braid technique keeps the filling nicely tucked inside, giving you a satisfying bite every time without the mess. Plus, the subtle dusting of powdered sugar at the end adds that delicate touch that makes you close your eyes and sigh.
What Ingredients You Will Need
This recipe calls for simple, wholesome ingredients to bring that light, citrusy, flaky magic to your kitchen. Most are staples you probably already have, and the lemon curd offers a bright punch that makes the whole thing sing.
- For the pastry:
- All-purpose flour, 2 ½ cups (315g) – use a trusted brand like King Arthur for consistent results
- Unsalted butter, 1 cup (227g), cold and cubed (adds rich flakiness)
- Granulated sugar, 2 tablespoons
- Salt, ½ teaspoon
- Cold water, ½ cup (120ml) – you can substitute ice water for extra crisp layers
- For the filling:
- Lemon curd, ¾ cup (approx. 180g) – homemade or store-bought, like the classic from Williams Sonoma
- Fresh lemon zest, 1 teaspoon (adds a fresh zing)
- For the glaze:
- Powdered sugar, ½ cup (60g)
- Fresh lemon juice, 1 tablespoon
- Milk, 1 teaspoon (optional for a smoother drizzle)
- Optional garnish:
- Thin lemon slices or candied lemon peel
- Fresh mint leaves for a pop of color
For a gluten-free twist, try swapping the all-purpose flour with a high-quality gluten-free blend. Dairy-free butter alternatives work well here too, especially if you want to keep things vegan. I’ve found that using a lemon curd with a creamy texture makes all the difference, so if you make your own, don’t skip the slow simmer that helps it thicken just right.
Equipment Needed
- Mixing bowls (medium and large)
- Rolling pin – a basic wooden one works perfectly, but silicone rollers are easier to clean
- Baking sheet lined with parchment paper
- Sharp knife or pizza cutter for slicing dough strips
- Pastry brush for egg wash or water glaze
- Measuring cups and spoons – precise measurements help, but don’t stress if it’s a bit off
- Cooling rack to let the pastry rest after baking
Personally, I find that a pizza cutter makes the braiding process smoother when cutting even strips, but a sharp chef’s knife can do the job just fine. If you don’t have parchment paper, lightly greasing the baking sheet works. Also, a silicone baking mat is a nice investment if you bake often—it saves cleanup time and keeps the pastry from sticking.
Preparation Method

- Prepare the dough: In a large bowl, whisk together 2 ½ cups (315g) of flour, 2 tablespoons of sugar, and ½ teaspoon of salt. Add the cold, cubed butter and use a pastry cutter or your fingers to blend until the mixture resembles coarse crumbs. This step is key for that flaky texture, so don’t rush it. (About 5 minutes)
- Add cold water: Slowly pour in ½ cup (120ml) cold water, mixing gently with a fork until the dough just comes together. You might not need all the water, so add it gradually. The dough should be moist but not sticky. (2-3 minutes)
- Chill the dough: Form the dough into a disk, wrap it in plastic wrap, and chill in the fridge for at least 30 minutes. This rest helps the gluten relax and the butter firm up. (30 minutes)
- Roll out the dough: On a floured surface, roll the dough into a 12×10 inch (30×25 cm) rectangle. Try to keep the edges straight but don’t stress if it’s a bit rustic—it adds charm!
- Spread the filling: Leave a 2-inch (5 cm) border on the long sides. Spread ¾ cup (180g) lemon curd evenly down the center strip of the dough, then sprinkle 1 teaspoon of fresh lemon zest over the curd for an extra kick.
- Cut strips for braiding: Using a sharp knife or pizza cutter, slice 1-inch (2.5 cm) wide strips down each side of the filling, cutting toward the edges but stopping at the border.
- Braid the pastry: Fold the strips over the filling, alternating sides to create a braid effect. Pinch the ends gently to seal and tuck under if needed.
- Bake: Transfer the braid to a parchment-lined baking sheet. Bake in a preheated 375°F (190°C) oven for 25-30 minutes or until golden brown and puffed. Keep an eye on it; ovens vary, and flaky edges can brown quickly.
- Prepare the glaze: While the braid bakes, whisk together ½ cup (60g) powdered sugar, 1 tablespoon fresh lemon juice, and 1 teaspoon milk until smooth.
- Finishing touches: Once the braid is out and slightly cooled (about 10 minutes), drizzle the lemon glaze over the top and add optional garnishes like thin lemon slices or mint leaves.
Pro tip: If the dough feels too soft when you try to braid, pop it back in the fridge for 10 minutes. Also, keep a close watch near the end to avoid overbaking, which can dry out the pastry.
Cooking Tips & Techniques
Working with pastry dough can be intimidating, but a few tricks make this lemon curd Danish braid approachable and fun. First, cold ingredients are your best friends here—the butter especially. When it’s cold, the butter creates steam pockets during baking, giving you that flaky, layered texture you want. So, keep your butter chilled and handle the dough quickly to prevent it from warming up too much.
Don’t skip the resting time in the fridge. It’s tempting to rush, but trust me, letting the dough rest chills the butter and relaxes the gluten. This means less shrinkage and easier rolling.
When braiding, keep the strips even and don’t stretch the dough too thin. If the strips tear, patch them gently with extra dough scraps. I once had a disastrous tear that I just folded back over and baked anyway—and it turned out just fine!
Timing is key. Bake until golden, not brown. Sometimes the edges brown faster, so if you notice this, tent the braid loosely with foil halfway through baking.
For an extra touch, brush the dough edges with an egg wash before baking to get a deeper golden color, but water works too if you want to keep it simple.
Variations & Adaptations
This Perfect Cottagecore Lemon Curd Danish Pastry Braid is wonderfully versatile. Here are some ways I’ve tweaked it to keep things interesting:
- Berry Twist: Swap half the lemon curd for mixed berry jam or fresh berries folded into the filling for a bright, fruity burst. I like this combo especially when paired with a side of fluffy strawberry mousse cups.
- Gluten-Free: Use a gluten-free baking blend and dairy-free butter to make it friendly for gluten sensitivities. The braid might be a bit more delicate but just as tasty.
- Herbal Lemon: Add a tablespoon of finely chopped fresh thyme or lavender to the filling for an earthy, floral note that pairs beautifully with lemon.
- Overnight Prep: Assemble the braid the night before and refrigerate it overnight. Bake fresh in the morning for a fuss-free breakfast treat.
Personally, I once tried a version with a cream cheese layer beneath the lemon curd for extra creaminess. It’s not traditional but absolutely delicious if you want something richer.
Serving & Storage Suggestions
This lemon curd Danish braid tastes best warm or at room temperature, making it a lovely treat for breakfast or afternoon tea. Serve it with a cup of freshly brewed tea or coffee for a cozy moment. If you’re hosting a brunch, pairing it with a light fruit salad or a creamy yogurt parfait balances the sweetness nicely.
To store, wrap the braid tightly in plastic wrap or place it in an airtight container. It keeps well at room temperature for up to two days. For longer storage, freeze the fully cooled braid wrapped in foil and plastic wrap for up to a month. Thaw overnight in the fridge, then warm gently in the oven before serving.
Reheating is best done in a low oven (about 300°F / 150°C) for 10-15 minutes to revive the flakiness without drying it out. Microwave reheating tends to make the pastry soggy, so I avoid that if possible.
Fun fact: The lemon flavor tends to mellow and marry beautifully overnight, so leftovers are sometimes even better the next day. If you want to add a fresh pop, drizzle a little extra lemon juice or zest before serving.
Nutritional Information & Benefits
This pastry is a treat, but it also brings some bright benefits from its ingredients. A typical serving contains around 300-350 calories, with a good balance of carbohydrates and fats from the buttery dough. The lemon curd supplies vitamin C and antioxidants, which add a fresh, healthy edge to the indulgence.
For those watching allergens, this recipe contains gluten and dairy, but both can be substituted with gluten-free flour blends and plant-based butter alternatives. The lemon curd is naturally egg-based, so vegan versions might require a special lemon filling.
From a wellness standpoint, this pastry fits nicely as an occasional treat that brings joy and comfort without overindulgence. The bright lemon flavor makes it feel lighter than many other pastries, which I appreciate when balancing sweet cravings.
Conclusion
The Perfect Cottagecore Lemon Curd Danish Pastry Braid is more than just a pretty braid—it’s a little ritual of care and simplicity that turns everyday moments a bit sweeter. Whether you’re a seasoned baker or someone who just wants a fuss-free way to impress the table, this recipe offers a reliable, delicious path to homemade charm.
Feel free to tweak the filling or add your favorite herbs and garnishes. Every time I make it, it feels like a fresh experience, yet comfortingly familiar. And if you’re in the mood for other crowd-pleasing desserts, you might enjoy the rich layers of the decadent red wine chocolate cake or the bright zing of mini lemon blueberry cheesecakes.
Give this braid a try—you might find it becoming your next favorite way to bring a little cottagecore magic to your kitchen.
Frequently Asked Questions
Can I use store-bought puff pastry instead of making the dough?
Yes! Store-bought puff pastry works well and saves time. Just thaw it according to package instructions before braiding with the lemon curd.
How do I prevent the lemon curd from leaking during baking?
Leaving a border around the filling and braiding the dough strips snugly helps contain the curd. Also, chilling the dough before baking reduces leakage.
Can I prepare this pastry braid in advance?
Absolutely. You can assemble it and refrigerate overnight, then bake fresh in the morning for a convenient and fresh-tasting treat.
What’s the best way to store leftovers?
Wrap tightly and keep at room temperature for up to two days or freeze for longer storage. Reheat gently in the oven before serving.
Can I make lemon curd from scratch for this recipe?
Definitely! Homemade lemon curd adds freshness and allows you to control sweetness. It does take a bit more time but is worth the effort if you have it on hand.
Pin This Recipe!
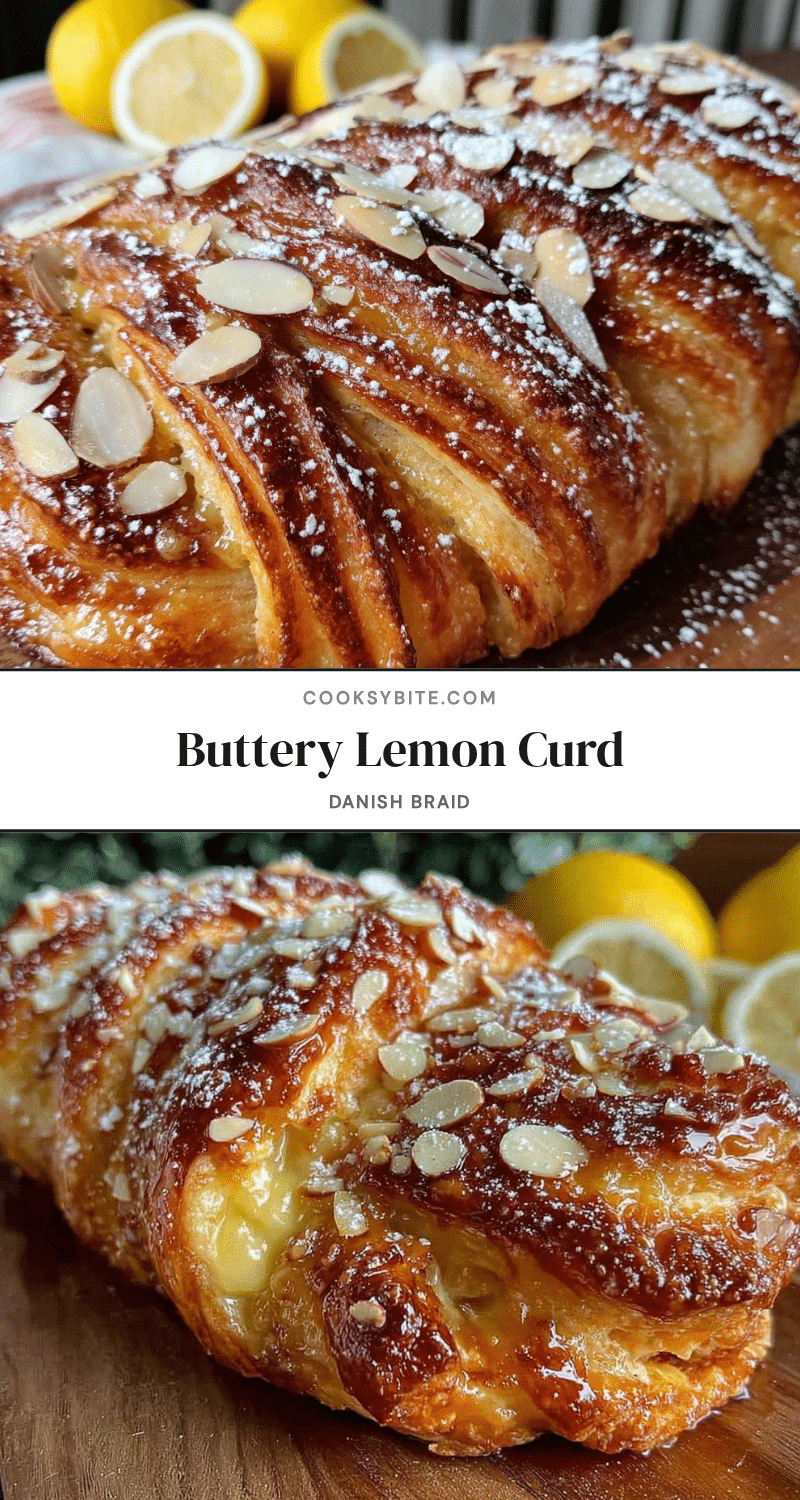
Perfect Cottagecore Lemon Curd Danish Pastry Braid

A quick and easy homemade Danish pastry braid filled with tangy lemon curd, wrapped in flaky, buttery dough and finished with a delicate lemon glaze. Perfect for cozy occasions and crowd-pleasing treats.
- Prep Time: 40 minutes
- Cook Time: 25-30 minutes
- Total Time: 65-70 minutes
- Yield: 8 servings 1x
- Category: Dessert
- Cuisine: European
Ingredients
- 2 ½ cups (315g) all-purpose flour
- 1 cup (227g) unsalted butter, cold and cubed
- 2 tablespoons granulated sugar
- ½ teaspoon salt
- ½ cup (120ml) cold water
- ¾ cup (approx. 180g) lemon curd, homemade or store-bought
- 1 teaspoon fresh lemon zest
- ½ cup (60g) powdered sugar
- 1 tablespoon fresh lemon juice
- 1 teaspoon milk (optional)
- Optional garnish: thin lemon slices or candied lemon peel
- Optional garnish: fresh mint leaves
Instructions
- In a large bowl, whisk together flour, sugar, and salt. Add cold, cubed butter and blend with a pastry cutter or fingers until mixture resembles coarse crumbs (about 5 minutes).
- Slowly pour in cold water, mixing gently with a fork until dough just comes together; dough should be moist but not sticky (2-3 minutes).
- Form dough into a disk, wrap in plastic wrap, and chill in the fridge for at least 30 minutes.
- Roll dough on a floured surface into a 12×10 inch rectangle.
- Leave a 2-inch border on the long sides. Spread lemon curd evenly down the center strip and sprinkle fresh lemon zest over the curd.
- Cut 1-inch wide strips down each side of the filling, stopping at the border.
- Braid the pastry by folding strips over the filling, alternating sides. Pinch ends to seal and tuck under if needed.
- Transfer braid to a parchment-lined baking sheet and bake at 375°F (190°C) for 25-30 minutes until golden brown and puffed.
- While baking, whisk powdered sugar, lemon juice, and milk until smooth to make glaze.
- Once slightly cooled (about 10 minutes), drizzle glaze over the braid and add optional garnishes.
Notes
Keep butter cold and handle dough quickly for flaky layers. Chill dough before braiding to reduce leakage. If dough is too soft when braiding, chill for 10 more minutes. Tent with foil if edges brown too fast. Egg wash can be used for deeper golden color but water glaze works too. Store leftovers wrapped tightly at room temperature for up to 2 days or freeze for up to a month. Reheat gently in oven to maintain flakiness.
Nutrition
- Serving Size: 1 slice (1/8 of brai
- Calories: 325
- Sugar: 12
- Sodium: 150
- Fat: 18
- Saturated Fat: 11
- Carbohydrates: 36
- Fiber: 1
- Protein: 4
Keywords: lemon curd, Danish pastry, braid, lemon pastry, homemade dessert, easy pastry, lemon glaze, flaky dough, brunch dessert


