Introduction
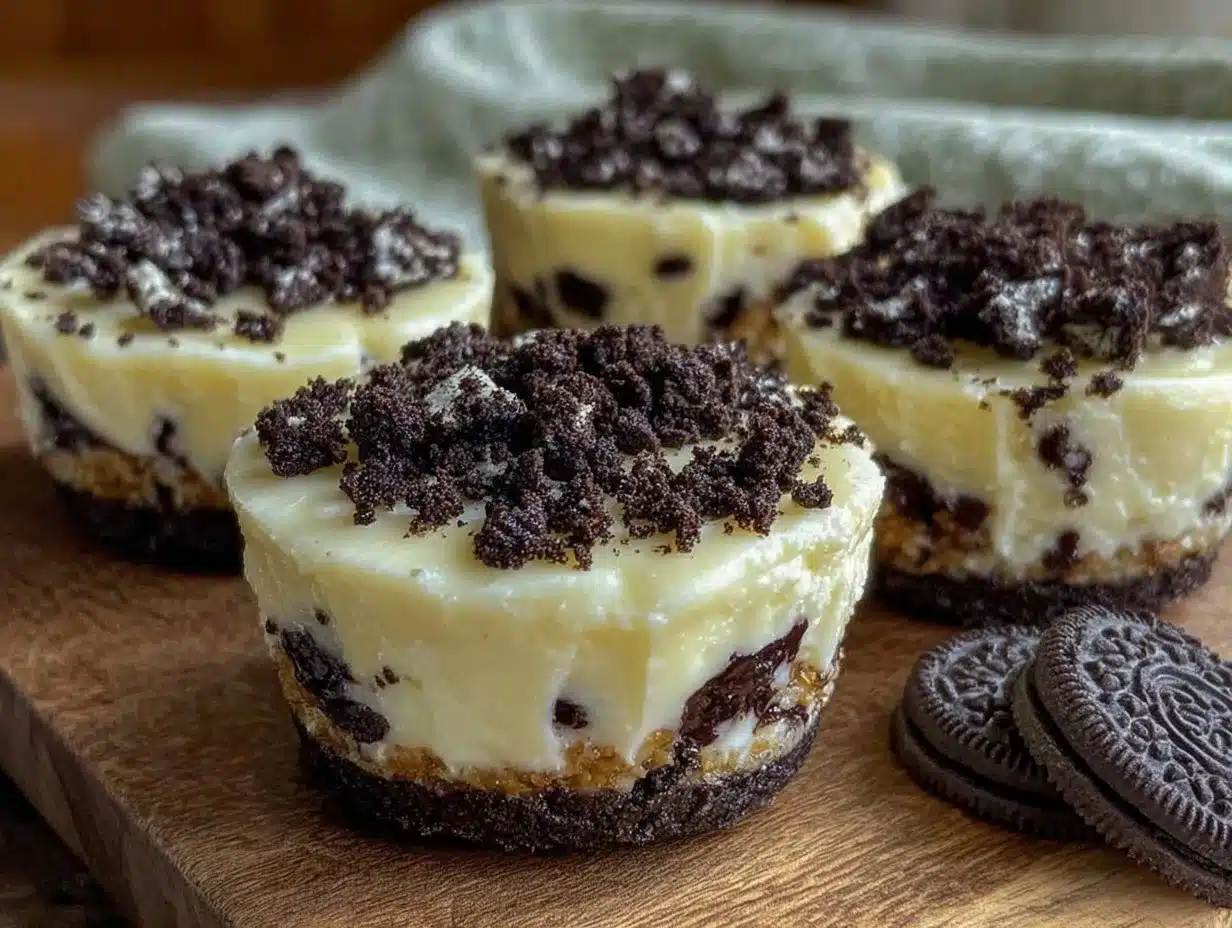
Velvety, almost pillowy smooth, and layered with that unmistakable Oreo crunch—that’s the whole point. The texture is what I made this recipe for — everything else is secondary. When I first spooned into these Creamy No-Bake Oreo Cheesecake Cups, my fingers were already itching to dig in again before the first bite even hit my lips. The contrast between the silky cheesecake filling and the crumbly, chocolate cookie base is downright addictive, and honestly, it’s the kind of dessert that you almost want to eat with your eyes first.
I remember the very moment this recipe stuck with me. It was during a summer evening when the oven felt like the enemy, and whipping up a no-fuss treat was the only way to save the day. These cheesecake cups came together in mere minutes, yet they delivered a richness and texture that felt anything but rushed. The way the Oreo crumbs softened just enough under the creamy layer but kept a satisfying bite? That little detail made all the difference. Let’s face it, sometimes it’s the texture that tells you a recipe is a keeper, and these little cups nailed it.
What’s more, they’re the kind of dessert that invites you to slow down and really appreciate the way something simple can feel indulgent. No baking, no waiting forever, just that perfect balance of creamy and crunchy that lingers on your fingertips and your mind long after the last bite. So, whether you’re craving a quick treat or need a dessert that looks like you spent hours in the kitchen, these cheesecake cups have quietly become my go-to comfort fix.
Why You’ll Love This Recipe
Honestly, this Creamy No-Bake Oreo Cheesecake Cups recipe hits all the right notes for busy days when you want something decadent but can’t be bothered with complicated steps. I’ve tested this recipe so many times (sometimes twice in a day—don’t judge!) and it just keeps delivering. Here’s why it’s become a staple:
- Quick & Easy: Ready in under 5 minutes of hands-on time—perfect for those last-minute dessert cravings or unexpected guests.
- Simple Ingredients: No fancy or hard-to-find items here; if you have Oreos, cream cheese, and a few pantry basics, you’re set.
- Perfect for Any Occasion: Great for casual get-togethers, potlucks, or just a cozy night in when you want something special without fuss.
- Crowd-Pleaser: Kids and adults alike go crazy for these—there’s something about the familiar Oreo crunch paired with smooth cheesecake that never fails.
- Unbelievably Delicious: The ultra-smooth filling has a light tang balanced by just enough sweetness, making it feel like comfort food with a twist.
What sets this recipe apart is the way the cream cheese gets whipped to a luscious fluffiness without any baking. I swear, blending the cream cheese with just the right amount of whipped cream (or cool whip if you’re in a pinch) creates that dreamy texture that’s neither too dense nor too airy. Plus, layering crushed Oreos on the bottom and a few more crumbs on top gives every spoonful that perfect Oreo bite. I’ve seen similar recipes, but this version just feels like the best balance of creamy and crunchy—no soggy bases or overly sweet fillings.
It’s a recipe I trust because it’s forgiving, fast, and always a hit, whether I’m making it for a quick treat or pairing it alongside something like the rich decadent red wine chocolate cake for a more elegant dessert spread. Honestly, once you make these, you’ll find yourself reaching for them again and again.
What Ingredients You Will Need
This recipe uses simple, wholesome ingredients to deliver bold flavor and satisfying texture without the fuss. Most of these are pantry staples, and you can easily swap or adjust based on what you have on hand.
- Oreo Cookies: About 24 whole Oreos, crushed finely for the base and roughly chopped for topping (feel free to use the classic or double-stuffed kind for extra creaminess)
- Unsalted Butter: 5 tablespoons (70g), melted – this binds the Oreo crust together perfectly (I like using Land O’Lakes for consistent quality)
- Cream Cheese: 16 ounces (450g), softened to room temperature – makes the filling rich and creamy (Philadelphia brand works great here)
- Powdered Sugar: ¾ cup (90g), sifted – adds sweetness without graininess
- Vanilla Extract: 1 teaspoon – for a subtle warmth and depth
- Heavy Whipping Cream: 1 cup (240ml), chilled – whipped to soft peaks to lighten the cream cheese mixture (can substitute with whipped topping if preferred)
If you want to make this gluten-free, you can swap Oreos with gluten-free chocolate sandwich cookies, which I’ve done with great success. For a dairy-free twist, try using dairy-free cream cheese and coconut whipped cream, but note the texture will be slightly different.
In summer, I sometimes add a handful of fresh raspberries on top for a tart contrast, which also pairs beautifully with the fluffy strawberry mousse cups I like to make alongside.
Equipment Needed
- Mixing Bowls: One large for the filling and one small for melting butter and mixing crumbs.
- Electric Mixer or Stand Mixer: Essential for whipping cream cheese and cream to the right fluffiness. You can use a hand whisk in a pinch, but it takes more effort.
- Measuring Cups and Spoons: For precise measurements, especially with powdered sugar and butter.
- Spatula: To fold the whipped cream into the cream cheese mixture gently without deflating it.
- Serving Cups or Jars: Small clear cups or mason jars work perfectly to showcase the layers visually.
If you don’t have a stand mixer, a handheld mixer will do just fine—just watch the cream cheese so it doesn’t get overmixed and turn too dense. For budget-friendly options, you can even whip the cream by hand with a balloon whisk, but it might take 5-7 minutes of elbow grease.
Preparation Method
- Crush the Oreos: Place 20 Oreos into a large zip-top bag and crush them with a rolling pin until you get fine crumbs. Reserve 4 Oreos, roughly chopped, for topping. This step takes about 5 minutes and sets the base texture.
- Make the Oreo Crust: In a bowl, combine the crushed Oreo crumbs with 5 tablespoons (70g) melted unsalted butter. Mix until all crumbs are moistened and hold together when pressed. Press about 2 tablespoons of this mixture into the bottom of each serving cup (makes about 8 cups). Chill in the fridge while you prepare the filling.
- Whip the Cream Cheese: In a large bowl, beat 16 ounces (450g) softened cream cheese with an electric mixer on medium speed until smooth and creamy, about 2-3 minutes. Make sure no lumps remain; this is key for that silky texture.
- Add Powdered Sugar and Vanilla: Gradually add ¾ cup (90g) powdered sugar and 1 teaspoon vanilla extract to the cream cheese, mixing well after each addition. Scrape down the sides to keep everything even.
- Whip the Cream: In a separate chilled bowl, whip 1 cup (240ml) heavy whipping cream on high speed until soft peaks form (about 3-5 minutes). Be careful not to overwhip; you want it to hold shape but still be smooth.
- Fold the Whipped Cream: Gently fold the whipped cream into the cream cheese mixture with a spatula. Use light, sweeping motions to keep the mixture airy and creamy without deflating the whip.
- Assemble the Cups: Spoon or pipe the cream cheese filling over the chilled Oreo crust in each cup, filling them almost to the top. Sprinkle the reserved roughly chopped Oreo pieces on top for texture contrast.
- Chill Before Serving: Refrigerate the cups for at least 2 hours to let the cheesecake set and flavors meld. Overnight chilling works even better if you can wait.
If you notice any separation or watery liquid on top after chilling, just give the cups a gentle stir before serving to reincorporate the cream. The key sensory cue here is a glossy, thick filling that holds its shape but still feels soft when spooned.
Cooking Tips & Techniques
One pro tip I’ve learned is to always bring your cream cheese to room temperature before mixing. Cold cream cheese tends to clump and makes the filling lumpy, which totally kills that velvety mouthfeel. Another thing: don’t rush whipping the cream—soft peaks are your goal. Overwhipping turns it grainy and can separate.
When folding whipped cream into the cream cheese mixture, patience is key. Use a spatula and fold gently with wide strokes to avoid deflating the air you just whipped. This little trick keeps the filling light and creamy instead of dense and heavy.
Pressing the Oreo crust firmly but not too hard into the bottom of the cups helps it hold shape without becoming compacted and hard. If you press too much, the crust can feel like a brick, and that’s no fun.
Lastly, chilling time is non-negotiable. The cheesecake cups need that rest period to set properly. If you’re in a hurry, 2 hours is a bare minimum, but overnight chilling is a game changer for texture and flavor melding.
From my own cooking mishaps, I once forgot to whip the cream separately and just mixed it all at once—it was a disaster. Lesson learned: separate whipping is non-negotiable for that perfect fluffiness.
Variations & Adaptations
These cheesecake cups are surprisingly flexible. Here are some ways to switch things up:
- Fruit-Infused: Add a layer of fresh sliced strawberries or raspberries between the crust and filling for a fruity surprise. This also pairs wonderfully with the mini lemon blueberry cheesecakes if you want a berry-themed dessert table.
- Mint Oreo Version: Swap classic Oreos for mint-flavored ones for a refreshing twist. You can add a few drops of peppermint extract to the filling for extra oomph.
- Peanut Butter Swirl: Gently fold in ¼ cup (60g) creamy peanut butter into the filling before assembling for a nutty, rich version that’s pure indulgence.
- Gluten-Free Option: Use gluten-free chocolate sandwich cookies instead of Oreos. The texture stays just as good, and it’s safe for gluten-sensitive eaters.
- Dairy-Free Adaptation: Replace cream cheese with a dairy-free cream cheese alternative and whipped cream with coconut whipped cream. The texture will be a bit different but still delicious and creamy.
Personally, I once made a batch adding crushed toffee bits on top for extra crunch and that sweet caramel finish—it was a hit at a party and so easy to do.
Serving & Storage Suggestions
Serve these cheesecake cups chilled straight from the fridge. The creamy texture is best enjoyed cold, and the Oreo crust holds up nicely against the filling. Presentation-wise, clear glass cups or mason jars show off the beautiful layers and make them feel a bit fancy without extra effort.
They pair nicely with a simple cup of coffee or even a light sparkling wine for celebrations. If you want a lighter pairing, fresh berries on the side add a lovely contrast.
Store leftovers covered in the refrigerator for up to 3 days. The texture stays creamy, but the Oreo crust may soften slightly, which honestly I don’t mind—it makes spooning easier. For longer storage, you can freeze the cups for up to a month; thaw in the fridge overnight before serving.
Reheat? Nah, these are best cold, but if you want to soften them slightly, let them sit at room temperature for 10 minutes before serving.
Flavors tend to deepen the longer they chill, so if you prepare them a day ahead, you’re rewarded with an even richer, more harmonious taste.
Nutritional Information & Benefits
Each serving (based on 8 cups) contains approximately:
| Nutrient | Amount |
|---|---|
| Calories | 320 kcal |
| Fat | 22g |
| Carbohydrates | 28g |
| Protein | 4g |
Key ingredients like cream cheese provide protein and calcium, while Oreos, though a treat, add that nostalgic chocolate crunch that makes the whole dessert worth it. This recipe is obviously indulgent, but with portion control, it fits nicely into most balanced diets.
For those avoiding gluten, swapping in gluten-free cookies makes this a safe choice without losing the Oreo essence. If you’re watching carbs, reducing the sugar slightly or using a sugar substitute can help, but honestly, the powdered sugar isn’t overwhelming here.
From a wellness perspective, I appreciate that this recipe requires no artificial additives or preservatives, just familiar ingredients done right. It’s a dessert I feel good about sharing with friends and family.
Conclusion
These Creamy No-Bake Oreo Cheesecake Cups are proof that sometimes the simplest ingredients, when combined thoughtfully, can create something truly special. They’re quick, fuss-free, and bring that perfect textural contrast that makes you want to savor every spoonful. Whether you’re making them for a casual night in or an impromptu gathering, you can tweak the recipe to match your mood and taste buds.
Honestly, I love this recipe because it never fails to impress without demanding hours in the kitchen. It’s a treat that feels indulgent yet accessible, and I hope it becomes one of your go-to desserts too. If you try it out, I’d love to hear how you customize it or what moments you pair it with!
Go ahead and give these cheesecake cups a whirl—you might just find your new favorite quick dessert. And if you’re in the mood for more no-bake delights, you might enjoy the easy elegance of pink champagne jello shots, a fun twist for parties.
FAQs About Creamy No-Bake Oreo Cheesecake Cups
Can I use a different cookie instead of Oreos?
Absolutely! Chocolate wafer cookies, graham crackers, or gluten-free sandwich cookies all work well. Just adjust the quantity to get the right crust texture.
How long do these cheesecake cups last in the fridge?
They keep well covered in the refrigerator for up to 3 days. After that, the texture may change slightly, but they’ll still taste good.
Can I make these ahead of time?
Yes, making them the day before is ideal. The chilling time helps the flavors meld and the texture set perfectly.
Is it possible to freeze these cheesecake cups?
You can freeze them for up to a month. Just thaw in the fridge overnight before serving to keep the texture intact.
What can I use if I don’t have heavy cream?
Whipped topping (like Cool Whip) can be substituted, but the texture might be a bit less rich. You can also try whipping coconut cream for a dairy-free version.
Pin This Recipe!
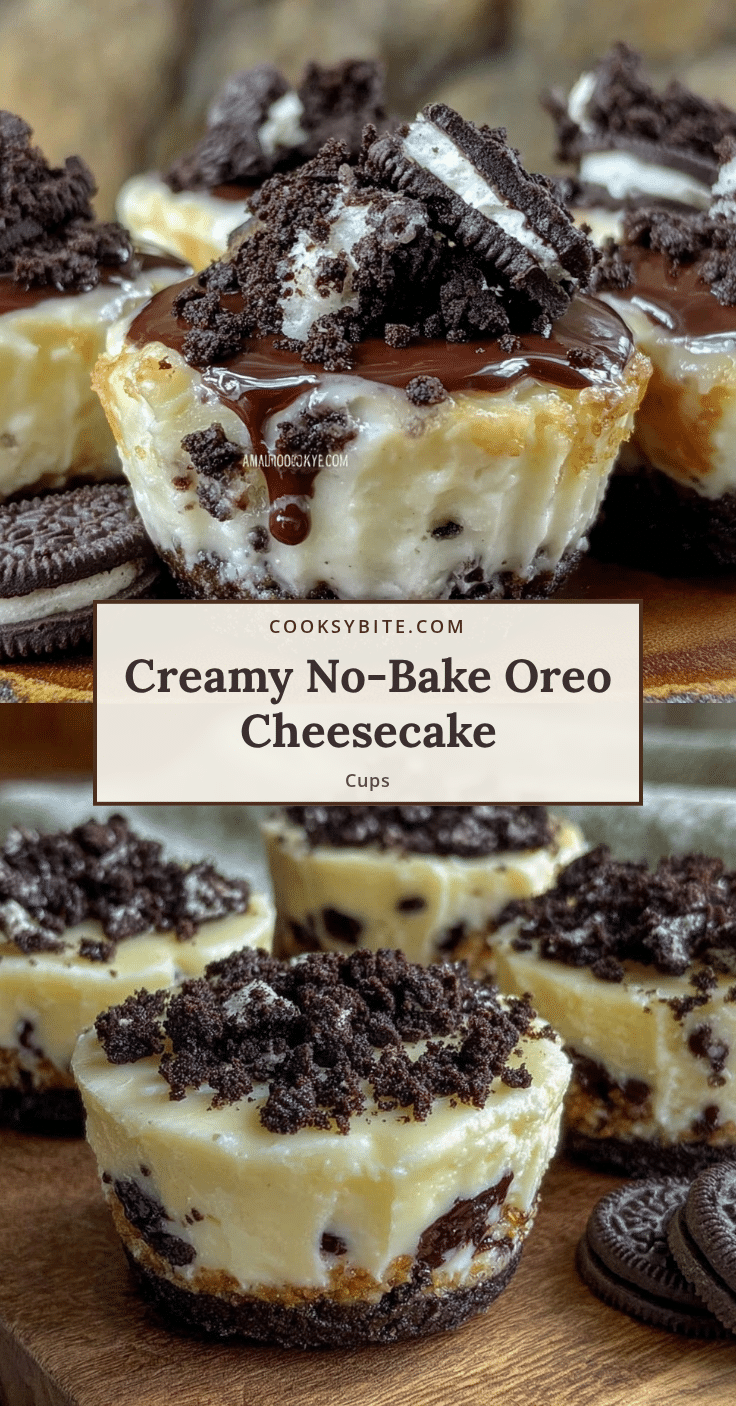
Creamy No-Bake Oreo Cheesecake Cups
Velvety smooth no-bake cheesecake cups layered with a crunchy Oreo crust, ready in under 5 minutes of hands-on time. Perfect for a quick, indulgent dessert with a creamy and crunchy texture contrast.
- Prep Time: 10 minutes
- Cook Time: 0 minutes
- Total Time: 2 hours 10 minutes
- Yield: 8 servings 1x
- Category: Dessert
- Cuisine: American
Ingredients
- 24 whole Oreo cookies, crushed finely for the base and roughly chopped for topping
- 5 tablespoons (70g) unsalted butter, melted
- 16 ounces (450g) cream cheese, softened to room temperature
- 3/4 cup (90g) powdered sugar, sifted
- 1 teaspoon vanilla extract
- 1 cup (240ml) heavy whipping cream, chilled
Instructions
- Crush 20 Oreos into fine crumbs using a rolling pin inside a large zip-top bag; reserve 4 Oreos roughly chopped for topping.
- Combine crushed Oreo crumbs with melted butter until moistened and press about 2 tablespoons into the bottom of each serving cup (makes about 8 cups). Chill in the fridge.
- Beat softened cream cheese with an electric mixer on medium speed until smooth and creamy, about 2-3 minutes.
- Gradually add powdered sugar and vanilla extract to the cream cheese, mixing well after each addition.
- Whip heavy cream in a separate chilled bowl on high speed until soft peaks form, about 3-5 minutes.
- Gently fold whipped cream into the cream cheese mixture using a spatula with light sweeping motions.
- Spoon or pipe the cream cheese filling over the chilled Oreo crust in each cup, filling almost to the top.
- Sprinkle the reserved chopped Oreo pieces on top.
- Refrigerate the cups for at least 2 hours or overnight to set before serving.
Notes
Bring cream cheese to room temperature before mixing to avoid lumps. Whip cream to soft peaks and fold gently to keep the mixture airy. Press Oreo crust firmly but not too hard to avoid a dense base. Chill at least 2 hours or overnight for best texture. If watery liquid appears after chilling, stir gently before serving.
Nutrition
- Serving Size: 1 cup
- Calories: 320
- Fat: 22
- Carbohydrates: 28
- Protein: 4
Keywords: no-bake, Oreo, cheesecake, dessert, quick dessert, easy dessert, creamy, Oreo crust, no oven


