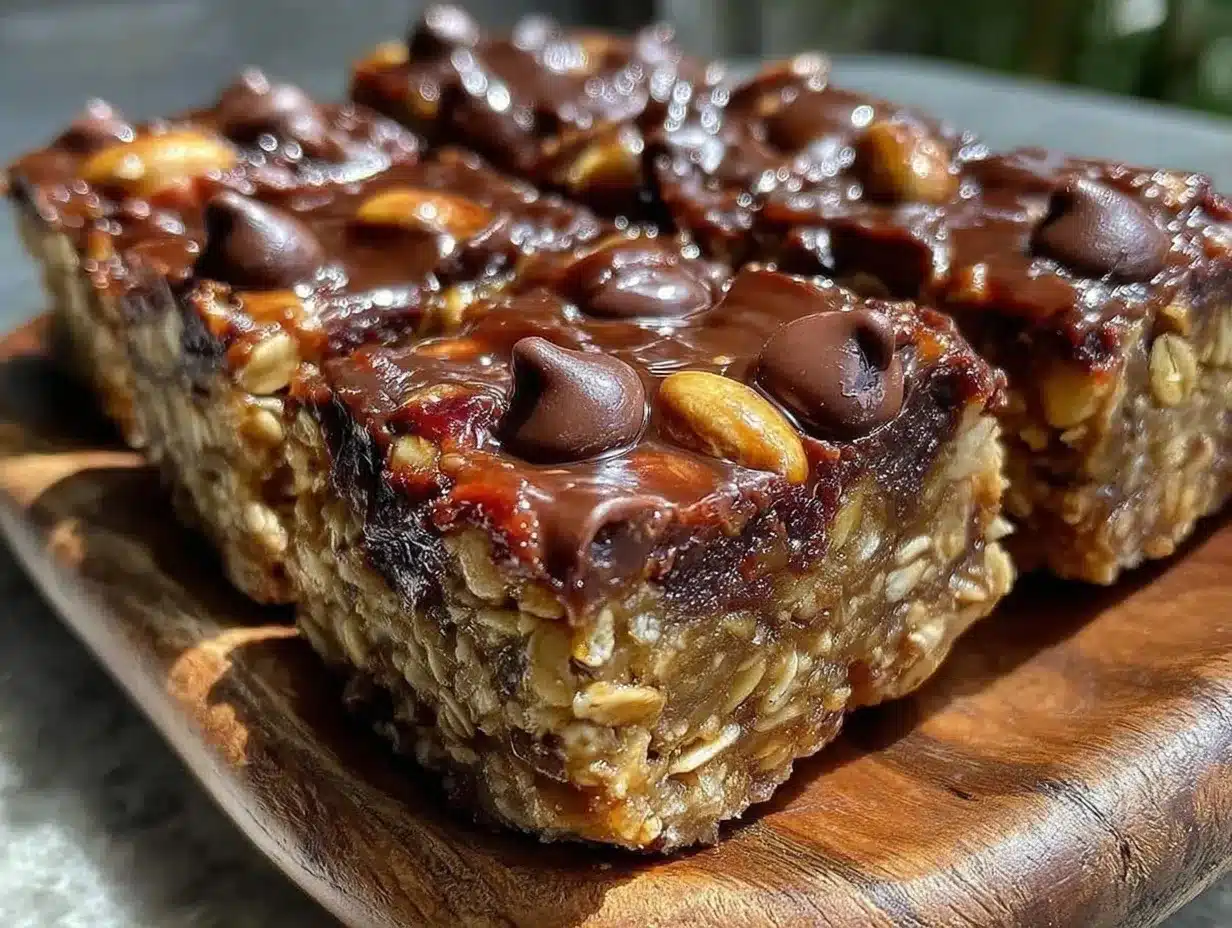
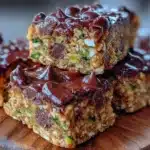
The sticky, slightly glossy sheen of these granola bars is what I made this for — everything else is secondary. That subtle tackiness on the surface, the way they hold together just enough to be chewy but still soft enough to bite through easily, it’s a texture you can’t fake with a baked bar. When I first tried crafting a no-bake chewy chocolate chip granola bar, I was obsessed with capturing this exact feel—something that didn’t crumble apart in your hand, yet wasn’t so dense it felt like a brick. Honestly, there’s a kind of comfort in how these bars just yield under gentle pressure, the chocolate chips peeking through the oat layers like little nuggets of promise.
I remember making my first batch in a rush, trying to avoid turning on the oven on a hot summer day. The mixture was warm and sticky, the oats fluffing up just right. The chocolate chips—tiny morsels of joy—melted slightly when pressed in, but didn’t lose their shape. That perfect balance? It stuck with me. And it’s why I keep coming back to this recipe when I want a snack that feels homemade but isn’t a hassle.
These bars aren’t just a grab-and-go snack; they’re a texture experience. The chewiness, the soft crumble, the way chocolate melts in your mouth without overwhelming the nuttiness and oats—it all comes together in a way that makes you pause for a moment. It’s a quiet little reward, perfect for when you need something satisfying but not heavy.
So if you’re someone who judges your food first by how it feels between your fingers and teeth, this recipe is for you. I’ve tested it countless times to nail that chewy, no-bake magic. And I promise, once you get that first bite, you’ll understand why these simple bars became a staple in my kitchen.
Why You’ll Love This Recipe
Making chewy chocolate chip granola bars without baking sounds a bit too good to be true, right? But trust me, this recipe nails it every time. Here’s why it’s become my go-to snack hack:
- Quick & Easy: Ready in under 20 minutes, no oven needed. Perfect for busy mornings or when life gets hectic.
- Simple Ingredients: You probably already have these in your pantry—rolled oats, honey, peanut butter, and chocolate chips. No last-minute store runs.
- Perfect for Anytime Snacking: Great for school lunches, hiking trips, or a quick energy boost at work.
- Crowd-Pleaser: Kids love the sweetness and chew. Adults appreciate the satisfying texture and wholesome ingredients.
- Unbelievably Delicious: The chewy base paired with melty chocolate chips hits that comfort-food sweet spot without feeling heavy.
What sets these apart from other granola bars is the exact balance of sticky and chewy, thanks to the combination of honey and peanut butter, and the way the oats soak up just enough moisture without turning mushy. Plus, I’ve found using mini chocolate chips makes all the difference—they spread evenly, so every bite has a little chocolate surprise. It’s not just a bar; it’s a snack that makes you want to slow down a bit, savor that chewiness, and remember what simple good food feels like.
Honestly, it’s the kind of recipe that sticks with you because it’s reliable and satisfying. I keep a batch stashed in my fridge for those moments when I want something homemade but fuss-free. And if you love a treat with great texture that doesn’t fall apart, you’ll appreciate how these bars hold their shape without baking.
What Ingredients You Will Need
This recipe uses simple, wholesome ingredients to deliver bold flavor and satisfying texture without the fuss. Most of these are pantry staples, and substitutions are easy if you want to tweak it for your dietary needs.
- Rolled oats (2 cups / 180g) – The chewy backbone of the bars. I recommend old-fashioned rolled oats for the best texture rather than quick oats.
- Natural peanut butter (½ cup / 125g) – Adds richness and sticky binding. Creamy works best; you can swap for almond or sunflower seed butter if needed.
- Honey (⅓ cup / 113g) – The sweetener and natural glue. Raw honey is my favorite for its flavor depth, but regular honey works fine.
- Mini chocolate chips (½ cup / 90g) – For melty chocolate pockets throughout. I use Ghirardelli mini chips for best melt without losing shape.
- Vanilla extract (1 teaspoon) – Just a touch to round out the flavors.
- Salt (¼ teaspoon) – To balance the sweetness and enhance flavor.
- Optional add-ins: Chopped nuts, dried fruit, or seeds (¼ cup / 30g) – For extra texture and nutrition.
If you want a gluten-free version, make sure your oats are certified gluten-free. For a vegan twist, swap honey with maple syrup or agave nectar. I’ve tried both, and maple syrup makes the bars a bit softer but just as tasty.
Equipment Needed
- Mixing bowl: A medium to large bowl for combining ingredients. A glass or stainless steel bowl works well.
- Measuring cups and spoons: Accurate measurements help keep the bars chewy and not too sticky or dry.
- Wooden spoon or silicone spatula: For stirring the sticky mixture without scraping your hands.
- 8×8-inch baking pan or any square pan: To press the mixture into a uniform layer. Lining with parchment paper makes removal easy.
- Microwave-safe bowl or small saucepan: To warm the peanut butter and honey if needed, making mixing easier.
If you don’t have a baking pan, a shallow dish or even a rimmed plate can work in a pinch. I’ve found pressing the mixture down firmly with a spatula or even the bottom of a glass helps compact the bars evenly. For cleanup, parchment paper is a lifesaver—it keeps everything from sticking, and you can lift the whole batch out for neat slicing.
Preparation Method
- Warm the peanut butter and honey: In a microwave-safe bowl, gently heat ½ cup peanut butter and ⅓ cup honey together for about 30 seconds to 1 minute (or warm on low in a small saucepan). Stir until smooth and combined. This step helps the ingredients blend better and keeps the bars chewy rather than crumbly.
- Add vanilla and salt: Stir in 1 teaspoon vanilla extract and ¼ teaspoon salt into the warm mixture. These little touches deepen the flavor.
- Combine oats and optional add-ins: In a large mixing bowl, pour 2 cups rolled oats and any optional ingredients like ¼ cup chopped nuts or dried fruit. Toss them together to distribute evenly.
- Mix wet and dry ingredients: Pour the peanut butter and honey mixture over the oats. Use a wooden spoon or spatula to fold everything together. The mixture should be sticky and hold together when pressed but not overly wet. If too dry, add a teaspoon of water or more honey; if too sticky, add a tablespoon more oats.
- Fold in mini chocolate chips: Add ½ cup mini chocolate chips last, folding gently so they don’t melt too much into the mixture at this stage.
- Press mixture into pan: Line an 8×8-inch pan with parchment paper, leaving some overhang. Transfer the mixture and press it down firmly and evenly with a spatula or your hands (clean, of course!). The pressure is key to keeping bars chewy and together.
- Chill and set: Place the pan in the refrigerator for at least 2 hours, or until firm enough to slice. This chilling step locks in the chewiness and makes cutting easy.
- Slice and enjoy: Using the parchment paper overhang, lift the set mixture out of the pan. Cut into 10-12 bars with a sharp knife. Store leftovers in an airtight container in the fridge.
Quick tip: If your bars seem crumbly, it’s usually from not pressing firmly enough or skipping the chilling step. Also, if you want the bars a bit firmer, add a tablespoon of melted coconut oil to the wet ingredients next time.
Cooking Tips & Techniques
Getting the perfect chewy texture for no-bake bars isn’t just about following a recipe—it’s about feeling your way through the process. Here are some things I’ve learned the hard way:
- Don’t skip warming the wet ingredients: Heating the peanut butter and honey makes them easier to mix, resulting in a better binding texture. Cold mixtures tend to clump and won’t stick evenly.
- Press firmly: It sounds obvious, but many times I’ve made the mistake of lightly pressing the mixture. Firm pressure compacts the oats and helps the bars hold together after chilling.
- Watch the oat type: Old-fashioned rolled oats absorb liquids better and keep the chew. Quick oats can turn the bars mushy.
- Mini chocolate chips are your friends: Regular chips can melt too much or clump. Minis spread out and give you little chocolate bursts with every bite.
- Chill thoroughly: I once tried slicing bars right after mixing—big mistake. Chilling for at least two hours is crucial to firm up the bars and get that perfect chewy snap.
When multitasking, I usually prepare the wet ingredients first, then toss the dry ingredients while the peanut butter and honey warm up. It saves time and keeps everything moving smoothly. And if your bars turn out too sticky, a quick 10-minute chill or a sprinkle of oats before pressing can help.
Variations & Adaptations
This no-bake chewy chocolate chip granola bars recipe is super flexible. I’ve tried quite a few variations to mix things up:
- Nut-free version: Swap peanut butter for sunflower seed butter or tahini. Use maple syrup instead of honey to make it vegan-friendly.
- Seasonal twist: Add dried cranberries or chopped dried apricots in fall and winter for a fruity pop. Fresh berries don’t work well here, but dried ones add nice texture.
- Chocolate upgrade: Stir in white chocolate chips or drizzle melted dark chocolate on top after chilling for an extra indulgence.
- Protein boost: Add a scoop of your favorite protein powder or sprinkle in chia seeds and flaxseeds for extra nutrition.
- Baking option: If you prefer baked bars, you can bake this mixture at 350°F (175°C) for about 15 minutes, but it won’t have the same chewiness that makes the no-bake version special.
One of my favorite tweaks is adding a teaspoon of cinnamon and a handful of chopped walnuts—gives it a cozy, warm vibe that’s perfect for chilly afternoons. This recipe is really about what works for you and your pantry.
Serving & Storage Suggestions
These chewy chocolate chip granola bars are best served cold or at room temperature. The chill keeps them firm enough to hold together, but if you leave them out too long, they soften a bit, which isn’t a bad thing if you like a more tender bite.
For a snack, they pair wonderfully with a glass of milk or a hot cup of coffee. I’ve even packed them alongside fresh fruit and yogurt for a balanced lunchbox treat. If you’re hosting, these bars can be a simple addition to a snack table alongside something a little fancier, like the pink velvet bundt cake or strawberry mousse cups—easy bites that satisfy different cravings.
Store leftovers in an airtight container in the refrigerator for up to a week. For longer storage, these bars freeze well—just wrap them individually in plastic wrap and place in a freezer-safe bag. Thaw at room temperature or microwave for 10-15 seconds before eating.
Over time, the flavors mellow and deepen, especially if you included nuts or spices. Sometimes I make a batch and let them sit for a day before slicing—it surprisingly improves the chew and flavor.
Nutritional Information & Benefits
Each bar (assuming 12 bars per batch) contains approximately:
| Calories | 180-200 |
|---|---|
| Protein | 5g |
| Fat | 8-10g |
| Carbohydrates | 22g |
| Fiber | 3g |
| Sugar | 10g (from honey and chocolate chips) |
The oats provide good fiber and slow-burning energy, while peanut butter gives you healthy fats and protein. Using natural peanut butter keeps the bars free from artificial additives. Honey adds natural sweetness with trace antioxidants.
This recipe is naturally gluten-free if you choose certified oats, and easily made vegan by swapping honey for maple syrup. It’s a wholesome snack that fits into balanced diets, perfect for refueling without processed sugars or fillers.
Conclusion
These easy no-bake chewy chocolate chip granola bars are a simple, satisfying snack that reminds me why homemade treats can feel so rewarding. The chewy texture, the melty pockets of chocolate, and the wholesome ingredients all come together to make something you want to eat again and again. Plus, it’s one of those recipes that you can tweak to match your pantry or mood without any fuss.
I love how quick it is to throw together, especially when I’m craving something sweet but don’t want to heat up the kitchen. Whether you’re packing lunches, need an afternoon pick-me-up, or want a snack that’s both tasty and textured, this recipe has you covered.
Give it a try, and if you experiment with your own add-ins or twists, I’d love to hear how you make it your own. There’s nothing better than sharing snack ideas that really work for real life.
FAQs about Easy No-Bake Chewy Chocolate Chip Granola Bars
Can I use quick oats instead of rolled oats?
Quick oats tend to make the bars mushier and less chewy. For the best texture, stick with old-fashioned rolled oats.
How long do these bars stay fresh?
Stored in an airtight container in the fridge, they stay fresh for up to a week. You can freeze them for up to 3 months.
Can I make these nut-free?
Yes! Swap peanut butter for sunflower seed butter or tahini and use maple syrup instead of honey for a vegan, nut-free option.
Why are my bars crumbly?
Usually, crumbly bars mean they weren’t pressed firmly enough or didn’t chill long enough. Make sure to compact the mixture tightly and chill for at least two hours.
Can I bake these bars instead of no-baking?
You can bake them at 350°F (175°C) for 15 minutes, but they won’t have the same chewy texture. The no-bake method is what keeps them soft and chewy.
Pin This Recipe!
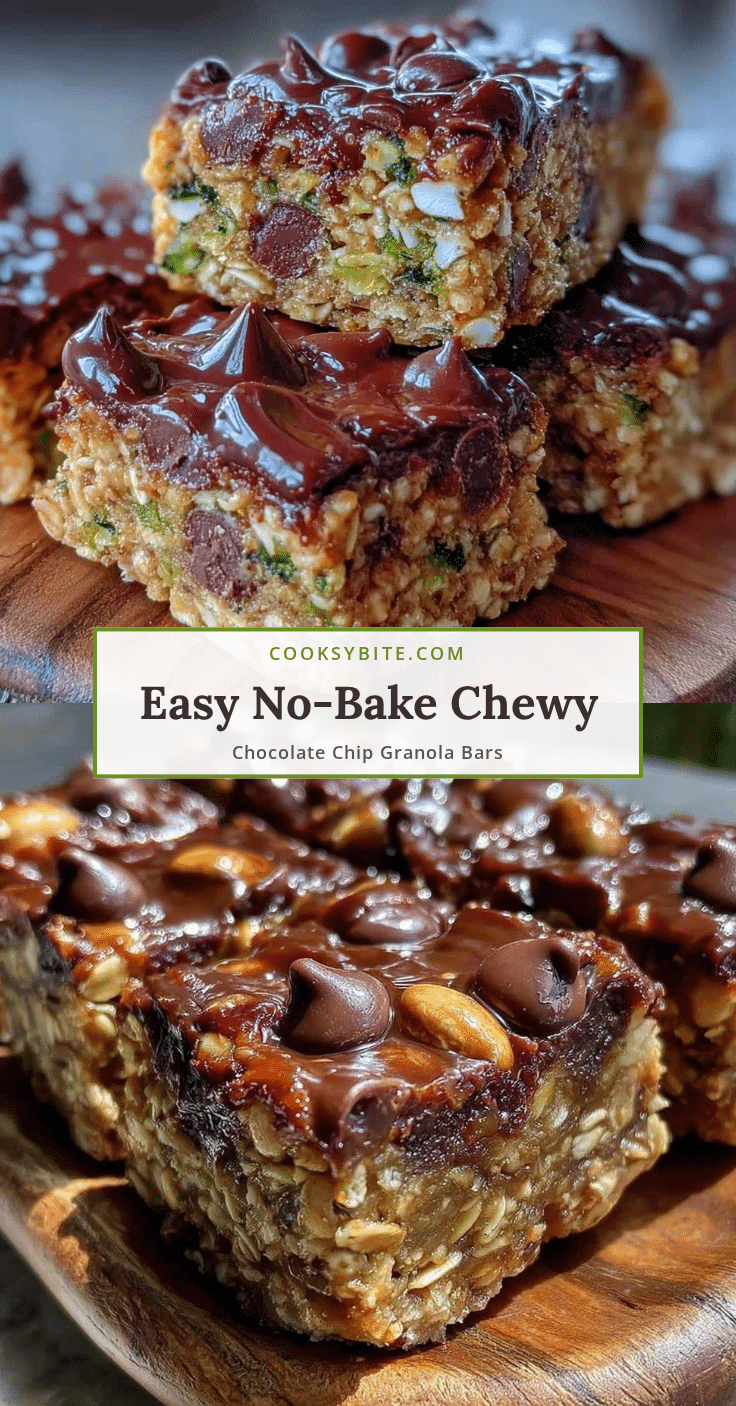
Easy No-Bake Chewy Chocolate Chip Granola Bars
These no-bake chewy chocolate chip granola bars offer a perfect balance of sticky and chewy texture with melty chocolate chips, making them a quick, satisfying snack without the need for baking.
- Prep Time: 10 minutes
- Cook Time: 0 minutes
- Total Time: 2 hours 10 minutes
- Yield: 10-12 bars 1x
- Category: Snack
- Cuisine: American
Ingredients
- 2 cups (180g) old-fashioned rolled oats
- 1/2 cup (125g) natural creamy peanut butter (or almond/sunflower seed butter)
- 1/3 cup (113g) honey (or maple syrup/agave nectar for vegan)
- 1/2 cup (90g) mini chocolate chips
- 1 teaspoon vanilla extract
- 1/4 teaspoon salt
- Optional: 1/4 cup (30g) chopped nuts, dried fruit, or seeds
Instructions
- Warm the peanut butter and honey together in a microwave-safe bowl for 30 seconds to 1 minute or on low heat in a small saucepan until smooth and combined.
- Stir in vanilla extract and salt into the warm mixture.
- In a large mixing bowl, combine rolled oats and any optional add-ins like chopped nuts or dried fruit.
- Pour the peanut butter and honey mixture over the oats and fold together with a wooden spoon or spatula until sticky and well combined. Adjust texture by adding a teaspoon of water or more honey if too dry, or a tablespoon more oats if too sticky.
- Fold in mini chocolate chips gently to avoid melting.
- Line an 8×8-inch baking pan with parchment paper and press the mixture firmly and evenly into the pan.
- Refrigerate for at least 2 hours until firm enough to slice.
- Lift the set mixture out using the parchment paper overhang and cut into 10-12 bars.
- Store leftovers in an airtight container in the refrigerator.
Notes
Warm the peanut butter and honey to improve mixing and binding. Press the mixture firmly into the pan to avoid crumbly bars. Chill for at least 2 hours before slicing. Use old-fashioned rolled oats for best texture. Mini chocolate chips prevent excessive melting. For firmer bars, add 1 tablespoon melted coconut oil to wet ingredients. Store bars in an airtight container in the fridge for up to a week or freeze for up to 3 months.
Nutrition
- Serving Size: 1 bar (if 12 bars pe
- Calories: 190
- Sugar: 10
- Sodium: 70
- Fat: 9
- Saturated Fat: 1.5
- Carbohydrates: 22
- Fiber: 3
- Protein: 5
Keywords: no-bake granola bars, chewy granola bars, chocolate chip granola bars, healthy snacks, peanut butter snacks, quick snacks, easy granola bars