Introduction
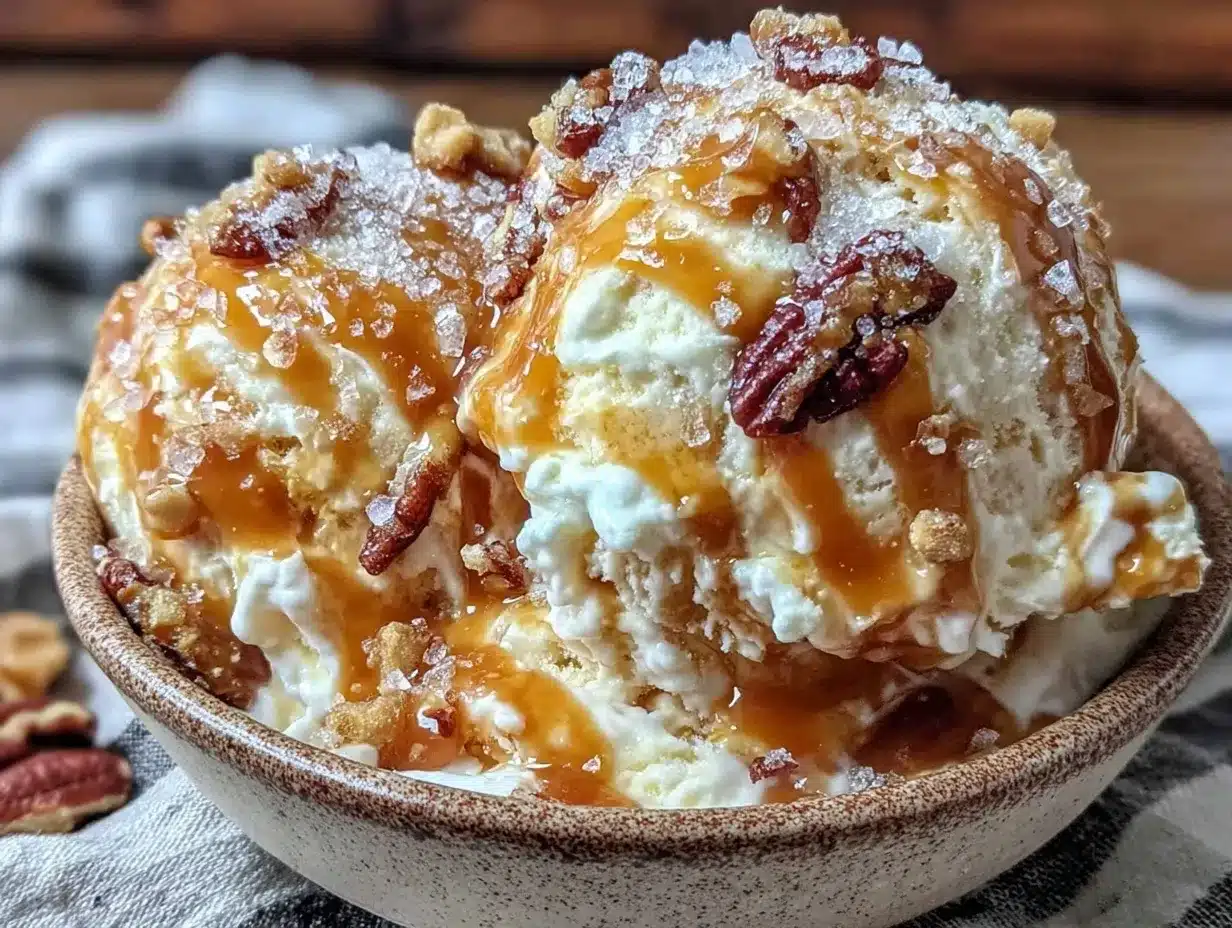
I burned the caramel sauce at least three times before I finally got this creamy no-churn salted caramel ice cream recipe right. Honestly, I’m not even the biggest ice cream fan, but something about this sweet-salty combo kept pulling me back. I remember one afternoon, the kitchen smelling like burnt sugar and a bit of smoke, and me wondering why my caramel never tasted quite right. It was frustrating because I wanted that perfect smoothness, that luxurious creaminess that melts right on your tongue without any chunks or bitterness.
What finally worked was slowing down, watching the sugar carefully, and having patience for the caramel to reach just the right amber color. The ice cream itself is a dream — rich yet light, with those tiny bursts of salty caramel that make it impossible to stop at one scoop. I didn’t expect this recipe to stick around much longer on my “favorites” list, but it did. It’s the kind of dessert that feels like a little indulgence after a long day or a sweet ending for a simple dinner.
You know, this recipe isn’t fancy or complicated — it’s honest, straightforward, and kind of comforting in its simplicity. No ice cream maker needed, just a few ingredients, and a bit of love. I keep coming back to it because it reminds me that sometimes, the best desserts are the ones that take a few tries to get right but are totally worth it.
Why You’ll Love This Recipe
This creamy no-churn salted caramel ice cream recipe has earned its spot in my kitchen for plenty of reasons:
- Quick & Easy: Ready in about 15 minutes of prep, then just freeze. Perfect for those unexpected dessert cravings or last-minute get-togethers.
- Simple Ingredients: No hunting for obscure items here — just basics like heavy cream, sweetened condensed milk, and caramel sauce.
- Perfect for Any Occasion: Whether it’s a cozy family night or you’re bringing something special to a summer potluck, this ice cream fits right in.
- Crowd-Pleaser: The sweet and salty combo always gets rave reviews, even from picky eaters and kids who usually avoid anything too fancy.
- Unbelievably Delicious: That creamy texture combined with the homemade salted caramel swirls makes you want to savor every bite.
What sets this recipe apart is the no-churn method that means you don’t need fancy equipment, yet the texture rivals what you get from an ice cream shop. The salted caramel isn’t just poured in; it’s folded in carefully so every scoop has a little caramel surprise. Plus, I like to lightly toast the sugar for the caramel to give it a deep, slightly smoky flavor that’s just right.
Honestly, this ice cream feels like a little luxury you can make anytime at home. It’s not just dessert — it’s a reminder that simple ingredients, when done with care, can bring big joy.
What Ingredients You Will Need
This recipe uses simple, wholesome ingredients to deliver bold flavor and satisfying texture without the fuss. Most of these are pantry staples or easy to find in any grocery store, and you can tweak a few to suit your preferences.
- Heavy whipping cream (2 cups / 480 ml) – This is what gives the ice cream its rich, creamy texture. I prefer using organic cream for the best flavor.
- Sweetened condensed milk (1 can, 14 oz / 396 g) – Adds sweetness and smoothness without crystallizing, which is key to that no-churn magic.
- Granulated sugar (1 cup / 200 g) – For making the caramel. You want pure white sugar here for a clean caramel flavor.
- Water (¼ cup / 60 ml) – Helps dissolve the sugar evenly when making caramel.
- Unsalted butter (2 tablespoons / 28 g) – Adds richness and a silky mouthfeel to the caramel.
- Sea salt flakes (1 teaspoon) – Use flaky sea salt like Maldon for the best texture and flavor contrast.
- Vanilla extract (1 teaspoon) – Enhances the overall flavor and adds warmth.
Optional but recommended:
- Brown sugar (2 tablespoons / 25 g) – You can mix a little into the caramel for depth.
- Light corn syrup (1 tablespoon / 15 ml) – Helps keep the caramel smooth and prevents crystallization.
If you want a dairy-free version, you can swap heavy cream with full-fat coconut cream and use sweetened condensed coconut milk instead. For the caramel, just make sure to use a vegan butter alternative. I’ve also tried using almond milk in a pinch, but the texture isn’t quite as creamy.
Equipment Needed
- Mixing bowls (medium and large) – Glass or metal works fine; I prefer glass for easy cleanup.
- Electric mixer or hand whisk – An electric mixer saves time and effort when whipping the cream, but a sturdy whisk works if you don’t mind the arm workout.
- Heavy saucepan – For making the caramel. Choose one with a thick bottom to prevent hot spots and burning.
- Spatula – For folding ingredients gently without deflating the cream.
- Loaf pan or airtight container – To freeze the ice cream. I like using a metal loaf pan because it freezes the ice cream faster.
- Measuring cups and spoons – Accuracy matters here, especially for the sugar and salt.
If you don’t have a heavy saucepan, a deep skillet will do, but just watch the sugar carefully as it heats. I once tried a nonstick pan and found the caramel stuck in odd places, so I recommend stainless steel or cast iron for the best results. Also, chilling your mixing bowl and beaters before whipping cream can make a noticeable difference.
Preparation Method
- Make the caramel sauce: In a heavy saucepan, combine 1 cup (200 g) granulated sugar and ¼ cup (60 ml) water over medium heat. Stir gently just until sugar dissolves, then stop stirring. Let it simmer, swirling the pan occasionally, until the sugar turns a deep amber color (about 8-10 minutes). Watch carefully—this is where it can go from perfect to burnt in seconds.
- Add butter and salt: Remove the pan from heat and quickly stir in 2 tablespoons (28 g) unsalted butter and 1 teaspoon sea salt flakes. The mixture will bubble vigorously, so be cautious. Stir until smooth, then set aside to cool slightly.
- Whip the cream: In a chilled large bowl, beat 2 cups (480 ml) heavy whipping cream with an electric mixer on medium-high speed until stiff peaks form. This should take about 3-4 minutes. Be careful not to overwhip, or you’ll get grainy texture.
- Combine sweetened condensed milk and vanilla: In another bowl, mix 1 can (14 oz / 396 g) sweetened condensed milk with 1 teaspoon vanilla extract.
- Fold ingredients together: Gently fold the condensed milk mixture into the whipped cream until combined. Then, pour half of the cooled caramel into the mixture and swirl it in lightly for a marbled effect. Reserve the rest for layering later.
- Assemble and freeze: Pour half of the ice cream base into your loaf pan or container. Drizzle some of the remaining caramel sauce over it. Top with the remaining ice cream base and swirl the rest of the caramel on top. Use a knife or skewer to create pretty caramel ribbons.
- Freeze for at least 6 hours: Cover tightly with plastic wrap or a lid and freeze until firm. It’s best overnight, but 6 hours works if you’re impatient (I get it!).
- Serve: Remove from the freezer about 5-10 minutes before serving to soften slightly. Scoop generously and enjoy your creamy no-churn salted caramel ice cream!
Pro tip: If your caramel hardens too much before adding to the ice cream, warm it gently over low heat to loosen it up. Also, for an extra smooth finish, strain the caramel before folding it in to catch any crystallized bits.
Cooking Tips & Techniques
Making caramel can be intimidating, but here are some pointers I picked up the hard way:
- Use a clean pan: Any leftover residue can cause uneven caramelization and burning.
- Don’t stir once the sugar dissolves: Stirring too much invites crystallization. Instead, swirl the pan gently.
- Watch the color, not the time: Caramel can go from golden to burnt in seconds. When it smells nutty and looks amber, it’s time to stop cooking.
- Cool caramel slightly: Adding it hot to cold cream can cause lumps or melting issues.
- Whip cream just right: Soft peaks will collapse; stiff peaks might turn grainy if mixed too much. Stop when peaks hold shape but still feel smooth.
- Fold, don’t mix: Folding keeps air in the cream, so your ice cream stays light and fluffy.
I’ve learned that multitasking carefully helps — I prep the caramel first, then whip the cream right after the caramel cools. Patience and timing are the secret weapons here. And if you want to impress friends, bring a little caramel sauce on the side for drizzling extra sweetness.
Variations & Adaptations
This creamy no-churn salted caramel ice cream recipe has plenty of room for creativity:
- Chocolate Swirl: Add melted dark chocolate ribbons instead of caramel swirls for a rich chocolate-caramel combo. I once paired this with my decadent red wine chocolate cake for a dessert extravaganza.
- Nutty Crunch: Fold in toasted pecans or almonds for texture contrast. Toasting nuts brings out a warm flavor that pairs beautifully with salted caramel.
- Dairy-Free Version: Use full-fat coconut cream and coconut condensed milk. The flavor shifts a bit but stays deliciously creamy and tropical.
- Spiced Caramel: Add a pinch of cinnamon or cardamom to the caramel sauce for a subtle spice twist.
If you want to try a different method, freezing the mixture in individual silicone molds creates lovely popsicle-style treats. Also, swapping in maple syrup for some sugar in the caramel can add a natural sweetness and complexity I really enjoy.
Serving & Storage Suggestions
This ice cream is best served slightly softened — about 5 to 10 minutes out of the freezer. That way, it scoops easily and the flavors come through fully. I like to serve it in small bowls with a sprinkle of flaky sea salt on top for an extra pop.
It pairs beautifully with fresh fruit, especially sliced apples or pears, and a drizzle of extra caramel sauce if you want to go all out. For a grown-up touch, a splash of bourbon or espresso poured over the ice cream is a game-changer.
Store leftovers tightly covered in the freezer. It will keep well for up to two weeks, though honestly, it rarely lasts that long in my house. When reheating is needed, let it thaw just slightly at room temperature, then stir gently to restore creaminess.
Interestingly, the salted caramel flavor intensifies after a day or two in the freezer, so if you can resist, letting it rest overnight really improves the depth.
Nutritional Information & Benefits
Each serving (about ½ cup or 125 ml) of this creamy no-churn salted caramel ice cream contains approximately:
| Calories | 280 |
|---|---|
| Fat | 18g |
| Saturated Fat | 11g |
| Carbohydrates | 27g |
| Sugar | 25g |
| Protein | 3g |
This dessert is a treat, so moderation is key. The heavy cream and butter provide satisfying fats that help keep you full, while the sea salt flakes add a mineral boost and balance the sweetness. For folks avoiding gluten or eggs, this recipe is naturally free of both.
From a wellness perspective, making this at home means you control the ingredients — no preservatives or artificial flavors. Plus, the joy of creating a homemade dessert brings its own kind of nourishment.
Conclusion
This creamy no-churn salted caramel ice cream recipe is a keeper for anyone who loves rich, satisfying desserts without the fuss of an ice cream maker. It’s simple, straightforward, and makes you feel like you’ve got dessert under control, even if caramel has been your nemesis before.
Feel free to tweak the salt level, swirl in extra toppings, or try one of the variations to make it your own. I love how this recipe brings a little homemade magic to my kitchen — and even as someone who’s not always head-over-heels for ice cream, this one holds a special place.
If you give it a try, I’d love to hear how you make it yours or what twists you add. There’s nothing like swapping stories over a scoop of something sweet and creamy.
FAQs
Can I use store-bought caramel sauce instead of making my own?
Yes, you can, but homemade caramel has a fresher, deeper flavor that really makes this recipe shine. Just make sure the store-bought sauce isn’t too runny or overly sweet.
How long can I store this ice cream in the freezer?
It keeps well for up to two weeks when stored in an airtight container, though it’s best enjoyed within the first week for optimal texture and flavor.
Is there a way to make this recipe lower in sugar?
You can reduce the sugar slightly in the caramel, but keep in mind it affects texture and sweetness balance. Using a sugar substitute isn’t recommended here because caramelization relies on real sugar.
Can I prepare this ice cream in advance for a party?
Absolutely! It actually tastes better after resting overnight. Just make sure to take it out a few minutes before serving for easier scooping.
What’s the best way to get those caramel swirls evenly distributed?
Pour half the ice cream base, drizzle some caramel, then add the rest of the base and finish with more caramel on top. Use a knife to gently swirl without overmixing to keep the ribbons defined.
If you’re interested in other homemade dessert ideas that impress with simple ingredients, you might enjoy my fluffy strawberry mousse cups or these delicious cherry chocolate brownies for a fudgy twist.
Pin This Recipe!
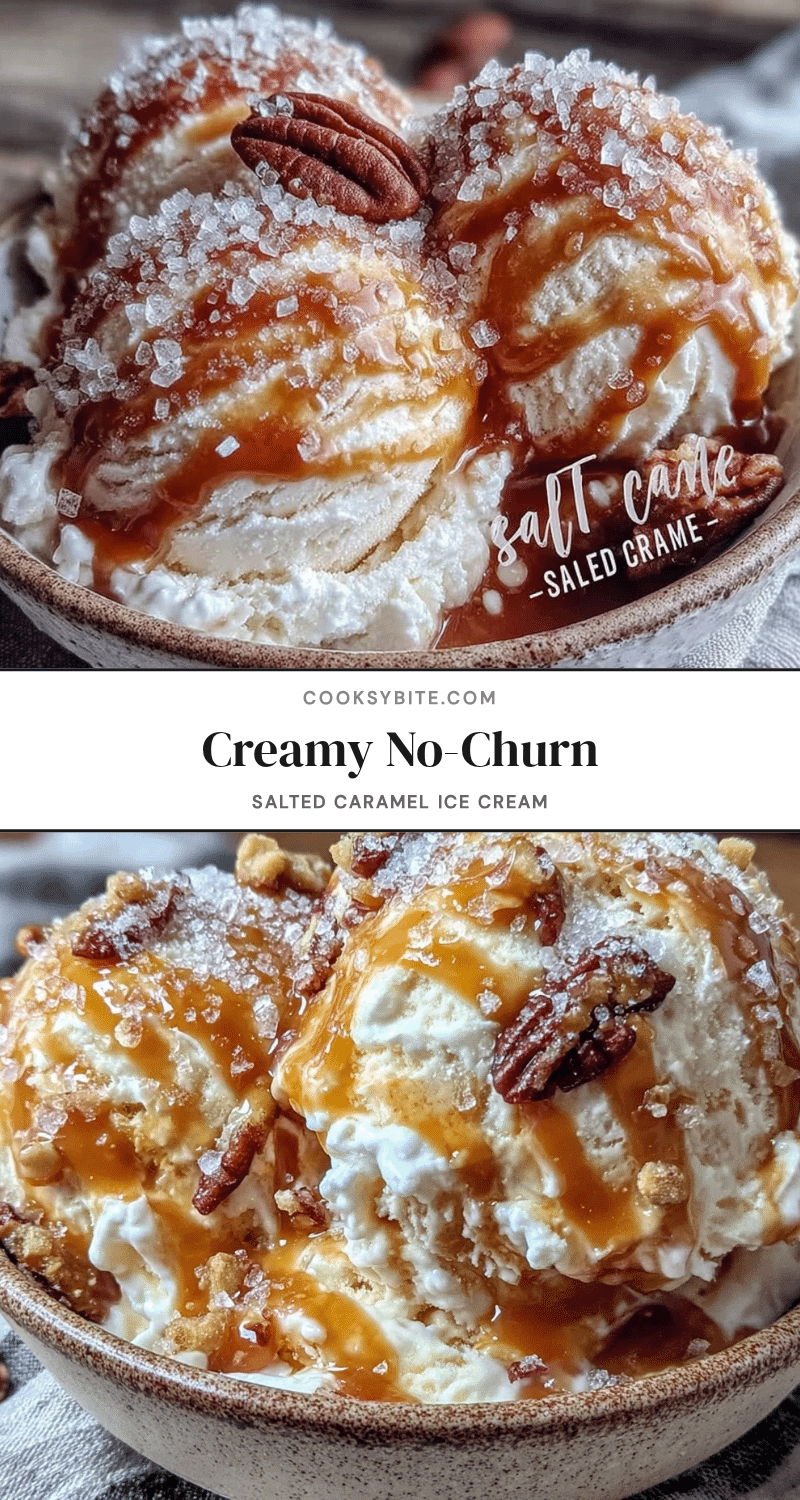
Creamy No-Churn Salted Caramel Ice Cream

A rich and creamy no-churn ice cream featuring homemade salted caramel swirls, perfect for an easy homemade dessert without an ice cream maker.
- Prep Time: 15 minutes
- Cook Time: 10 minutes
- Total Time: 6 hours 25 minutes
- Yield: 8 servings 1x
- Category: Dessert
- Cuisine: American
Ingredients
- 2 cups (480 ml) heavy whipping cream
- 1 can (14 oz / 396 g) sweetened condensed milk
- 1 cup (200 g) granulated sugar
- 1/4 cup (60 ml) water
- 2 tablespoons (28 g) unsalted butter
- 1 teaspoon sea salt flakes
- 1 teaspoon vanilla extract
- Optional: 2 tablespoons (25 g) brown sugar
- Optional: 1 tablespoon (15 ml) light corn syrup
Instructions
- Make the caramel sauce: In a heavy saucepan, combine 1 cup granulated sugar and 1/4 cup water over medium heat. Stir gently until sugar dissolves, then stop stirring. Let simmer, swirling occasionally, until sugar turns deep amber (8-10 minutes).
- Remove from heat and stir in 2 tablespoons unsalted butter and 1 teaspoon sea salt flakes. Stir until smooth and set aside to cool slightly.
- In a chilled large bowl, beat 2 cups heavy whipping cream with an electric mixer on medium-high speed until stiff peaks form (3-4 minutes).
- In another bowl, mix 1 can sweetened condensed milk with 1 teaspoon vanilla extract.
- Gently fold the condensed milk mixture into the whipped cream until combined. Pour half of the cooled caramel into the mixture and swirl lightly for a marbled effect. Reserve the rest for layering.
- Pour half of the ice cream base into a loaf pan or airtight container. Drizzle some of the remaining caramel sauce over it. Top with the remaining ice cream base and swirl the rest of the caramel on top. Use a knife or skewer to create caramel ribbons.
- Cover tightly and freeze for at least 6 hours or overnight until firm.
- Remove from freezer 5-10 minutes before serving to soften slightly. Scoop and enjoy.
Notes
Use a clean pan to avoid burning caramel. Do not stir caramel once sugar dissolves; swirl gently instead. Watch caramel color closely to avoid burning. Chill mixing bowl and beaters before whipping cream for best results. Fold ingredients gently to keep ice cream light and fluffy. Warm hardened caramel gently before folding in. Strain caramel for extra smoothness.
Nutrition
- Serving Size: 1/2 cup (125 ml)
- Calories: 280
- Sugar: 25
- Sodium: 0.15
- Fat: 18
- Saturated Fat: 11
- Carbohydrates: 27
- Protein: 3
Keywords: no-churn ice cream, salted caramel, homemade dessert, easy ice cream recipe, no ice cream maker, creamy ice cream, caramel swirl