That faint, sweet scent of vanilla and powdered sugar—the kind that hangs in the air long after the baking is done—still takes me straight to my tiny apartment kitchen last October. I was trying to do too much at once, as usual, and I had a batch of sugar cookies cooling on the counter that were supposed to be “cute.” Instead, they were just… round. And beige. And incredibly boring. I had a tube of black icing and a sudden, stubborn idea. I wasn’t going to make perfect little pumpkins or tidy ghosts. I wanted something with a little attitude. I wanted a black cat.
So I grabbed a #2 round tip, held my breath, and started piping. That first cookie came out lopsided—one ear was too big, the tail looked like a question mark. But honestly? That was the one that made me laugh out loud. It had personality. It looked like a cat who had just seen a cucumber. By the time I finished the batch, I had a tray full of the most delightfully imperfect, slightly mischievous little black cats. They were gone before the night was over, and my neighbor (a known cookie snob) asked for the recipe. That was the moment I knew this was something special.
These Adorable Black Cat Halloween Sugar Cookies with Royal Icing aren’t about being perfect. They are about capturing that little spark of Halloween fun—the spooky-but-cute vibe that makes October feel so magical. The cookies themselves are a simple, buttery sugar cookie that holds its shape beautifully, and the royal icing is a dream to work with. It dries hard and glossy, which is perfect for those little cat faces. You don’t need to be a professional baker to get great results here. I promise you, if I can make a cat that looks like it’s plotting world domination (in a cute way), you can absolutely make these.
So, let’s get our hands a little messy and make some cookies that are equal parts spooky and sweet. These are the kind of treats that make people smile, and honestly, that’s the whole point.
Why You’ll Love This Recipe
I’ve tested this recipe more times than I care to count, and I can tell you with total confidence—this is the one. It’s the perfect mix of foolproof technique and creative fun. Here is why it works so well.
- No Spooky Fails Here: The sugar cookie recipe is a tried-and-true winner. No spreading, no losing shape, just perfectly crisp edges and a soft center every single time. I’ve made it using different brands of butter and flour, and it holds up beautifully.
- Simple Ingredients: You probably have 90% of these in your pantry right now. No weird extracts or specialty flours. Just butter, sugar, eggs, and vanilla. It’s the kind of recipe you can whip up on a whim.
- Perfect for a Halloween Party: These cookies are the star of any spread. They are adorable, festive, and way more impressive than a store-bought bag of candy. I brought a batch to a friend’s Halloween potluck and they were the first thing to disappear.
- Crowd-Pleaser: Kids love them because they are cute. Adults love them because they taste incredible. It’s a win-win. I’ve seen grown adults literally fight over the one with the best “grumpy cat” face.
- Unbelievably Delicious: This isn’t just a pretty cookie. The texture is spot on—crisp on the outside, tender on the inside. The royal icing adds a sweet, melt-in-your-mouth finish that perfectly complements the buttery base.
What makes this recipe different from all the others? It’s the method. I’ve streamlined the chilling and rolling process so you don’t end up with a sticky mess. And the royal icing? It’s a medium-consistency icing that is thick enough to hold a line but fluid enough to self-level. It’s the sweet spot for detailed piping. This isn’t just another version of a cut-out cookie—it’s the version that will make you feel like a pro.
This recipe is comfort food reimagined for the Halloween season. It’s the kind of treat that makes you close your eyes after the first bite, not because it’s fancy, but because it’s just so perfectly satisfying.
What Ingredients You Will Need
This recipe uses simple, wholesome ingredients to deliver bold flavor and satisfying texture without the fuss. Most of these are pantry staples, which makes them perfect for a last-minute baking session.
For the Sugar Cookies:
- Unsalted butter, softened (1 cup / 226g) – The foundation of a great cookie. I always use unsalted so I can control the salt level. Let it sit out for at least 30 minutes to get truly soft.
- Granulated sugar (1 cup / 200g) – Just standard white sugar. It gives the cookies that perfect crisp edge.
- Large egg (1) – Room temperature is best. If you forget to take it out early, just place it in a bowl of warm water for 5 minutes.
- Vanilla extract (1 teaspoon) – Pure vanilla makes a difference. I prefer Nielsen-Massey for its rich, floral notes.
- All-purpose flour (2 ½ cups / 312g) – Spoon and level it. Don’t scoop directly from the bag or you’ll end up with dense cookies.
- Baking powder (½ teaspoon) – Helps them puff up just a tiny bit.
- Salt (¼ teaspoon) – Balances the sweetness.
For the Royal Icing:
- Powdered sugar (3 cups / 360g) – Sift it if it’s lumpy. Trust me, it makes a difference in the smoothness.
- Meringue powder (2 tablespoons) – This is the secret to a glossy, hard-drying icing. You can find it in the baking aisle or online. I like Wilton brand.
- Warm water (4-5 tablespoons) – Add it slowly. You might not need all of it.
- Black gel food coloring (1-2 teaspoons) – Gel is key. Liquid coloring will mess up the consistency of the icing.
- White gel food coloring (optional, for a true black) – A tiny drop of white can help neutralize any gray tones in the black.
For Decorating:
- Orange and green gel food coloring (for the eyes) – You only need a tiny bit.
- Piping bags and tip #2 (or a small round tip) – This is the workhorse tip for these cookies.
Equipment Needed
You don’t need a professional bakery setup for this, but a few key tools will make your life a lot easier.
- Stand mixer or hand mixer – A stand mixer is a lifesaver for creaming the butter and sugar, but a hand mixer works just fine. I’ve made this recipe with both.
- Rolling pin – I prefer a French rolling pin (the one without handles) because it gives me more control, but any rolling pin will do.
- Cat-shaped cookie cutter – The star of the show! I found a great set on Amazon that has a sitting cat and a walking cat. Look for one that is about 3-4 inches tall.
- Parchment paper – Non-negotiable for easy cleanup and preventing sticking.
- Baking sheets – Light-colored, heavy-duty sheets work best to prevent over-browning.
- Piping bags – Disposable ones are easiest for cleanup. You can also use a zip-top bag with the corner snipped off in a pinch.
- Cooling rack – Essential for letting the cookies cool completely before icing.
A budget-friendly tip: if you don’t have a rolling pin, a clean wine bottle works surprisingly well. Just make sure it’s smooth and not too cold!
Preparation Method
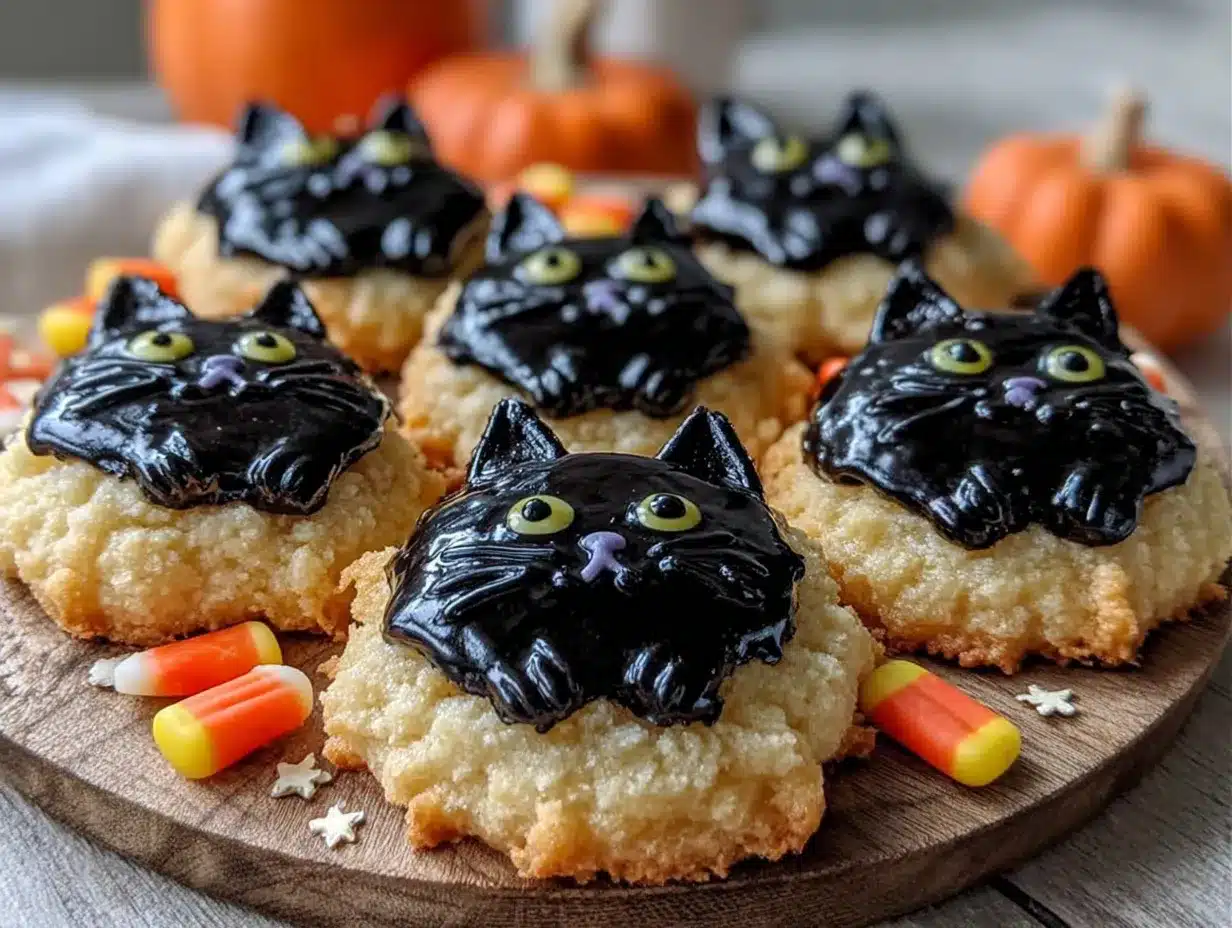
Let’s get baking! This process is broken down into simple steps. Take your time, especially with the chilling and icing. It’s worth it.
Step 1: Make the Cookie Dough (15 minutes)
In the bowl of your stand mixer fitted with the paddle attachment, cream the softened butter and granulated sugar together on medium speed until light and fluffy. This takes about 2-3 minutes. You want it to look pale and airy. Scrape down the sides of the bowl. Add the egg and vanilla extract, and mix on low until just combined.
In a separate bowl, whisk together the flour, baking powder, and salt. With the mixer on low, gradually add the dry ingredients to the wet ingredients. Mix until the dough just comes together. It should look crumbly at first, then form a soft, cohesive ball. Do not overmix, or your cookies will be tough.
Step 2: Chill the Dough (2 hours)
Divide the dough in half, flatten each half into a disc about 1-inch thick, and wrap tightly in plastic wrap. Refrigerate for at least 2 hours, or up to overnight. This step is non-negotiable. Chilled dough holds its shape perfectly when cut and baked. I learned this the hard way after making a batch of sad, blob-shaped pumpkins.
Step 3: Roll and Cut (20 minutes)
Preheat your oven to 350°F (175°C). Line your baking sheets with parchment paper. Lightly flour your work surface and rolling pin. Remove one disc of dough from the fridge. Roll it out to about ¼-inch thickness. If the dough cracks at the edges, let it sit for a minute to warm up slightly. Use your cat-shaped cutter to cut out the cookies. Transfer them to the prepared baking sheets, spacing them about 2 inches apart. Gather the scraps, re-roll, and cut again. You can get about 18-24 cookies depending on the size of your cutter.
Step 4: Bake (10-12 minutes)
Bake for 10-12 minutes, or until the edges are just barely starting to turn golden brown. The centers will still look slightly pale. Don’t overbake! They will continue to set on the baking sheet. Let them cool on the baking sheet for 5 minutes, then transfer to a wire rack to cool completely. Cookies must be 100% cool before icing.
Step 5: Make the Royal Icing (10 minutes)
In the bowl of your stand mixer (or using a hand mixer), combine the powdered sugar, meringue powder, and 4 tablespoons of warm water. Mix on low until combined, then beat on medium-high for 5-7 minutes, until the icing is thick, glossy, and forms stiff peaks. If it’s too thick, add the remaining tablespoon of water, a few drops at a time. The consistency should be like toothpaste. Add the black gel food coloring and mix until you get a deep, dark black. You can add a tiny drop of white to help it along.
Step 6: Decorate the Cookies (30-60 minutes)
Fit a piping bag with a #2 round tip and fill it with the black royal icing. Pipe the outline of the cat’s body, leaving the face area open. Fill in the body with a back-and-forth motion. Use a toothpick to spread the icing into the edges. Let this base layer dry for at least 1 hour. Then, pipe two small triangles for ears, a curved line for a tail, and little paws. For the eyes, use a tiny bit of orange icing (mix a little of the black icing with orange gel) and a toothpick to dab it on. Let the cookies dry completely, uncovered, for at least 4-6 hours or overnight. This creates a hard, glossy finish.
Cooking Tips & Techniques
I’ve made every mistake in the book so you don’t have to. Here are my best tips for getting perfect results.
- The Dough is Your Friend: If your dough feels sticky when you’re rolling it out, don’t add more flour. Just pop it back in the fridge for 15 minutes. Cold dough is happy dough.
- Even Thickness is Key: Use two ¼-inch rolling pin rings or place two pencils on either side of your dough to ensure an even thickness. This guarantees uniform baking.
- Royal Icing Consistency: The “toothpaste” consistency is perfect for outlining and flooding. If you drag a knife through the icing, the line should hold for a second before slowly disappearing. If it disappears immediately, it’s too thin. Add more powdered sugar.
- Patience is a Virtue: I know you want to eat them immediately, but let the icing dry completely. Touching it too soon will leave fingerprints. I once ruined an entire batch of meticulously decorated cookies because I couldn’t wait. Learn from my pain.
- Use a Toothpick: For those tiny details like eyes and noses, a toothpick is your best friend. It gives you way more control than a piping bag.
Variations & Adaptations
This recipe is a fantastic base for creativity. Here are a few ways to make it your own.
- Dietary Adaptation – Gluten-Free: Swap the all-purpose flour for a 1:1 gluten-free baking flour blend (like King Arthur Measure for Measure). The texture will be slightly more tender, but the cookies will still hold their shape beautifully. I’ve tested this and it works great.
- Flavor Twist – Spiced Halloween: Add ½ teaspoon of cinnamon and ¼ teaspoon of nutmeg to the dry ingredients. It gives the cookies a warm, cozy fall flavor that pairs perfectly with the royal icing.
- Design Variation – Pumpkin Patch Cats: Instead of plain black cats, pipe a small orange pumpkin next to each cat. You can use the same royal icing recipe, just tint a small portion orange. It adds a fun seasonal touch.
- Allergen Substitution – Dairy-Free: Use a high-quality vegan butter stick (like Miyoko’s) in place of the dairy butter. The cookies will be slightly less crisp but still delicious.
I once made a version where I added a tiny bit of orange zest to the dough. It was a subtle but lovely addition that I highly recommend if you want a little extra flavor.
Serving & Storage Suggestions
These cookies are best enjoyed at room temperature. The royal icing will be hard and glossy, and the cookie will be perfectly crisp.
Serving: Arrange them on a festive Halloween platter or tiered tray. They look amazing alongside a batch of Perfect Pink Champagne Jello Shots for a grown-up Halloween party. For a kid-friendly spread, pair them with a glass of cold milk or a warm mug of apple cider.
Storage: Store completely decorated and dried cookies in an airtight container at room temperature. Place a sheet of parchment paper between layers to prevent the icing from sticking. They will stay fresh for up to 2 weeks. Honestly, they get even better after a day—the flavors meld together.
Freezing: You can freeze the undecorated baked cookies for up to 3 months. Just place them in a freezer-safe bag with parchment paper between layers. Thaw them at room temperature, then decorate as directed. You can also freeze the raw dough discs for up to 3 months. Just thaw in the fridge overnight before rolling and cutting.
Reheating: These cookies are best enjoyed as-is. Do not microwave them, as it will ruin the texture of the icing.
Nutritional Information & Benefits
Let’s be real—these are a treat. But they are made with real, whole ingredients, which is always a win. Here’s a rough estimate per cookie (based on 24 cookies).
- Calories: ~180
- Fat: 8g
- Carbohydrates: 26g
- Sugar: 18g
- Protein: 2g
Health Benefits: While not a health food, these cookies are free from artificial preservatives and hydrogenated oils. The butter provides a small amount of vitamin A, and the egg contributes protein. The biggest benefit? The pure joy of baking and sharing something beautiful with the people you love. That’s good for the soul.
Dietary Considerations: This recipe contains gluten, dairy, and eggs. See the variations section for gluten-free and dairy-free adaptations.
Conclusion
These Adorable Black Cat Halloween Sugar Cookies with Royal Icing are more than just a recipe—they are a little piece of Halloween magic you can make with your own hands. They are forgiving, fun, and absolutely delicious. Whether you are a seasoned baker or a total beginner, I promise you can make these. And honestly, the slightly crooked ones? Those are the best ones. They have character.
I would love to see your creations! Tag me in your photos or leave a comment below telling me how your cats turned out. Did you make them grumpy? Cute? A little bit of both? I want to hear all about it. Don’t forget to check out some of my other favorite party treats, like this Decadent Red Wine Chocolate Cake or these Mini Lemon Blueberry Cheesecakes for your next gathering.
Happy Halloween, and happy baking!
Frequently Asked Questions
Can I use a different cookie cutter shape?
Absolutely! This dough works perfectly with any shape. Just adjust the baking time slightly for smaller or larger cutters. The technique for decorating with royal icing is the same, no matter the shape.
My royal icing is too thin. How do I fix it?
If your royal icing is runny, it won’t hold its shape. Simply add more sifted powdered sugar, one tablespoon at a time, until it reaches the correct “toothpaste” consistency. Mix well after each addition.
How long do the cookies need to dry before I can stack them?
You need to let the royal icing dry completely, which takes at least 4-6 hours at room temperature. For best results, leave them out overnight. If you try to stack them too soon, the icing will smudge and stick together.
Can I freeze the decorated cookies?
Yes, you can! Once the royal icing is fully dry and hard, place the cookies in a single layer in a freezer-safe container with parchment paper between layers. They will keep for up to 3 months. Thaw them in the container at room temperature to prevent condensation.
My cookies spread in the oven. What went wrong?
This usually happens if the dough wasn’t chilled long enough or if the butter was too soft. Make sure your dough is thoroughly chilled for at least 2 hours. Also, ensure your baking sheets are cool before placing the cut-out cookies on them.
Pin This Recipe!
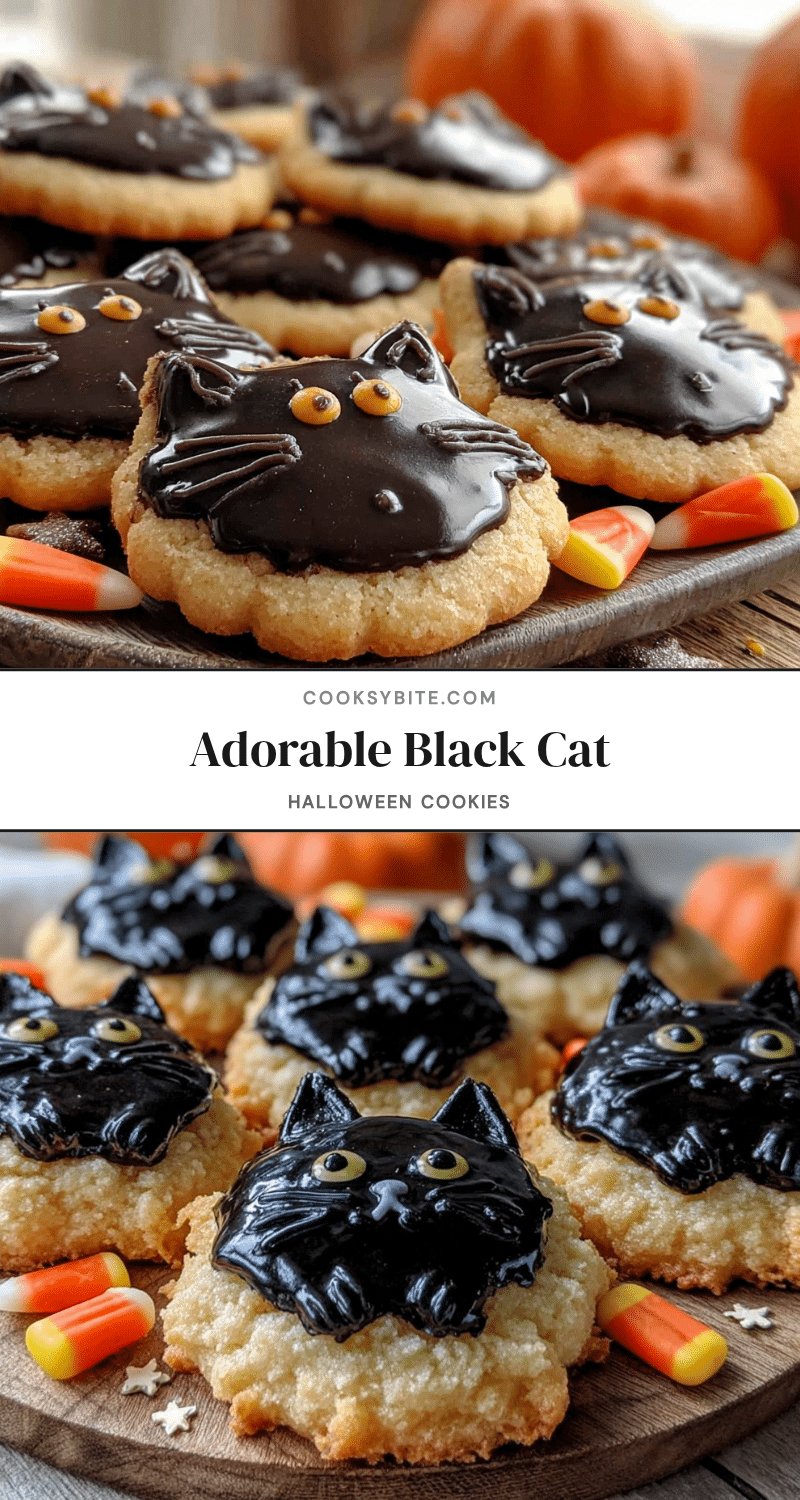
Adorable Black Cat Sugar Cookies: Easy Halloween Treat

These Adorable Black Cat Halloween Sugar Cookies with Royal Icing are a fun and forgiving recipe that captures the spooky-but-cute vibe of Halloween. Made with a simple, buttery sugar cookie and glossy royal icing, they are perfect for bakers of all skill levels.
- Prep Time: 15 minutes
- Cook Time: 10-12 minutes
- Total Time: 2 hours 30 minutes (including chilling and drying time)
- Yield: 18-24 cookies 1x
- Category: Dessert
- Cuisine: American
Ingredients
- 1 cup (226g) unsalted butter, softened
- 1 cup (200g) granulated sugar
- 1 large egg, room temperature
- 1 teaspoon vanilla extract
- 2 ½ cups (312g) all-purpose flour
- ½ teaspoon baking powder
- ¼ teaspoon salt
- 3 cups (360g) powdered sugar
- 2 tablespoons meringue powder
- 4–5 tablespoons warm water
- 1–2 teaspoons black gel food coloring
- White gel food coloring (optional, for true black)
- Orange and green gel food coloring (for eyes)
Instructions
- Make the Cookie Dough: In a stand mixer fitted with the paddle attachment, cream the softened butter and granulated sugar on medium speed until light and fluffy (2-3 minutes). Scrape down the sides. Add the egg and vanilla extract, mixing on low until just combined. In a separate bowl, whisk together the flour, baking powder, and salt. Gradually add the dry ingredients to the wet mixture on low speed, mixing until the dough just comes together. Do not overmix.
- Chill the Dough: Divide the dough in half, flatten each half into a 1-inch thick disc, and wrap tightly in plastic wrap. Refrigerate for at least 2 hours, or up to overnight.
- Roll and Cut: Preheat oven to 350°F (175°C). Line baking sheets with parchment paper. Lightly flour your work surface and rolling pin. Remove one disc of dough from the fridge and roll it out to ¼-inch thickness. Use a cat-shaped cookie cutter to cut out cookies. Transfer to prepared baking sheets, spacing 2 inches apart. Gather scraps, re-roll, and cut again. You should get 18-24 cookies.
- Bake: Bake for 10-12 minutes, until edges are just barely golden. Centers will still look pale. Cool on baking sheet for 5 minutes, then transfer to a wire rack to cool completely. Cookies must be 100% cool before icing.
- Make the Royal Icing: In a stand mixer (or using a hand mixer), combine powdered sugar, meringue powder, and 4 tablespoons warm water. Mix on low until combined, then beat on medium-high for 5-7 minutes until thick, glossy, and forms stiff peaks. If too thick, add remaining water a few drops at a time. Consistency should be like toothpaste. Add black gel food coloring and mix until deep black. Add a tiny drop of white if needed.
- Decorate the Cookies: Fit a piping bag with a #2 round tip and fill with black royal icing. Pipe the outline of the cat’s body, leaving the face area open. Fill in the body with a back-and-forth motion, using a toothpick to spread icing into edges. Let base layer dry for at least 1 hour. Pipe two small triangles for ears, a curved line for a tail, and little paws. For eyes, use a tiny bit of orange icing (mix black icing with orange gel) and a toothpick to dab it on. Let cookies dry completely, …
Notes
Chill the dough for at least 2 hours to prevent spreading. Royal icing should be like toothpaste consistency. Let icing dry completely (4-6 hours or overnight) before stacking. For gluten-free, use a 1:1 gluten-free flour blend. For dairy-free, use vegan butter sticks.
Nutrition
- Serving Size: 1 cookie
- Calories: 180
- Sugar: 18
- Sodium: 60
- Fat: 8
- Saturated Fat: 5
- Carbohydrates: 26
- Protein: 2
Keywords: Halloween cookies, black cat cookies, sugar cookies, royal icing, easy Halloween treat, spooky cookies, cut-out cookies


