“These are the best cupcakes I’ve ever had.” My neighbor Jen said that last Halloween, and she wasn’t just being polite. She had a smear of cream cheese frosting on her nose and a look of genuine confusion, like she couldn’t quite figure out how something so dark and dramatic could taste so light and tender. I just shrugged and handed her another one.
The thing is, I didn’t set out to make the Best Black Velvet Halloween Cupcakes with Cream Cheese Spiderwebs that year. I was actually trying to salvage a red velvet recipe that had gone sideways. I used too much cocoa, the food coloring looked wrong, and somewhere in the frustration, I grabbed the black coloring instead. That mistake turned into something I now make every October without fail.
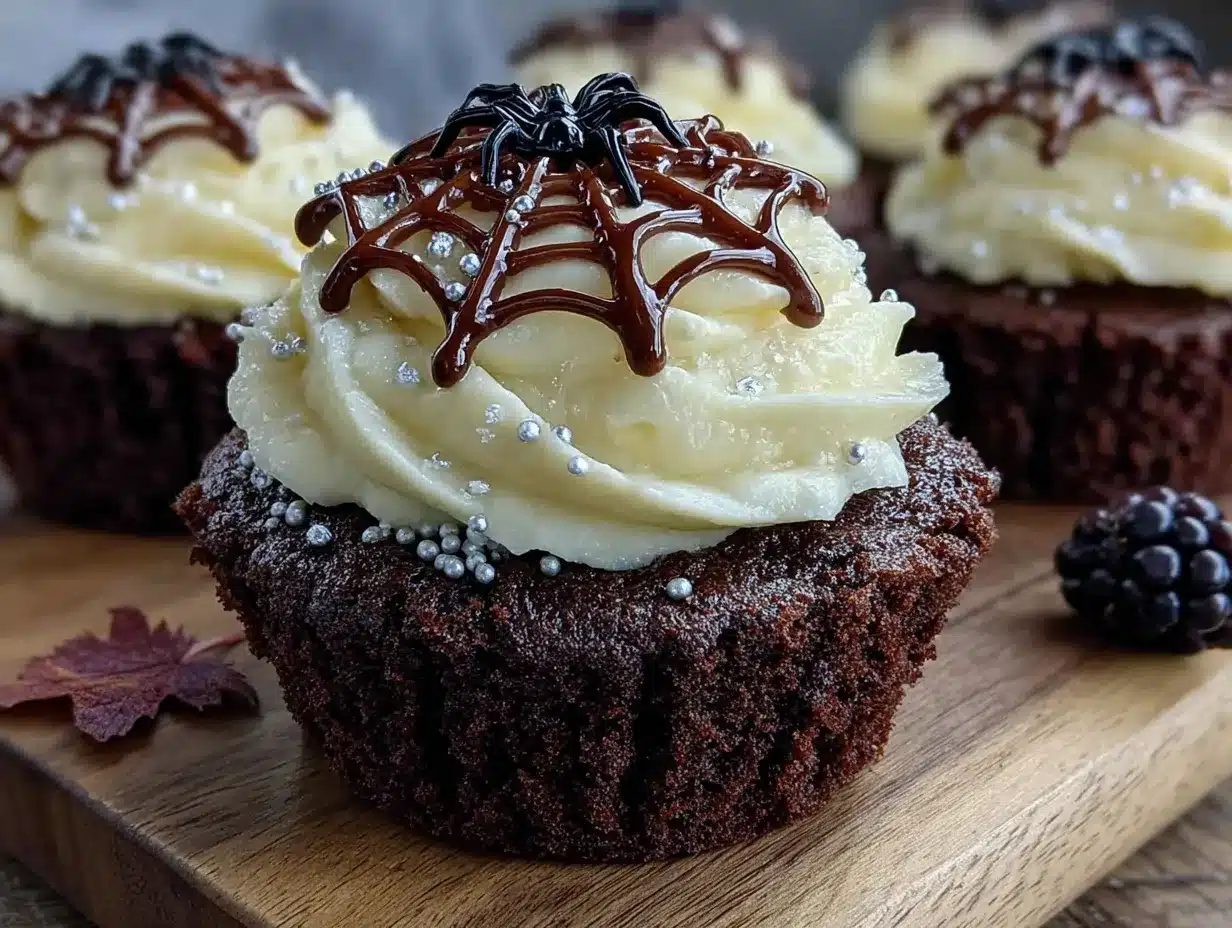
These cupcakes are everything you want for a Halloween party. They’re rich but not heavy, sweet but balanced, and the cream cheese frosting is so smooth you’ll want to eat it with a spoon. The spiderweb design looks complicated, but honestly? It’s one of the easiest decorating tricks I know. You just need a piping bag and a toothpick. That’s it.
I’ve made these for three Halloweens now, and every time someone asks for the recipe, I feel a little proud. Not because they’re fancy, but because they’re proof that sometimes the best recipes come from happy accidents. And if a batch of overly dark cupcakes can turn into a crowd favorite, there’s hope for all of us.
Why You’ll Love This Recipe
I’ve tested this recipe more times than I care to admit. The first batch was too dry. The second was too dense. The third? That was the one where I finally understood what makes these cupcakes so special. Here’s why this version works:
- Quick & Easy: From start to finish, you’re looking at about 45 minutes. The batter comes together in one bowl, and the frosting takes five minutes flat. Perfect for last-minute Halloween cravings or when you realize the school bake sale is tomorrow morning.
- Simple Ingredients: No weird specialty items here. You probably have most of this in your pantry right now. The only thing you might need to grab is black food coloring, and that’s easy to find at any grocery store or online.
- Perfect for Halloween Parties: These cupcakes are the star of any spooky spread. They look dramatic and professional, but they’re secretly beginner-friendly. The spiderweb design impresses everyone without stressing you out.
- Crowd-Pleaser: Kids love the color, adults love the flavor, and absolutely everyone loves the cream cheese frosting. I’ve watched people who “don’t like cupcakes” eat two of these in one sitting.
- Unbelievably Delicious: The texture is what gets me every time. These cupcakes are so moist and tender, they practically melt in your mouth. The cocoa flavor is present but not overwhelming, and the cream cheese frosting adds just the right amount of tangy sweetness.
What makes this recipe different from all the other black velvet cupcakes out there? It’s the balance. Most versions are either too dry or too sweet, and the frosting is usually an afterthought. I spent months fine-tuning the ratios until I got that perfect crumb structure and a frosting that pipes like a dream. This isn’t just another Halloween cupcake recipe. It’s the one you’ll come back to year after year.
Honestly, this is the kind of recipe that makes you close your eyes after the first bite. It’s comfort food with a spooky twist, and it’s perfect for impressing guests without spending hours in the kitchen. Whether you’re hosting a costume party or just want something fun to bake with your kids, these cupcakes deliver every single time.
What Ingredients You Will Need
This recipe uses simple, everyday ingredients to create something that looks and tastes like it came from a professional bakery. Most of these are pantry staples, which makes these cupcakes perfect for spontaneous baking sessions.
For the Cupcakes
- All-purpose flour, 1 ½ cups (190g) – Standard flour works perfectly here. Spoon and level it for accurate measuring. Too much flour makes dry cupcakes.
- Granulated sugar, 1 cup (200g) – Regular white sugar adds sweetness and helps with that tender crumb.
- Unsweetened cocoa powder, ¼ cup (25g) – I prefer Dutch-processed cocoa for a smoother, less acidic flavor. But natural cocoa works fine too.
- Baking soda, 1 teaspoon – This reacts with the buttermilk to give the cupcakes their lift.
- Salt, ½ teaspoon – Don’t skip this. Salt balances the sweetness and enhances the chocolate flavor.
- Vegetable oil, ½ cup (120ml) – Oil keeps these cupcakes incredibly moist. Butter would make them drier, so stick with oil here.
- Buttermilk, ¾ cup (180ml) – The acidity in buttermilk makes the cupcakes tender and helps activate the baking soda. No buttermilk? Add 1 tablespoon of lemon juice or vinegar to regular milk and let it sit for 5 minutes.
- Eggs, 2 large, room temperature – Room temperature eggs incorporate better into the batter. Take them out of the fridge 30 minutes before you start.
- Vanilla extract, 1 teaspoon – Pure vanilla extract adds warmth and depth. Imitation vanilla works, but pure is better.
- White vinegar, 1 teaspoon – This sounds weird, I know. But the vinegar reacts with the baking soda to create extra lift, making the cupcakes fluffier.
- Black gel food coloring, 2-3 teaspoons – Liquid coloring won’t give you that deep, dramatic black. Gel coloring is concentrated and won’t thin out the batter. I recommend the AmeriColor brand for the best results.
For the Cream Cheese Frosting
- Cream cheese, 8 oz (226g), softened – Full-fat cream cheese gives the best texture and flavor. Let it sit at room temperature for at least an hour so it blends smoothly.
- Unsalted butter, ½ cup (113g), softened – Butter adds structure to the frosting. Make sure it’s softened but not melted.
- Powdered sugar, 3 cups (360g) – Sift it if you want an extra-smooth frosting. Clumps are the enemy of beautiful piping.
- Vanilla extract, 1 teaspoon – Again, pure vanilla makes a difference here.
- Pinch of salt – Just a tiny bit to cut through the sweetness.
For the Spiderweb Design
- White gel food coloring or extra powdered sugar – You can either tint a small amount of frosting white or use powdered sugar for a simpler look. I prefer the gel coloring for a brighter contrast.
- Toothpicks – The secret tool for perfect spiderwebs. You’ll need at least one per cupcake.
One thing I learned the hard way: don’t try to substitute the buttermilk with regular milk. The acidity is crucial for the texture. Also, if you’re using black gel coloring, start with 2 teaspoons and add more if needed. Different brands have different intensities, so adjust based on what you see.
Equipment Needed
You don’t need a fancy kitchen to make these cupcakes. Here’s what you’ll actually use:
- Standard 12-cup muffin tin – Any standard pan works. Dark pans tend to brown cupcakes faster, so keep an eye on them.
- Paper cupcake liners – I recommend dark-colored or Halloween-themed liners for the full effect. White liners will show some of the black color through.
- Large mixing bowl – For the dry ingredients.
- Medium mixing bowl or large liquid measuring cup – For the wet ingredients.
- Whisk – For combining the dry ingredients and smoothing the batter.
- Electric hand mixer or stand mixer – You can make the frosting by hand, but a mixer makes it much easier and fluffier.
- Piping bag with a round tip – A disposable piping bag works great. If you don’t have one, a zip-top bag with the corner snipped off works in a pinch.
- Toothpicks – For the spiderweb design. You’ll need several, one per cupcake.
- Cooling rack – Essential for letting the cupcakes cool completely before frosting. Frosting warm cupcakes is a recipe for a melty disaster.
- Spatula – For scraping every last bit of frosting out of the bowl.
I’ve made these cupcakes with a cheap hand mixer and a plastic piping bag that cost two dollars. You don’t need expensive equipment. The technique matters more than the tools. If you don’t have a piping bag, you can even spread the frosting with a knife and then draw the spiderwebs directly on top. It won’t look as polished, but it’ll taste just as good.
Preparation Method
Let me walk you through this step by step. I’ve made these cupcakes enough times to know exactly where things can go wrong, so I’ll point out the tricky parts as we go.
Step 1: Preheat and Prep
Preheat your oven to 350°F (175°C). Line your muffin tin with paper liners. If you’re using dark-colored liners, you won’t see any of the black batter bleeding through, which is nice. Set the tin aside.
Step 2: Mix the Dry Ingredients
In a large mixing bowl, whisk together the flour, sugar, cocoa powder, baking soda, and salt. Make sure everything is evenly combined. I like to whisk for about 30 seconds to break up any clumps in the cocoa powder. This step is simple but important—if the baking soda isn’t evenly distributed, some cupcakes will rise more than others.
Step 3: Combine the Wet Ingredients
In a separate bowl or large liquid measuring cup, whisk together the vegetable oil, buttermilk, eggs, vanilla extract, and white vinegar. Whisk until the eggs are fully incorporated and the mixture looks smooth. It should be a uniform brownish color at this point.
Step 4: Add the Black Food Coloring
Here’s where the magic happens. Add 2 teaspoons of black gel food coloring to the wet ingredients and whisk until it’s fully incorporated. The mixture will look dark gray at first. Add another teaspoon if you want a deeper black. I usually use about 2 ½ teaspoons for that true velvet black color. Don’t worry if it looks a bit odd now—it will darken as it bakes.
Step 5: Combine Wet and Dry
Pour the wet ingredients into the dry ingredients and stir with a whisk or spatula until just combined. Do not overmix. A few small lumps are fine. Overmixing develops the gluten and makes the cupcakes tough. You want to stop as soon as you don’t see any more streaks of flour. The batter will be thin and glossy, which is exactly right.
Step 6: Fill the Liners
Divide the batter evenly among the 12 cupcake liners. I use a cookie scoop or a measuring cup for this. Fill each liner about ⅔ full. Don’t overfill, or the cupcakes will mushroom over the top and lose their shape. If you have extra batter, you can make a 13th cupcake in a separate liner.
Step 7: Bake
Bake for 18-22 minutes, or until a toothpick inserted into the center comes out clean or with a few moist crumbs. The tops should spring back when lightly touched. Every oven is different, so start checking at 18 minutes. I’ve had ovens that took the full 22 minutes and others that were done at 19. Trust the toothpick test over the timer.
Step 8: Cool Completely
Let the cupcakes cool in the pan for 5 minutes, then transfer them to a wire rack to cool completely. This is non-negotiable. If you frost them while they’re still warm, the frosting will melt and slide right off. I’ve made that mistake before, and it’s heartbreaking. Give them at least 30 minutes to cool.
Step 9: Make the Cream Cheese Frosting
While the cupcakes are cooling, make the frosting. In a large bowl, beat the softened cream cheese and butter together until smooth and creamy. This takes about 2 minutes with an electric mixer. Scrape down the sides of the bowl. Add the powdered sugar, vanilla extract, and pinch of salt. Beat on low speed until the sugar is incorporated, then increase to medium-high and beat for 2-3 minutes until the frosting is light, fluffy, and completely smooth. If it looks too soft, refrigerate it for 15 minutes before piping.
Step 10: Pipe the Frosting
Transfer the frosting to a piping bag fitted with a round tip. Pipe a generous swirl onto each cooled cupcake. You can also just spread it with a knife if you prefer a more rustic look. Leave a little bit of frosting in the bowl for the spiderweb design, or make a separate small batch of white frosting.
Step 11: Create the Spiderwebs
This is the fun part. If you kept some frosting white, pipe a small circle in the center of each frosted cupcake. Then, using a toothpick, drag lines outward from the center to the edge, like drawing spokes on a wheel. Then drag the toothpick in a circular motion around the center, connecting the spokes. You’ll see the spiderweb pattern emerge instantly. It takes about 10 seconds per cupcake and looks incredibly professional.
Step 12: Add Spiders (Optional)
For an extra touch, place a small candy spider or chocolate piece on top of each web. I’ve used black licorice legs stuck into a chocolate button, but even a simple chocolate chip works. This step is totally optional but adds a lot of character.
Cooking Tips & Techniques
I’ve made plenty of mistakes with these cupcakes, and I want you to learn from them so you don’t have to repeat them.
Don’t overmix the batter. This is the most common mistake. When you combine the wet and dry ingredients, mix just until you don’t see flour anymore. Overmixing develops gluten, which makes the cupcakes dense and tough instead of light and tender. A few lumps are perfectly fine.
Use room temperature ingredients. Cold eggs and cold buttermilk don’t incorporate as smoothly into the batter. They can also cause the batter to seize up, leading to uneven baking. Take everything out of the fridge 30-45 minutes before you start. If you’re in a hurry, you can warm the buttermilk slightly in the microwave (just 10-15 seconds) and place the eggs in a bowl of warm water for 5 minutes.
Check your oven temperature. Ovens run hot or cold more often than you’d think. An oven thermometer is a cheap investment that saves you from overbaked or underbaked cupcakes. If your cupcakes are browning too quickly on the edges but still raw in the center, your oven is too hot. If they’re pale and flat after 22 minutes, it’s too cool.
Let the frosting soften properly. Cold cream cheese and cold butter will leave you with lumpy frosting. Give them at least an hour at room temperature. If you forget, you can microwave the cream cheese for 10 seconds and the butter for 15 seconds. But be careful—melting the butter changes the texture completely.
Practice the spiderweb technique on a plate first. If you’re nervous about the design, pipe a small swirl of frosting on a plate and practice drawing the web with a toothpick. It takes two tries to get the hang of it, and then you’ll be able to do it in seconds.
Make extra frosting. I always make a little more than I think I need. There’s nothing worse than running out of frosting halfway through piping. Plus, leftover cream cheese frosting is amazing on graham crackers or spread on toast.
Variations & Adaptations
One of the best things about this recipe is how adaptable it is. Here are some variations I’ve tried and loved:
Gluten-Free Version
Swap the all-purpose flour with a 1:1 gluten-free baking flour blend. I’ve used Bob’s Red Mill and King Arthur brands with great results. The texture is slightly more delicate, so be gentle when mixing. Everything else stays the same.
Dairy-Free Version
Use dairy-free cream cheese (like Kite Hill or Violife) and substitute the buttermilk with ¾ cup of almond milk mixed with 1 tablespoon of lemon juice. Use vegan butter in the frosting. The flavor is slightly different, but the texture holds up beautifully.
Spiderweb Color Variations
Instead of white spiderwebs, try using purple, green, or orange frosting for the web design. Gel food coloring works best. I made orange webs one year for a fall-themed party, and they looked amazing against the black cupcakes.
Chocolate Lover’s Version
Add ½ cup of mini chocolate chips to the batter before baking. The extra chocolate chunks make these even richer. I’ve also drizzled melted dark chocolate over the finished cupcakes for an extra layer of decadence.
Cupcake Flavor Variations
Add 1 teaspoon of peppermint extract to the batter for a chocolate-mint combination. Or try 1 teaspoon of orange extract for a chocolate-orange twist. Both pair beautifully with the cream cheese frosting.
Mini Cupcakes
Use a mini muffin tin and bake for 10-12 minutes instead of 18-22. This is perfect for parties where you want people to try multiple desserts. You’ll get about 36 mini cupcakes from this recipe.
One of my favorite variations was when I made these for a pink velvet bundt cake party and decided to bring a black velvet version instead. Everyone loved the contrast, and the spiderwebs were a huge hit with the kids. If you’re looking for more Halloween dessert ideas, you might also enjoy these cherry chocolate brownies—they’re just as indulgent and perfect for a spooky spread.
Serving & Storage Suggestions
These cupcakes are best served at room temperature. The cream cheese frosting softens slightly, and the cake is at its most tender. If you’ve refrigerated them, let them sit out for 20-30 minutes before serving.
For presentation, arrange them on a black or dark-colored cake stand to make the spiderwebs pop. Add some fake spider webs around the base of the stand for a spooky touch. I’ve also placed them on a platter with candy corn and chocolate spiders scattered around. It looks like a Halloween dessert table centerpiece.
These cupcakes pair beautifully with a glass of cold milk, a hot cup of coffee, or even a pink champagne jello shot for an adult Halloween party. The rich chocolate flavor balances well with something light and bubbly.
Storage: Store leftover cupcakes in an airtight container in the refrigerator for up to 5 days. The cream cheese frosting needs to be refrigerated, but the cupcakes will stay moist for several days. Let them come to room temperature before eating for the best texture.
Freezing: You can freeze unfrosted cupcakes for up to 3 months. Wrap each one tightly in plastic wrap, then place them in a freezer bag. When you’re ready to serve, thaw them at room temperature, then make the frosting fresh. Frosted cupcakes can also be frozen, but the texture of the cream cheese frosting changes slightly after thawing.
Make Ahead: These cupcakes are perfect for making ahead. Bake the cupcakes and make the frosting separately the day before. Store the cupcakes in an airtight container at room temperature and the frosting in the refrigerator. The next day, bring the frosting to room temperature, give it a quick whip with a mixer to fluff it up, and frost the cupcakes. The spiderwebs should be drawn just before serving for the best visual effect.
One thing I’ve noticed is that the flavors actually develop overnight. The cupcakes taste even better the next day, as the cocoa and vanilla have time to meld together. So don’t hesitate to make these a day in advance.
Nutritional Information & Benefits
Here’s the estimated nutritional breakdown per cupcake (based on 12 servings):
| Nutrient | Amount per Cupcake |
|---|---|
| Calories | 385 |
| Total Fat | 22g |
| Saturated Fat | 10g |
| Cholesterol | 65mg |
| Sodium | 280mg |
| Total Carbohydrates | 45g |
| Dietary Fiber | 1g |
| Sugars | 34g |
| Protein | 4g |
These cupcakes are a treat, plain and simple. But there are a few redeeming qualities. The cocoa powder contains antioxidants called flavonoids, which can support heart health when consumed in moderation. Cream cheese provides calcium and protein, though it’s also high in fat. The buttermilk adds probiotics and calcium as well.
For those with dietary restrictions, this recipe contains gluten (unless you use the gluten-free variation), dairy, and eggs. It is not suitable for vegans without significant modifications. If you’re looking for a lighter option, you can reduce the sugar in the frosting by using a sugar substitute, but the texture will be slightly different.
I personally believe that desserts like these are about joy and celebration. Halloween comes once a year, and these cupcakes are meant to be enjoyed without guilt. Balance is key, and one cupcake with your coffee or after dinner is a perfectly reasonable indulgence.
Conclusion
These Best Black Velvet Halloween Cupcakes with Cream Cheese Spiderwebs have become a non-negotiable part of my Halloween tradition. They’re dramatic enough to impress at parties, simple enough to make on a weeknight, and delicious enough that people genuinely ask for the recipe every single time.
What I love most about this recipe is how it brings people together. I’ve made them with my niece, who thought the black batter was “disgusting and amazing” at the same time. I’ve brought them to office parties where they disappeared in minutes. And I’ve shared the recipe with friends who swore they couldn’t bake, only to get photos of their perfect spiderwebs the next day.
Don’t be afraid to make this recipe your own. Use different colored spiderwebs. Add sprinkles. Skip the spiders and just enjoy the beautiful contrast of black and white. The great thing about baking is that there’s always room for your personal touch.
If you make these cupcakes, I’d love to hear about it. Leave a comment below and tell me how they turned out. Did you try a variation? Did the spiderwebs work on your first try? Did someone at your party ask for the recipe? Share your stories and photos—I read every single comment.
Happy Halloween, and happy baking. You’ve got this.
FAQs
Can I use liquid food coloring instead of gel?
You can, but you’ll need a lot more to achieve a true black color. Liquid coloring will also thin out the batter, which can affect the texture. Gel food coloring is much more concentrated and gives you that deep, dramatic black without changing the consistency of the batter. I really recommend sticking with gel.
Why did my cupcakes turn out dry?
Dry cupcakes usually mean one of two things: you overmixed the batter or you overbaked them. Mix just until the flour disappears, and start checking for doneness at 18 minutes. Also, make sure you’re measuring your flour correctly. Spoon it into the measuring cup and level it off, don’t scoop directly from the bag.
How do I get my cream cheese frosting to be stiff enough for piping?
Make sure your cream cheese and butter are fully softened but not warm. Beat them together until they’re light and fluffy before adding the powdered sugar. If the frosting is too soft after mixing, refrigerate it for 15-20 minutes. You can also add a little more powdered sugar, one tablespoon at a time, until it reaches the right consistency.
Can I make these cupcakes without a piping bag?
Absolutely. You can spread the frosting with a knife or spatula for a more rustic look. To create the spiderwebs, just spread the frosting evenly, then pipe a small circle of white frosting in the center using a zip-top bag with the corner snipped off. Use a toothpick to drag the lines outward. It works perfectly without any special equipment.
How far in advance can I make these cupcakes?
You can bake the cupcakes up to two days in advance. Store them in an airtight container at room temperature. Make the frosting the day you plan to serve them for the best texture. The spiderwebs should be drawn just before serving, as they can soften and blur over time. If you need to make them further ahead, freeze the unfrosted cupcakes for up to three months.
If you’re looking for more easy party desserts, check out these mini lemon blueberry cheesecakes or this decadent red wine chocolate cake. Both are perfect for entertaining and pair beautifully with the spooky theme of these cupcakes.
Pin This Recipe!
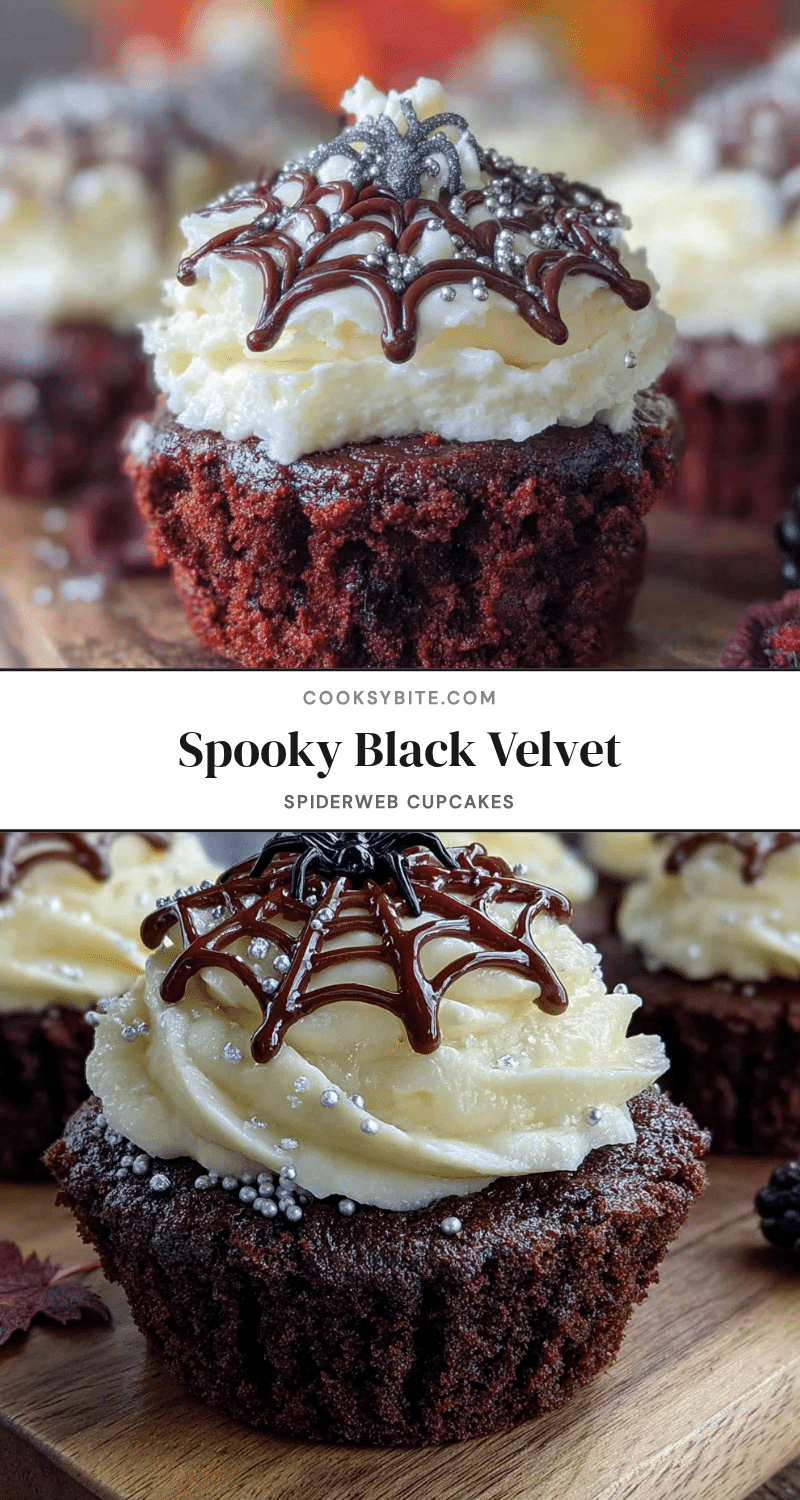
Best Black Velvet Halloween Cupcakes with Cream Cheese Spiderwebs
Rich, moist black velvet cupcakes topped with smooth cream cheese frosting and decorated with easy spiderweb designs. Perfect for Halloween parties, these dramatic treats are surprisingly simple to make and always impress.
- Prep Time: 15 minutes
- Cook Time: 20 minutes
- Total Time: 45 minutes
- Yield: 12 cupcakes
- Category: Dessert
- Cuisine: American
Ingredients
- All-purpose flour, 1 ½ cups (190g)
- Granulated sugar, 1 cup (200g)
- Unsweetened cocoa powder, ¼ cup (25g)
- Baking soda, 1 teaspoon
- Salt, ½ teaspoon
- Vegetable oil, ½ cup (120ml)
- Buttermilk, ¾ cup (180ml)
- Eggs, 2 large, room temperature
- Vanilla extract, 1 teaspoon
- White vinegar, 1 teaspoon
- Black gel food coloring, 2-3 teaspoons
- Cream cheese, 8 oz (226g), softened
- Unsalted butter, ½ cup (113g), softened
- Powdered sugar, 3 cups (360g)
- Vanilla extract, 1 teaspoon (for frosting)
- Pinch of salt (for frosting)
- White gel food coloring or extra powdered sugar (for spiderwebs)
- Toothpicks
Instructions
- Preheat oven to 350°F (175°C). Line a 12-cup muffin tin with paper liners.
- In a large bowl, whisk together flour, sugar, cocoa powder, baking soda, and salt.
- In a separate bowl, whisk together vegetable oil, buttermilk, eggs, vanilla extract, and white vinegar.
- Add 2-3 teaspoons black gel food coloring to the wet ingredients and whisk until fully incorporated.
- Pour wet ingredients into dry ingredients and stir until just combined. Do not overmix; a few lumps are fine.
- Divide batter evenly among the 12 liners, filling each about ⅔ full.
- Bake for 18-22 minutes, until a toothpick inserted in the center comes out clean or with a few moist crumbs.
- Cool in the pan for 5 minutes, then transfer to a wire rack to cool completely (at least 30 minutes).
- For the frosting: Beat softened cream cheese and butter together until smooth and creamy (about 2 minutes).
- Add powdered sugar, vanilla extract, and a pinch of salt. Beat on low until incorporated, then on medium-high for 2-3 minutes until light and fluffy.
- Transfer frosting to a piping bag fitted with a round tip. Pipe a generous swirl onto each cooled cupcake.
- For spiderwebs: Pipe a small circle of white frosting (or use powdered sugar) in the center of each frosted cupcake. Use a toothpick to drag lines outward from the center to the edge, then drag in a circular motion around the center to create web patterns.
- Optional: Add a small candy spider or chocolate piece on top of each web.
Notes
Use gel food coloring for best results; liquid coloring will thin the batter. Do not overmix the batter to avoid dense cupcakes. Ensure all ingredients are at room temperature for best texture. Frost cupcakes only after they are completely cooled. For gluten-free version, use a 1:1 gluten-free flour blend. For dairy-free, use dairy-free cream cheese and substitute buttermilk with almond milk mixed with lemon juice.
Nutrition
- Serving Size: 1 cupcake
- Calories: 385
- Sugar: 34
- Sodium: 280
- Fat: 22
- Saturated Fat: 10
- Carbohydrates: 45
- Fiber: 1
- Protein: 4
Keywords: Halloween cupcakes, black velvet cupcakes, cream cheese frosting, spiderweb cupcakes, Halloween dessert, easy cupcakes, black food coloring


