This was supposed to be a batch of my standard chocolate chip cookies—the ones I’ve made a hundred times, the ones my neighbor Brenda swears by. But somewhere between the phone ringing (my mother, checking in) and the dog barking at the mailman, I grabbed the wrong stick of butter from the counter. It was already half-melted, sitting in a puddle from the morning sun streaming through my kitchen window. I was already late starting dinner, and honestly, I almost just tossed it and started over. But I didn’t. I figured, what’s the worst that could happen? I’d end up with flat, greasy cookies and a story to tell. I browned it anyway, just to see, and the whole kitchen filled with this nutty, toasty smell that I’d only ever associated with fancy bakery cookies. I didn’t even use my stand mixer—it was buried under a pile of mail—so I just grabbed a wooden spoon and a bowl. What came out of that oven was nothing like the plan. It was better. So much better. I mean, I actually sat down and stared at the first cookie for a solid minute before I even bit into it. The edges were all crispy and caramelized, the middle was soft and chewy, and that brown butter flavor? Let me tell you, it was like the cookie version of a warm hug. Maybe you’ve been there—when a kitchen mishap turns into your new favorite thing. That’s this cookie. That’s the one I keep making, over and over, because it’s the kind of accident you’re grateful for.
Why You’ll Love This Recipe
Let’s be honest—there are a million chocolate chip cookie recipes out there. But this one? It’s different. It’s the one that makes people close their eyes after the first bite. It’s the one that disappears from the serving plate before you’ve even poured yourself a glass of milk. And the best part? You don’t need a mixer.
- No Mixer Required: Seriously, just a bowl and a wooden spoon. Your stand mixer can stay buried in the cupboard for this one.
- Deep, Nutty Flavor: Brown butter adds a richness you just can’t get from regular melted butter. It’s like a secret weapon for flavor.
- Perfect for a Crowd: This recipe scales beautifully for dinner parties, potlucks, or holiday gatherings. Make a double batch—trust me, you’ll need it.
- Simple Ingredients: You probably have everything in your pantry right now. No fancy extracts or hard-to-find flours.
- That Perfect Texture: Crispy edges, soft and chewy centers, and pools of melted chocolate in every bite. It’s comfort food at its finest.
What makes this recipe different from the rest? It’s the brown butter. It’s not just melted butter; it’s butter that’s been cooked until the milk solids turn golden and nutty. That simple step transforms the entire cookie, giving it a depth of flavor that tastes like you spent hours in the kitchen—when really, it only took a few extra minutes. This is the cookie you bring to a gathering when you want to impress without stress. It’s the one that gets asked for again and again. And honestly, it’s the one that makes you feel like a rockstar baker, even when you’re just using a wooden spoon.
What Ingredients You Will Need
This recipe uses simple, pantry-friendly ingredients to deliver big flavor. The star of the show is the brown butter, but each ingredient plays a crucial role in getting that perfect texture and taste.
For the Cookie Dough
- 1 cup (2 sticks or 226g) unsalted butter: I prefer using unsalted so I can control the salt level. Brands like Kerrygold or Land O’Lakes work beautifully for browning.
- 1 ½ cups (300g) packed light brown sugar: Brown sugar is key here—it adds moisture and a hint of molasses flavor that pairs perfectly with the nutty brown butter. Dark brown sugar works too, for an even deeper flavor.
- ½ cup (100g) granulated sugar: This helps create those crispy edges we all love. Don’t skip it!
- 2 large eggs, room temperature: Room temperature eggs incorporate more easily into the brown butter mixture, creating a smoother dough. (If you forgot to take them out, place them in a bowl of warm water for 5 minutes.)
- 2 teaspoons vanilla extract: Pure vanilla extract makes a difference here. I’m partial to Nielsen-Massey, but any good quality brand will do.
- 2 ¼ cups (280g) all-purpose flour: Spoon and level your flour—don’t scoop directly from the bag, or you’ll end up with dry cookies.
- 1 teaspoon baking soda: This helps the cookies spread just the right amount.
- ½ teaspoon salt: If you used salted butter, reduce this to ¼ teaspoon. I like using fine sea salt for even distribution.
- 1 ½ cups (270g) semi-sweet chocolate chips: I’m a fan of Ghirardelli or Guittard chips. You can also chop up a good quality chocolate bar for bigger puddles of chocolate.
For the Brown Butter (Yes, It’s an Ingredient)
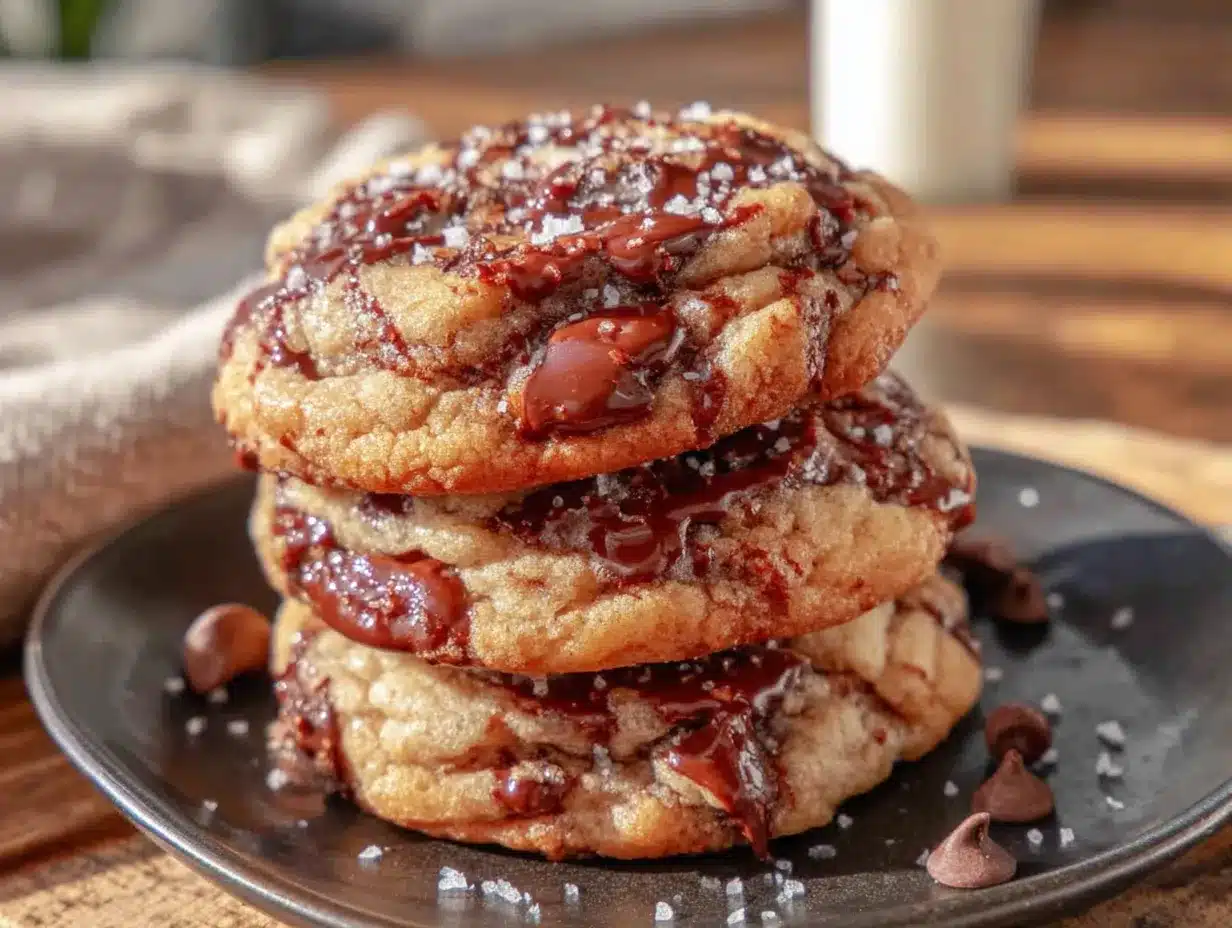
- The butter listed above is what you’ll brown. It’s not a separate ingredient—just a preparation step. But it’s so important, it deserves its own mention!
Substitution Tip: Need this to be dairy-free? Use a high-quality vegan butter stick (like Miyoko’s or Earth Balance) for browning. It won’t brown exactly the same way, but it will still add a lovely toasty flavor. For a gluten-free version, swap the all-purpose flour with a 1:1 gluten-free baking blend that contains xanthan gum.
Equipment Needed
One of the best things about this recipe? You probably already own everything you need. No fancy gadgets required.
- Medium saucepan: A light-colored saucepan is ideal for browning butter because you can easily see the milk solids turn golden. I use my trusty stainless steel one. If you only have a dark nonstick pan, just keep a close eye on the color.
- Large mixing bowl: Any big bowl will do. I’ve used everything from a vintage Pyrex bowl to a cheap plastic one from the dollar store.
- Wooden spoon or rubber spatula: A sturdy wooden spoon is my go-to for this dough. It’s sturdy enough to handle the thick batter and won’t scratch your bowls.
- Whisk: For combining the sugars and eggs before adding the flour. A fork works in a pinch.
- Baking sheets: Two standard half-sheet pans work perfectly. If you only have one, just let it cool completely between batches.
- Parchment paper or silicone baking mat: Parchment paper is my preference—it’s cheap, disposable, and gives the cookies a perfectly crisp bottom. Silicone mats work too, but the cookies might spread a tiny bit more.
- Cooling rack: Essential for letting the cookies cool evenly. A wire rack is best, but a clean dish towel works in a pinch.
- Cookie scoop (optional but helpful): A 1.5-tablespoon scoop gives you perfectly uniform cookies. I’ve also used two spoons and my hands—whatever works!
Preparation Method
Alright, let’s make some cookies. This method is broken down into clear steps so you can follow along easily. Take your time, and don’t rush the brown butter—it’s the heart of this recipe.
- Brown the butter. Place the 1 cup of unsalted butter in a medium saucepan over medium heat. Let it melt completely, stirring occasionally with a rubber spatula or wooden spoon. Once melted, it will start to foam and sputter. Keep stirring. After about 5-7 minutes, you’ll notice the milk solids at the bottom of the pan turning a golden amber color and the butter will smell intensely nutty and toasty. The moment it reaches that deep golden color (think the color of honey), immediately remove it from the heat and pour it into a heatproof bowl to stop the cooking process. Don’t walk away—brown butter can go from perfect to burnt in seconds. You should have about ¾ cup of brown butter.
- Cool the brown butter. Let the brown butter cool for about 10-15 minutes. It should be warm but not hot to the touch. If it’s too hot, it will cook the eggs when you add them. (I once made that mistake—scrambled egg bits in my cookie dough. Not ideal.)
- Combine sugars and brown butter. In your large mixing bowl, add the cooled brown butter, 1 ½ cups packed light brown sugar, and ½ cup granulated sugar. Whisk them together until well combined. The mixture will look a bit grainy and thick—that’s perfect.
- Add the eggs and vanilla. Crack the 2 room-temperature eggs into the bowl and add the 2 teaspoons of vanilla extract. Whisk vigorously for about 1 minute until the mixture becomes smooth, glossy, and slightly lighter in color. This is where the texture starts to come together. The dough should look like a thick, shiny caramel.
- Mix the dry ingredients. In a separate small bowl, whisk together the 2 ¼ cups all-purpose flour, 1 teaspoon baking soda, and ½ teaspoon salt. This ensures the baking soda and salt are evenly distributed.
- Combine wet and dry. Add the flour mixture to the wet ingredients. Switch to your wooden spoon or rubber spatula and stir gently until just combined. A few streaks of flour are okay—overmixing will make the cookies tough. The dough will be thick and slightly sticky.
- Fold in the chocolate chips. Add the 1 ½ cups semi-sweet chocolate chips and fold them in with a few gentle strokes. Make sure they’re evenly distributed throughout the dough.
- Chill the dough (optional but recommended). For the best texture, cover the bowl with plastic wrap and refrigerate the dough for at least 30 minutes, or up to 72 hours. Chilling solidifies the brown butter, which prevents the cookies from spreading too much and gives them that perfect thick, chewy center. If you’re in a rush, you can skip this step, but the cookies will be flatter and spread more.
- Preheat the oven. While the dough chills, preheat your oven to 375°F (190°C). Line two baking sheets with parchment paper.
- Scoop and shape. Once the dough is chilled, use a cookie scoop (or two spoons) to portion out rounded tablespoons of dough, about 1.5 tablespoons each. Place them about 2 inches apart on the prepared baking sheets. If you want picture-perfect cookies, gently press a few extra chocolate chips onto the top of each dough ball.
- Bake. Bake one sheet at a time for 10-12 minutes, or until the edges are golden brown and the centers are still slightly soft and puffy. The cookies will continue to set on the hot baking sheet as they cool. For softer cookies, pull them out at the 10-minute mark. For crispier edges, go to 12 minutes.
- Cool. Let the cookies cool on the baking sheet for 5 minutes. This allows them to firm up without sticking. Then, transfer them to a wire rack to cool completely. Or, you know, eat one warm and melty. I won’t judge.
Cooking Tips & Techniques
I’ve made this recipe more times than I can count, and I’ve learned a few things along the way. Here are my best tips for cookie success.
Watch the brown butter like a hawk. I cannot stress this enough. The difference between perfect brown butter and burnt butter is about 30 seconds. Swirl the pan constantly once it starts foaming, and trust your nose—when it smells nutty and amazing, it’s done. I once got distracted by a text message and ended up with black butter. The cookies tasted like ash. Learn from my mistake.
Don’t skip the cooling step. I know you’re impatient—I am too. But if you add the eggs to hot brown butter, you’ll end up with scrambled eggs in your cookie dough. Let it cool until it’s warm to the touch, like a comfortable bathwater temperature.
Use a cookie scoop for even baking. Uniform cookie sizes mean they’ll all bake at the same rate. No more burnt edges on the small ones and raw centers on the big ones. A 1.5-tablespoon scoop is my go-to for this recipe.
Chill the dough if you have time. This is the secret to those thick, bakery-style cookies. Chilling solidifies the fat (the brown butter), which slows down spreading in the oven. The result? A thicker, chewier cookie with a more pronounced flavor. If you chill for 24 hours, the flavors meld even more. It’s worth the wait.
Bake one sheet at a time. If you cram two baking sheets in the oven, the heat won’t circulate properly, and your cookies will bake unevenly. It takes a little longer, but the results are worth it.
Tap the baking sheet. Right when the cookies come out of the oven, give the baking sheet a gentle tap on the counter. This deflates the puffy centers slightly, creating those beautiful crinkly tops. It’s a little trick I picked up from a bakery in Chicago.
Variations & Adaptations
This recipe is wonderfully flexible. Here are some ways to make it your own.
- Chocolate Lover’s Dream: Swap ½ cup of the semi-sweet chips for dark chocolate chunks or even white chocolate chips. I once made a batch with half dark chocolate and half milk chocolate—absolute chaos in the best way.
- Nutty Addition: Fold in ½ cup of toasted pecans or walnuts along with the chocolate chips. Toast them first in a dry skillet for a few minutes to bring out their flavor. It adds a lovely crunch and pairs beautifully with the brown butter.
- Sea Salt Finish: Sprinkle a tiny pinch of flaky sea salt (like Maldon) on top of each cookie right after they come out of the oven. That sweet-salty combo is irresistible. I do this for every batch now.
- Gluten-Free Option: Substitute the all-purpose flour with a 1:1 gluten-free baking blend that contains xanthan gum. I’ve tested this with Bob’s Red Mill 1:1 Baking Flour, and the texture is surprisingly close to the original.
- Vegan Version: Use a high-quality vegan butter stick (like Miyoko’s) for browning, and replace the eggs with a flax egg (1 tablespoon ground flaxseed mixed with 3 tablespoons water per egg, let sit for 5 minutes). The texture will be slightly different—a bit more cakey—but still delicious.
- Add Some Spice: Add ½ teaspoon of cinnamon or a pinch of nutmeg to the flour mixture for a warm, cozy twist. It’s especially nice in the fall.
Serving & Storage Suggestions
These cookies are best served warm, when the chocolate is still a little melty and the edges are crisp. But they’re pretty amazing at room temperature too.
Serving Ideas: Arrange them on a beautiful platter for a dinner party—they’re a guaranteed crowd-pleaser. Pair them with a cold glass of milk, a hot cup of coffee, or even a scoop of vanilla ice cream for an indulgent dessert. For a festive gathering, stack them on a cake stand and watch them disappear.
Storage: Store baked cookies in an airtight container at room temperature for up to 5 days. Place a slice of bread in the container to keep them soft—the cookies will absorb the moisture from the bread. (The bread will get stale, but your cookies will stay perfect.)
Freezing: You can freeze the baked cookies for up to 3 months. Layer them between sheets of parchment paper in a freezer-safe container. Thaw at room temperature for about 15 minutes before serving. Or, freeze the unbaked dough balls on a baking sheet, then transfer them to a freezer bag. Bake from frozen, adding 2-3 minutes to the baking time. It’s the ultimate make-ahead hack for holiday baking.
Flavor Development: Honestly, these cookies taste even better the next day. The brown butter flavor deepens and melds with the chocolate overnight. So if you can resist eating them all right away, you’re in for a treat.
Nutritional Information & Benefits
Let’s be real—these are cookies, not health food. But here’s a rough idea of what you’re working with per cookie (based on a batch of 24).
- Calories: Approximately 220-250 per cookie
- Fat: 12-14g (mostly from butter and chocolate)
- Carbohydrates: 28-32g
- Protein: 3-4g
- Sugar: 18-22g
Health Highlights: While these are an indulgence, the brown butter does add a small amount of conjugated linoleic acid (CLA), which has been linked to some health benefits in studies. The dark chocolate contains antioxidants and flavonoids. And honestly, sometimes the best thing for your mental health is a warm, homemade cookie. I firmly believe that.
Dietary Considerations: This recipe contains gluten, dairy, and eggs. For gluten-free or vegan adaptations, see the variations section above. The cookies are nut-free if you skip the optional nuts.
Conclusion
These brown butter chocolate chip cookies are more than just a recipe—they’re a happy accident that turned into a staple in my kitchen. They’re the cookies I bring to every potluck, the ones I bake when I need a little comfort, and the ones that always, always get rave reviews. The brown butter adds a depth of flavor that feels fancy, but the no-mixer method keeps it approachable for any home cook. Whether you’re hosting a dinner party, feeding your family, or just treating yourself on a Tuesday night, these cookies deliver.
I’d love to hear how they turn out for you! Did you try any of the variations? Did you add a sprinkle of sea salt? Did you eat three before they even cooled? (No judgment here.) Drop a comment below and let me know. And if you loved this recipe, share it with a friend who needs a little cookie magic in their life. Happy baking!
Frequently Asked Questions
Can I use salted butter instead of unsalted?
Yes, you can. Just reduce the added salt in the recipe to ¼ teaspoon instead of ½ teaspoon. The brown butter will still work beautifully, though the flavor might be slightly less neutral.
Why did my cookies turn out flat?
Flat cookies usually happen for one of three reasons: the butter was too warm when you added the eggs, the dough wasn’t chilled long enough, or you used too much sugar. Make sure your brown butter has cooled to room temperature before proceeding, and chill the dough for at least 30 minutes.
Can I make the dough ahead of time?
Absolutely! You can refrigerate the dough for up to 72 hours. In fact, the flavor improves over time. Just cover the bowl tightly with plastic wrap. You can also freeze the dough balls for up to 3 months.
How do I know when the cookies are done baking?
Look for golden brown edges and puffy, slightly soft centers. The cookies will continue to set on the hot baking sheet as they cool, so don’t wait for them to look fully firm in the oven. For soft cookies, bake for 10 minutes; for crispier edges, go to 12 minutes.
Can I use a different type of chocolate?
Of course! Milk chocolate, dark chocolate, white chocolate, or even chocolate chunks all work wonderfully. Just keep the total amount around 1 ½ cups. I love using a mix of semi-sweet chips and dark chocolate chunks for variety.
PrintBest Brown Butter Chocolate Chip Cookies (No Mixer!)
These brown butter chocolate chip cookies are a happy accident turned staple. With crispy edges, soft and chewy centers, and a deep nutty flavor from browned butter, they require no mixer and are perfect for any occasion.
- Prep Time: 15 minutes
- Cook Time: 12 minutes
- Total Time: 57 minutes
- Yield: 24 servings 1x
- Category: Dessert
- Cuisine: American
Ingredients
- 1 cup (2 sticks or 226g) unsalted butter
- 1 ½ cups (300g) packed light brown sugar
- ½ cup (100g) granulated sugar
- 2 large eggs, room temperature
- 2 teaspoons vanilla extract
- 2 ¼ cups (280g) all-purpose flour
- 1 teaspoon baking soda
- ½ teaspoon salt
- 1 ½ cups (270g) semi-sweet chocolate chips
Instructions
- Brown the butter: Place 1 cup unsalted butter in a medium saucepan over medium heat. Melt completely, stirring occasionally. Continue cooking until milk solids turn golden amber and butter smells nutty, about 5-7 minutes. Immediately remove from heat and pour into a heatproof bowl to stop cooking.
- Cool the brown butter for 10-15 minutes until warm but not hot.
- In a large mixing bowl, combine cooled brown butter, 1 ½ cups packed light brown sugar, and ½ cup granulated sugar. Whisk until well combined and grainy.
- Add 2 room-temperature eggs and 2 teaspoons vanilla extract. Whisk vigorously for about 1 minute until smooth, glossy, and slightly lighter in color.
- In a separate small bowl, whisk together 2 ¼ cups all-purpose flour, 1 teaspoon baking soda, and ½ teaspoon salt.
- Add flour mixture to wet ingredients. Stir with a wooden spoon or rubber spatula until just combined (a few streaks of flour are okay).
- Fold in 1 ½ cups semi-sweet chocolate chips until evenly distributed.
- Cover bowl with plastic wrap and refrigerate dough for at least 30 minutes (up to 72 hours) for best texture.
- Preheat oven to 375°F (190°C). Line two baking sheets with parchment paper.
- Scoop rounded tablespoons of dough (about 1.5 tablespoons each) and place 2 inches apart on prepared baking sheets. Optionally press extra chocolate chips on top.
- Bake one sheet at a time for 10-12 minutes, until edges are golden brown and centers are still soft and puffy.
- Let cookies cool on baking sheet for 5 minutes, then transfer to a wire rack to cool completely.
Notes
Watch the brown butter carefully—it can go from perfect to burnt in seconds. Chill the dough for at least 30 minutes for thicker, chewier cookies. For a sea salt finish, sprinkle flaky sea salt on cookies right after baking.
Nutrition
- Serving Size: 1 cookie
- Calories: 235
- Sugar: 20
- Sodium: 135
- Fat: 13
- Saturated Fat: 8
- Carbohydrates: 30
- Fiber: 1
- Protein: 3
Keywords: brown butter, chocolate chip cookies, no mixer, easy cookies, homemade cookies


