This was supposed to be a batch of apple butter. I had the slow cooker going, the peeler in my hand, and a whole Saturday afternoon planned around simmering down a bushel of Honeycrisps into something dark and spreadable. But somewhere between the second cup of coffee and the third episode of a podcast I can’t even remember, I grabbed the wrong measuring cup and dumped a full cup of apple cider vinegar into the pot instead of the sweet cider I’d set aside. The smell hit me about thirty seconds later, and I just stood there staring at this bubbling, vinegary disaster thinking, well, that’s that.
I was already annoyed at myself, honestly. Apples aren’t cheap in October if you’re buying the good ones, and I’d promised my kids we’d make something fun that afternoon. The whole plan was shot. But I’m not one to waste food, especially when the grocery budget is already stretched thin from back-to-school shopping. So I grabbed a bowl, scooped out about a cup of the ruined apple butter mixture, and started throwing flour and sugar at it like a mad scientist trying to save a failing experiment. I mean, what else was I going to do? Toss it? Not on my watch.
The first batch came out of the oven looking nothing like I expected. They were puffy, a little uneven, and I was ready to call it a loss. But my youngest grabbed one off the cooling rack before I could stop her, took a bite, and her eyes went wide. “Mom, these are actually good,” she said, with that surprised tone kids use when they don’t think you can pull something off. I tried one myself, and let me tell you, I was shocked. The vinegar had mellowed into this tangy sweetness that worked perfectly with the cinnamon and brown sugar. It was a happy accident, but a real one — not the kind you plan for a blog post. I’ve been making them ever since, and they’ve become the cookie my kids actually request by name. Maybe you’ve had one of those kitchen moments where everything goes wrong and something better comes out of it. These cookies are that moment, baked into something you can hold in your hand.
Why You’ll Love This Recipe
Look, I’ve tested a lot of cookie recipes over the years, and most of them fall into one of two camps: they’re either too fussy for a Tuesday afternoon or they taste like a compromise. These chewy apple cider cookies sit right in the sweet spot where easy meets genuinely delicious, and I’ve got the sticky countertops and happy kids to prove it.
- Budget-Friendly Ingredients : You probably already have most of this stuff in your pantry. No fancy extracts, no specialty flours, no trips to three different stores. The apple cider concentrate does the heavy lifting, and a bottle costs about the same as a loaf of bread.
- Kid-Approved Texture : These cookies come out soft and chewy with slightly crisp edges, which is apparently the exact texture my children have been demanding all along. They’re not cakey, not crunchy — just right.
- Quick Enough for School Days : From start to finish, we’re talking about 30 minutes. No chilling the dough overnight, no complicated folding techniques. Mix, scoop, bake, done.
- Makes the House Smell Amazing : I’m not exaggerating when I say the combination of apple cider, cinnamon, and brown sugar baking together is basically fall in a jar. Your kitchen will smell like a candle store, but better.
- Freezes Beautifully : These cookies freeze and reheat like champions. I always make a double batch and stash half in the freezer for those afternoons when someone needs a little pick-me-up.
What makes these different from every other apple cookie recipe out there? It’s the apple cider concentrate. Most recipes use fresh cider, which is watery and doesn’t give you that concentrated apple punch. Using the frozen concentrate that you’d normally use for drinking gives you all the flavor without the extra liquid that ruins the cookie structure. I figured this out by accident, but I’ve been doing it on purpose ever since. These cookies aren’t just good for a budget-friendly recipe — they’re good, period. The kind of good that makes you close your eyes after the first bite, even if you’re standing at the counter in sweatpants.
What Ingredients You Will Need
This recipe uses simple, honest ingredients that work together to create something greater than the sum of their parts. The magic really comes from the apple cider concentrate, which packs a flavor punch that fresh cider just can’t match. Here’s what you’ll need to gather:
For the Cookie Dough
- All-purpose flour, 2 ½ cups (315g) — Spoon and level it; don’t scoop directly from the bag or you’ll end up with dense cookies
- Baking soda, 1 teaspoon — Make sure it’s fresh; old baking soda won’t give you that nice spread
- Ground cinnamon, 1 ½ teaspoons — I prefer McCormick or simply organic, but any brand works
- Ground nutmeg, ½ teaspoon — Freshly grated if you have it, but pre-ground is totally fine
- Salt, ½ teaspoon — Just regular table salt, nothing fancy
- Unsalted butter, ¾ cup (1 ½ sticks, 170g), softened to room temperature — Don’t microwave it; let it sit out for about an hour
- Light brown sugar, 1 cup (200g), packed — This is where the chewy texture comes from, so don’t substitute white sugar here
- Granulated sugar, ¼ cup (50g) — Just a little to balance the molasses flavor of the brown sugar
- Large egg, 1, room temperature — If you forgot to take it out of the fridge, set it in a bowl of warm water for 5 minutes
- Vanilla extract, 1 teaspoon — Pure vanilla is nice but imitation works fine for baking
- Frozen apple cider concentrate, ¼ cup (60ml), thawed — This is the secret ingredient; look for it in the frozen juice aisle, usually near the orange juice concentrate
For the Cinnamon Sugar Coating (Optional but Recommended)
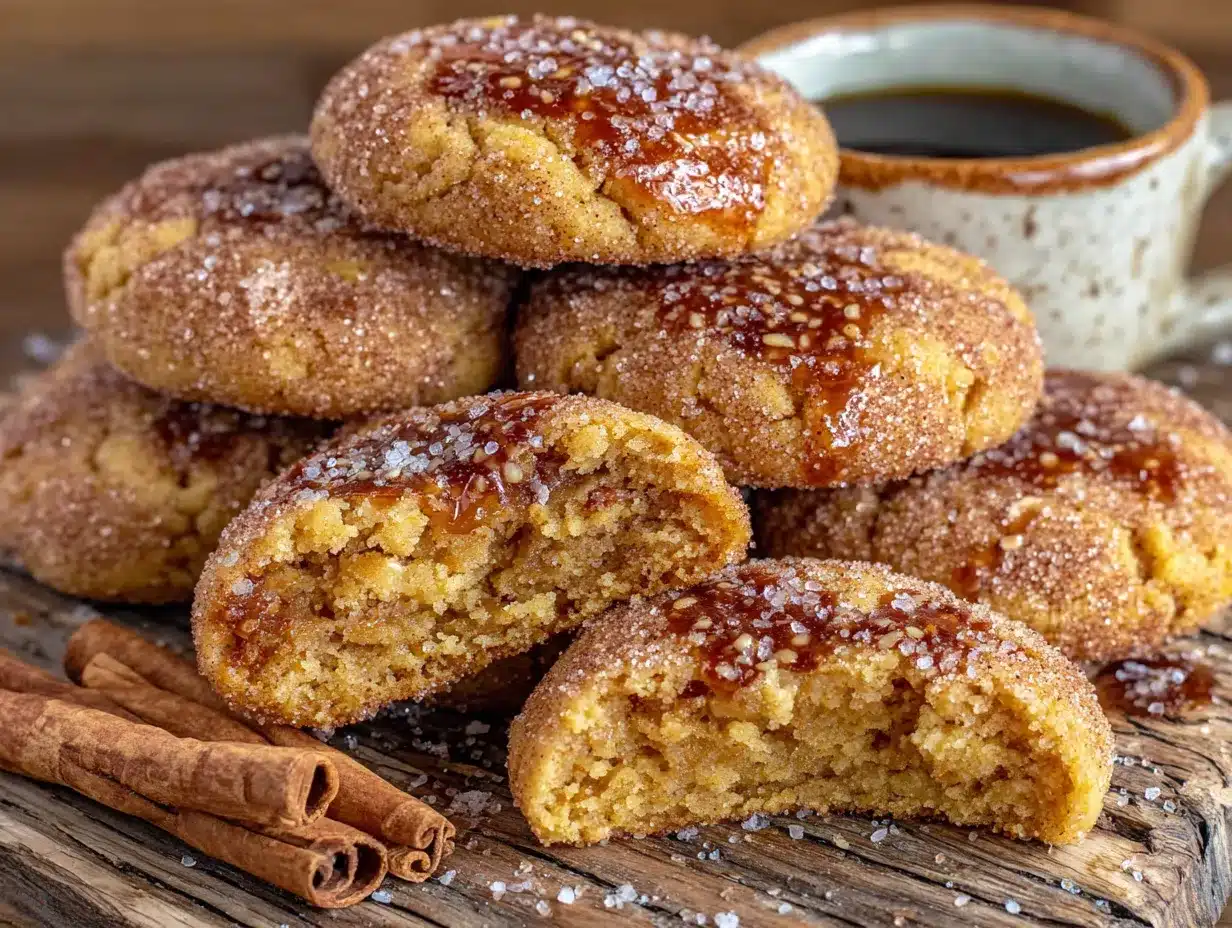
- Granulated sugar, ¼ cup (50g)
- Ground cinnamon, 1 tablespoon
A few notes on ingredients: The apple cider concentrate is non-negotiable if you want that intense apple flavor. I’ve tested this with fresh cider and it makes the dough too sticky and the cookies come out flat. If you absolutely can’t find the concentrate, you can simmer 1 cup of fresh cider on the stove until it reduces to about ¼ cup, but that takes time and honestly, the frozen stuff is cheaper and easier. For the butter, make sure it’s truly softened — you should be able to press your finger into it and leave an indent without it being greasy. If the butter is too cold, your cookies won’t spread properly in the oven.
Equipment Needed
You don’t need a fancy kitchen to make these cookies, which is one of the reasons I love this recipe. Here’s what you’ll actually use:
- Large mixing bowl — Any bowl will do, but a wide one makes mixing easier
- Medium mixing bowl — For combining the dry ingredients
- Hand mixer or stand mixer — A hand mixer is perfectly fine; I’ve made these with a wooden spoon before and it works, but your arm will get tired
- Measuring cups and spoons — Dry measuring cups for the flour and sugar, liquid measuring cup for the cider concentrate
- Baking sheets — Two if you have them, to speed up the process
- Parchment paper or silicone baking mats — Parchment paper is cheaper and works just as well
- Cookie scoop — A 1.5-tablespoon scoop gives you consistent cookies; I got mine for five dollars at the grocery store
- Cooling rack — Wire racks let air circulate so the bottoms don’t get soggy
- Spatula — For transferring cookies to the cooling rack
If you don’t have a cookie scoop, you can use two spoons to drop the dough onto the baking sheet. The cookies won’t be perfectly round, but they’ll taste exactly the same. And if you don’t have a cooling rack, just let the cookies cool on the baking sheet for a few extra minutes before moving them to a plate. I’ve done it plenty of times and it works fine.
Preparation Method
Alright, let’s get to the actual making part. This is straightforward, but I’ll walk you through each step with the little details that make a difference.
- Preheat your oven to 350°F (175°C). Line two baking sheets with parchment paper or silicone mats. If you only have one baking sheet, that’s fine — you’ll just bake in batches. Just let the sheet cool down between batches so the dough doesn’t start spreading before it hits the oven.
- Whisk together the dry ingredients. In a medium bowl, combine 2 ½ cups (315g) all-purpose flour, 1 teaspoon baking soda, 1 ½ teaspoons cinnamon, ½ teaspoon nutmeg, and ½ teaspoon salt. Whisk them together until everything is evenly distributed. This might seem like a small step, but it ensures the baking soda and spices are mixed throughout the dough instead of clumping up in one spot.
- Cream the butter and sugars. In a large bowl, beat ¾ cup (170g) softened unsalted butter with 1 cup (200g) packed light brown sugar and ¼ cup (50g) granulated sugar. Beat on medium speed for about 2-3 minutes until the mixture looks light and fluffy. You’ll notice the color getting paler and the texture getting airy. Don’t rush this step — proper creaming is what gives cookies their structure.
- Add the wet ingredients. Beat in 1 large egg, 1 teaspoon vanilla extract, and ¼ cup (60ml) thawed apple cider concentrate. Mix on low speed until just combined. The mixture might look a little separated at this point, and that’s totally normal. Don’t overmix or the cookies will be tough.
- Combine wet and dry. Gradually add the flour mixture to the wet ingredients, mixing on low speed. I usually add it in three parts, scraping down the sides of the bowl with a spatula after each addition. Mix just until you don’t see any more streaks of flour. A few streaks are better than overmixing, honestly.
- Make the cinnamon sugar coating. In a small bowl, stir together ¼ cup (50g) granulated sugar and 1 tablespoon cinnamon. This step is optional, but it adds that nice sparkly look and an extra layer of flavor.
- Scoop and coat the dough. Using a 1.5-tablespoon cookie scoop, scoop out portions of dough. Roll each portion into a ball between your palms — the dough will be slightly sticky, so it helps to lightly grease your hands with a little butter or cooking spray. Drop each ball into the cinnamon sugar mixture and roll it around to coat. Place the coated dough balls on the prepared baking sheets, spacing them about 2 inches apart. They will spread, so don’t crowd them.
- Bake for 10-12 minutes. Bake one sheet at a time in the center of the oven. At 10 minutes, the cookies should look puffed and slightly golden around the edges but still soft in the center. That’s exactly what you want. If you bake them until they look fully done, they’ll be overbaked and crunchy. The cookies continue to set as they cool on the baking sheet.
- Cool on the baking sheet for 5 minutes. This is important — don’t try to move them right away or they’ll fall apart. After 5 minutes, transfer them to a wire rack to cool completely. If you’re using a single baking sheet, run it under cold water and dry it between batches so the next round of cookies doesn’t start spreading too fast.
A quick note on timing: The first batch always takes a little longer because you’re figuring out your oven. My oven runs hot, so I check at 9 minutes. Yours might need the full 12. The visual cues — puffed center, golden edges — are more reliable than the timer.
Cooking Tips & Techniques
I’ve made these cookies probably two dozen times by now, and I’ve learned a few things the hard way so you don’t have to.
Don’t skip the room temperature ingredients. I know it’s tempting to use cold butter straight from the fridge, especially when you’re impatient, but cold butter doesn’t cream properly with the sugar. You’ll end up with dense, flat cookies instead of soft, chewy ones. Same goes for the egg — a cold egg can seize up the butter mixture and ruin the texture. Set everything out about an hour before you start baking.
Measure your flour correctly. This is the most common mistake I see in cookie recipes. If you scoop your measuring cup directly into the flour bag, you’re packing in extra flour and your cookies will be dry and cakey. Instead, spoon the flour into the measuring cup and level it off with a knife. It takes an extra five seconds and makes a huge difference.
Watch the bake time like a hawk. These cookies go from perfectly chewy to overdone in about 90 seconds. I’ve ruined more than one batch by getting distracted by a phone call or a kid asking for a snack. Set a timer for 9 minutes, check them, and add time in 1-minute increments if needed. The cookies should look slightly underdone when you pull them out — they’ll finish setting up on the hot baking sheet.
Use the parchment paper trick for easy cleanup. I line my baking sheets with parchment paper and reuse the same sheet for all the batches. When I’m done, I just throw away the paper and the baking sheet is clean. Silicone mats work too, but I find parchment paper gives slightly crisper edges.
If your cookies spread too much, chill the dough. Sometimes if your kitchen is warm or your butter was too soft, the dough will spread into flat puddles instead of nice round cookies. If that happens, just pop the scooped dough balls in the fridge for 15-20 minutes before baking. It firms up the butter and gives you better control over the shape.
Variations & Adaptations
One of the best things about this recipe is how flexible it is. Here are some variations I’ve tried and loved:
Apple Cider Oatmeal Cookies — Reduce the flour to 2 cups (250g) and add 1 cup (90g) old-fashioned rolled oats. The oats add a nice chewy texture and make the cookies feel a little heartier. My husband prefers these to the original version, honestly.
Gluten-Free Version — Substitute the all-purpose flour with a 1:1 gluten-free baking flour blend. I’ve tested this with Bob’s Red Mill and King Arthur Measure for Measure, and both work well. The cookies might spread a tiny bit more, so chilling the dough for 20 minutes helps. No one in my family noticed the difference, which is the highest compliment.
Dairy-Free Adaptation — Use vegan butter sticks instead of regular butter. I’ve used both Earth Balance and Miyoko’s, and they both work. Just make sure you’re using the stick form, not the spreadable tub version, which has a different water content. The cookies come out slightly less tender but still delicious.
Add-In Options — Fold in ½ cup (60g) of chopped pecans or walnuts for some crunch. Dried cranberries or chopped dried apples work great too. My kids love when I add white chocolate chips — about ½ cup (85g) — which turns these into a special occasion cookie. Just fold in the add-ins after you’ve combined the wet and dry ingredients.
Spiced Apple Cider Cookies — Add ½ teaspoon ground ginger and ¼ teaspoon ground cloves to the flour mixture for a warmer, more complex spice profile. This version tastes like apple pie in cookie form and is perfect for holiday cookie exchanges.
Serving & Storage Suggestions
These cookies are best served slightly warm, when the edges are still a little soft and the center is tender. I like to pop them in the microwave for about 10 seconds if they’ve been sitting out for a while. They’re perfect with a glass of cold milk for the kids or a hot cup of coffee for the adults. Honestly, they’re also great straight from the counter at room temperature — not every cookie needs to be fancy.
For storage, keep the cookies in an airtight container at room temperature. They’ll stay soft and chewy for about 4-5 days. I layer them between sheets of parchment paper so they don’t stick together. If you live in a humid climate, add a slice of bread to the container — it absorbs excess moisture and keeps the cookies from getting soggy. Replace the bread slice every couple of days.
These cookies freeze beautifully, which is a lifesaver for busy weeks. To freeze, let the cookies cool completely, then place them in a single layer on a baking sheet and freeze for about an hour. Once they’re solid, transfer them to a freezer-safe bag or container. They’ll keep for up to 3 months. To thaw, just leave them on the counter for about 30 minutes, or microwave for 15-20 seconds. I always keep a stash in the freezer for school lunch treats or unexpected visitors.
The flavor actually develops overnight, so if you can resist eating them all on day one, they’ll taste even better on day two. Something about the apple cider flavor settling into the dough makes the second day cookies extra good.
Nutritional Information & Benefits
Let’s be real — these are cookies, not health food. But I do appreciate that they use real ingredients without any weird additives or preservatives. Here’s the estimated nutrition per cookie (based on 24 cookies):
- Calories: 165
- Total Fat: 7g
- Saturated Fat: 4g
- Carbohydrates: 24g
- Sugar: 14g
- Protein: 2g
- Fiber: 0.5g
- Sodium: 95mg
The apples in the cider concentrate provide a small amount of vitamin C and antioxidants, and the cinnamon has anti-inflammatory properties. The brown sugar gives you a quick energy boost, which is why these are great for an after-school snack. If you’re watching your sugar intake, you can reduce the brown sugar to ¾ cup and add an extra tablespoon of applesauce to keep the moisture balance — the cookies will be slightly less sweet but still very good.
These cookies are not gluten-free or dairy-free in their standard form, but as I mentioned above, both adaptations work well. They do contain eggs and wheat, so keep that in mind if you’re baking for someone with allergies.
Conclusion
These chewy apple cider cookies started as a mistake, but they’ve become one of those recipes I genuinely look forward to making every fall. They’re simple enough for a Tuesday afternoon when the kids are bouncing off the walls and fancy enough to bring to a potluck or bake sale. The ingredients are cheap, the technique is forgiving, and the result is a cookie that tastes like autumn in the best possible way.
I hope you give them a try, even if your kitchen is small and your baking skills are rusty. Don’t stress about making them perfect — my first batch was uneven and lopsided and they were still gone within an hour. If you end up making them your own with a different spice blend or a handful of chocolate chips, even better. That’s the whole point of a recipe like this — it’s a starting point, not a rulebook.
If you do make them, I’d love to hear how they turned out. Drop a comment below or tag me in your photos — nothing makes my day like seeing someone else enjoy a recipe that started as a total disaster in my own kitchen. Happy baking, and don’t forget to save one for yourself before the kids get to them!
Frequently Asked Questions
Can I use apple juice instead of apple cider concentrate?
I wouldn’t recommend it. Apple juice is much thinner and has less concentrated flavor. It will make your dough too wet and the cookies will spread into thin, crispy discs. If you can’t find the frozen concentrate, simmer 1 cup of apple cider on the stove until it reduces to about ¼ cup, then let it cool completely before using.
Why did my cookies turn out flat?
Flat cookies usually mean the butter was too soft or the dough was too warm when it went into the oven. Make sure your butter is softened but not melted, and try chilling the scooped dough balls for 15-20 minutes before baking. Also check that your baking soda is fresh — old baking soda loses its leavening power.
Can I make the dough ahead of time?
Absolutely. You can make the dough, scoop it into balls, and refrigerate them for up to 3 days. Just cover the dough balls tightly with plastic wrap. You can bake them straight from the fridge — just add an extra minute or two to the bake time. The cookies might actually turn out even better because the flavors have more time to meld.
How do I make these cookies vegan?
Substitute the butter with vegan butter sticks and replace the egg with a flax egg (1 tablespoon ground flaxseed mixed with 3 tablespoons water, let sit for 5 minutes). The texture will be slightly different — a little less tender — but they’ll still be delicious. Make sure your sugar is vegan-friendly too, as some brands process sugar with bone char.
Can I double this recipe?
Yes, this recipe doubles beautifully. Just make sure you have enough baking sheets and space in your oven. If you’re doubling, mix the dry ingredients in a separate bowl and add them in batches to ensure even mixing. The bake time stays the same, but you might need to rotate your baking sheets halfway through if your oven has hot spots.
Pin This Recipe!

Best Chewy Apple Cider Cookies – Easy Fall Dessert

These chewy apple cider cookies are a happy accident turned family favorite. Made with frozen apple cider concentrate for intense flavor, they’re soft, chewy, and perfect for fall.
- Prep Time: 15 minutes
- Cook Time: 12 minutes
- Total Time: 27 minutes
- Yield: 24 cookies 1x
- Category: Dessert
- Cuisine: American
Ingredients
- 2 ½ cups (315g) all-purpose flour
- 1 teaspoon baking soda
- 1 ½ teaspoons ground cinnamon
- ½ teaspoon ground nutmeg
- ½ teaspoon salt
- ¾ cup (1 ½ sticks, 170g) unsalted butter, softened to room temperature
- 1 cup (200g) packed light brown sugar
- ¼ cup (50g) granulated sugar
- 1 large egg, room temperature
- 1 teaspoon vanilla extract
- ¼ cup (60ml) frozen apple cider concentrate, thawed
- ¼ cup (50g) granulated sugar (for coating)
- 1 tablespoon ground cinnamon (for coating)
Instructions
- Preheat your oven to 350°F (175°C). Line two baking sheets with parchment paper or silicone mats.
- In a medium bowl, whisk together 2 ½ cups all-purpose flour, 1 teaspoon baking soda, 1 ½ teaspoons cinnamon, ½ teaspoon nutmeg, and ½ teaspoon salt.
- In a large bowl, beat ¾ cup softened unsalted butter with 1 cup packed light brown sugar and ¼ cup granulated sugar on medium speed for 2-3 minutes until light and fluffy.
- Beat in 1 large egg, 1 teaspoon vanilla extract, and ¼ cup thawed apple cider concentrate on low speed until just combined.
- Gradually add the flour mixture to the wet ingredients, mixing on low speed in three parts, scraping down the sides as needed. Mix just until no streaks of flour remain.
- In a small bowl, stir together ¼ cup granulated sugar and 1 tablespoon cinnamon for the coating.
- Using a 1.5-tablespoon cookie scoop, scoop out portions of dough. Roll each into a ball, then coat in the cinnamon sugar mixture. Place on prepared baking sheets, spacing 2 inches apart.
- Bake for 10-12 minutes, until puffed and slightly golden around the edges but still soft in the center.
- Cool on the baking sheet for 5 minutes, then transfer to a wire rack to cool completely.
Notes
The apple cider concentrate is non-negotiable for intense flavor. If you can’t find it, simmer 1 cup of fresh apple cider until reduced to ¼ cup. For best results, ensure butter and egg are at room temperature. Cookies freeze well for up to 3 months.
Nutrition
- Serving Size: 1 cookie
- Calories: 165
- Sugar: 14
- Sodium: 95
- Fat: 7
- Saturated Fat: 4
- Carbohydrates: 24
- Fiber: 0.5
- Protein: 2
Keywords: apple cider cookies, chewy cookies, fall dessert, easy cookie recipe, apple cookies


