The Halloween potluck was in six hours and I’d completely forgotten. Everyone else would be bringing those elaborate themed desserts—you know the ones, with the perfect fondant spiders and hand-piped webs. I had a block of cream cheese softening on the counter, a bag of black olives I’d bought for salads, and honestly, a growing sense of panic. I mean, I couldn’t show up empty-handed, but I also couldn’t compete with the Pinterest-perfect spread I knew was coming.
So I did what any slightly frantic home cook does when backed into a corner—I grabbed what I had and started mixing. Cream cheese, some shredded cheddar, a handful of spices from the back of the cabinet. I shaped it into a ball, pressed it into some crushed crackers, and then my eyes landed on those olives. And that’s when it clicked. Slice them into legs, arrange them on top, and suddenly my sad little cheese ball looked like it was crawling right off the plate. I laughed out loud, honestly. It was ridiculous, it was simple, and it was going to have to do.
Well, let me tell you what happened. That spooky spider cheese ball didn’t just survive the potluck—it stole the whole show. People were gathered around it, taking pictures, asking for the recipe. The elaborate desserts sat untouched while my accidental spider became the star of the table. Maybe you’ve been there, where the thing you threw together in a panic ends up being the thing everyone remembers. That’s this recipe. It’s proof that you don’t need fancy tools or hours of prep to impress a crowd—you just need a good idea and a little bit of last-minute desperation. And now, I’m sharing it with you so you can be the hero of your next Halloween gathering without the stress.
Why You’ll Love This Recipe
This spooky spider cheese ball has become my go-to Halloween party trick, and honestly, it never fails to get a reaction. After testing it at three different gatherings—from my kid’s classroom party to a neighborhood block party—I can tell you exactly why it works so well.
- Quick & Easy: Comes together in under 20 minutes of active prep time. Perfect for those last-minute Halloween parties when you’ve forgotten until the day before.
- Simple Ingredients: No fancy grocery trips needed. Cream cheese, cheddar, basic spices, and olives—you probably have most of this in your kitchen right now.
- Perfect for Halloween Parties: It’s spooky without being gross, impressive without being complicated. Kids love it, adults love it, and it starts conversations.
- Crowd-Pleaser: I’ve watched people who “don’t like cheese balls” go back for thirds. The texture is creamy, the flavor is savory, and the presentation is just fun.
- Unbelievably Delicious: The combination of cream cheese, sharp cheddar, and a hint of garlic and onion creates this savory, addictive spread that pairs perfectly with crackers.
What makes this recipe different from the rest? It’s the attention to texture and flavor balance. I’ve tested this with different cheese ratios and spice blends until I found the perfect combination that’s creamy but holds its shape, flavorful but not overwhelming. Plus, the spider design is actually doable—no artistic skills required. It’s the kind of recipe that makes you look like you spent hours when you really spent twenty minutes. And honestly, isn’t that the best kind of party recipe?
What Ingredients You Will Need
This recipe uses simple, everyday ingredients to create something that looks like it took way more effort than it actually did. Most of these are pantry staples, which makes this perfect for those “oh no, I need to bring something” moments.
For the Cheese Ball Base
- 16 ounces cream cheese, softened to room temperature (I recommend Philadelphia for the creamiest texture—the generic brands can be a bit grainy)
- 2 cups sharp cheddar cheese, shredded (buy a block and shred it yourself—the pre-shredded stuff has anti-caking agents that affect the texture)
- 1/4 cup sour cream (adds tanginess and helps with creaminess)
- 1 teaspoon garlic powder (not garlic salt—we want the flavor without extra sodium)
- 1 teaspoon onion powder
- 1/2 teaspoon smoked paprika (adds a subtle smokiness that makes people ask “what’s in this?”)
- 1/4 teaspoon black pepper
- 1/4 teaspoon salt (optional—the cheeses are already salty, so taste first)
For the Coating and Decoration
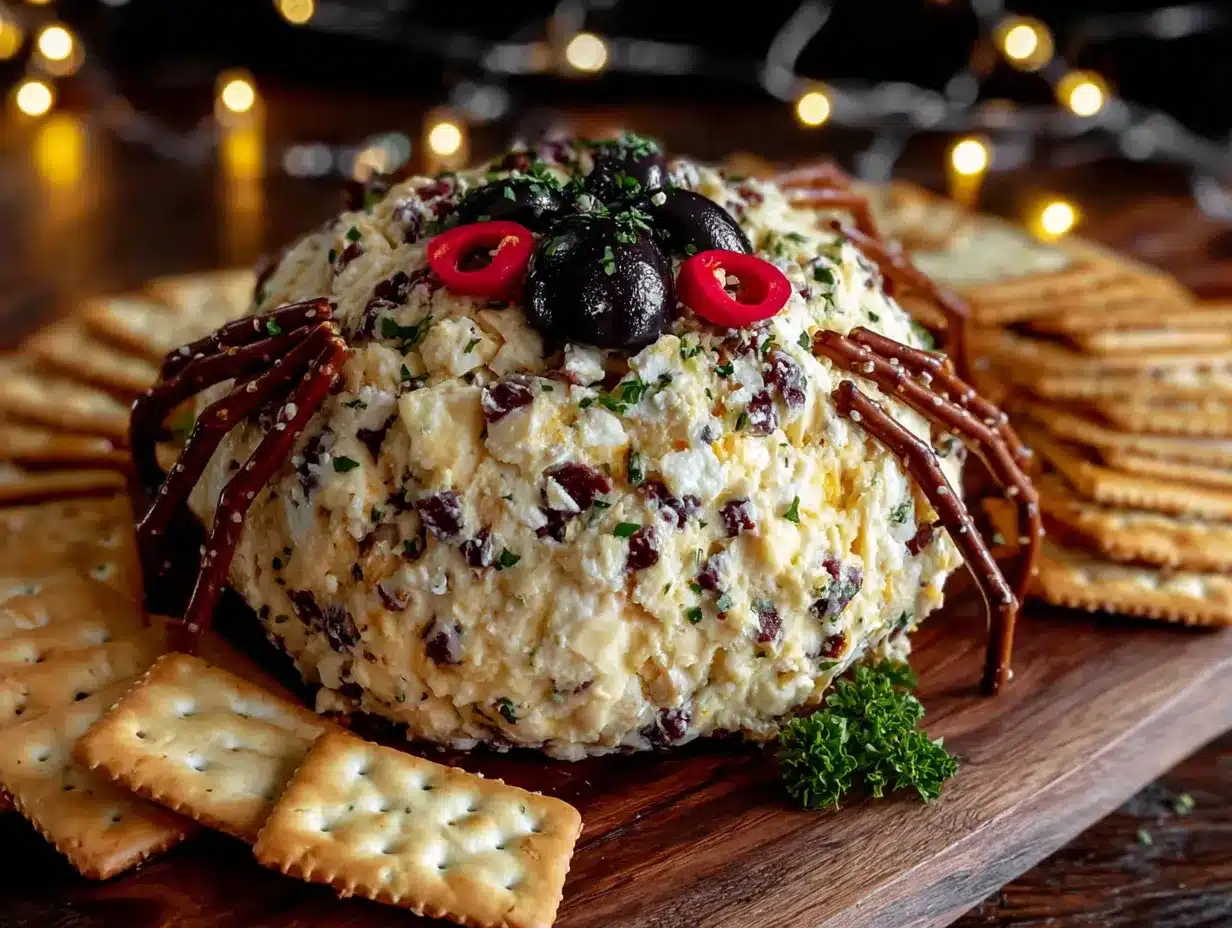
- 1 cup crushed crackers (buttery crackers like Ritz work best, but you can use panko breadcrumbs for a different texture)
- 1 can (6 ounces) whole black olives, drained and patted dry (these become the spider legs and body)
- 1 tablespoon chives or parsley, finely chopped (optional, for a pop of color around the base)
For Serving
- Assorted crackers (I like a mix of buttery rounds and whole wheat varieties)
- Fresh vegetable sticks (carrots, celery, bell pepper strips—for a lower-carb option)
When selecting your cream cheese, make sure it’s truly softened. I’ve made the mistake of using cold cream cheese and ended up with lumpy, difficult-to-mix cheese ball dough. Let it sit on the counter for at least an hour before you start. For the cheddar, I’ve found that sharp or extra-sharp gives the best flavor—mild cheddar just doesn’t have enough punch to stand out. And for the olives, look for jumbo-sized ones if you can find them. They make better spider bodies and are easier to slice into leg shapes.
Equipment Needed
You don’t need a fancy kitchen to pull off this spooky spider cheese ball. Here’s what you’ll need:
- Large mixing bowl (for combining the cheese mixture)
- Hand mixer or stand mixer (you can do this by hand with a sturdy spatula, but a mixer makes it much easier to get that smooth, creamy texture)
- Rubber spatula (for scraping the bowl and shaping the ball)
- Plastic wrap (essential for shaping and chilling the cheese ball)
- Small sharp knife (for slicing olives into leg shapes)
- Cutting board
- Serving platter or plate (a dark-colored plate makes the spider pop)
- Parchment paper (optional, but makes cleanup much easier)
If you don’t have a hand mixer, no worries. I’ve made this recipe using nothing but a fork and some elbow grease. It takes a bit longer and your arm might get tired, but it works. Just make sure your cream cheese is really soft. For the plastic wrap, the cheap store brand works fine—you’re just using it to shape and chill. And if you don’t have a rubber spatula, a wooden spoon will do the job, though you’ll lose a bit less mixture with a spatula.
Preparation Method
Follow these steps carefully, and you’ll have a spooky spider cheese ball that looks like it came from a professional catering company. Trust me, I’ve made this more times than I can count, and these are the exact steps that work every time.
- Soften the cream cheese. Take your cream cheese out of the refrigerator at least 1 hour before you start. Cut it into cubes to speed up the process. You want it so soft that when you press it with your finger, it leaves an indent without resistance. This is crucial for a smooth, lump-free cheese ball.
- Mix the base. In your large mixing bowl, combine the softened cream cheese, shredded cheddar, sour cream, garlic powder, onion powder, smoked paprika, black pepper, and salt if using. Beat with a hand mixer on medium speed for about 2-3 minutes, until everything is fully combined and the mixture is smooth and creamy. Scrape down the sides of the bowl at least once during mixing.
- Taste and adjust. This is the step I never skip. Take a small taste and adjust the seasoning. Sometimes I add a bit more garlic powder or a pinch of cayenne for heat. Remember, the flavors will mellow slightly as it chills, so make it a touch stronger than you think you want.
- Shape the cheese ball. Lay out a large piece of plastic wrap on your work surface. Use your rubber spatula to scrape the cheese mixture onto the center of the plastic wrap. Gather the corners of the plastic wrap and twist them together, using the plastic to shape the mixture into a smooth ball. Don’t worry about perfection here—you’ll smooth it out more later. Twist the plastic wrap tightly and refrigerate for at least 2 hours, or up to overnight. The chilling is essential for the cheese ball to hold its shape.
- Prepare the coating. While the cheese ball chills, crush your crackers. I put them in a zip-top bag and use a rolling pin, but you can also pulse them in a food processor. You want a mix of fine crumbs and slightly larger pieces for texture. Set aside in a shallow bowl or plate.
- Prepare the olives. Drain your olives and pat them completely dry with paper towels. Any moisture will make the cheese ball soggy. For the spider legs, slice 8 olives lengthwise into thin strips—you want them to look like spider legs, so aim for about 4-5 slices per olive. For the spider body, leave one olive whole. For the eyes, cut two tiny rounds from another olive. Set these aside on a paper towel.
- Coat the cheese ball. Remove the chilled cheese ball from the refrigerator. Unwrap it and place it in the bowl of crushed crackers. Use your hands to gently press the crumbs onto all sides of the cheese ball, coating it completely. Don’t press too hard or you’ll flatten the ball. Transfer the coated cheese ball to your serving platter.
- Assemble the spider. This is the fun part. Place the whole olive in the center of the cheese ball for the spider’s body. Arrange the olive slices around it to look like legs—four on each side, slightly curved to look like they’re crawling. Place the two tiny olive rounds at the front for eyes. Press everything gently into the cheese ball so it stays in place.
- Add final touches. If using, sprinkle the chopped chives or parsley around the base of the cheese ball. This adds a nice pop of green and makes it look more polished. You can also add a few extra cracker crumbs around the plate for a “dirt” effect.
- Chill again before serving. Place the assembled spider cheese ball back in the refrigerator for at least 30 minutes before serving. This helps everything set and makes it easier to spread. Take it out about 15 minutes before serving to soften slightly for easier spreading.
A few sensory cues to watch for: The cheese mixture should be smooth and creamy with no visible lumps of cream cheese. When you shape it, it should hold together without being sticky. The finished cheese ball should be firm to the touch but not hard—think of the texture of a slightly chilled butter. And when you serve it, it should spread smoothly onto crackers without crumbling.
Cooking Tips & Techniques
After making this spooky spider cheese ball more times than I can count, I’ve learned a few tricks that make the difference between good and unforgettable. Let me share what I’ve discovered through trial and error.
The biggest mistake I see people make is not softening the cream cheese enough. I once tried to rush the process and mixed cold cream cheese with the other ingredients. The result was a lumpy, streaky mess that looked nothing like the smooth, creamy cheese ball I was going for. Trust me, let that cream cheese sit out for a full hour. If you’re really in a hurry, you can microwave it in 10-second bursts, but be careful—you want it soft, not melted.
Another common mistake is over-mixing. Once the ingredients are combined, stop mixing. Over-mixing can make the cheese ball too soft and difficult to shape. You want it just combined and smooth. And when you’re shaping it, use the plastic wrap to help you—it’s much easier than trying to shape it with your hands alone. The plastic wrap gives you control and keeps your hands clean.
For the perfect texture, chill the cheese ball for at least 2 hours. I’ve tried cutting this short, and the cheese ball was too soft to hold its shape when I tried to coat it. The chilling step isn’t optional—it’s essential. And when you’re coating it, work quickly so the cheese ball doesn’t warm up too much. If it starts getting soft, pop it back in the fridge for 15 minutes.
Here’s a multitasking strategy that works well: Make the cheese mixture the night before and let it chill overnight. The next day, all you have to do is coat it, decorate it, and you’re done. This is especially helpful if you’re hosting a party or bringing this to an event. You can even assemble the spider decoration a few hours ahead and keep it refrigerated until serving time.
For consistent results every time, use a kitchen scale to measure your cheeses. I know it sounds fussy, but different brands of cream cheese come in slightly different package sizes, and shredded cheese can be packed more or less densely. Weighing ensures you get the exact same results every time. But honestly, if you don’t have a scale, don’t stress—this recipe is forgiving enough that eyeballing it works fine.
Variations & Adaptations
One of the things I love about this spooky spider cheese ball is how adaptable it is. Over the years, I’ve tried several variations, and I’m excited to share them with you.
Dietary Variations: For a lower-fat version, use reduced-fat cream cheese and sharp cheddar. The flavor will be slightly less rich, but it still works beautifully. For a gluten-free option, use gluten-free crackers for the coating or skip the coating entirely and just press the cheese ball with fresh herbs. For a dairy-free version, use dairy-free cream cheese and nutritional yeast instead of cheddar—the texture will be different, but the concept still works.
Flavor Variations: This is where you can really make the recipe your own. Try adding 1/4 cup of finely chopped sun-dried tomatoes for an Italian twist. Or mix in 1/4 cup of crumbled bacon for a smoky, savory version. I once made a buffalo chicken version by adding shredded rotisserie chicken and hot sauce to the cheese mixture—it was a huge hit at a Super Bowl party. For a more sophisticated flavor, try using herbed goat cheese instead of some of the cream cheese.
Seasonal Adaptations: While this is perfect for Halloween, you can easily adapt it for other occasions. For a Christmas party, shape the cheese ball into a wreath and decorate with red bell pepper strips and fresh rosemary. For a summer barbecue, add fresh herbs like dill and chives, and serve with cucumber rounds instead of crackers. For a New Year’s Eve party, roll the cheese ball in crushed pistachios for a festive green coating.
Different Cooking Methods: While I typically serve this cold, I’ve experimented with serving it at room temperature for a softer, more spreadable texture. Just let it sit out for about 30 minutes before serving. You can also make individual mini spider cheese balls for appetizer portions—just shape the mixture into smaller balls and adjust the chilling time accordingly.
My personal favorite variation: I once added a tablespoon of horseradish to the cheese mixture for a spicy kick. It was a happy accident—I was out of garlic powder and grabbed the horseradish by mistake. But the result was amazing. The horseradish adds a warmth that cuts through the richness of the cheese perfectly. Now I make it that way every time.
Serving & Storage Suggestions
This spooky spider cheese ball is best served chilled but not straight from the refrigerator. Take it out about 15-20 minutes before your guests arrive to let it soften slightly. This makes it easier to spread and brings out the full flavor of the cheeses and spices.
For presentation, I like to serve it on a dark-colored platter. The contrast makes the spider really pop. Arrange crackers around the cheese ball in a circular pattern, almost like a web. I use a mix of buttery round crackers, whole wheat crackers, and even some pretzel sticks for variety. For a healthier option, serve with carrot sticks, celery, and bell pepper strips. The crunch of fresh vegetables pairs beautifully with the creamy cheese.
This cheese ball pairs wonderfully with a variety of beverages. For a Halloween party, try serving it with a crisp white wine like Sauvignon Blanc or a light beer. For a non-alcoholic option, sparkling apple cider or ginger ale works great. The savory, creamy flavors also complement a nice dry martini—very fitting for a spooky-themed gathering!
Storage is simple. Leftovers can be wrapped tightly in plastic wrap and stored in the refrigerator for up to 5 days. The coating might soften slightly, but the flavor will actually improve as the ingredients meld together. I don’t recommend freezing this cheese ball—the texture becomes grainy and watery when thawed.
For reheating, you don’t actually reheat a cheese ball. Just let it sit at room temperature for about 20 minutes before serving again. If you’re serving it over several hours, you can leave it out for up to 2 hours, then return it to the refrigerator. The flavors actually develop more over time, so day-old cheese ball is often even better than fresh.
One note about flavor development: This cheese ball tastes even better the next day. The garlic and onion powders have time to fully infuse the cheese, and the texture becomes perfectly creamy. So if you can, make it a day ahead. Your future self will thank you.
Nutritional Information & Benefits
While this spooky spider cheese ball is definitely a treat, it does offer some nutritional benefits. Here’s a general breakdown per serving (based on 12 servings, with crackers not included):
| Nutrient | Amount per Serving |
|---|---|
| Calories | 210 |
| Total Fat | 18g |
| Saturated Fat | 11g |
| Cholesterol | 55mg |
| Sodium | 320mg |
| Total Carbohydrates | 4g |
| Protein | 8g |
| Calcium | 150mg |
The cream cheese and cheddar provide a good amount of calcium and protein. Cream cheese also contains vitamin A and some B vitamins. The smoked paprika adds a small amount of antioxidants, and if you add fresh herbs, you’ll get a bit of vitamin K and other micronutrients. Of course, this is an indulgent appetizer, so enjoy it in moderation as part of a balanced diet.
Dietary considerations: This recipe contains dairy and gluten (from the crackers). For a gluten-free version, use gluten-free crackers for the coating. For a lower-sodium option, use reduced-sodium cheeses and skip the added salt. This recipe is not suitable for vegans, but there are excellent dairy-free cream cheese alternatives available if you need a vegan version.
From a wellness perspective, I love that this recipe uses real, whole ingredients. There’s nothing artificial here—just cheese, spices, and olives. It’s the kind of appetizer that feels indulgent but doesn’t have any hidden additives or preservatives. And because it’s so rich and satisfying, a little bit goes a long way. I find that guests naturally eat smaller portions because the flavor is so intense, which helps with portion control.
Conclusion
This spooky spider cheese ball has become my secret weapon for Halloween parties, and honestly, I think it should be yours too. It’s proof that you don’t need fancy ingredients or hours of prep to create something that looks impressive and tastes amazing. The creamy, savory cheese mixture combined with the fun spider decoration creates an appetizer that people can’t stop talking about.
I love this recipe because it’s so forgiving. You can make it ahead, customize it to your taste, and it always turns out great. Whether you’re hosting a Halloween party, bringing something to a potluck, or just want to make a fun snack for your family, this cheese ball delivers. And the best part? It’s genuinely easy. No complicated techniques, no special equipment, no stress.
So go ahead and give it a try. Customize it with your favorite spices, experiment with different coatings, and have fun with the spider decoration. I’d love to hear how it turns out for you! Drop a comment below and let me know if your spider cheese ball was a hit at your party. Did you add any creative twists? What did your guests think? Your feedback helps other readers who are considering making this recipe. And if you loved it, please share this post with your friends—everyone deserves a stress-free, impressive appetizer in their recipe collection.
Happy Halloween, and happy cooking!
Frequently Asked Questions
Can I make this spooky spider cheese ball ahead of time?
Absolutely! In fact, I recommend it. You can make the cheese mixture up to 3 days ahead and shape it into a ball. Keep it wrapped in plastic wrap in the refrigerator. When you’re ready to serve, just coat it with the crushed crackers and add the spider decoration. The flavors actually get better as they meld together in the fridge.
How do I keep the olive spider legs from falling off?
This is a common question, and the key is to press them gently but firmly into the cheese ball. Make sure the cheese ball is well-chilled before you add the olives—the cold cheese will hold them in place better. If you’re really worried, you can use a tiny bit of cream cheese as “glue” to hold the olives in place. Just dab a small amount on the back of each olive slice before pressing it onto the cheese ball.
Can I use different types of cheese?
Yes, definitely! While I love the combination of cream cheese and sharp cheddar, you can experiment with other cheeses. Try using pepper jack for a spicy kick, smoked gouda for a deeper flavor, or goat cheese for a tangier taste. Just keep in mind that different cheeses have different moisture levels, so you might need to adjust the amount of cream cheese to get the right texture.
What should I do if my cheese ball is too soft to shape?
If your cheese mixture is too soft to hold its shape, don’t panic. Just pop it back in the refrigerator for 30-60 minutes to firm up. The most common cause of a too-soft cheese ball is cream cheese that wasn’t fully softened before mixing, or over-mixing the ingredients. Next time, make sure your cream cheese is at room temperature and mix just until combined.
Can I freeze this spooky spider cheese ball?
I don’t recommend freezing this cheese ball. The texture of cream cheese changes when frozen and thawed, becoming grainy and watery. The cheese ball will still be safe to eat, but the creamy, smooth texture you’re going for will be compromised. If you need to make it far in advance, just refrigerate it for up to 5 days. It’s actually better fresh anyway!
Pin This Recipe!
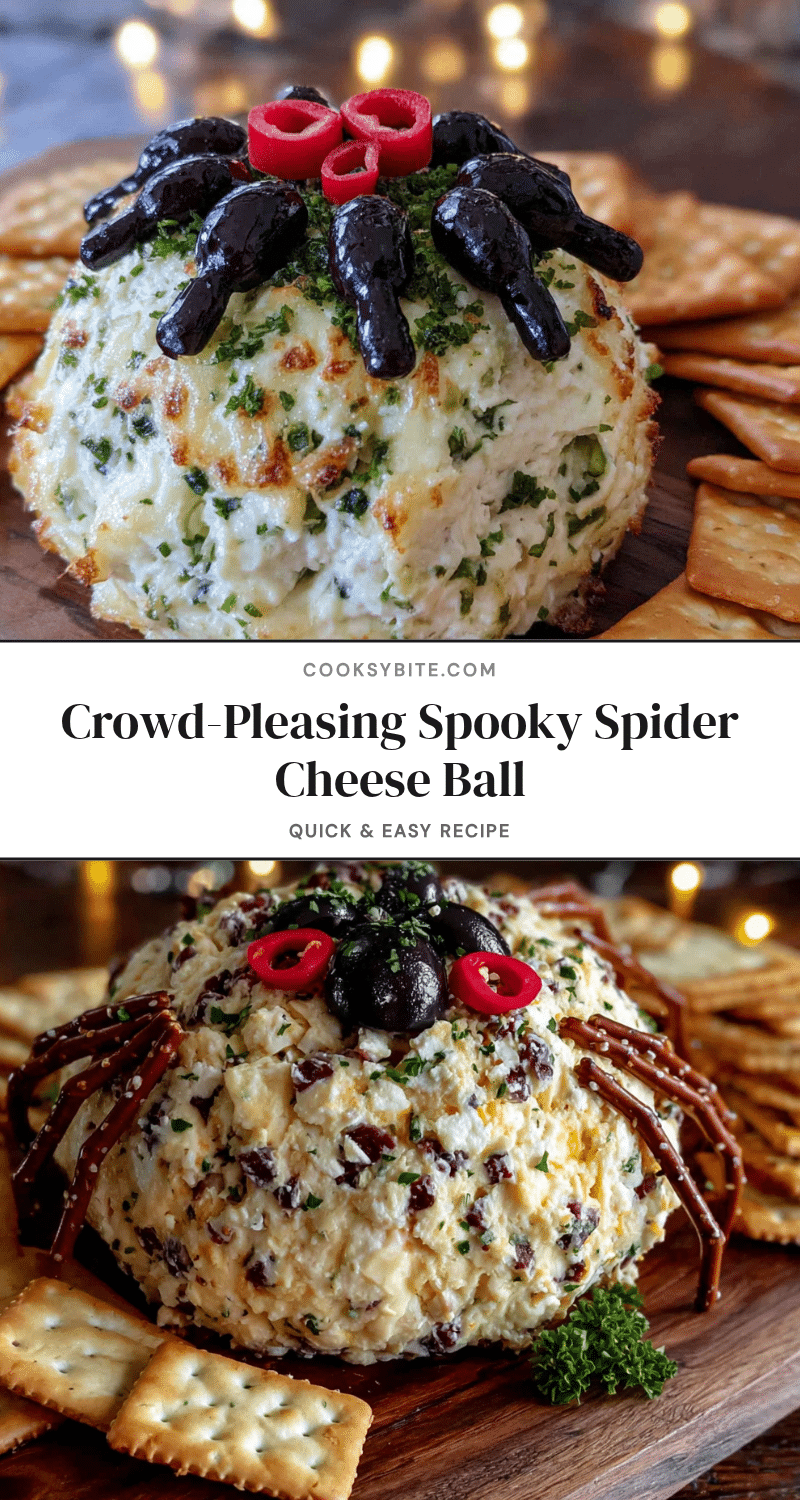
Best Easy Spooky Spider Cheese Ball Recipe
A creamy, savory cheese ball shaped like a spider, perfect for Halloween parties. Made with simple ingredients and ready in under 20 minutes of active prep, this spooky appetizer is sure to be a crowd-pleaser.
- Prep Time: 20 minutes
- Cook Time: 0 minutes
- Total Time: 2 hours 50 minutes (includes chilling)
- Yield: 12 servings 1x
- Category: Appetizer
- Cuisine: American
Ingredients
- 16 ounces cream cheese, softened to room temperature
- 2 cups sharp cheddar cheese, shredded
- 1/4 cup sour cream
- 1 teaspoon garlic powder
- 1 teaspoon onion powder
- 1/2 teaspoon smoked paprika
- 1/4 teaspoon black pepper
- 1/4 teaspoon salt (optional)
- 1 cup crushed crackers (buttery crackers like Ritz work best)
- 1 can (6 ounces) whole black olives, drained and patted dry
- 1 tablespoon chives or parsley, finely chopped (optional)
- Assorted crackers for serving
- Fresh vegetable sticks (carrots, celery, bell pepper strips) for serving
Instructions
- Soften the cream cheese: Take cream cheese out of refrigerator at least 1 hour before starting. Cut into cubes to speed up softening. It should be soft enough that pressing with a finger leaves an indent without resistance.
- Mix the base: In a large mixing bowl, combine softened cream cheese, shredded cheddar, sour cream, garlic powder, onion powder, smoked paprika, black pepper, and salt if using. Beat with a hand mixer on medium speed for 2-3 minutes until smooth and creamy. Scrape down sides of bowl at least once.
- Taste and adjust: Taste the mixture and adjust seasoning if needed. Flavors will mellow slightly as it chills, so make it slightly stronger than desired.
- Shape the cheese ball: Lay a large piece of plastic wrap on work surface. Scrape cheese mixture onto center of plastic wrap. Gather corners of plastic wrap and twist together, using plastic to shape mixture into a smooth ball. Twist plastic wrap tightly and refrigerate for at least 2 hours, or up to overnight.
- Prepare the coating: While cheese ball chills, crush crackers in a zip-top bag with a rolling pin or pulse in a food processor. Aim for a mix of fine crumbs and slightly larger pieces. Set aside in a shallow bowl or plate.
- Prepare the olives: Drain olives and pat completely dry with paper towels. For spider legs, slice 8 olives lengthwise into thin strips (about 4-5 slices per olive). For spider body, leave one olive whole. For eyes, cut two tiny rounds from another olive. Set aside on paper towel.
- Coat the cheese ball: Remove chilled cheese ball from refrigerator. Unwrap and place in bowl of crushed crackers. Gently press crumbs onto all sides until completely coated. Transfer to serving platter.
- Assemble the spider: Place whole olive in center of cheese ball for spider’s body. Arrange olive slices around it to look like legs—four on each side, slightly curved. Place two tiny olive rounds at front for eyes. Press everything gently into cheese ball.
- Add final touches: If using, sprinkle chopped chives or parsley around base of cheese ball. Optionally add extra cracker crumbs around plate for a ‘dirt’ effect.
- Chill again before serving: Place assembled spider cheese ball back in refrigerator for at least 30 minutes before serving. Take out about 15 minutes before serving to soften slightly for easier spreading.
Notes
For best results, let cream cheese soften at room temperature for at least 1 hour. Use block cheddar and shred it yourself for better texture. Chilling is essential for the cheese ball to hold its shape. The cheese ball tastes even better the next day as flavors meld. For gluten-free, use gluten-free crackers for coating. For lower fat, use reduced-fat cream cheese and cheddar.
Nutrition
- Serving Size: 1 serving (about 2 t
- Calories: 210
- Sugar: 1
- Sodium: 320
- Fat: 18
- Saturated Fat: 11
- Carbohydrates: 4
- Protein: 8
Keywords: spider cheese ball, Halloween appetizer, cheese ball, easy appetizer, spooky snack, cream cheese, olive spider


