The first time I made these pumpkin chocolate chip cookies, it was an accident. I mean, not the cookies themselves—those were very intentional. The accident was the moment that led to them. I was standing in my neighbor Rosa’s kitchen last October, watching her wrestle with a piping bag full of cream cheese frosting that would not cooperate. She was making her famous pumpkin rolls for a church bake sale, and the frosting kept bursting out the sides instead of the tip. She muttered something in Spanish I won’t repeat, then looked at me and said, “You know what? This is a sign. I should just make cookies instead.”
She wiped her hands on her apron and started pulling ingredients from her pantry without measuring anything. She just knew. I watched her dump flour, sugar, pumpkin puree, and a mountain of chocolate chips into a bowl, mixing by hand with a wooden spoon that had seen decades of use. She didn’t give me a recipe that day. She just said, “Pay attention. The dough should look like wet sand.” I scribbled notes on a napkin while she talked, and honestly, I got half of it wrong. But that first batch of imperfect cookies? They disappeared in two days. My kids, who usually pick around anything that looks “healthy” (pumpkin counts as healthy to them, apparently), ate them for breakfast. I didn’t stop them. That’s how good these were.
I’ve made these cookies at least twenty times since that afternoon with Rosa. I’ve tweaked the spice ratio, adjusted the baking time, and figured out which chocolate chips melt best without turning the whole cookie into a puddle. This version is what I’ve settled on—the one that makes my family’s eyes light up the second they walk through the door and smell cinnamon and nutmeg. Maybe you’ve been there, standing in your own kitchen, hoping for a recipe that actually works the first time and makes everyone happy. These cookies are that recipe. They’re soft, they’re spiced just right, and the chocolate gets all melty in a way that feels like a hug.
Why You’ll Love This Recipe
Look, I’ve tested a lot of pumpkin cookie recipes over the years. Some turn out cakey and dry. Others spread into flat, sad discs that barely hold a chocolate chip. These cookies hit the sweet spot—literally and figuratively. They’re soft and tender with slightly crisp edges, packed with warm fall spices, and loaded with enough chocolate to keep even the pickiest eaters coming back for more.
- Budget-Friendly Ingredients: You probably already have most of these in your pantry. Canned pumpkin is cheap, chocolate chips go on sale constantly, and the spices are pantry staples. No expensive specialty items required.
- Quick & Easy: From start to finish, these cookies take about 30 minutes. No chilling the dough (unless you want to), no complicated techniques. Just mix, scoop, and bake.
- Family-Approved: My kids have nicknamed these “pumpkin pillows.” They disappear faster than any other cookie I make, and I’ve never had a complaint. Not one.
- Perfect for Fall Baking: Whether it’s a rainy October afternoon or a Thanksgiving gathering, these cookies fit every autumn occasion. They also freeze beautifully, so you can stash some for later.
- Forgiving Recipe: Overmix the batter? It still works. Use margarine instead of butter? Fine. Forget to bring the eggs to room temperature? No problem. This recipe doesn’t punish you for being human.
What makes these cookies different from the dozens of other pumpkin cookie recipes out there? Two things. First, I use a technique where I blot the pumpkin puree with paper towels before mixing it in. This removes excess moisture, which is usually what makes pumpkin cookies turn gummy or cakey instead of chewy. Second, I use a mix of granulated and brown sugar—the brown sugar adds moisture and depth, while the granulated sugar helps the edges crisp up. It’s a small tweak, but it makes all the difference.
These cookies aren’t just good. They’re the kind that make you close your eyes after the first bite. The kind that make you reach for another one before you’ve finished the first. The kind that make your kitchen smell like a fall candle, except better because you can eat it.
What Ingredients You Will Need
This recipe uses simple, wholesome ingredients to create that perfect balance of pumpkin flavor, warm spices, and melty chocolate. Most of these are pantry staples, especially if you do any fall baking. Let me walk you through each one and explain why it matters.
- All-Purpose Flour (2 cups / 240g): Standard all-purpose flour gives these cookies structure without making them tough. Spoon and level your flour—don’t scoop straight from the bag, or you’ll end up with dry cookies. I use Gold Medal or King Arthur Flour, but any brand works fine.
- Baking Soda (1 teaspoon): This helps the cookies spread slightly and gives them a tender crumb. Make sure your baking soda is fresh—if it’s been sitting in your cabinet for two years, it won’t work as well.
- Ground Cinnamon (1½ teaspoons): Cinnamon is the backbone of pumpkin spice. I use Saigon cinnamon when I can find it—it’s stronger and more aromatic than regular cassia cinnamon.
- Ground Nutmeg (½ teaspoon): Nutmeg adds that warm, slightly sweet undertone that makes pumpkin desserts taste like fall. Freshly grated nutmeg is amazing here, but pre-ground works just fine.
- Ground Ginger (½ teaspoon): Ginger gives these cookies a little warmth and complexity. Don’t skip it—it’s the secret ingredient that makes people ask, “What’s in these? They’re so good.”
- Salt (½ teaspoon): Salt balances the sweetness and enhances the other flavors. I use fine sea salt for baking.
- Unsalted Butter (½ cup / 113g, softened): Butter adds richness and flavor. If you only have salted butter, reduce the added salt to ¼ teaspoon. Let it soften at room temperature for about 30 minutes—don’t microwave it, or it’ll melt and change the cookie texture.
- Granulated Sugar (½ cup / 100g): White sugar helps the cookies spread and creates those slightly crisp edges.
- Light Brown Sugar (½ cup / 100g, packed): Brown sugar adds moisture and a deeper, caramel-like flavor. Pack it firmly into your measuring cup. Dark brown sugar works too, but the cookies will be slightly darker and more molasses-forward.
- Large Egg (1, room temperature): The egg binds everything together. Room temperature eggs incorporate more evenly into the butter-sugar mixture. If you forgot to take yours out of the fridge, place it in a bowl of warm water for 5 minutes.
- Vanilla Extract (1 teaspoon): Vanilla rounds out the spices and makes the chocolate taste even better. Pure vanilla extract is worth the splurge here, but imitation works in a pinch.
- Canned Pumpkin Puree (¾ cup / 170g): Not pumpkin pie filling—make sure you grab pure pumpkin puree. I blot mine with paper towels to remove excess moisture, which prevents gummy cookies. Libby’s is my go-to brand because it’s consistently thick and not watery.
- Semi-Sweet Chocolate Chips (1½ cups / 255g): Semi-sweet is my favorite because it’s not too sweet and balances the spiced cookie base. Dark chocolate chips work wonderfully too. I prefer Ghirardelli or Guittard—they hold their shape better during baking and taste richer than budget brands.
That’s it. Ten ingredients, most of which you probably already have. No weird extracts, no specialty flours, no hunting down obscure spices. Just straightforward, honest ingredients that come together into something special.
Equipment Needed
You don’t need a fancy kitchen to make these cookies. Here’s what you’ll need:
- Large Mixing Bowls (2): One for dry ingredients, one for wet. I use glass or stainless steel bowls—plastic can retain grease and affect your dough.
- Whisk: For combining the dry ingredients. A fork works in a pinch, but a whisk is faster and more thorough.
- Hand Mixer or Stand Mixer: You can absolutely cream the butter and sugar by hand with a wooden spoon—I’ve done it many times. But a mixer makes it faster and ensures the butter and sugar are properly creamed. A hand mixer is perfectly fine; you don’t need a fancy stand mixer.
- Rubber Spatula: For scraping down the sides of the bowl and folding in the chocolate chips. A silicone spatula is heat-resistant and easy to clean.
- Baking Sheets (2): Standard half-sheet pans work great. If you only have one, let it cool completely between batches, or the dough will spread too much on a hot pan.
- Parchment Paper or Silicone Baking Mat: Parchment paper makes cleanup effortless and prevents sticking. Silicone mats are reusable and work just as well. I prefer parchment because I can slide the cookies off the pan immediately.
- Cookie Scoop (1½ tablespoon size): A scoop ensures uniform cookies that bake evenly. If you don’t have one, use two spoons—one to scoop, one to scrape the dough onto the pan. Aim for golf ball-sized portions.
- Cooling Rack: Cookies need airflow underneath to cool properly, or they’ll steam and get soggy. If you don’t have a rack, transfer them to a clean plate after a few minutes.
- Paper Towels: For blotting the pumpkin puree. This step is non-negotiable for the best texture.
My first batch of these cookies was made with a fork, a wooden spoon, and a warped baking sheet I bought at a thrift store. They turned out great. Don’t stress about equipment—use what you have.
Preparation Method
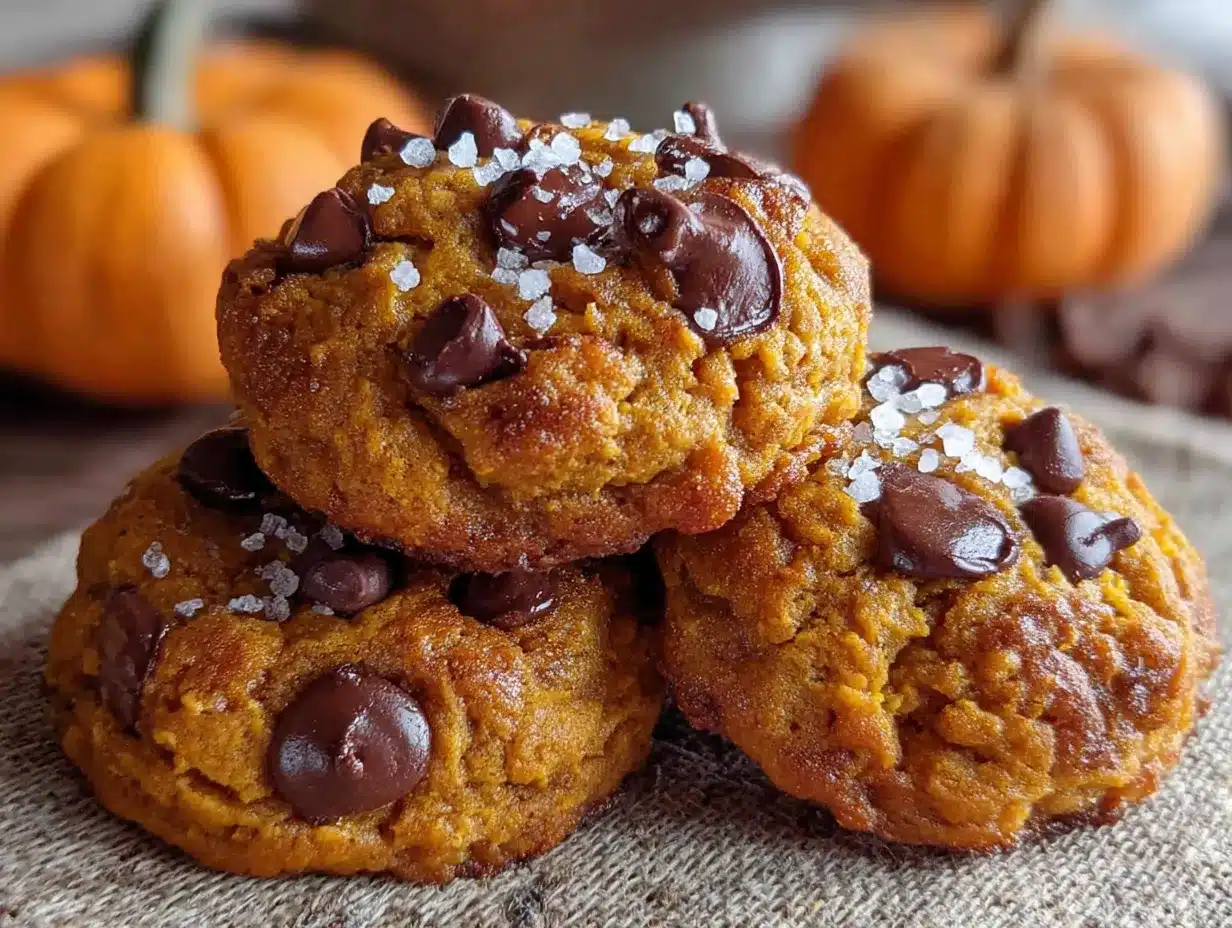
Alright, let’s make some cookies. This process takes about 10 minutes of active prep and 12 minutes of baking per batch. The whole thing comes together faster than you’d expect.
- Preheat your oven to 350°F (175°C). Position the racks in the upper and lower thirds of your oven if you’re baking two sheets at once. Line two baking sheets with parchment paper or silicone mats.
- Blot the pumpkin puree. This is the step most recipes skip, and it makes all the difference. Spread your ¾ cup of pumpkin puree onto a plate lined with a few layers of paper towels. Place another paper towel on top and press gently. Let it sit while you prepare the rest of the ingredients. You’ll see moisture soaking into the paper towels. This prevents your cookies from turning into gummy, cakey pucks.
- Whisk the dry ingredients. In a medium bowl, combine 2 cups all-purpose flour, 1 teaspoon baking soda, 1½ teaspoons cinnamon, ½ teaspoon nutmeg, ½ teaspoon ginger, and ½ teaspoon salt. Whisk until evenly combined. Set aside.
- Cream the butter and sugars. In a large bowl, beat ½ cup softened unsalted butter with ½ cup granulated sugar and ½ cup packed light brown sugar. Beat on medium speed for 2-3 minutes until light and fluffy. The mixture should look pale and feel smooth when you rub a bit between your fingers. If you’re doing this by hand, use a wooden spoon and some elbow grease—it takes about 4 minutes of vigorous stirring.
- Add the egg and vanilla. Crack in 1 large room-temperature egg and add 1 teaspoon vanilla extract. Beat until just combined. Don’t overmix here—you don’t want to incorporate too much air.
- Add the pumpkin. Scrape the blotted pumpkin puree off the paper towels and add it to the wet mixture. Beat on low speed until just combined. The mixture will look slightly curdled or separated—that’s normal. Pumpkin is mostly water, and water doesn’t like to mix with fat. It will come together when you add the flour.
- Combine wet and dry ingredients. Add the flour mixture to the wet ingredients in two additions, mixing on low speed after each until just combined. Stop as soon as you no longer see streaks of flour. Overmixing develops gluten and makes tough cookies.
- Fold in the chocolate chips. Add 1½ cups semi-sweet chocolate chips and fold them in with a rubber spatula. Make sure they’re evenly distributed. At this point, the dough will be soft and slightly sticky—that’s exactly what you want.
- Scoop the cookies. Using a 1½ tablespoon cookie scoop or two spoons, drop rounded balls of dough onto the prepared baking sheets, spacing them about 2 inches apart. Each ball should be about the size of a golf ball. Don’t flatten them—they’ll spread naturally in the oven.
- Bake. Bake for 10-12 minutes, rotating the pans halfway through (swap top and bottom racks and turn front to back). The cookies are done when the edges are set and lightly golden, but the centers still look slightly soft and underdone. They’ll continue to set as they cool on the pan.
- Cool. Let the cookies rest on the baking sheet for 5 minutes. This allows them to firm up enough to transfer without breaking. Then move them to a wire rack to cool completely. If you try to move them too soon, they’ll fall apart. Trust me, I’ve learned this the hard way.
That’s it. Eleven steps, and most of them are “mix this with that.” The hardest part is waiting for the first batch to cool enough to eat without burning your mouth.
Cooking Tips & Techniques
I’ve made these cookies enough times to learn what works and what doesn’t. Here are the tips I wish someone had told me before my first attempt.
Don’t skip blotting the pumpkin. I know it seems fussy, but this single step is the difference between a cookie that’s soft and chewy versus one that’s gummy and dense. Pumpkin puree is about 90% water. If you don’t remove some of that moisture, it creates steam in the oven, which makes the cookies puff up and then collapse into a sad, wet mess. I’ve forgotten to do this before, and the cookies were edible but not great. Blotting takes 30 seconds. Do it.
Use room temperature ingredients. Cold butter doesn’t cream properly with sugar. Cold egg seizes up the butter mixture. Room temperature ingredients emulsify better, creating a smoother dough that bakes more evenly. If you’re in a hurry, cut your butter into small cubes and let it sit for 15 minutes. For the egg, place it in a bowl of warm water for 5 minutes.
Measure flour correctly. This is the most common baking mistake I see. Scooping your measuring cup directly into the flour bag packs it down, and you can end up with 20-30% more flour than the recipe calls for. Instead, fluff the flour with a spoon, then spoon it into your measuring cup and level it off with a knife. Or better yet, use a kitchen scale. 240 grams is 2 cups.
Bake one sheet at a time if possible. Your oven works best when air can circulate freely around each pan. If you bake two sheets at once, the cookies on the bottom rack might spread more or take longer to set. If you need to bake two at once, rotate them halfway through and add 1-2 minutes to the baking time.
Underbake slightly. Pull the cookies out when the edges are set and golden but the centers still look soft and slightly puffy. They’ll continue to bake on the hot pan for those 5 minutes you let them rest. Overbaked pumpkin cookies turn dry and crumbly fast.
Let the pan cool between batches. If you scoop dough onto a hot baking sheet, the butter in the dough will start melting immediately, and your cookies will spread into flat, thin discs. Run the empty pan under cold water, dry it, and let it come back to room temperature before adding more dough.
Variations & Adaptations
One of the best things about this recipe is how flexible it is. Here are some ways I’ve adapted it over the years:
Gluten-Free Version: Substitute the all-purpose flour with a 1:1 gluten-free baking flour blend that contains xanthan gum. I’ve used Bob’s Red Mill 1:1 Baking Flour with great results. The cookies will be slightly more delicate, so let them cool on the pan for a full 7 minutes before transferring. Don’t overmix the dough—gluten-free batters get gummy if you work them too much.
Dairy-Free Version: Use vegan butter sticks (not margarine in a tub, which has too much water) and dairy-free chocolate chips. I like Earth Balance Buttery Sticks or Miyoko’s European Style Cultured Vegan Butter. The cookies will spread slightly more, so chill the dough for 15 minutes before baking.
Spice It Up: Add ¼ teaspoon ground cloves and ¼ teaspoon allspice for a more traditional pumpkin pie spice blend. Or add ½ teaspoon pumpkin pie spice in addition to the individual spices for extra warmth. My friend Sarah adds a pinch of cayenne pepper to hers, and I thought she was crazy until I tried one. It’s subtle but adds a nice little kick.
Mix-In Swaps: Not a chocolate chip fan? Try white chocolate chips and dried cranberries for a fall twist. Or chopped pecans and butterscotch chips. Or just leave them plain—the spiced cookie base is good enough to stand on its own. One time I threw in some leftover Halloween candy—chopped up Milky Way bars. It was a mess, but a delicious mess.
Pumpkin Seeds on Top: Before baking, press a few pepitas (pumpkin seeds) into the top of each dough ball. It adds a nice crunch and makes the cookies look prettier. My kids love this version and call them “crunchy pumpkin cookies.”
Make Them Bigger: Use a 3-tablespoon cookie scoop for bakery-style cookies. Bake for 13-15 minutes instead of 10-12. You’ll get about 18 large cookies instead of 30 regular-sized ones.
Serving & Storage Suggestions
These cookies are best served slightly warm, when the chocolate chips are still soft and melty. I know that’s not always practical, so here’s what I do: pop a cookie in the microwave for 10 seconds before serving. It brings back that fresh-from-the-oven texture without making it hot.
For serving, I like to arrange them on a rustic wooden board or a simple white platter. They pair beautifully with a cold glass of milk (obviously), a warm cup of chai tea, or even a scoop of vanilla ice cream for dessert. During the holidays, I’ll stack them on a cake stand and dust them with a little powdered sugar—it makes them look fancy with zero extra effort.
Storage Instructions: Store cooled cookies in an airtight container at room temperature for up to 5 days. Place a slice of bread in the container to keep them soft—the cookies will absorb moisture from the bread, and the bread will get stale. Replace the bread slice every other day. This trick has saved many batches of cookies in my house.
Freezer Instructions: These cookies freeze beautifully, both baked and unbaked. For baked cookies, let them cool completely, then layer them between sheets of parchment paper in a freezer-safe container. They’ll keep for up to 3 months. Thaw at room temperature for about 30 minutes, or microwave for 15 seconds.
For unbaked dough, scoop the dough balls onto a parchment-lined baking sheet and freeze until solid (about 1 hour). Transfer the frozen dough balls to a freezer bag. When you’re ready to bake, place them on a baking sheet and add 2-3 minutes to the baking time—no need to thaw. This is my favorite method because I can bake just 2 or 3 cookies at a time when a craving hits.
Flavor Development: Honestly, these cookies taste even better the next day. The spices have time to meld together, and the texture softens slightly. If you can resist eating them all on day one, you’ll be rewarded on day two.
Nutritional Information & Benefits
I’m not a nutritionist, but I’ve estimated the nutritional values for these cookies based on standard ingredient calculations. One cookie (based on 30 cookies per batch) contains approximately:
- Calories: 145
- Total Fat: 7g
- Saturated Fat: 4g
- Carbohydrates: 20g
- Sugar: 13g
- Fiber: 1g
- Protein: 2g
Are these health food? No. But they’re not as bad as you might think. The pumpkin adds vitamin A and fiber, which you wouldn’t get from a regular chocolate chip cookie. The dark chocolate chips contain antioxidants and less sugar than milk chocolate. And the spices—cinnamon, nutmeg, ginger—all have anti-inflammatory properties.
If you’re watching your sugar intake, you can reduce the granulated sugar to ⅓ cup and the brown sugar to ⅓ cup. The cookies will be slightly less sweet but still delicious. I’ve also made them with coconut sugar instead of brown sugar, and they turned out well—darker in color with a more complex, caramel-like sweetness.
These cookies are vegetarian, and with the substitutions I mentioned above, they can be made gluten-free and dairy-free. They contain eggs, wheat, and dairy in their standard form, so keep that in mind if you’re baking for someone with allergies.
Frequently Asked Questions
Can I use pumpkin pie filling instead of pumpkin puree?
No, please don’t. Pumpkin pie filling is pre-sweetened and spiced, which will throw off the sugar and spice ratios in this recipe. The cookies will come out overly sweet and the texture will be off. Stick with 100% pure pumpkin puree. If you accidentally bought pie filling, save it for making actual pumpkin pie.
Why are my cookies flat and spreading too much?
This usually happens for one of three reasons: your butter was too soft or melted, your baking sheet was still hot from the previous batch, or you didn’t use enough flour. Make sure your butter is softened but not greasy, let your baking sheets cool completely between batches, and measure your flour correctly (spoon and level, don’t scoop). If your kitchen is warm, you can chill the dough balls for 15-20 minutes before baking.
Can I make these cookies without a mixer?
Absolutely. I’ve made them by hand many times when my mixer was packed away during a kitchen renovation. Use a wooden spoon and some patience. Creaming the butter and sugar by hand takes about 4-5 minutes of vigorous stirring. Everything else comes together easily with a spoon or spatula. It’s actually a great arm workout.
How do I know when the cookies are done baking?
Look for set edges that are lightly golden brown, while the centers still look slightly soft and underdone. The cookies will continue to bake on the hot pan for the 5 minutes you let them rest. If you wait until the centers look fully set, they’ll be overbaked and dry. When in doubt, take them out a minute earlier rather than later.
Can I freeze the dough for later?
Yes, and I highly recommend it. Scoop the dough into balls, place them on a parchment-lined baking sheet, and freeze until solid (about 1 hour). Transfer the frozen dough balls to a freezer bag or container. When you’re ready to bake, place them on a baking sheet and bake straight from frozen, adding 2-3 minutes to the baking time. You can bake as many or as few as you want, which is dangerous knowledge to have.
Conclusion
These pumpkin chocolate chip cookies are the kind of recipe that becomes part of your fall rotation, year after year. They’re simple enough to make on a Tuesday afternoon when the kids are begging for something sweet, but special enough to bring to a Thanksgiving gathering or holiday cookie exchange. The spices smell like autumn, the chocolate makes everyone happy, and the texture is just right—soft, chewy, and satisfying without being heavy.
I love that this recipe came from a real person, not a blog or a cookbook. Rosa didn’t write it down for me. She just showed me. And now I’m showing you. That’s how good recipes travel—through messy kitchens and burnt fingertips and the occasional failed batch that you eat anyway because it’s still pretty good.
Try these cookies this weekend. Make them with your kids, or make them alone while listening to a podcast. Eat one warm from the oven, then save some for the next day—they really do get better. And when you make them, leave a comment below and tell me how they turned out. Did your family love them? Did you add your own twist? I’d love to hear about it. Happy baking, friends.
Pin This Recipe!
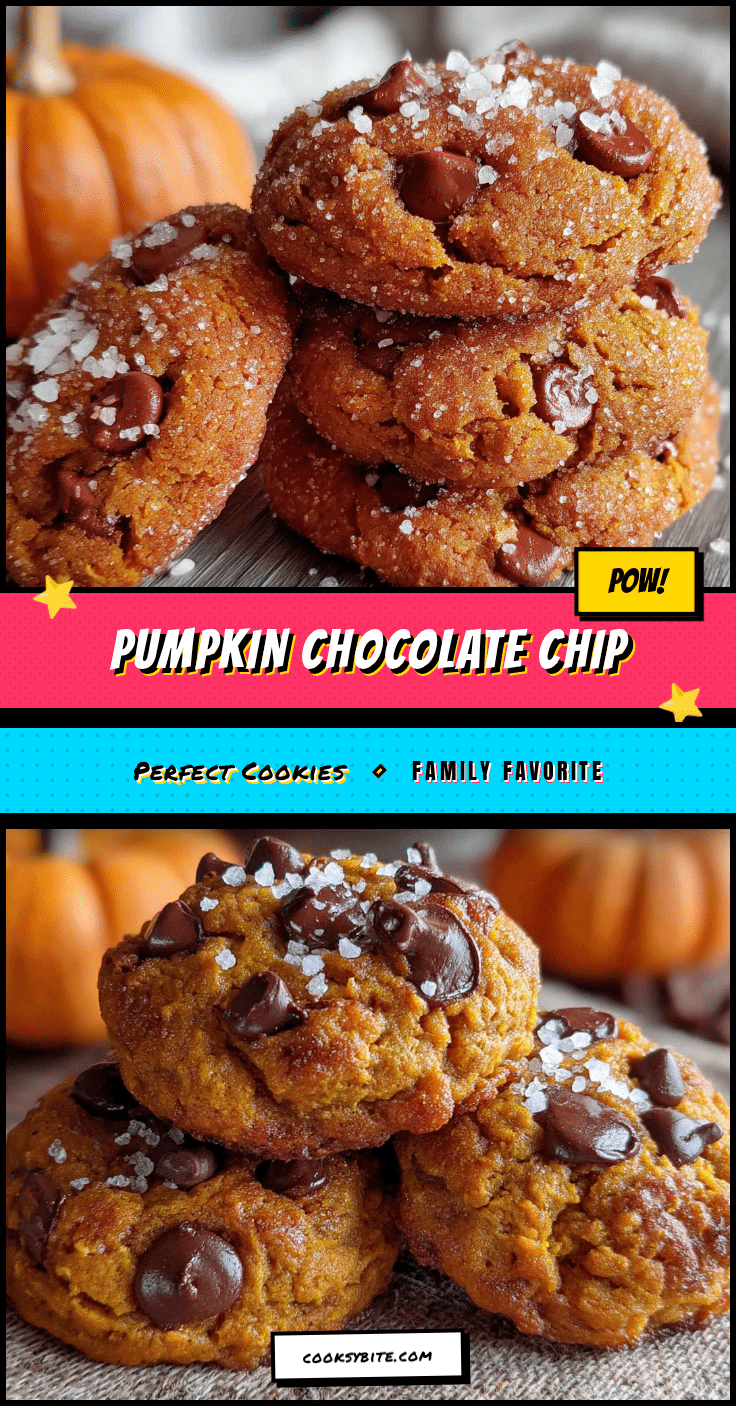
Best Homemade Pumpkin Chocolate Chip Cookies
Soft and tender pumpkin chocolate chip cookies with slightly crisp edges, packed with warm fall spices and melty chocolate. A forgiving recipe that’s quick, easy, and family-approved.
- Prep Time: 10 minutes
- Cook Time: 12 minutes
- Total Time: 22 minutes
- Yield: 30 cookies 1x
- Category: Dessert
- Cuisine: American
Ingredients
- 2 cups (240g) all-purpose flour
- 1 teaspoon baking soda
- 1½ teaspoons ground cinnamon
- ½ teaspoon ground nutmeg
- ½ teaspoon ground ginger
- ½ teaspoon salt
- ½ cup (113g) unsalted butter, softened
- ½ cup (100g) granulated sugar
- ½ cup (100g) packed light brown sugar
- 1 large egg, room temperature
- 1 teaspoon vanilla extract
- ¾ cup (170g) canned pumpkin puree (blotted)
- 1½ cups (255g) semi-sweet chocolate chips
Instructions
- Preheat oven to 350°F (175°C). Position racks in upper and lower thirds if baking two sheets. Line two baking sheets with parchment paper or silicone mats.
- Blot the pumpkin puree: Spread ¾ cup pumpkin puree onto a plate lined with paper towels. Place another paper towel on top and press gently. Let sit while preparing other ingredients.
- Whisk dry ingredients: In a medium bowl, combine flour, baking soda, cinnamon, nutmeg, ginger, and salt. Whisk until evenly combined. Set aside.
- Cream butter and sugars: In a large bowl, beat softened butter with granulated sugar and brown sugar on medium speed for 2-3 minutes until light and fluffy.
- Add egg and vanilla: Add egg and vanilla extract. Beat until just combined.
- Add pumpkin: Scrape blotted pumpkin puree into the wet mixture. Beat on low speed until just combined (mixture may look curdled).
- Combine wet and dry: Add flour mixture in two additions, mixing on low speed after each until just combined. Do not overmix.
- Fold in chocolate chips: Add chocolate chips and fold with a rubber spatula until evenly distributed. Dough will be soft and slightly sticky.
- Scoop cookies: Using a 1½ tablespoon cookie scoop or two spoons, drop rounded balls of dough onto prepared baking sheets, spacing 2 inches apart. Do not flatten.
- Bake: Bake for 10-12 minutes, rotating pans halfway through. Cookies are done when edges are set and lightly golden, centers still look slightly soft.
- Cool: Let cookies rest on baking sheet for 5 minutes, then transfer to a wire rack to cool completely.
Notes
Blotting the pumpkin puree is crucial for preventing gummy cookies. Use room temperature ingredients for best results. Measure flour correctly by spooning and leveling. Underbake slightly for soft cookies. Let pan cool between batches. Cookies taste even better the next day.
Nutrition
- Serving Size: 1 cookie
- Calories: 145
- Sugar: 13
- Sodium: 95
- Fat: 7
- Saturated Fat: 4
- Carbohydrates: 20
- Fiber: 1
- Protein: 2
Keywords: pumpkin chocolate chip cookies, fall cookies, pumpkin cookies, chocolate chip cookies, easy pumpkin recipe


