“These are dangerous.” That’s what my brother-in-law said, reaching for his third bar. We were standing in my kitchen after a particularly long Thanksgiving dinner. The turkey was picked clean, the pie was half-eaten, and somehow, this pan of maple bourbon pecan pie bars I’d thrown together on a whim was the only thing disappearing faster than the wine. He wasn’t wrong. They were dangerous. But the thing is, I didn’t even mean to make them that good. I was just trying to use up the last of a bottle of bourbon my husband had left on the counter and a bag of pecans that had been sitting in the pantry since last Christmas. Desperation and a sweet tooth—that’s the real origin story here.
I’ve always been a little obsessed with pecan pie. That sticky, sweet, nutty filling inside a flaky crust? It’s a classic for a reason. But let’s be honest, a whole pie can feel like a commitment. You have to slice it, serve it, and then you’re stuck with leftovers for days. These bars? They’re the same soul-soothing flavor but in a perfectly portable, shareable form. And the bourbon? It doesn’t just add alcohol; it adds a warmth, a slight smokiness that cuts through the sweetness and makes the maple syrup sing. It’s the kind of flavor you didn’t know you were missing until you taste it. These aren’t just another bar cookie; they’re the reason your friends will start texting you in late October asking if you’re “making those things again.”
Why You’ll Love This Recipe
I’ve tested this recipe more times than I care to admit. I’ve had soggy crusts, runny fillings, and bars that stuck to the pan like cement. But this version? It’s the one I bring to every potluck, every holiday party, and every quiet Tuesday when I just need a little something sweet. It’s the recipe that earned its spot in my permanent rotation.
- Quick & Easy: The crust comes together in minutes with just a food processor or a pastry cutter. No chilling, no rolling, no fuss. You’ll have the base ready before the oven even preheats.
- Simple Ingredients: You likely have most of these in your pantry right now. Butter, flour, sugar, eggs, and pecans. The maple syrup and bourbon are the only “special” items, and they’re worth the trip to the store.
- Perfect for the Holidays: These bars are a showstopper on any Thanksgiving or Christmas dessert table. They’re also fantastic for cookie swaps, cocktail parties, or as a hostess gift.
- Crowd-Pleaser: I’ve served these to bourbon lovers and bourbon skeptics alike. The alcohol bakes off, leaving behind just that warm, woodsy flavor. Everyone goes back for seconds.
- Unbelievably Delicious: The shortbread crust is buttery and crisp, the filling is rich and gooey without being cloying, and the pecans on top get perfectly toasted. It’s a texture and flavor combo that hits every single note.
This isn’t just another pecan pie bar recipe you find online. The secret is in the balance. Many recipes use corn syrup, which makes the filling one-note sweet. By using real maple syrup and a splash of bourbon, you create a depth of flavor that’s complex and sophisticated. It’s pecan pie, but better. It’s the kind of dessert that makes you close your eyes after the first bite. Honestly, it’s comfort food, reimagined—a little bit boozy, a little bit fancy, but still that familiar, soul-soothing satisfaction you crave on a cold fall evening.
What Ingredients You Will Need
This recipe uses simple, wholesome ingredients to deliver a bold, complex flavor. You’ll notice there’s no corn syrup here—we’re relying on the natural sweetness of maple syrup and brown sugar to do the heavy lifting. It makes all the difference.
For the Shortbread Crust
- 1 ½ cups all-purpose flour (spooned and leveled for accuracy)
- ½ cup unsalted butter, cold and cut into small cubes (I use Kerrygold for its rich flavor)
- ¼ cup granulated sugar
- ¼ teaspoon salt (a fine sea salt works best)
For the Maple Bourbon Filling
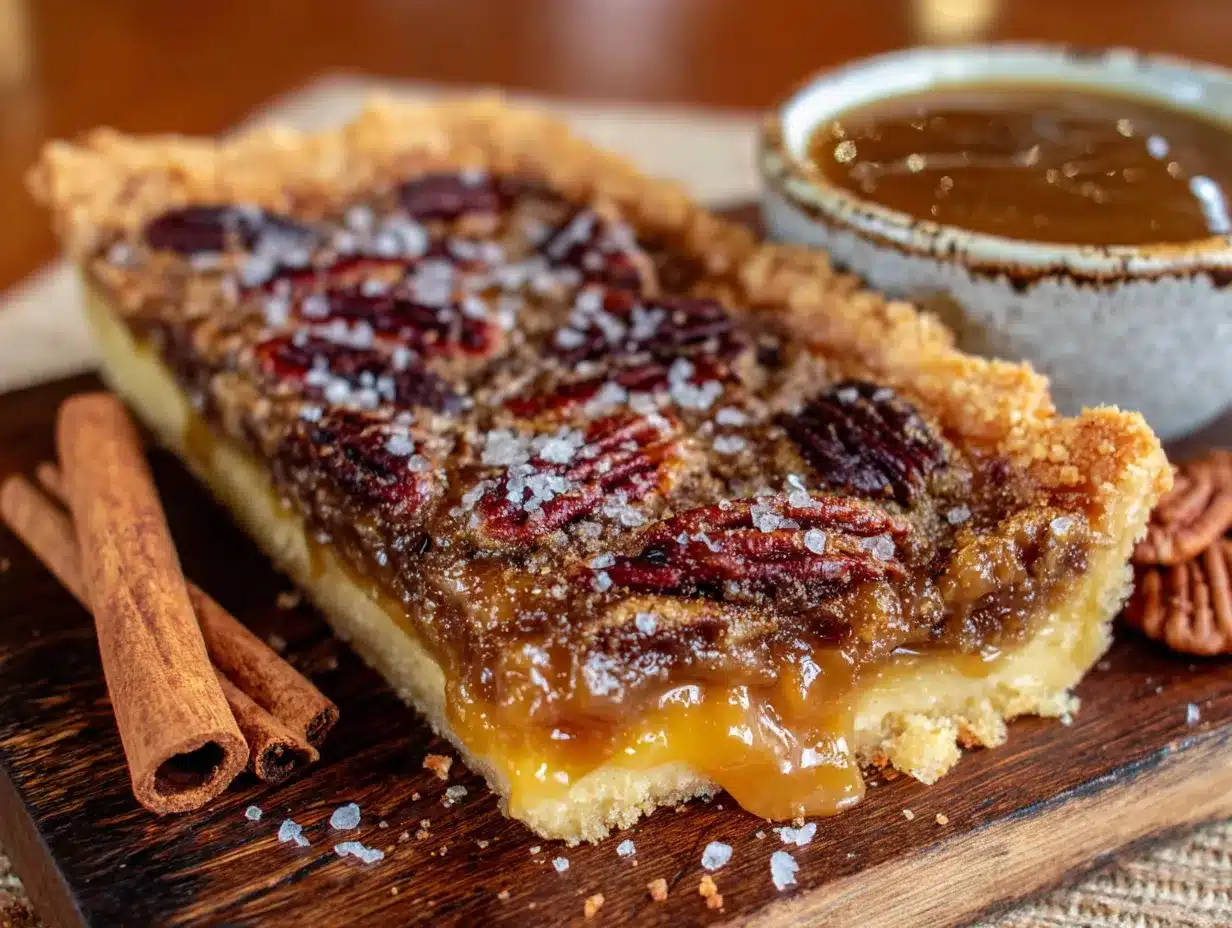
- ¾ cup pure maple syrup (not pancake syrup—use the real stuff. Grade A Amber is my go-to for its robust flavor)
- ½ cup packed light brown sugar
- 3 large eggs, at room temperature
- ¼ cup unsalted butter, melted and slightly cooled
- 2 tablespoons bourbon (I recommend a good quality one like Maker’s Mark or Bulleit—something you’d enjoy sipping)
- 1 teaspoon vanilla extract
- ¼ teaspoon salt
- 2 cups pecan halves (or roughly chopped, if you prefer smaller pieces)
Ingredient Tips & Substitutions: For the bourbon, don’t use the cheap stuff. The flavor concentrates as it bakes, so you want something smooth. If you don’t have bourbon, you can substitute it with a high-quality vanilla extract or even a tablespoon of dark rum. For a non-alcoholic version, simply replace the bourbon with an additional tablespoon of maple syrup and a teaspoon of vanilla. If you’re gluten-free, you can use a 1:1 gluten-free baking flour blend (like Bob’s Red Mill) for the crust. Just make sure it contains xanthan gum for structure. I’ve also made this with a mix of pecans and walnuts when I was running low on pecans, and it was fantastic.
Equipment Needed
You don’t need a fancy bakery setup for these bars. Here’s what you’ll need:
- A 9×13-inch baking pan (metal is best for even browning; glass works too, but you may need to bake a few minutes longer)
- Parchment paper (this is non-negotiable for easy removal—get the pre-cut sheets if you want to save time)
- A food processor (for the crust; a pastry cutter or even your fingers work if you don’t have one)
- A large mixing bowl and a whisk
- A rubber spatula
- A sharp knife for clean cuts (I learned the hard way that a dull knife will just smash the filling)
Budget-Friendly Tips: If you don’t own a food processor, don’t worry. You can make the crust by hand: cut the cold butter into the flour mixture using a pastry blender or two forks until it looks like coarse meal. It takes a little more elbow grease, but the result is the same. Also, a standard 9×13 pan is a kitchen workhorse. If you don’t have one, you can use a 9-inch square pan and adjust the baking time slightly, though the bars will be thicker.
Preparation Method
Alright, let’s get to the good part. Follow these steps, and you’ll have a pan of golden, gooey bars that’ll make you the hero of any gathering.
- Preheat and Prep the Pan (5 minutes): Preheat your oven to 350°F (175°C). Line your 9×13-inch baking pan with a long sheet of parchment paper, leaving a 2-inch overhang on the two long sides. This is your “sling” for lifting the bars out later. Lightly grease the parchment with butter or non-stick spray.
- Make the Shortbread Crust (10 minutes): In a food processor, combine the flour, sugar, and salt. Pulse a few times to mix. Add the cold, cubed butter and pulse until the mixture resembles coarse sand with a few pea-sized butter lumps remaining. Don’t over-process—those little butter pieces create a flaky texture. Dump the mixture into your prepared pan and press it firmly and evenly into the bottom. I use the bottom of a measuring cup to get it really flat. Bake for 18-20 minutes, until the edges are just starting to turn light golden brown. The center might look a little pale—that’s perfect.
- Prepare the Filling (5 minutes): While the crust is baking, make the filling. In a large bowl, whisk together the maple syrup, brown sugar, eggs, melted butter, bourbon, vanilla, and salt until smooth and well combined. Don’t over-whisk—you don’t want to incorporate too much air. Just make sure everything is one homogenous, beautiful mixture.
- Assemble the Bars (5 minutes): Once the crust is out of the oven, sprinkle the pecan halves evenly over the hot crust. Then, carefully pour the filling over the pecans. The pecans will float to the top—that’s exactly what you want. Give the pan a gentle tap on the counter to release any air bubbles.
- Bake to Perfection (25-30 minutes): Return the pan to the oven and bake for 25-30 minutes. The bars are done when the edges are set and the center is slightly jiggly—like a firm Jell-O. If you insert a toothpick near the center, it should come out with a little bit of gooey filling, not raw batter. A good sign is when the top is a deep, glossy golden brown. Warning: Do not over-bake! The filling will continue to set as it cools, and an over-baked bar will be dry and crumbly.
- Cool Completely (2 hours—don’t rush this!): Place the pan on a wire rack and let it cool completely at room temperature. This is the hardest part, I know. But if you cut into them while they’re warm, the filling will run out like a river. For the cleanest slices, once cool, transfer the pan to the refrigerator for another 30 minutes to firm up completely.
- Slice and Serve (5 minutes): Using the parchment overhang, lift the entire block of bars out of the pan and onto a cutting board. Use a sharp, long knife to cut into squares. For clean cuts, wipe the knife clean between each slice. I usually cut them into 24 small bars, but you can make them bigger or smaller depending on your crowd.
Cooking Tips & Techniques
I’ve made this recipe more times than I can count, and I’ve made every mistake in the book so you don’t have to.
The Cold Butter Secret: The key to a perfect shortbread crust is cold butter. If the butter warms up before it hits the oven, the crust will spread and become tough. If you’re working in a warm kitchen, pop the flour mixture in the fridge for 10 minutes before adding the butter.
The “Slightly Jiggly” Test: I know it’s scary to pull a pan out of the oven when the center is still wobbly. But trust me—this is the secret to a gooey, not dry, filling. The residual heat will finish the cooking process as it cools. I once left the bars in for an extra 5 minutes because I was nervous, and they were still good, but they lost that signature sticky texture. Learn from my mistake!
Multitasking is Your Friend: While the crust is baking, you can prep the filling. This saves time and keeps your workflow smooth. Just don’t forget the crust in the oven—set a timer!
Perfect Slices, Every Time: For the prettiest presentation, use a knife with a long, straight blade. A serrated knife will tear the top. And please, for the love of all things sweet, wipe the blade clean between each cut. It takes an extra 10 seconds and makes your bars look bakery-worthy.
Variations & Adaptations
This recipe is a fantastic base for experimentation. Here are a few of my favorite twists:
- Chocolate Maple Bourbon Bars: Sprinkle ½ cup of dark chocolate chips (I like Ghirardelli 60% cacao) over the hot crust before adding the pecans. The melted chocolate creates a fudge-like layer that’s incredible with the bourbon.
- Spiced Pecan Pie Bars: Add ½ teaspoon of cinnamon, ¼ teaspoon of nutmeg, and a pinch of cloves to the filling for a warm, chai-like flavor. This is my go-to version for fall gatherings.
- Gluten-Free Version: As mentioned, use a 1:1 gluten-free flour blend. I’ve also had success using almond flour for the crust, but the texture is more crumbly and delicate. It’s delicious, but not as sturdy for transporting.
- Bourbon-Free Version: For the kids or non-drinkers, replace the bourbon with 2 tablespoons of apple cider or cold coffee. The coffee actually enhances the maple flavor beautifully.
- Nut-Free Adaptation: You can replace the pecans with toasted pumpkin seeds (pepitas) or sunflower seeds. The texture will be different, but the flavor is still fantastic and safe for school events.
Serving & Storage Suggestions
These bars are incredibly versatile. Here’s how to make the most of them:
Serving: I love serving these at room temperature or slightly chilled. If you want to get fancy, warm a bar for 10 seconds in the microwave and serve it with a scoop of vanilla bean ice cream and a drizzle of caramel sauce. It’s pure heaven. They’re also amazing on a dessert board alongside a slice of red wine chocolate cake for a truly indulgent spread.
Storage: Store the bars in an airtight container at room temperature for up to 3 days. For longer storage, place them in the refrigerator for up to a week. The flavors actually meld together and get even better after a day or two. I promise—they’re even better the next morning with your coffee.
Freezing: These freeze like a dream! Once the bars are completely cool, cut them into squares and place them on a baking sheet lined with parchment paper. Freeze for 1-2 hours until solid, then transfer the frozen squares to a freezer-safe bag or container. They’ll keep for up to 3 months. To serve, thaw them in the refrigerator overnight or at room temperature for about 30 minutes. You can also reheat them in a 300°F oven for 5-7 minutes to restore that fresh-baked texture.
Reheating: The microwave works in a pinch (10-15 seconds), but for the best texture, reheat them in a low oven. This keeps the crust crisp and the filling gooey.
Nutritional Information & Benefits
Let’s be real—these are a treat, not a health food. But there are a few silver linings in this delicious dessert!
- Estimated per bar (based on 24 servings): Calories: 220, Fat: 14g, Saturated Fat: 5g, Carbohydrates: 22g, Sugar: 15g, Protein: 3g, Sodium: 90mg.
- Pecans: These little guys are packed with healthy monounsaturated fats, fiber, and antioxidants. They’re also a good source of magnesium, which is great for muscle function and sleep.
- Maple Syrup: Unlike refined sugar, real maple syrup contains trace amounts of minerals like zinc and manganese. Plus, it has a lower glycemic index than regular sugar, meaning it won’t spike your blood sugar as dramatically.
- Dietary Considerations: This recipe is naturally vegetarian. For a dairy-free version, use a high-quality vegan butter in the crust (I like Miyoko’s) and in the filling.
- Allergens: This recipe contains wheat (gluten), dairy, eggs, and tree nuts (pecans). Please be mindful of your guests’ allergies.
I always say, life is about balance. Enjoying a rich, buttery bar like this is part of a happy, well-lived life. Pair it with a brisk walk or a green salad at dinner, and you’re golden!
Conclusion
These Maple Bourbon Pecan Pie Bars are more than just a dessert—they’re a moment. They’re the smell of your kitchen on a chilly November afternoon. They’re the satisfied sighs around the table after the big holiday meal. They’re the little squares of happiness you sneak from the fridge at midnight with a glass of milk. They’re everything I love about fall baking, packed into one simple, no-fuss pan.
I truly hope you give this recipe a try. Don’t be afraid to make it your own—add more bourbon if you’re feeling bold, or swap in your favorite nuts. The best recipes are the ones you adapt. And when you make them, I’d love to hear about it. Drop a comment below and tell me how they turned out! Did you add chocolate? Did you serve them with ice cream? Did your brother-in-law eat three of them in one sitting? I want to know all the delicious details. Happy baking, friends!
Frequently Asked Questions
Can I use dark corn syrup instead of maple syrup?
You can, but the flavor profile will change significantly. Corn syrup is much sweeter and one-dimensional. The maple syrup is what gives these bars their complex, warm flavor. If you’re in a pinch, you can use half corn syrup and half maple syrup.
My filling turned out runny. What went wrong?
This usually happens for two reasons: either the bars weren’t baked long enough, or they were cut while still too warm. The filling needs to set completely at room temperature, and then a chill in the fridge helps it firm up. If you followed the baking time and cooling instructions, they should be perfect.
Can I make these bars ahead of time?
Absolutely! In fact, I prefer to make them a day ahead. The flavors meld together beautifully overnight. Just store them in an airtight container in the refrigerator and bring them to room temperature before serving.
How do I get the perfect clean cut on my bars?
Patience is key. Let the bars cool completely, then chill them in the fridge for 30 minutes. Use a long, sharp knife and wipe it clean with a damp paper towel between each cut. This prevents the filling from smearing.
Can I toast the pecans before adding them?
Yes, toasting the pecans is a great way to deepen their flavor. Spread them on a baking sheet and toast at 350°F for 5-7 minutes, just until they smell fragrant. Let them cool completely before using. This adds another layer of nutty goodness to the bars.
Pin This Recipe!
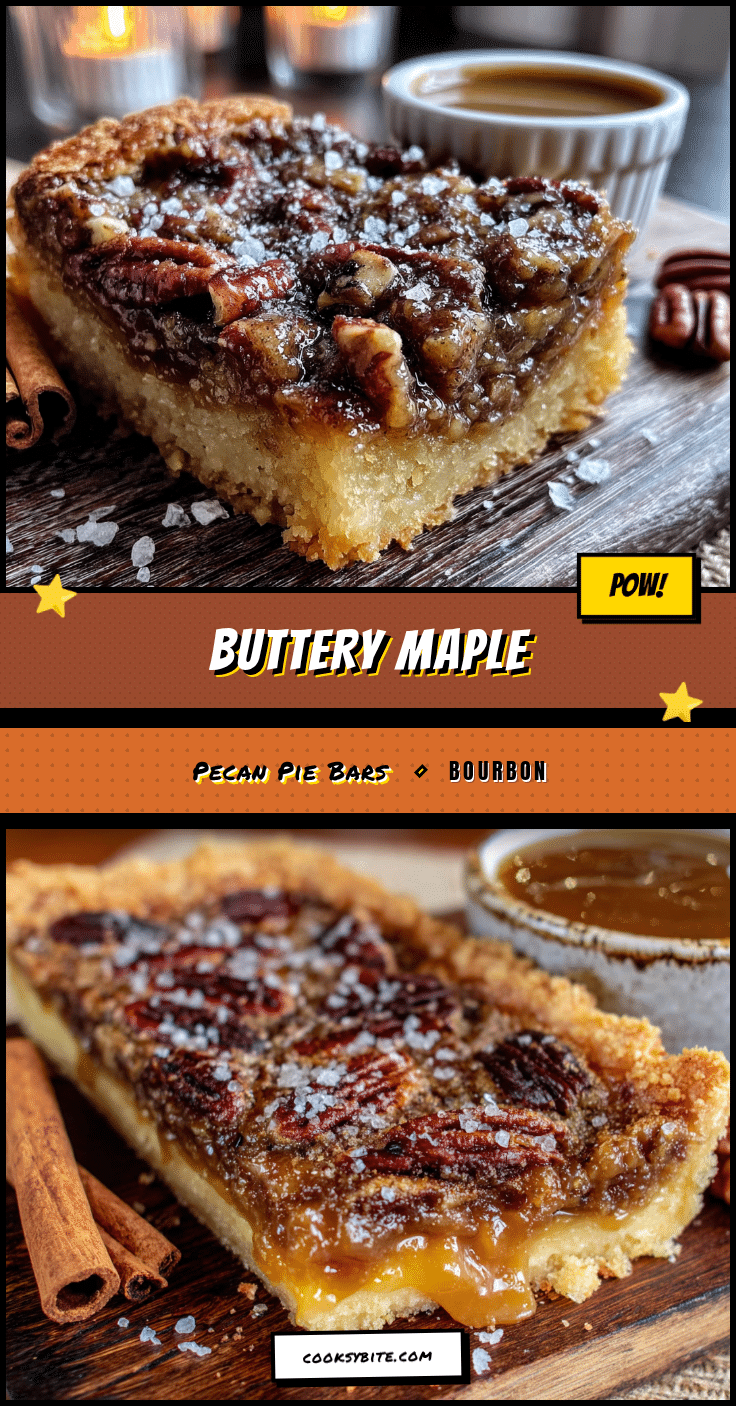
Best Maple Bourbon Pecan Pie Bars – Easy Homemade Recipe
These Maple Bourbon Pecan Pie Bars are the perfect portable, shareable dessert with a buttery shortbread crust, a rich and gooey maple bourbon filling, and toasted pecans. They’re a crowd-pleasing twist on a classic pecan pie, ideal for holidays or any occasion.
- Prep Time: 20 minutes
- Cook Time: 45 minutes
- Total Time: 2 hours 5 minutes (plus cooling)
- Yield: 24 bars 1x
- Category: Dessert
- Cuisine: American
Ingredients
- 1 ½ cups all-purpose flour (spooned and leveled)
- ½ cup unsalted butter, cold and cut into small cubes
- ¼ cup granulated sugar
- ¼ teaspoon salt (fine sea salt)
- ¾ cup pure maple syrup (Grade A Amber recommended)
- ½ cup packed light brown sugar
- 3 large eggs, at room temperature
- ¼ cup unsalted butter, melted and slightly cooled
- 2 tablespoons bourbon (e.g., Maker’s Mark or Bulleit)
- 1 teaspoon vanilla extract
- ¼ teaspoon salt
- 2 cups pecan halves (or roughly chopped)
Instructions
- Preheat oven to 350°F (175°C). Line a 9×13-inch baking pan with parchment paper, leaving a 2-inch overhang on the long sides. Lightly grease the parchment.
- Make the shortbread crust: In a food processor, combine flour, sugar, and salt. Pulse to mix. Add cold butter cubes and pulse until mixture resembles coarse sand with a few pea-sized butter lumps. Press firmly into the prepared pan. Bake for 18-20 minutes until edges are light golden brown.
- Prepare the filling: In a large bowl, whisk together maple syrup, brown sugar, eggs, melted butter, bourbon, vanilla, and salt until smooth.
- Assemble the bars: Sprinkle pecan halves evenly over the hot crust. Carefully pour the filling over the pecans. Tap the pan gently to release air bubbles.
- Bake for 25-30 minutes until edges are set and center is slightly jiggly (like firm Jell-O). Do not over-bake.
- Cool completely on a wire rack (about 2 hours). For clean slices, refrigerate for 30 minutes after cooling.
- Using the parchment overhang, lift the bars onto a cutting board. Cut into squares with a sharp knife, wiping the blade clean between cuts.
Notes
For the best flavor, use real maple syrup and a good quality bourbon. The bars must cool completely before cutting to prevent the filling from running. For gluten-free, use a 1:1 gluten-free flour blend. For a non-alcoholic version, replace bourbon with 1 tablespoon maple syrup and 1 teaspoon vanilla extract. Store in an airtight container at room temperature for up to 3 days, or refrigerate for up to a week. Freeze for up to 3 months.
Nutrition
- Serving Size: 1 bar
- Calories: 220
- Sugar: 15
- Sodium: 90
- Fat: 14
- Saturated Fat: 5
- Carbohydrates: 22
- Fiber: 1
- Protein: 3
Keywords: maple bourbon pecan pie bars, pecan pie bars, maple bourbon dessert, holiday bars, easy pecan bars, Thanksgiving dessert, Christmas dessert


