I was standing in the middle of a grocery store aisle last October when it hit me—that specific, warm smell of cinnamon and brown sugar wafting from somewhere near the bakery section. And suddenly I was eight years old at my Aunt Carol’s kitchen table, watching her slice a Granny Smith apple so thin you could almost see through it. She always let me lick the caramel off the spoon, and I remember thinking, this is what fall feels like. Aunt Carol passed a few years back, and honestly, I haven’t had a bite of her apple cheesecake since. But that smell in the grocery store? It woke something up in me. I needed to make that dessert again—but I wanted it easier, no-bake, and worthy of a dinner party table.
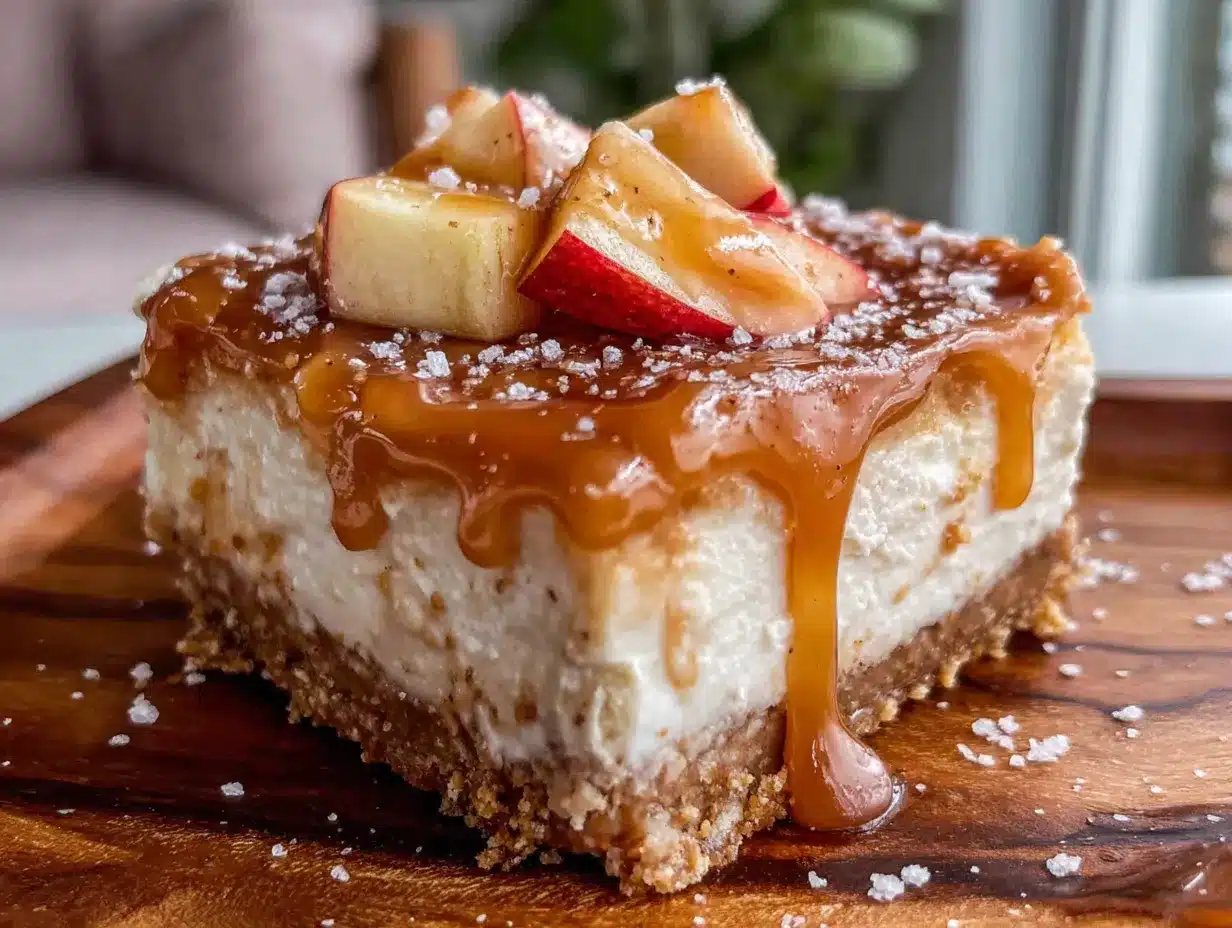
So I went home and started testing. And testing. And maybe burned a few batches of caramel along the way (you know how it is). But eventually, I landed on these Best No-Bake Caramel Apple Cheesecake Bars. They’re everything I remembered—creamy, tart, sweet, and that little crunch from the crust—but without turning on the oven. Perfect for when you’re hosting and want to actually spend time with your guests instead of hovering over a hot stove.
Maybe you’ve been there too—standing in your kitchen, staring at a pile of apples, wondering how to make something impressive without the stress. These bars are the answer. Let me show you how they came together.
Why You’ll Love This Recipe
Let me tell you—these bars have saved me more times than I can count. Whether it’s a last-minute potluck or a fancy Friendsgiving, they always steal the show. Here’s why they’ll become your go-to dessert:
- No Oven Needed: That’s right—zero baking. Perfect for hot fall days or when your oven is already full of roasted turkey and stuffing.
- Simple Ingredients: Cream cheese, caramel sauce, apples, and a buttery graham cracker crust. You probably have most of this in your pantry right now.
- Perfect for Hosting: These bars look like you spent hours in the kitchen, but they come together in about 30 minutes of active work. Your guests will be impressed, and you’ll actually get to enjoy the party.
- Crowd-Pleaser: I’ve served these at three different gatherings now, and every single person asked for the recipe. Kids love the sweetness, adults love the sophisticated flavor.
- Unbelievably Delicious: The combination of tangy cream cheese, sweet caramel, and tart apples is next-level comfort food. It’s the kind of dessert that makes you close your eyes after the first bite.
What makes this version different from all the others? I spent weeks perfecting the ratio of filling to crust, and I discovered that a quick sauté of the apples with butter and brown sugar before layering them in makes all the difference. No watery, sad apples here—just perfectly tender, caramel-coated slices that hold their shape. Plus, I use a trick with the cream cheese mixture that keeps it silky smooth without any lumps. Trust me, this isn’t just another no-bake cheesecake. It’s the one you’ll make on repeat.
What Ingredients You Will Need
This recipe uses simple, wholesome ingredients to deliver bold flavor and satisfying texture without the fuss. Most of these are pantry staples, so you probably won’t need a special trip to the store.
For the Crust
- 2 cups graham cracker crumbs (about 14-16 full sheets, crushed finely)
- 1/2 cup unsalted butter, melted (I use Kerrygold for that rich flavor)
- 1/4 cup granulated sugar
- 1/4 teaspoon salt (balances the sweetness)
For the Cheesecake Filling
- 16 oz cream cheese, softened to room temperature (full-fat works best for texture)
- 1/2 cup powdered sugar
- 1 teaspoon vanilla extract
- 1 cup heavy cream, cold (or use whipped topping if you’re short on time)
For the Caramel Apple Topping
- 3 medium Granny Smith apples, peeled, cored, and thinly sliced (about 1/8-inch thick)
- 2 tablespoons unsalted butter
- 1/4 cup brown sugar, packed
- 1 teaspoon cinnamon
- 1/4 teaspoon nutmeg (freshly grated if you have it)
- 1/2 cup store-bought caramel sauce (I prefer Al Dente Caramel or homemade if you’re ambitious)
- 1/4 cup chopped pecans, optional (adds a lovely crunch)
Ingredient Tips & Substitutions: If you can’t find graham crackers, use digestive biscuits or vanilla wafers instead. For a gluten-free version, swap in gluten-free graham crackers or crushed almonds. The cream cheese must be room temperature—cold cream cheese will give you a lumpy filling, and nobody wants that. If you’re dairy-free, use plant-based cream cheese and coconut cream in place of heavy cream. And hey, if you don’t have Granny Smiths, Honeycrisp or Fuji apples work beautifully too—just note they’re a little sweeter.
Equipment Needed
You don’t need fancy gadgets to make these bars, which is part of why I love them. Here’s what you’ll need:
- 9×9-inch baking pan (or an 8×8—just adjust the crust amount slightly)
- Parchment paper (for easy lifting—trust me, this is non-negotiable)
- Mixing bowls (one medium, one large)
- Electric hand mixer or stand mixer (a whisk and some elbow grease works too, but your arm will thank you for the mixer)
- Spatula (for smoothing the filling)
- Skillet or frying pan (for sautéing the apples)
- Sharp knife and cutting board
- Measuring cups and spoons
No springform pan needed here—just a regular baking dish lined with parchment. If you don’t have a mixer, you can whip the cream by hand with a whisk, but honestly, I’ve done it and it takes about 10 minutes of steady work. A hand mixer saves time and sanity.
Preparation Method
Ready to make these beauties? Let’s do it step by step. I’ll include all the little tricks I’ve learned along the way.
- Prep the Pan: Line your 9×9-inch baking pan with parchment paper, leaving a 2-inch overhang on two sides. This makes lifting the bars out later a breeze. Lightly grease the parchment with non-stick spray so nothing sticks.
- Make the Crust: In a medium bowl, combine the graham cracker crumbs, melted butter, sugar, and salt. Stir with a fork until every crumb is coated—it should look like wet sand. Press the mixture firmly into the bottom of the prepared pan. Use the bottom of a measuring cup to really pack it down. Pop it in the fridge while you make the filling.
- Whip the Cream Cheese Filling: In a large bowl, beat the softened cream cheese with an electric mixer on medium speed until smooth and fluffy—about 2 minutes. Add the powdered sugar and vanilla, and beat until combined. Scrape down the sides of the bowl.
- Whip the Cream: In a separate bowl (or the same bowl if you’re washing it), whip the cold heavy cream until stiff peaks form. This takes about 3-4 minutes with a mixer. Be careful not to over-whip or you’ll end up with butter. Fold the whipped cream into the cream cheese mixture gently with a spatula. Fold until just combined—no streaks of white left.
- Assemble the First Layer: Spread the cream cheese mixture evenly over the chilled crust. Smooth the top with your spatula. Place the pan back in the fridge while you cook the apples.
- Sauté the Apples: In a skillet over medium heat, melt the 2 tablespoons of butter. Add the sliced apples, brown sugar, cinnamon, and nutmeg. Stir to coat. Cook for 5-7 minutes, stirring occasionally, until the apples are tender but still hold their shape. You want them soft enough to bite but not mushy. Remove from heat and let them cool for 5 minutes.
- Layer the Apples: Arrange the sautéed apple slices evenly over the cream cheese layer. Drizzle about 1/4 cup of the caramel sauce over the apples. If you’re using pecans, sprinkle them on top now.
- Chill and Set: Cover the pan with plastic wrap and refrigerate for at least 6 hours, but overnight is best. This is crucial—the bars need time to firm up so you can slice them cleanly. I know it’s hard to wait, but trust me.
- Slice and Serve: Once set, lift the bars out of the pan using the parchment overhang. Place on a cutting board and slice into 9 squares (or 12 if you want smaller portions). Drizzle with remaining caramel sauce just before serving. A sprinkle of sea salt on top is heavenly if you’re feeling fancy.
Cooking Tips & Techniques
I’ve made these bars probably a dozen times now, and I’ve learned a few things the hard way. Let me save you the trouble.
Don’t Skip the Chilling Time: I know—6 hours feels like forever. But I once tried to rush it and cut into the bars after only 3 hours. Total disaster. The filling was still soft, the crust crumbled, and I had a delicious but ugly mess. Give it the full overnight chill, and you’ll get clean, beautiful slices.
Room Temperature Cream Cheese Is Key: Cold cream cheese doesn’t blend well and leaves lumps. Leave it on the counter for about 30 minutes before you start. If you forget, microwave it in 10-second bursts until it’s soft but not warm.
Don’t Overcook the Apples: You want them tender but with a little bite. Overcooked apples turn into applesauce, and while that’s tasty, it won’t give you the nice layered look. Cook them just until they start to soften and the caramel sauce thickens slightly.
Use a Sharp Knife for Slicing: Run your knife under hot water, wipe it dry, then slice. The heat helps cut through the cheesecake cleanly. Wipe the blade between each cut for the prettiest bars.
Timing Strategy for Hosting: Make these the day before your party. They actually taste better after a full night in the fridge—the flavors meld together beautifully. Then all you have to do on party day is slice, drizzle, and serve. No last-minute stress.
Variations & Adaptations
One of the best things about this recipe is how easy it is to tweak. Here are a few of my favorite variations:
- Gluten-Free Version: Swap the graham crackers for gluten-free grahams or crushed almonds. The crust will be a little nuttier but just as delicious.
- Vegan Option: Use vegan cream cheese (like Kite Hill), coconut cream instead of heavy cream, and a plant-based butter for the crust. The apples and caramel are naturally vegan if you check the label on the caramel sauce.
- Caramel Apple Pie Bars: Add a layer of apple pie filling (homemade or canned) between the cream cheese and the sautéed apples. It adds extra fruitiness and a pie-like texture.
- Spiced Up Version: Add 1/2 teaspoon of ginger and a pinch of cloves to the apple mixture for a warmer, more complex flavor. Perfect for holiday gatherings.
- No-Caramel Option: If you’re not a caramel fan (are you okay?), drizzle with honey or maple syrup instead. Or skip the drizzle entirely and dust with cinnamon sugar.
I once tried a version with pear instead of apple, and honestly? It was amazing. Pears are softer, so cook them for a minute less, and use a little extra cinnamon. My neighbor Sarah still asks for that version every time she comes over.
Serving & Storage Suggestions
These bars are best served cold, straight from the fridge. The filling is firm but creamy, and the caramel gets a little sticky in the best way. For presentation, I like to drizzle extra caramel sauce on the plate, place a bar on top, and add a tiny sprinkle of sea salt and a few extra pecans. It looks like you spent all day on it.
What to Serve Alongside: A scoop of vanilla ice cream or a dollop of whipped cream takes these over the top. If you’re hosting a fall dinner, serve them after a hearty meal like slow cooker pot roast or creamy pumpkin soup. They also pair beautifully with a cup of hot apple cider or a cinnamon latte.
Storage: Keep leftover bars in an airtight container in the refrigerator for up to 5 days. The crust will soften slightly over time, but the flavor only gets better. To freeze, wrap individual bars in plastic wrap and then foil. They’ll keep for up to 3 months. Thaw in the fridge overnight before serving.
Reheating: Honestly, I prefer these cold. But if you want a warm dessert, microwave a single bar for about 15 seconds—just enough to take the chill off without melting the cheesecake.
Nutritional Information & Benefits
Here’s a rough estimate per bar (based on 9 servings):
- Calories: 420
- Fat: 28g
- Carbohydrates: 38g
- Protein: 6g
- Sugar: 26g
These bars are definitely a treat, but they do have some redeeming qualities. Apples are packed with fiber and vitamin C, and the cinnamon has anti-inflammatory properties. The cream cheese provides calcium and protein. Of course, this isn’t a health food—it’s a celebration dessert. But I feel good knowing there’s real fruit in there.
Dietary Considerations: This recipe contains gluten (from graham crackers), dairy (cream cheese, butter, cream), and nuts (pecans). For allergen-friendly versions, check the variations section above.
Conclusion
These Best No-Bake Caramel Apple Cheesecake Bars are everything I hoped they’d be—creamy, crunchy, sweet, and a little tart. They bring back that memory of Aunt Carol’s kitchen, but they also make new ones every time I serve them to friends. And honestly? That’s the best part. Food is about connection, and these bars are made for sharing.
I’d love to hear how yours turn out. Did you try a variation? Did your guests go crazy for them? Drop a comment below and let me know—I read every single one. And if you snap a photo, tag me on social media so I can see your beautiful creation. Happy hosting, friends.
Frequently Asked Questions
Can I make these bars without a mixer?
Absolutely. You can whip the cream by hand with a whisk—it’ll just take about 10 minutes of steady work. The cream cheese can be softened and mixed with a spatula if you’re patient. But a hand mixer makes life a lot easier.
How far in advance can I make these?
Up to 2 days ahead. They actually taste better after a full night in the fridge. Just keep them covered in the pan and add the final caramel drizzle right before serving.
Can I use low-fat cream cheese?
You can, but the filling won’t be as rich or firm. Full-fat cream cheese gives the best texture and flavor. If you’re watching calories, consider using a smaller serving size instead.
What if I don’t have a 9×9 pan?
An 8×8 pan works fine—the bars will just be a little thicker. You might need to increase the chilling time slightly. A 9×13 pan will give you thinner bars, so double the crust and filling if you go that route.
Can I use canned apple pie filling instead of fresh apples?
Yes, but the texture will be different. Canned filling is softer and sweeter. Drain it well before using, and skip the sautéing step—just layer it directly over the cream cheese. It’s a great shortcut when you’re short on time.
Pin This Recipe!
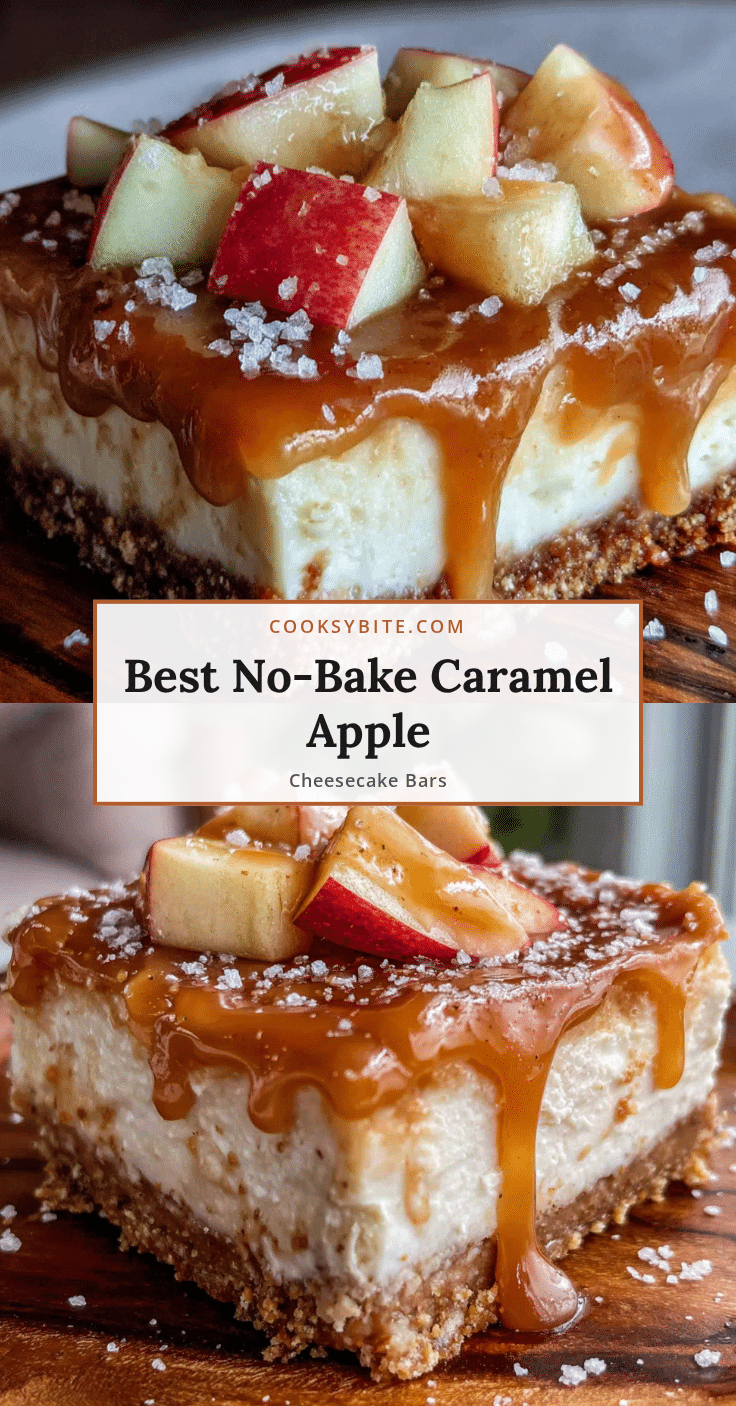
Best No-Bake Caramel Apple Cheesecake Bars Recipe
These no-bake caramel apple cheesecake bars feature a buttery graham cracker crust, a creamy cheesecake filling, and a sautéed apple topping with caramel sauce. Perfect for fall gatherings, they require no oven and come together in about 30 minutes of active work.
- Prep Time: 30 minutes
- Cook Time: 10 minutes
- Total Time: 6 hours 40 minutes (includes chilling)
- Yield: 9 servings 1x
- Category: Dessert
- Cuisine: American
Ingredients
- 2 cups graham cracker crumbs (about 14–16 full sheets, crushed finely)
- 1/2 cup unsalted butter, melted
- 1/4 cup granulated sugar
- 1/4 teaspoon salt
- 16 oz cream cheese, softened to room temperature
- 1/2 cup powdered sugar
- 1 teaspoon vanilla extract
- 1 cup heavy cream, cold
- 3 medium Granny Smith apples, peeled, cored, and thinly sliced (about 1/8-inch thick)
- 2 tablespoons unsalted butter
- 1/4 cup brown sugar, packed
- 1 teaspoon cinnamon
- 1/4 teaspoon nutmeg
- 1/2 cup store-bought caramel sauce
- 1/4 cup chopped pecans (optional)
Instructions
- Prep the Pan: Line your 9×9-inch baking pan with parchment paper, leaving a 2-inch overhang on two sides. Lightly grease the parchment with non-stick spray.
- Make the Crust: In a medium bowl, combine graham cracker crumbs, melted butter, sugar, and salt. Stir until every crumb is coated. Press the mixture firmly into the bottom of the prepared pan. Use the bottom of a measuring cup to pack it down. Refrigerate while making the filling.
- Whip the Cream Cheese Filling: In a large bowl, beat the softened cream cheese with an electric mixer on medium speed until smooth and fluffy, about 2 minutes. Add powdered sugar and vanilla, and beat until combined. Scrape down the sides of the bowl.
- Whip the Cream: In a separate bowl, whip the cold heavy cream until stiff peaks form, about 3-4 minutes. Fold the whipped cream into the cream cheese mixture gently with a spatula until just combined.
- Assemble the First Layer: Spread the cream cheese mixture evenly over the chilled crust. Smooth the top with a spatula. Refrigerate while cooking the apples.
- Sauté the Apples: In a skillet over medium heat, melt 2 tablespoons butter. Add sliced apples, brown sugar, cinnamon, and nutmeg. Stir to coat. Cook for 5-7 minutes, stirring occasionally, until apples are tender but still hold their shape. Remove from heat and let cool for 5 minutes.
- Layer the Apples: Arrange the sautéed apple slices evenly over the cream cheese layer. Drizzle about 1/4 cup of caramel sauce over the apples. Sprinkle pecans on top if using.
- Chill and Set: Cover the pan with plastic wrap and refrigerate for at least 6 hours, preferably overnight.
- Slice and Serve: Once set, lift the bars out of the pan using the parchment overhang. Place on a cutting board and slice into 9 squares. Drizzle with remaining caramel sauce just before serving.
Notes
Don’t skip the chilling time—at least 6 hours, preferably overnight. Room temperature cream cheese is key for a smooth filling. Don’t overcook the apples; they should be tender but still hold their shape. For clean slices, run a knife under hot water, wipe dry, then slice. Make these a day ahead for best flavor.
Nutrition
- Serving Size: 1 bar
- Calories: 420
- Sugar: 26
- Sodium: 320
- Fat: 28
- Saturated Fat: 16
- Carbohydrates: 38
- Fiber: 2
- Protein: 6
Keywords: no-bake cheesecake, caramel apple, fall dessert, cheesecake bars, apple dessert, no-bake dessert


