My neighbor, Carol, wasn’t trying to impress anyone that Tuesday afternoon. I’d stopped by to pick up a garden trowel she’d promised to lend me, and the smell hit me before I even made it past her screen door. It was warm and cozy, like fall had decided to move into her kitchen and set up camp. There she was, pulling a muffin tin out of the oven, and she just shrugged when I asked what she was making. “Oh, just using up a banana and some leftover pumpkin,” she said, like it was nothing. But I’d already spotted the tiny handprint smudges on her refrigerator door, and I knew right then—these muffins weren’t for her. They were for her little guy, who’d been hovering nearby with that hopeful, hungry look kids get when something good is about to happen.
Honestly, I stood there for a solid minute, watching her cool them on the counter while she told me about her day. She wasn’t measuring anything fancy or stressing over the batter. She just mixed, poured, and baked like it was the most ordinary thing in the world. But the way those muffins smelled—like pumpkin spice and banana sweetness all tangled up together—made me feel like I’d stumbled onto something special. I mean, have you ever walked into a kitchen where the person cooking doesn’t even realize they’re making magic? That was Carol. She handed me one, still warm, and I took a bite right there in her sunny kitchen. The texture was soft, not too dense, with just enough sweetness to make you smile without feeling like you’d eaten dessert for breakfast.
I asked her for the recipe, and she laughed. “There’s no real recipe,” she said. “I just throw stuff in a bowl until it feels right.” That’s when I knew I had to figure it out myself, because a muffin that good deserved to be shared. So I went home, grabbed a banana that was past its prime, a can of pumpkin puree, and started testing. After a few tries—and a few batches that were either too dry or too flat—I landed on this version. It’s small-batch, so you’re not stuck with a dozen muffins when you only need a few. It’s kid-approved, because Carol’s little guy gave it two sticky thumbs up. And it’s the kind of recipe you’ll keep coming back to, maybe on a quiet Tuesday afternoon when you’re not trying to impress anyone either.
Why You’ll Love This Recipe
Let’s be real for a second. Finding a muffin recipe that actually works for a busy weeknight with picky eaters can feel like hunting for a needle in a haystack. But these small-batch pumpkin banana muffins? They’re different. I’ve tested this recipe more times than I care to admit, and every single time, it delivers the same soft, tender crumb that kids and adults both go crazy for. Here’s why this one’s a keeper:
- Quick & Easy: From start to finish, you’re looking at about 30 minutes. That’s it. No complicated steps, no waiting around for dough to rest.
- Simple Ingredients: You probably have most of these in your pantry right now. Pumpkin puree, a ripe banana, flour, sugar, eggs—nothing fancy.
- Perfect for Small Families: This recipe makes just 6 muffins, which is ideal when you don’t want a mountain of leftovers staring at you from the counter.
- Crowd-Pleaser: My own kids have polished off an entire batch in one afternoon, and I’ve had neighbors text me asking for the recipe after their little ones tried them.
- Unbelievably Delicious: The combo of pumpkin and banana creates this naturally sweet, moist texture that feels like comfort food without any of the guilt.
What makes these muffins stand out from the dozens of other recipes out there? It’s the balance. I’ve tried versions that were too pumpkin-heavy and tasted like a spice bomb, or too banana-forward and turned gummy. This one hits that sweet spot where both flavors shine without overpowering each other. Plus, the small-batch size means you can whip them up on a whim, even on a school night when you’re short on time and patience.
These muffins aren’t just good—they’re the kind that make you close your eyes after the first bite, just for a second. They’re comfort food reimagined for real life: quicker, simpler, but with the same soul-soothing satisfaction. Whether you’re feeding a toddler who’s going through a “I only eat things that are orange” phase or you just want something warm to go with your afternoon coffee, this recipe delivers every single time.
What Ingredients You Will Need
This recipe uses simple, wholesome ingredients to create muffins that are soft, flavorful, and just sweet enough. Most of these are pantry staples, so you probably won’t need to make a special trip to the store. Here’s what you’ll need:
For the Muffins
- 1/2 cup pumpkin puree (not pumpkin pie filling—make sure it’s 100% pure pumpkin). I prefer Libby’s for its consistent texture, but store brands work fine too.
- 1 medium ripe banana (the spotty ones are best—they add natural sweetness and moisture). Mash it well with a fork until it’s almost liquid.
- 1 large egg, room temperature (this helps everything blend smoothly).
- 1/4 cup brown sugar, packed (light or dark both work; dark adds a deeper molasses flavor).
- 2 tablespoons melted butter (unsalted is best so you can control the salt). You can also use coconut oil or vegetable oil in a pinch.
- 1 teaspoon vanilla extract (pure vanilla extract adds the best flavor, but imitation works too).
- 3/4 cup all-purpose flour (spoon and level it—don’t scoop directly from the bag or you’ll end up with dense muffins).
- 1/2 teaspoon baking soda (make sure it’s fresh—test by dropping a pinch in vinegar; if it fizzes, you’re good).
- 1/4 teaspoon baking powder
- 1/4 teaspoon salt
- 1 teaspoon pumpkin pie spice (or a mix of 1/2 teaspoon cinnamon, 1/4 teaspoon nutmeg, 1/4 teaspoon ginger, and a pinch of cloves).
Optional Add-Ins
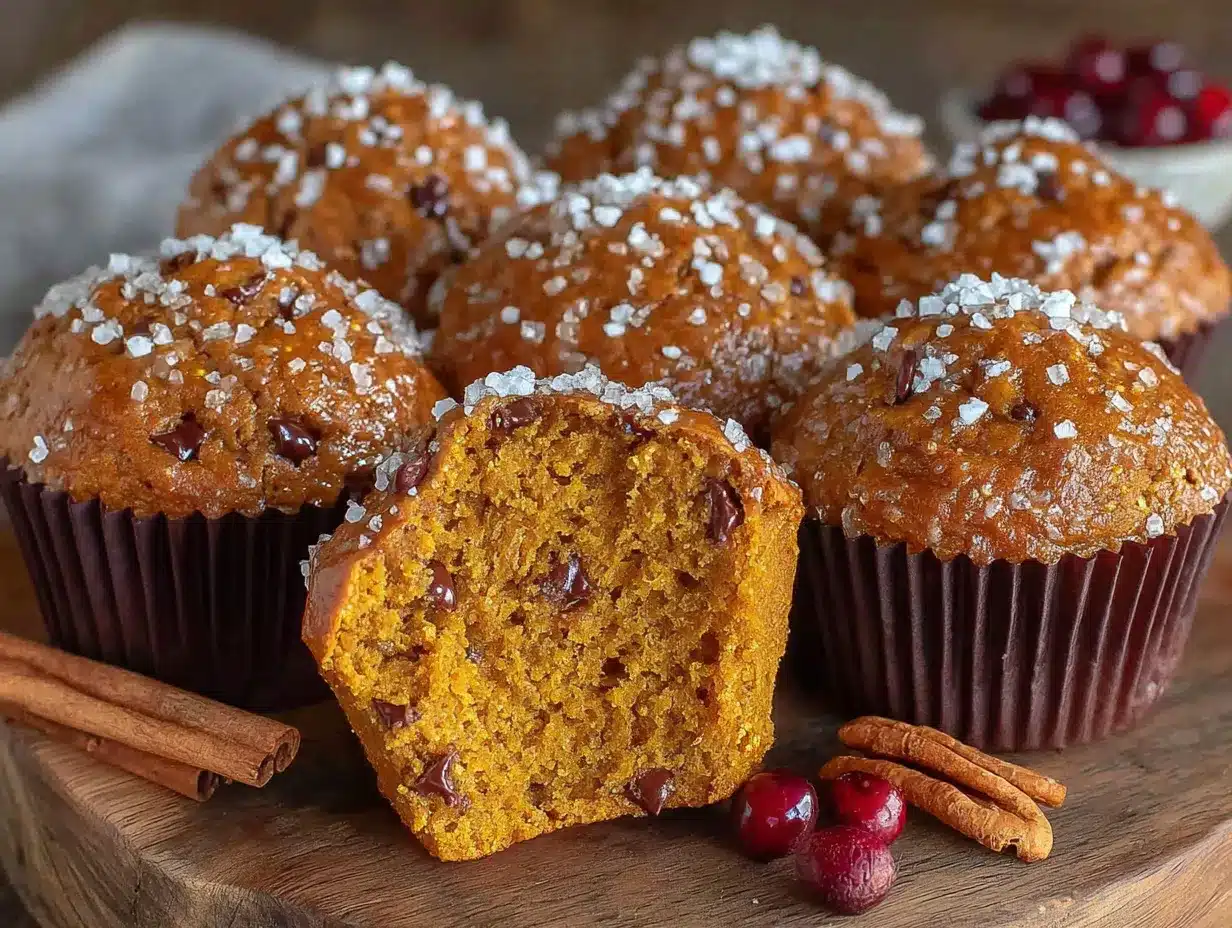
- 1/4 cup chocolate chips (semi-sweet or dark—my kids love these).
- 2 tablespoons chopped walnuts or pecans (skip if you’re serving toddlers who might not like the texture).
- 1 tablespoon ground flaxseed (adds a little fiber without changing the taste).
When it comes to ingredient selection, here’s a tip I learned the hard way: don’t use a banana that’s still green or even just yellow with no spots. It won’t mash properly and your muffins will turn out dry. You want that banana that’s been sitting on your counter for a few days, the one you were about to toss in the freezer for smoothies. That’s the sweet spot. And for the pumpkin puree, if you open a can and only use half, you can freeze the rest in an airtight container for up to three months. Just thaw it in the fridge overnight before using.
If you need to make substitutions, here are a few I’ve tested: Use whole wheat pastry flour instead of all-purpose for a slightly nuttier flavor, but add an extra tablespoon of milk if the batter seems too thick. For a dairy-free version, swap the butter with melted coconut oil and use a flax egg (1 tablespoon ground flaxseed mixed with 3 tablespoons water, let sit for 5 minutes). The texture will be a bit denser, but still delicious.
Equipment Needed
You don’t need a fancy kitchen to pull off these muffins. Here’s what you’ll need:
- A 6-cup muffin tin (this is the small-batch hero—I use a standard non-stick one from Wilshire, but any brand works).
- Paper muffin liners (or you can grease the tin well with butter or cooking spray).
- Two mixing bowls (one medium for wet ingredients, one small for dry).
- A whisk or fork for mixing.
- A rubber spatula (for scraping the bowl clean—trust me, you don’t want to waste any batter).
- A measuring cup and spoons (I prefer metal measuring spoons for accuracy).
- A cooling rack (if you don’t have one, you can use a clean kitchen towel laid flat on the counter).
If you don’t have a muffin tin, you can bake the batter in a small 8×4-inch loaf pan, but you’ll need to increase the baking time to about 30-35 minutes. Just keep an eye on it and test with a toothpick. I’ve also used silicone muffin cups directly on a baking sheet, and they work great—just place them on a sturdy tray first so they don’t tip over when you’re filling them.
One last thing: if you’re using a dark-colored muffin tin, reduce the oven temperature by 25°F to prevent the bottoms from burning. I learned that one the hard way after a batch of muffins came out looking like little hockey pucks on the bottom.
Preparation Method
Alright, let’s get baking. This whole process takes about 30 minutes from start to finish, and most of that is hands-off oven time. Here’s how to do it:
- Preheat your oven to 350°F (175°C). Position the rack in the middle. Line your 6-cup muffin tin with paper liners or grease it well. I like to do this first so the oven is ready when the batter is.
- Mash the banana. In a medium bowl, mash the ripe banana with a fork until it’s mostly smooth with just a few tiny lumps. You should have about 1/3 cup of mashed banana. Set it aside for a moment.
- Mix the wet ingredients. To the same bowl with the mashed banana, add the pumpkin puree, egg, brown sugar, melted butter, and vanilla extract. Whisk everything together until it’s smooth and well combined. It should look like a thick, orange-tinted batter. Don’t overmix—just until there are no streaks of egg or butter.
- Combine the dry ingredients. In a separate small bowl, whisk together the flour, baking soda, baking powder, salt, and pumpkin pie spice. This step is important because it distributes the leavening agents evenly so your muffins rise properly. If you skip this, you might end up with a muffin that’s flat on one side and puffy on the other.
- Fold the dry into the wet. Add the dry ingredients to the wet mixture. Use a rubber spatula to fold gently—just until you can’t see any more flour. A few streaks are okay. Overmixing at this stage will make your muffins tough, so be gentle. If you’re adding chocolate chips or nuts, fold them in now.
- Fill the muffin cups. Divide the batter evenly among the 6 muffin cups. Each cup should be about 3/4 full. I use a cookie scoop for this—it’s less messy and gives you equal portions. The batter will be thick, so don’t worry if it doesn’t look super liquidy.
- Bake. Place the muffin tin in the preheated oven and bake for 15-18 minutes. At the 15-minute mark, check them by inserting a toothpick into the center of one muffin. If it comes out clean or with just a few moist crumbs, they’re done. If it’s still wet, give them another 2-3 minutes.
- Cool. Let the muffins rest in the tin for 5 minutes. This helps them set so they don’t fall apart when you take them out. Then transfer them to a cooling rack to cool completely. If you’re impatient like me, you can eat one after about 10 minutes—just be careful, the banana pieces hold heat and can burn your tongue.
A few things to watch for: If your muffins are browning too quickly on top but still raw in the center, tent the tin loosely with aluminum foil for the last 5 minutes of baking. Also, if you’re using frozen pumpkin puree (thawed), make sure to drain off any excess liquid before using, or your muffins will turn out soggy.
Cooking Tips & Techniques
After making these muffins about a dozen times, I’ve picked up a few tricks that make a real difference. Here’s what I’ve learned:
Don’t overmix the batter. This is the number one mistake I see home cooks make. When you mix the dry ingredients into the wet, you’re activating the gluten in the flour. The more you mix, the more gluten develops, and the tougher your muffins get. Stir just until the flour disappears, even if there are a few lumps. They’ll bake out in the oven.
Use room temperature ingredients. Cold eggs and butter don’t blend as smoothly into the batter, which can lead to uneven texture. If you forgot to take the egg out of the fridge, place it in a bowl of warm water for 5 minutes. For the butter, you can melt it gently in the microwave, but let it cool for a minute before adding it to the egg so you don’t accidentally scramble it.
Check your baking soda freshness. Baking soda loses its potency over time, and old baking soda won’t give your muffins the lift they need. If your baking soda has been sitting in the pantry for more than six months, it’s time for a new box. A quick test: drop a teaspoon of baking soda into a small bowl of vinegar. If it fizzes vigorously, it’s still good. If not, toss it.
Let the batter rest. This is a tip I picked up from a pastry chef friend. After you mix the batter, let it sit for 5 minutes before filling the muffin cups. This allows the flour to fully hydrate and the leavening agents to start working, which results in a more tender crumb. It’s a small step that makes a noticeable difference.
Rotate the pan halfway through. Ovens can have hot spots, so rotating the muffin tin halfway through baking ensures even browning. I do this at the 8-minute mark, and it’s saved me from batches where one side was golden and the other was pale.
One more thing: I once forgot to add the sugar to a batch. Don’t ask me how—I was probably distracted by my kids arguing over a toy. The muffins came out dense and barely sweet. So double-check your ingredients before you pop them in the oven. It’s a simple mistake that’s easy to avoid if you just take a second to scan your bowl.
Variations & Adaptations
One of the best things about this recipe is how flexible it is. Here are some variations I’ve tried and loved:
Gluten-Free Version: Swap the all-purpose flour with a 1:1 gluten-free baking blend. I’ve used Bob’s Red Mill and King Arthur’s Measure for Measure, and both work well. Add an extra tablespoon of milk or water if the batter seems too thick, since gluten-free flours absorb more liquid.
Vegan Version: Replace the egg with a flax egg (1 tablespoon ground flaxseed mixed with 3 tablespoons water, let sit for 5 minutes) and use melted coconut oil instead of butter. The muffins will be a bit denser, but still moist and flavorful.
Lower Sugar Option: Reduce the brown sugar to 2 tablespoons and add an extra 1/4 teaspoon of cinnamon for sweetness without the sugar. The banana provides enough natural sweetness that you won’t miss it.
Seasonal Twist: In the fall, add 1/4 cup of canned apple butter along with the pumpkin for an extra layer of flavor. In the summer, swap the pumpkin puree for mashed strawberries (drained well) for a fruity version.
Flavor Boosters: Add 1/4 teaspoon of cardamom or a pinch of cloves to the spice mix for a warmer, more complex flavor. I’ve also tried adding 1 tablespoon of maple syrup to the wet ingredients, and it gave the muffins a lovely caramel-like sweetness.
My personal favorite variation? I made a batch with mini chocolate chips and a sprinkle of coarse sugar on top before baking. The sugar gave the muffins a little crunch, and the chocolate melted into gooey pockets. My kids called them “breakfast cupcakes,” and honestly, they weren’t wrong.
Serving & Storage Suggestions
These muffins are best served warm, straight from the oven, when the edges are still slightly crisp and the center is soft and tender. But they’re also delicious at room temperature, which makes them perfect for packing in lunchboxes or grabbing on your way out the door.
For a fun presentation, I like to split a muffin in half, toast it lightly in a skillet with a pat of butter, and serve it with a drizzle of honey or a dollop of Greek yogurt. It turns a simple muffin into a cozy breakfast or afternoon snack. They also pair beautifully with a cup of coffee, a glass of cold milk, or a warm mug of chai tea.
If you want to make them extra special for kids, try spreading a thin layer of cream cheese frosting on top. Just mix 2 ounces of softened cream cheese with 1 tablespoon of powdered sugar and a splash of vanilla. It’s not necessary, but it sure is fun.
Storage Instructions: Keep leftover muffins in an airtight container at room temperature for up to 3 days. If your kitchen is warm or humid, store them in the fridge to prevent mold. To reheat, pop a muffin in the microwave for 15-20 seconds, or warm it in a 300°F oven for 5 minutes. The texture comes back beautifully.
Freezing Instructions: These muffins freeze like a dream. Let them cool completely, then place them in a single layer in a freezer-safe bag or container. They’ll keep for up to 3 months. When you’re ready to eat, thaw at room temperature for about an hour, or microwave for 30 seconds from frozen. I often double the batch and freeze half for busy mornings.
One thing I’ve noticed: the flavors actually deepen after a day in the fridge. The pumpkin and banana meld together even more, and the spices become more pronounced. So don’t be discouraged if they taste even better on day two.
Nutritional Information & Benefits
Here’s the approximate nutritional breakdown for one muffin (based on the recipe as written, without add-ins):
- Calories: 165
- Total Fat: 5g
- Saturated Fat: 3g
- Cholesterol: 35mg
- Sodium: 180mg
- Total Carbohydrates: 27g
- Dietary Fiber: 2g
- Sugars: 14g
- Protein: 3g
These muffins offer some solid nutritional benefits. Pumpkin is packed with vitamin A, which supports healthy vision and immune function. Bananas provide potassium and vitamin C, plus natural sweetness that lets you cut back on added sugar. The fiber from both the pumpkin and banana helps keep little tummies full and happy.
If you’re watching sugar intake, you can easily reduce the brown sugar to 2 tablespoons without sacrificing much sweetness. And if you’re avoiding dairy, the butter substitution with coconut oil works perfectly. Just keep in mind that these muffins are not gluten-free unless you make the flour swap mentioned earlier.
From my own wellness perspective, I love that these muffins feel like a treat but aren’t loaded with processed ingredients. They’re a great way to sneak some fruits and veggies into a picky eater’s diet without a fight. My youngest, who usually turns her nose up at anything orange, ate two of these before I could even blink.
Conclusion
These small-batch pumpkin banana muffins are proof that you don’t need a complicated recipe or a kitchen full of fancy gadgets to make something truly special. They’re simple, honest, and made with ingredients you probably already have on hand. Whether you’re baking for a toddler who’s going through a picky phase, a busy weeknight when you need a quick breakfast for the morning, or just because you want the house to smell amazing, this recipe delivers every single time.
I love that these muffins are forgiving—they don’t punish you if you overmix a little or forget to set the egg out. They’re the kind of recipe that builds confidence in the kitchen, especially if you’re new to baking. And honestly, there’s something deeply satisfying about pulling a tray of warm, golden muffins out of the oven and knowing you made them yourself.
So go ahead, give them a try. Mash that spotty banana, open that can of pumpkin, and let the aroma fill your kitchen. And when you do, I’d love to hear about it. Did your kids gobble them up? Did you add chocolate chips? Did you make a mess of your counter like I always do? Drop a comment below and share your version. Happy baking, friend!
Frequently Asked Questions
Can I use pumpkin pie filling instead of pumpkin puree?
No, I wouldn’t recommend it. Pumpkin pie filling has added sugar and spices, which will throw off the balance of this recipe. Stick with 100% pure pumpkin puree for the best results. If you only have pumpkin pie filling, reduce the brown sugar to 1 tablespoon and skip the pumpkin pie spice, but the texture might still be slightly different.
Why are my muffins flat or dense?
This usually happens for one of three reasons: your baking soda is old, you overmixed the batter, or your oven wasn’t hot enough. Make sure your baking soda is fresh, mix just until combined, and preheat your oven fully before baking. Also, check that your oven temperature is accurate—an oven thermometer is a cheap investment that saves a lot of headaches.
Can I double this recipe?
Absolutely! To make a full dozen, simply double all the ingredients. The baking time might increase by 2-3 minutes, so keep an eye on them. I often double the batch and freeze half for later. It’s a great way to have muffins ready for busy mornings or unexpected guests.
How do I know when the muffins are done?
The best way is the toothpick test: insert a toothpick into the center of a muffin. If it comes out clean or with just a few moist crumbs, they’re done. If it’s still wet with batter, give them another 2-3 minutes. The tops should also be golden brown and spring back when lightly pressed.
Can I make these muffins without a muffin tin?
Yes, you can! Pour the batter into a greased 8×4-inch loaf pan and bake at 350°F for 30-35 minutes. You can also use silicone muffin cups placed on a baking sheet. Just note that the baking time may vary, so start checking at 15 minutes if using smaller cups. The texture will be slightly different, but they’ll still be delicious.
Pin This Recipe!
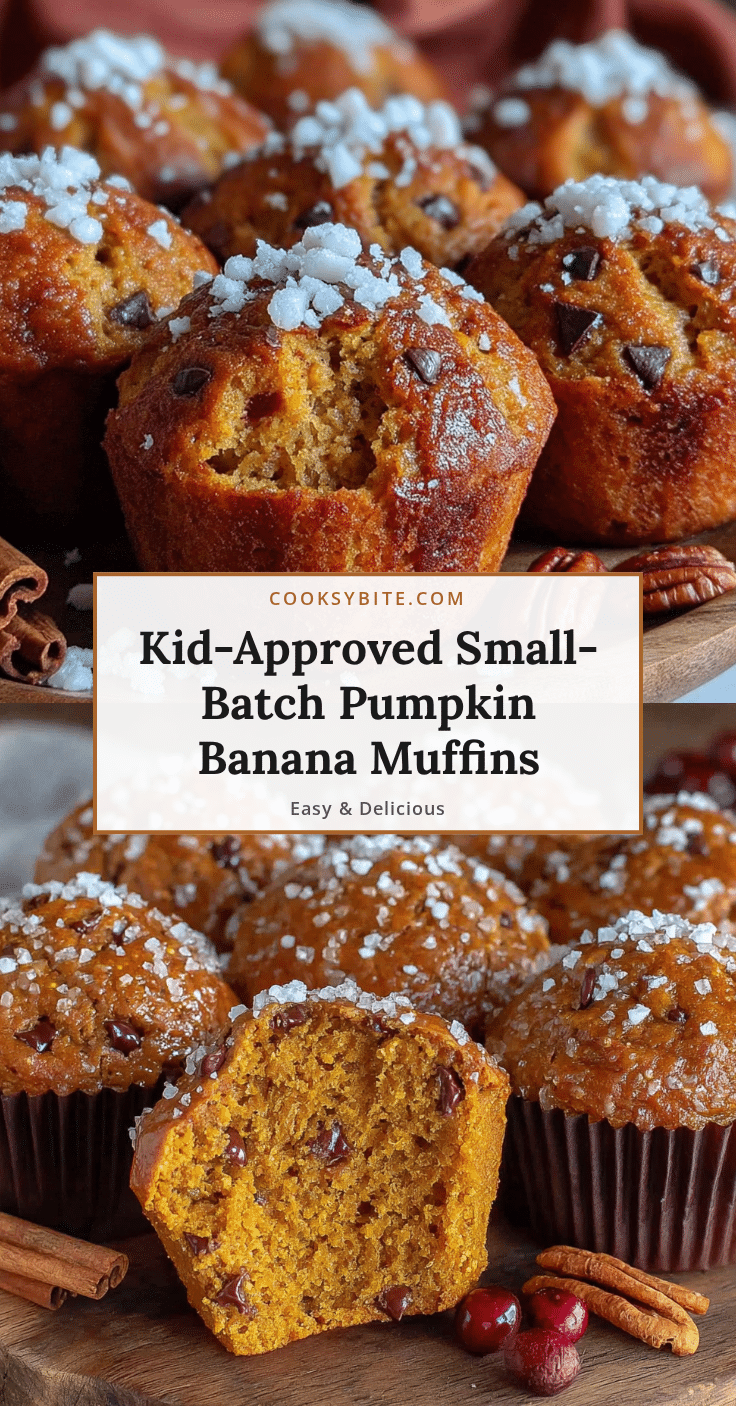
Best Small-Batch Pumpkin Banana Muffins (Kid-Approved!)
These small-batch pumpkin banana muffins are soft, tender, and perfectly balanced with pumpkin and banana flavors. Made with simple ingredients, they’re quick to whip up and ideal for busy weeknights or picky eaters.
- Prep Time: 10 minutes
- Cook Time: 18 minutes
- Total Time: 28 minutes
- Yield: 6 muffins 1x
- Category: Breakfast
- Cuisine: American
Ingredients
- 1/2 cup pumpkin puree (not pumpkin pie filling)
- 1 medium ripe banana (spotty, mashed to about 1/3 cup)
- 1 large egg, room temperature
- 1/4 cup brown sugar, packed (light or dark)
- 2 tablespoons melted unsalted butter (or coconut oil/vegetable oil)
- 1 teaspoon vanilla extract
- 3/4 cup all-purpose flour (spooned and leveled)
- 1/2 teaspoon baking soda
- 1/4 teaspoon baking powder
- 1/4 teaspoon salt
- 1 teaspoon pumpkin pie spice (or 1/2 tsp cinnamon, 1/4 tsp nutmeg, 1/4 tsp ginger, pinch cloves)
- 1/4 cup chocolate chips (optional)
- 2 tablespoons chopped walnuts or pecans (optional)
- 1 tablespoon ground flaxseed (optional)
Instructions
- Preheat oven to 350°F (175°C). Line a 6-cup muffin tin with paper liners or grease well.
- In a medium bowl, mash the ripe banana with a fork until mostly smooth with a few tiny lumps.
- Add pumpkin puree, egg, brown sugar, melted butter, and vanilla extract to the banana. Whisk until smooth and well combined.
- In a separate small bowl, whisk together flour, baking soda, baking powder, salt, and pumpkin pie spice.
- Add dry ingredients to wet mixture. Fold gently with a rubber spatula until just combined (a few streaks are okay). If using add-ins, fold them in now.
- Divide batter evenly among the 6 muffin cups, filling each about 3/4 full.
- Bake for 15-18 minutes, until a toothpick inserted in the center comes out clean or with a few moist crumbs.
- Let muffins rest in the tin for 5 minutes, then transfer to a cooling rack to cool completely.
Notes
Don’t overmix the batter to avoid tough muffins. Use room temperature ingredients for best texture. Check baking soda freshness by testing with vinegar. Let batter rest 5 minutes before filling cups for a tender crumb. Rotate pan halfway through baking for even browning. If using a dark muffin tin, reduce oven temperature by 25°F.
Nutrition
- Serving Size: 1 muffin
- Calories: 165
- Sugar: 14
- Sodium: 180
- Fat: 5
- Saturated Fat: 3
- Carbohydrates: 27
- Fiber: 2
- Protein: 3
Keywords: pumpkin banana muffins, small batch muffins, kid-friendly muffins, easy pumpkin muffins, banana pumpkin muffins


