The neighborhood cookie swap was in two hours and I’d completely forgotten. Everyone else would be bringing their signature showstoppers—the ones they’d been perfecting for years. My neighbor Sarah always brought those delicate French macarons that looked like they belonged in a Parisian bakery. Across the street, Mrs. Henderson would arrive with her legendary seven-layer bars that had a waiting list. And me? I had a half-empty jug of apple cider in the fridge, some basic baking staples, and a growing sense of panic that felt like a knot in my stomach.
I mean, I’d been to this swap three years running. I knew the stakes. But somehow, between work and life and that thing where Tuesday just evaporates, I’d let it slip my mind completely. I stood there staring into my pantry like it might magically produce something impressive. Spoiler: it didn’t. But then I spotted that apple cider—the good stuff from the farmers market I’d bought on a whim last weekend. And I thought, maybe I could make something simple. Something that tasted like fall, like cozy afternoons, like the kind of cookie you eat with a cup of tea while wearing your softest sweater.
Honestly, I wasn’t aiming for a win. I was aiming for “not embarrassing.” I threw these chewy apple cider cookies together in a rush, my kitchen looking like a flour bomb had gone off, and I practically sprinted to the swap with them still warm in a tin. You know that feeling when you’re just hoping nobody notices your contribution is a little… basic? Yeah. That was me. But then something unexpected happened. People kept coming back to the cookie table. They were asking for the recipe. And by the end of the night, my little last-minute apple cider cookies had somehow stolen the show. The macarons sat untouched. The seven-layer bars barely got a second glance. And I walked home with a tin full of everyone else’s cookies and this ridiculous grin on my face.
Why You’ll Love This Recipe
Let me tell you why these cookies have become my most-requested recipe, even above things I actually planned and tested for weeks.
- Quick & Easy : Comes together in under 30 minutes, perfect for those moments when you need a dessert fast—whether it’s a last-minute gathering or a Tuesday night craving that won’t quit.
- Simple Ingredients : No fancy grocery trips needed. You probably have everything except maybe the apple cider, and that’s easy to find this time of year.
- Perfect for Fall Gatherings : These are the ideal cookie for Thanksgiving, Friendsgiving, cookie swaps, or just a cozy night in when the weather turns chilly.
- Crowd-Pleaser : I’ve made these for kids, adults, picky eaters, and dessert snobs. They disappear every single time without fail.
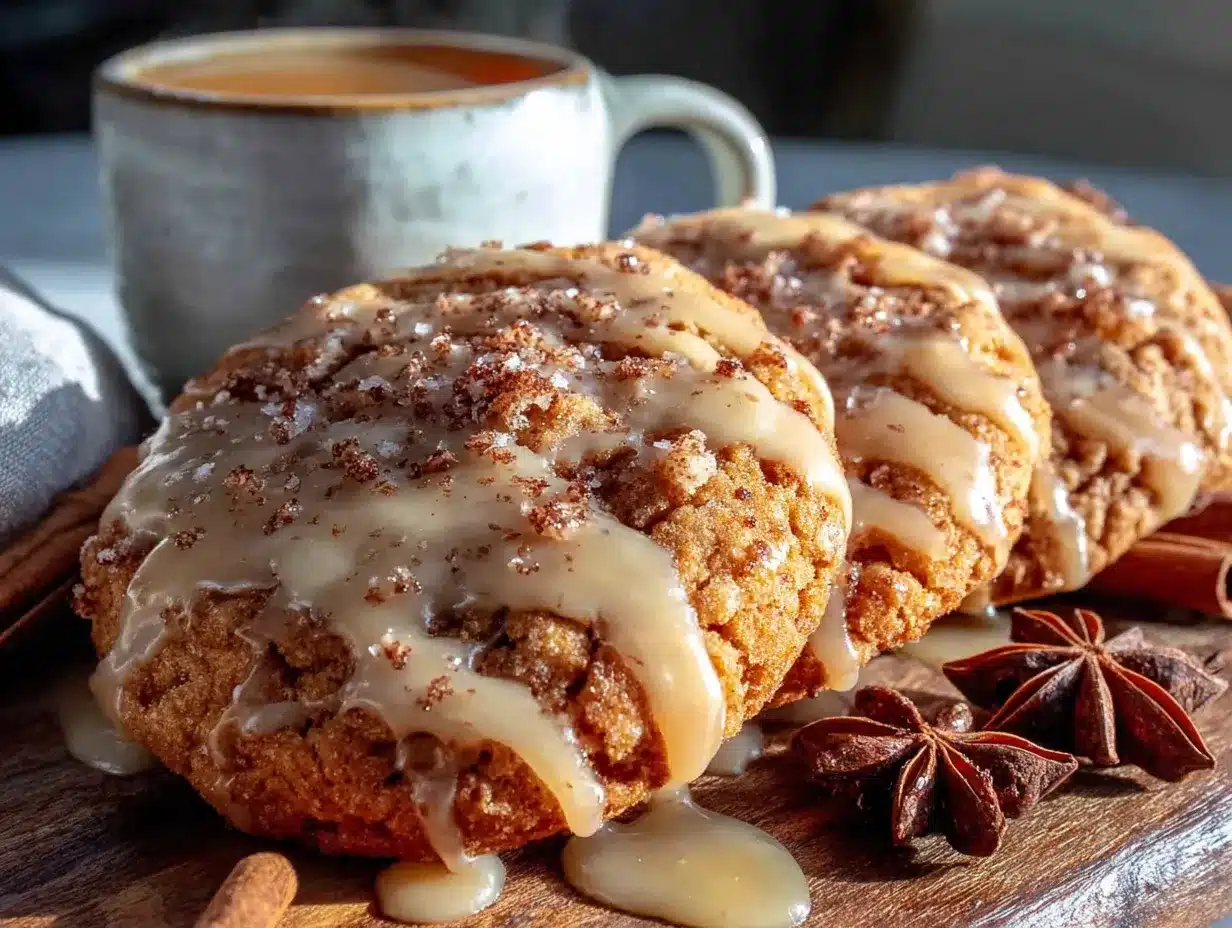
- Unbelievably Delicious : The texture is that perfect chewy-on-the-inside, slightly crisp-on-the-outside situation. And that cinnamon glaze? It’s the kind of thing you want to put on everything.
What makes these different from every other apple cookie out there? It’s the technique. I spent months testing the ratio of apple cider to flour, figuring out how to get that concentrated apple flavor without making the dough too wet. The secret is reducing the cider first—it sounds fancy, but it’s literally just simmering it on the stove for a few minutes. This little step concentrates all that apple goodness into something intensely flavorful. And the cinnamon glaze isn’t just a drizzle—it’s a generous coating that adds this warm, spicy sweetness that makes the whole thing feel like a hug in cookie form.
What Ingredients You Will Need
This recipe uses simple, wholesome ingredients that come together to create something truly special. The magic is in how they work together, not in having a complicated list of exotic items.
- Apple Cider (1 cup, reduced to 1/4 cup) – Use the good stuff, not apple juice. I prefer fresh-pressed local cider when it’s available, but any quality apple cider from the store works beautifully. The reduction is where the flavor concentrates, so don’t skip this step!
- Unsalted Butter (1/2 cup, 1 stick, softened) – Make sure it’s at room temperature. Cold butter won’t cream properly with the sugar, and melted butter will change the texture entirely.
- Granulated Sugar (3/4 cup) – Regular white sugar gives these cookies their structure and helps with that chewy texture we’re after.
- Light Brown Sugar (1/2 cup, packed) – This adds moisture and a hint of molasses flavor that pairs beautifully with the apple cider. Dark brown sugar works too if that’s what you have.
- Large Egg (1, room temperature) – Room temperature eggs incorporate more evenly into the batter. If you forget to take yours out, just place it in a bowl of warm water for 5 minutes.
- Vanilla Extract (1 teaspoon) – Pure vanilla extract makes a difference here. The imitation stuff has a chemical aftertaste that doesn’t play well with the apple and cinnamon.
- All-Purpose Flour (2 cups) – Spoon and level your flour—don’t scoop directly from the bag or you’ll end up with dry cookies.
- Baking Soda (1 teaspoon) – This helps the cookies spread and gives them that nice chewy texture.
- Salt (1/2 teaspoon) – Don’t skip this! Salt balances the sweetness and makes the apple and cinnamon flavors pop.
- Ground Cinnamon (1 teaspoon for dough, plus more for glaze) – I use Saigon cinnamon when I can find it—it’s stronger and more aromatic than regular cinnamon.
- Ground Nutmeg (1/4 teaspoon) – Just a hint adds warmth without being overpowering. Freshly grated is amazing if you have it.
- Powdered Sugar (1 cup, for glaze) – Sift it if it’s lumpy. Nobody wants clumpy glaze on their beautiful cookies.
- Milk (2-3 tablespoons, for glaze) – Whole milk gives the richest glaze, but any milk works. Start with 2 tablespoons and add more if needed.
Equipment Needed
You don’t need a professional bakery setup for these cookies. Here’s what you’ll actually use:
- Medium Saucepan – For reducing the apple cider. A small one works best so the cider doesn’t spread out too thin.
- Large Mixing Bowl – For the dough. I prefer glass or ceramic because they don’t retain smells.
- Electric Mixer (hand or stand) – You can do this by hand with a wooden spoon, but it takes some elbow grease. I’ve done both and honestly, the mixer saves time.
- Baking Sheets (2) – Light-colored metal sheets work best for even browning. Dark sheets can make the bottoms burn.
- Parchment Paper – Non-negotiable for easy cleanup and preventing sticking. Silicone baking mats work great too.
- Cookie Scoop (about 1.5 tablespoons) – Not required, but it gives you evenly sized cookies that bake at the same rate. I use a #40 scoop.
- Cooling Rack – Essential for letting the glaze set properly. If you don’t have one, you can use wax paper, but it’s not as effective.
- Small Whisk – For the glaze. A fork works in a pinch, but a whisk gives you a smoother result.
I bought my favorite cookie scoop at a kitchen supply store for about eight dollars, and it’s been worth every penny. If you’re just starting out, a regular spoon works fine—just try to make each scoop roughly the same size.
Preparation Method
Let’s walk through this step by step. I’ve included all the little details I wish someone had told me the first time I made these.
Step 1: Reduce the Apple Cider
Pour 1 cup of apple cider into your medium saucepan. Bring it to a boil over medium-high heat, then reduce to a simmer. Let it cook for about 12-15 minutes, stirring occasionally, until it’s reduced to about 1/4 cup. You’re looking for a syrupy consistency—it should coat the back of a spoon. Watch it carefully toward the end because it can burn quickly. Set it aside to cool completely. This is important—if you add hot cider to your butter mixture, it’ll melt the butter and ruin the texture.
Step 2: Preheat and Prep
Preheat your oven to 350°F (175°C). Line your baking sheets with parchment paper. While the oven heats, make sure your butter and egg are at room temperature. Cold ingredients don’t cream properly, and you’ll end up with dense cookies instead of chewy ones.
Step 3: Cream Butter and Sugars
In your large mixing bowl, beat the softened butter, granulated sugar, and brown sugar together until light and fluffy. This takes about 2-3 minutes with an electric mixer on medium speed. You’ll know it’s ready when it looks pale and almost doubled in volume. Scrape down the sides of the bowl halfway through—trust me on this, it makes a difference.
Step 4: Add Wet Ingredients
Beat in the egg and vanilla extract until combined. Then add the cooled reduced apple cider and mix until just incorporated. The mixture might look slightly separated at this point—that’s normal. Don’t overmix or your cookies will be tough.
Step 5: Combine Dry Ingredients
In a separate bowl, whisk together the flour, baking soda, salt, cinnamon, and nutmeg. This ensures the leavening and spices are evenly distributed. Nobody wants a cookie with a pocket of baking soda!
Step 6: Mix Wet and Dry
Gradually add the dry ingredients to the wet mixture, mixing on low speed until just combined. Stop as soon as you no longer see streaks of flour. Overmixing at this stage develops gluten, which makes cookies tough instead of tender. The dough will be soft and slightly sticky—that’s exactly what you want.
Step 7: Scoop and Bake
Scoop rounded tablespoons of dough (about 1.5 tablespoons each) onto your prepared baking sheets, spacing them about 2 inches apart. These cookies spread a bit, so give them room to breathe. Bake for 10-12 minutes, or until the edges are lightly golden and the centers look set but still soft. The centers will look slightly underdone—that’s the secret to chewy cookies. They’ll continue baking from residual heat on the pan.
Step 8: Cool and Glaze
Let the cookies cool on the baking sheet for 5 minutes, then transfer them to a cooling rack to cool completely. While they cool, make the glaze. Whisk together the powdered sugar, 2 tablespoons of milk, and 1/4 teaspoon of cinnamon until smooth. Add more milk if needed to reach a drizzling consistency. Once the cookies are completely cool, drizzle or spread the glaze over the tops. Let the glaze set for about 15 minutes before serving.
Cooking Tips & Techniques
I’ve made these cookies at least twenty times, and I’ve learned a few things the hard way. Here’s what I wish I’d known from the start:
Don’t rush the cider reduction. The first time I made these, I tried to speed this up by using high heat. The cider burned, my kitchen smelled like a campfire, and I had to start over. Low and slow is the way to go. And let it cool completely—I once added warm cider to my butter mixture and ended up with a greasy, separated mess.
Chill the dough if you have time. I know, I know—you want cookies now. But if you can resist for 30 minutes in the fridge, the dough becomes easier to handle and the cookies bake up thicker and chewier. The flour hydrates more fully, and the flavors meld together. It’s worth the wait if you can manage it.
Watch your baking time like a hawk. These cookies go from perfectly chewy to overbaked in about 60 seconds. I pull them out when the edges are golden but the centers still look slightly soft and puffy. They’ll continue setting on the hot pan. If you wait until the centers look fully baked, they’ll be dry by the time they cool.
Use a cookie scoop for consistent sizing. I learned this lesson after a batch where some cookies were tiny and crispy while others were huge and underbaked. A scoop ensures every cookie bakes at the same rate. If you don’t have one, use a measuring tablespoon and roll the dough into balls with your hands.
Let the glaze set completely. I once stacked these cookies too soon and ended up with a sticky, glazed mess. Give them at least 15 minutes on the cooling rack before you move them. If you’re in a hurry, pop them in the fridge for 5 minutes.
Variations & Adaptations
One of the best things about this recipe is how flexible it is. Here are some ways to make it your own:
Gluten-Free Version: Substitute the all-purpose flour with a 1:1 gluten-free baking blend that contains xanthan gum. I’ve tested this with Bob’s Red Mill and King Arthur brands, and both worked beautifully. The texture is slightly more delicate, so handle the dough gently.
Dairy-Free Adaptation: Use vegan butter in place of regular butter—I like Miyoko’s or Country Crock plant butter. For the glaze, substitute the milk with oat milk or almond milk. Coconut milk works too but adds a slight coconut flavor that’s actually pretty nice with the apple and cinnamon.
Spiced Apple Variation: Add 1/4 teaspoon of ground ginger and a pinch of ground cloves to the dry ingredients. This gives the cookies a chai-like warmth that’s perfect for winter baking. I made this version for a holiday party and got asked for the recipe three times.
Apple Cider Caramel Drizzle: Instead of the cinnamon glaze, make a quick caramel sauce by melting 1/2 cup of brown sugar with 2 tablespoons of butter and 2 tablespoons of heavy cream. Drizzle over the cooled cookies and sprinkle with flaky sea salt. It’s extra work, but honestly, it’s incredible.
No-Glaze Option: If you want to skip the glaze entirely, these cookies are still delicious on their own. Roll the dough balls in cinnamon sugar before baking for a crunchy, sparkly finish. I’ve done this when I was short on time, and nobody complained.
Serving & Storage Suggestions
These cookies are best served at room temperature with a cold glass of milk or a hot cup of coffee. The combination of the chewy cookie and the creamy glaze is pure comfort. For a special treat, warm them in the microwave for about 10 seconds before serving—it softens the glaze and makes the cookie extra gooey.
They’re perfect for fall gatherings, Thanksgiving dessert tables, or just a cozy afternoon snack. I love packing them in a pretty tin for gifts—they travel well and stay fresh for days.
Storage: Store these cookies in an airtight container at room temperature for up to 5 days. Layer them with parchment paper between each layer to prevent sticking. The glaze will stay beautiful and not get sticky if you keep them in a cool, dry place.
Freezing: You can freeze the baked cookies (unglazed) for up to 3 months. Just wrap them tightly in plastic wrap and place them in a freezer-safe bag. When you’re ready to serve, thaw them at room temperature, then make the glaze fresh. I’ve also frozen the dough—scoop it into balls, freeze on a baking sheet, then transfer to a bag. Bake from frozen, adding 2-3 minutes to the baking time.
The flavors actually develop and get better after a day or two. The apple cider taste becomes more pronounced and the spices mellow into something perfectly balanced. If you can resist eating them all immediately, they’re even better on day two.
Nutritional Information & Benefits
Per cookie (based on 24 cookies): Approximately 140 calories, 5g fat, 22g carbohydrates, 1g protein, 12g sugar. These are estimates and will vary based on exact ingredients and portion sizes.
While these are definitely a treat, there are some redeeming qualities. Apple cider contains antioxidants called polyphenols, which help fight inflammation in the body. The cinnamon in the glaze has been shown to help regulate blood sugar levels, which means these cookies might cause less of a sugar spike than other desserts. And honestly, there’s something to be said for the mental health benefits of a warm, homemade cookie on a cold day.
For those with dietary concerns: These cookies contain gluten, dairy, and eggs. I’ve included gluten-free and dairy-free variations above that work well. They are nut-free as written, making them safe for school bake sales and parties where allergies might be a concern.
I believe in balance—enjoying treats like these in moderation is part of a healthy relationship with food. These cookies are meant to be savored, not stressed over. One or two with a cup of tea is the perfect way to enjoy them.
Conclusion
These chewy apple cider cookies have become my signature recipe, and they started as a total accident. That’s the thing about baking sometimes—the best discoveries happen when you’re just trying to make something work with what you have. The reduced apple cider gives them this incredible concentrated flavor that you just can’t get from extract or juice. And that cinnamon glaze? It’s the finishing touch that turns a good cookie into something you’ll crave all year long.
I hope you’ll try these cookies and make them your own. Maybe you’ll add extra cinnamon, or skip the glaze, or double the batch because one tray is never enough. Whatever you do, I’d love to hear about it. Drop a comment below and tell me how yours turned out—did you make any changes? Did they disappear as fast as mine always do? And if you’re feeling generous, share a photo of your creation. There’s nothing that makes my day quite like seeing someone else enjoying a recipe that started in my little kitchen.
Happy baking, friends. May your cookies be chewy, your glaze be perfect, and your kitchen smell like autumn.
Frequently Asked Questions
Can I use apple juice instead of apple cider?
Technically yes, but the flavor won’t be as rich. Apple cider has a deeper, more complex taste because it’s less filtered and often includes some apple pulp. Apple juice is sweeter and more one-dimensional. If you’re in a pinch, go ahead and use juice, but add an extra 1/4 teaspoon of cinnamon to boost the apple flavor.
Why did my cookies turn out flat?
This usually happens for one of three reasons: your butter was too soft or melted, you didn’t chill the dough, or your baking soda is old. Make sure your butter is softened but not greasy, and try chilling the dough for 30 minutes before baking. Also, check that your baking soda is fresh—it should fizz when you drop a pinch into vinegar.
Can I make the dough ahead of time?
Absolutely! You can refrigerate the dough for up to 3 days. Just wrap it tightly in plastic wrap or store it in an airtight container. When you’re ready to bake, let it sit at room temperature for about 10 minutes so it’s soft enough to scoop. You can also freeze the dough balls for up to 3 months—bake them straight from frozen, adding 2-3 minutes to the baking time.
How do I get the perfect chewy texture?
The key is not overbaking. Pull the cookies out when the edges are golden but the centers still look slightly soft and puffy. They’ll continue baking on the hot pan for another 5 minutes. Also, using a combination of granulated and brown sugar helps—the brown sugar adds moisture that keeps the cookies chewy. And don’t skip the cider reduction—concentrated cider adds flavor without making the dough too wet.
Can I double this recipe?
Yes, and I actually recommend it because these cookies disappear fast. Just make sure you have a large enough bowl for the dough—doubling fills up a standard mixing bowl pretty quickly. You’ll also need to reduce the cider in batches or use a larger saucepan. The baking time stays the same, but you might need to rotate your baking sheets halfway through if you’re baking multiple trays at once.
Pin This Recipe!

Cozy Chewy Apple Cider Cookies with Cinnamon Glaze

These chewy apple cider cookies are made with reduced apple cider for intense flavor, topped with a warm cinnamon glaze. Perfect for fall gatherings, cookie swaps, or a cozy night in.
- Prep Time: 15 minutes
- Cook Time: 12 minutes
- Total Time: 27 minutes
- Yield: 24 servings 1x
- Category: Dessert
- Cuisine: American
Ingredients
- 1 cup apple cider (reduced to 1/4 cup)
- 1/2 cup unsalted butter (1 stick, softened)
- 3/4 cup granulated sugar
- 1/2 cup light brown sugar (packed)
- 1 large egg (room temperature)
- 1 teaspoon vanilla extract
- 2 cups all-purpose flour
- 1 teaspoon baking soda
- 1/2 teaspoon salt
- 1 teaspoon ground cinnamon (for dough)
- 1/4 teaspoon ground nutmeg
- 1 cup powdered sugar (for glaze)
- 2–3 tablespoons milk (for glaze)
- 1/4 teaspoon ground cinnamon (for glaze)
Instructions
- Reduce the apple cider: Pour 1 cup apple cider into a medium saucepan. Bring to a boil over medium-high heat, then reduce to a simmer. Cook for 12-15 minutes, stirring occasionally, until reduced to about 1/4 cup and syrupy. Set aside to cool completely.
- Preheat oven to 350°F (175°C). Line baking sheets with parchment paper.
- In a large mixing bowl, beat softened butter, granulated sugar, and brown sugar together until light and fluffy (about 2-3 minutes with an electric mixer on medium speed). Scrape down sides as needed.
- Beat in egg and vanilla extract until combined. Add cooled reduced apple cider and mix until just incorporated.
- In a separate bowl, whisk together flour, baking soda, salt, 1 teaspoon cinnamon, and nutmeg.
- Gradually add dry ingredients to wet mixture, mixing on low speed until just combined. Dough will be soft and slightly sticky.
- Scoop rounded tablespoons of dough (about 1.5 tablespoons each) onto prepared baking sheets, spacing 2 inches apart.
- Bake for 10-12 minutes, until edges are lightly golden and centers look set but still soft. Cool on baking sheet for 5 minutes, then transfer to a cooling rack to cool completely.
- Make the glaze: Whisk together powdered sugar, 2 tablespoons milk, and 1/4 teaspoon cinnamon until smooth. Add more milk if needed for drizzling consistency.
- Once cookies are completely cool, drizzle or spread glaze over tops. Let glaze set for about 15 minutes before serving.
Notes
Don’t rush the cider reduction; let it cool completely before adding to butter mixture. For thicker, chewier cookies, chill dough for 30 minutes before baking. Watch baking time closely—pull cookies when edges are golden but centers still look soft. Let glaze set completely before stacking. Cookies can be stored in an airtight container at room temperature for up to 5 days. Freeze unglazed baked cookies for up to 3 months.
Nutrition
- Serving Size: 1 cookie
- Calories: 140
- Sugar: 12
- Sodium: 95
- Fat: 5
- Saturated Fat: 3
- Carbohydrates: 22
- Protein: 1
Keywords: apple cider cookies, chewy cookies, cinnamon glaze, fall cookies, cookie swap, easy cookie recipe


