I was digging through the back of my pantry last Tuesday, hunting for a specific piping tip I swore I owned, when the smell hit me. Not dust or old cardboard, but the faint, sweet ghost of cocoa powder and vanilla that had somehow seeped into the wooden spoon I was holding. And just like that, I was eight years old in my Aunt Carol’s tiny, perpetually warm kitchen in Portland. She wasn’t a fancy baker—her measuring cups were mismatched and she always forgot to set a timer—but every October 30th, she’d pull out a scratched-up metal mixing bowl and make the most ridiculous, wonderful chocolate cupcakes. She’d frost them with a thick, fudgy buttercream, and then, with a toothpick and a steady hand I never saw her use for anything else, she’d draw perfect little spiderwebs on top. I remember the way the wooden spoon felt in my hand that day, the same one I found in my own pantry years later. I never got to ask her for the recipe. She moved to Arizona a few years after that, and the phone calls got shorter. So this is my attempt to bring that feeling back—not just the chocolate cake, but the quiet, focused magic of that evening, the way the kitchen light made the frosting gleam, and the feeling that a little bit of spiderweb could make a whole night feel special. Maybe you’ve got a memory like that, too—a taste you’re trying to chase down. These cupcakes are my best shot at it.
Why You’ll Love This Recipe
Let’s be honest—Halloween baking can be a little stressful. You’ve got costumes to wrangle, candy to hide from yourself, and a general chaos that doesn’t leave room for complicated piping techniques. These Cozy Chocolate Spiderweb Cupcakes are the antidote to all of that. They’re the kind of recipe that makes you feel like a pro without actually having to be one.
- Quick & Easy: From mixing bowl to decorated cupcake in under an hour. Seriously. The batter comes together in one bowl, and the decorating is so forgiving that a wobbly hand just makes the web look more authentic.
- Simple Ingredients: You probably already have everything you need. Flour, sugar, cocoa powder, eggs, butter, and a little bit of milk. No trips to a specialty baking store required.
- Perfect for Halloween: Whether you’re hosting a spooky movie night, sending treats to a school party, or just want a cozy baking project on a chilly October afternoon, these fit the bill perfectly.
- Crowd-Pleaser: I’ve brought these to three different gatherings now, and they disappear faster than the candy corn. Kids love the web design, and adults love the rich, moist chocolate cake.
- Unbelievably Delicious: This isn’t a dry, crumbly cupcake situation. The cake is so moist it practically melts, and the frosting is a silky chocolate buttercream that’s not too sweet. It’s the kind of dessert that makes you close your eyes after the first bite.
What makes this recipe different is the technique for the frosting. Instead of a standard buttercream that can be grainy, we’re melting real chocolate into it. This gives you a smooth, fudge-like texture that’s perfect for drawing delicate spiderwebs. It’s a small step that makes a huge difference. These aren’t just Halloween cupcakes; they’re a little moment of comfort wrapped in a paper liner.
What Ingredients You Will Need
This recipe uses simple, wholesome ingredients to deliver a deep chocolate flavor and a tender crumb without any fuss. Most of these are pantry staples, which is exactly what you want on a busy weeknight or a lazy weekend.
For the Chocolate Cupcakes
- All-purpose flour: 1 ½ cups (190g). Provides the structure. Spoon and level it into your measuring cup for the best results—don’t scoop directly from the bag, or you’ll pack in too much.
- Granulated sugar: 1 cup (200g). For sweetness and a tender crumb.
- Unsweetened cocoa powder: ½ cup (50g). I prefer Ghirardelli for its deep, rich flavor. Do not use Dutch-process for this recipe; natural cocoa gives a better rise with the baking soda.
- Baking soda: 1 teaspoon. The leavening agent that makes these cupcakes fluffy.
- Salt: ½ teaspoon. Balances the sweetness and enhances the chocolate flavor.
- Large egg: 1, at room temperature. Binds the ingredients and adds richness.
- Buttermilk: ½ cup (120ml), at room temperature. This is the secret to a moist cupcake. If you don’t have buttermilk, you can make a quick substitute by adding 1 ½ teaspoons of lemon juice or white vinegar to ½ cup of milk and letting it sit for 5 minutes.
- Vegetable oil: ½ cup (120ml). Keeps the cupcakes moist for days. You can use melted coconut oil for a slightly different flavor.
- Hot water: ½ cup (120ml). This helps bloom the cocoa powder, intensifying the chocolate flavor. It’s a game-changer.
- Vanilla extract: 1 teaspoon. Use pure vanilla extract if you have it—it makes a noticeable difference.
For the Chocolate Buttercream Frosting
- Unsalted butter: 1 cup (2 sticks, 226g), softened to room temperature.
- Powdered sugar: 3 cups (360g), sifted to avoid lumps.
- Unsweetened cocoa powder: ½ cup (50g), sifted.
- Heavy cream: 3-4 tablespoons (45-60ml). Adds creaminess. Use milk if that’s all you have.
- Vanilla extract: 1 teaspoon.
- Salt: A pinch, to cut the sweetness.
- Semi-sweet chocolate chips: 4 oz (115g), melted and slightly cooled. This is the secret to a silky, fudge-like frosting that pipes like a dream.
For the Spiderweb Decoration
- White frosting: About ¼ cup of store-bought or homemade white frosting. I use a simple mixture of ½ cup powdered sugar and 1 tablespoon of milk for a quick, pipeable consistency.
- Candy spiders: Optional, but they add a fun, spooky touch. You can find them at most grocery stores around Halloween.
Equipment Needed
- Muffin tin: A standard 12-cup muffin tin. I’ve used cheap ones and expensive ones, and honestly, a non-stick one works best for these.
- Paper liners: Get the good ones—not the thin, flimsy kind that stick to the cake. I like the foil-lined ones for a more festive look.
- Large mixing bowls: Two—one for the wet ingredients and one for the dry.
- Whisk: For combining the dry ingredients.
- Electric hand mixer or stand mixer: For the frosting. You can do it by hand, but your arm will get a serious workout.
- Piping bag or zip-top bag: For the white frosting. A zip-top bag with a tiny corner snipped off works perfectly.
- Toothpick: The star of the show for creating the spiderweb pattern.
- Cooling rack: Essential for letting the cupcakes cool completely before frosting.
Preparation Method
- Preheat and Prepare (5 minutes): Preheat your oven to 350°F (175°C). Line your muffin tin with 12 paper liners. Trust me, don’t skip this step—greasing the pan alone will lead to stuck cupcakes and tears.
- Mix the Dry Ingredients (2 minutes): In a large bowl, whisk together the flour, sugar, cocoa powder, baking soda, and salt. Make sure there are no lumps of cocoa. I usually sift the cocoa powder into the bowl just to be safe.
- Combine the Wet Ingredients (3 minutes): In a separate bowl or a large liquid measuring cup, whisk together the egg, buttermilk, vegetable oil, and vanilla extract until smooth.
- Bring It All Together (2 minutes): Pour the wet ingredients into the dry ingredients and stir with a spatula until just combined. It will be thick. Don’t overmix! A few streaks of flour are okay at this point.
- Add the Hot Water (1 minute): Slowly pour in the hot water while stirring gently. The batter will become very thin and shiny—this is normal and exactly what you want. It’s the key to a moist, tender crumb.
- Fill the Liners (3 minutes): Divide the batter evenly among the 12 liners. I use a ¼-cup measuring cup or a cookie scoop to get even portions. Fill each liner about ⅔ full—any more and they’ll overflow like a volcano.
- Bake (18-20 minutes): Bake for 18-20 minutes, or until a toothpick inserted into the center of a cupcake comes out clean or with a few moist crumbs. The tops should spring back when lightly touched. Let them cool in the pan for 5 minutes, then transfer to a cooling rack to cool completely. Do not frost warm cupcakes, or you’ll have a chocolate puddle on your hands.
- Make the Frosting (10 minutes): While the cupcakes cool, melt the chocolate chips in a microwave-safe bowl in 30-second intervals, stirring after each, until smooth. Set aside to cool slightly. In a large bowl, beat the softened butter with an electric mixer until creamy, about 2 minutes. Add the sifted powdered sugar and cocoa powder, one cup at a time, beating on low speed to avoid a sugar cloud. Add the vanilla, salt, and 2 tablespoons of heavy cream. Beat on medium-high for 3 minutes until light and fluffy. Add the melted chocolate and beat for another minute. If the frosting is too thick, add the remaining cream, one tablespoon at a time.
- Frost the Cupcakes (5 minutes): Once the cupcakes are completely cool, pipe or spread a generous amount of chocolate frosting on each one. I like to use a star tip for a pretty swirl, but a simple knife swipe works just as well.
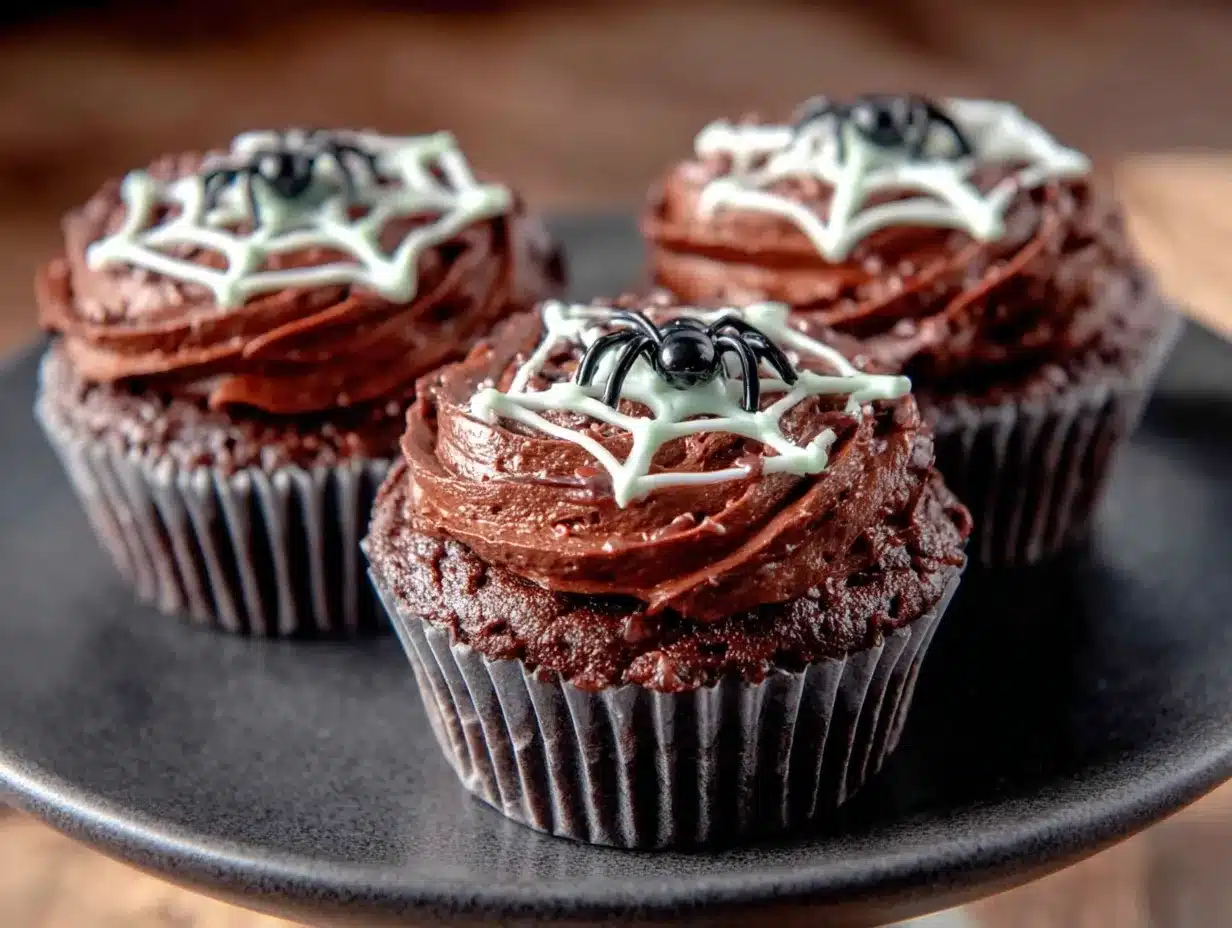
- Create the Spiderwebs (5 minutes per batch): This is the fun part. Spoon the white frosting into a small piping bag or a zip-top bag. Snip off a tiny corner. Pipe a small circle of white frosting in the center of each cupcake. Then, pipe 4-5 concentric circles around it, getting wider with each ring. Take a toothpick and gently drag it from the center outward through all the rings. Repeat this 5-6 times around the cupcake, spacing the drags evenly. You’ll see the web pattern magically appear! Wipe the toothpick clean between drags for the sharpest lines.
- Add the Spiders (1 minute): Place a candy spider on each web, or pipe a small dot of frosting and press it on. Let the frosting set for about 10 minutes before serving.
Cooking Tips & Techniques
I’ve learned a few things the hard way so you don’t have to. The first time I made spiderwebs, I used a fork instead of a toothpick and ended up with a muddy mess. A toothpick is your best friend here—it’s thin enough to create clean lines without tearing the frosting.
Another mistake I made was rushing the cooling process. I was impatient and frosted a barely-warm cupcake. The frosting slid right off into a sad little puddle. Let them cool completely, at least 30 minutes. If you’re in a hurry, pop them in the fridge for 15 minutes.
For the most consistent cupcakes, make sure your ingredients are at room temperature. Cold eggs and buttermilk can make the batter seize up. I set them on the counter about 30 minutes before I start baking. Also, don’t overmix the batter once you add the flour—a few lumps are fine. Overmixing develops gluten, which leads to tough, dense cupcakes.
When piping the white frosting for the webs, start with a very small amount. You can always add more, but you can’t take it back. The circles don’t have to be perfect—in fact, a little wobble makes the web look more organic and spider-like.
Finally, if your chocolate frosting is too stiff to pipe, add a splash of cream. If it’s too runny, pop it in the fridge for 10 minutes to firm up. Frosting is forgiving—don’t panic.
Variations & Adaptations
One of the best things about this recipe is how easy it is to tweak. I’ve made a few versions over the years, and each one has been a hit.
- Gluten-Free Version: Swap the all-purpose flour with a good 1:1 gluten-free baking flour blend. I’ve used King Arthur Measure for Measure with great results. The texture is slightly more delicate, but the flavor is just as rich.
- Dairy-Free Adaptation: Use a plant-based butter (like Miyoko’s) and a dairy-free milk like oat or almond milk for the buttermilk substitute. For the frosting, use dairy-free chocolate chips and a vegan butter stick. It works beautifully.
- Spooky Color Twist: Instead of white frosting for the webs, tint it a pale green or orange with food coloring. It gives the cupcakes a fun, eerie glow. I did this for a Halloween party last year, and everyone thought I was a decorating genius.
- Peppermint Spiderwebs: Add ½ teaspoon of peppermint extract to the cupcake batter and another ¼ teaspoon to the frosting. The combination of chocolate and mint is a holiday classic, and it works surprisingly well for a winter-themed twist.
- Mini Cupcakes: Use a mini muffin tin and bake for 10-12 minutes. You’ll get about 36 mini spiderwebs—perfect for a crowd.
Serving & Storage Suggestions
These cupcakes are best served at room temperature. The frosting is soft and creamy, and the cake is perfectly moist. I like to display them on a cake stand with a few fake spiderwebs draped around the base for a spooky tablescape.
They pair wonderfully with a cold glass of milk, a hot cup of coffee, or a warm mug of apple cider. If you’re serving them at a party, consider adding a bowl of popcorn on the side for a sweet-and-salty combo.
To store, place the cupcakes in an airtight container at room temperature for up to 3 days. Do not refrigerate them—the fridge dries out the cake and can make the frosting lose its sheen. If you need to store them longer, freeze the unfrosted cupcakes in a freezer-safe bag for up to 2 months. When you’re ready to serve, thaw them at room temperature, then make the frosting fresh. Trust me, the texture is so much better.
The flavors actually deepen after a day or two, so these are a great make-ahead option for a Halloween party. Just wait to add the spiderweb decoration until the day you serve them for the crispest lines.
Nutritional Information & Benefits
Let’s be real—these are a treat, not a health food. But that doesn’t mean they can’t have a few redeeming qualities. The cocoa powder in the cupcakes and frosting is rich in antioxidants called flavonoids, which can help support heart health. The dark chocolate in the frosting also contains iron and magnesium. Of course, the sugar and butter balance that out, but a little indulgence is good for the soul, especially on a cozy fall evening.
Here are the estimated nutritional values per cupcake (based on 12 servings):
- Calories: 420
- Fat: 22g
- Carbohydrates: 55g
- Protein: 5g
- Sugar: 38g
If you’re looking for a lighter option, you can reduce the sugar by ¼ cup in the cupcake batter and use a sugar substitute like monk fruit in the frosting. The texture will be slightly different, but the spiderweb magic remains the same.
These cupcakes are not gluten-free or dairy-free as written, but the adaptations above make them accessible for most dietary needs. They do contain eggs, dairy, and wheat.
Conclusion
These Cozy Chocolate Spiderweb Cupcakes are more than just a Halloween dessert—they’re a little piece of nostalgia that you can hold in your hand and share with the people you love. They remind me that sometimes the best recipes aren’t the most complicated ones, but the ones that bring a smile to your face and a warmth to your kitchen. Whether you’re making them for a party, a quiet night in, or just because the mood strikes you, I hope they bring you the same cozy joy they’ve brought me.
I’d love to hear how yours turn out! Did you add a spooky twist? Did the kids help with the spiderwebs? Drop a comment below and share your creations. And if you’re looking for more cozy baking ideas, you might also enjoy my homemade pumpkin bread or these fudgy brownies with sea salt. Happy baking, and don’t forget to save the last cupcake for yourself!
Frequently Asked Questions
Can I use a boxed cake mix for these cupcakes?
Absolutely! If you’re short on time, a boxed chocolate cake mix works perfectly. Just follow the instructions on the box, and then make the homemade frosting and spiderweb decoration. No one will know the difference, and you’ll still get that beautiful, cozy result.
Why did my spiderweb lines blur together?
This usually happens if the white frosting is too thin or you’re dragging the toothpick too slowly. Make sure your white frosting is thick—like a toothpaste consistency. And when you drag the toothpick, use a quick, confident motion. Wipe the toothpick clean after each drag for the sharpest lines.
Can I make the frosting ahead of time?
Yes! You can make the chocolate frosting up to 3 days in advance. Store it in an airtight container in the refrigerator. When you’re ready to use it, let it sit at room temperature for about 30 minutes, then re-whip it with an electric mixer to bring back its creamy texture.
How do I get perfectly even cupcakes?
Use a cookie scoop or a ¼-cup measuring cup to portion the batter. This ensures each cupcake is the same size and bakes evenly. Also, rotating the muffin tin halfway through baking helps prevent hot spots from causing uneven tops.
Can I freeze the decorated cupcakes?
I don’t recommend freezing them once they’re decorated. The spiderweb pattern can smudge, and the frosting can become grainy. Instead, freeze the unfrosted cupcakes and make the frosting fresh when you’re ready to serve. The decoration only takes a few minutes, and the results are much better.
Pin This Recipe!
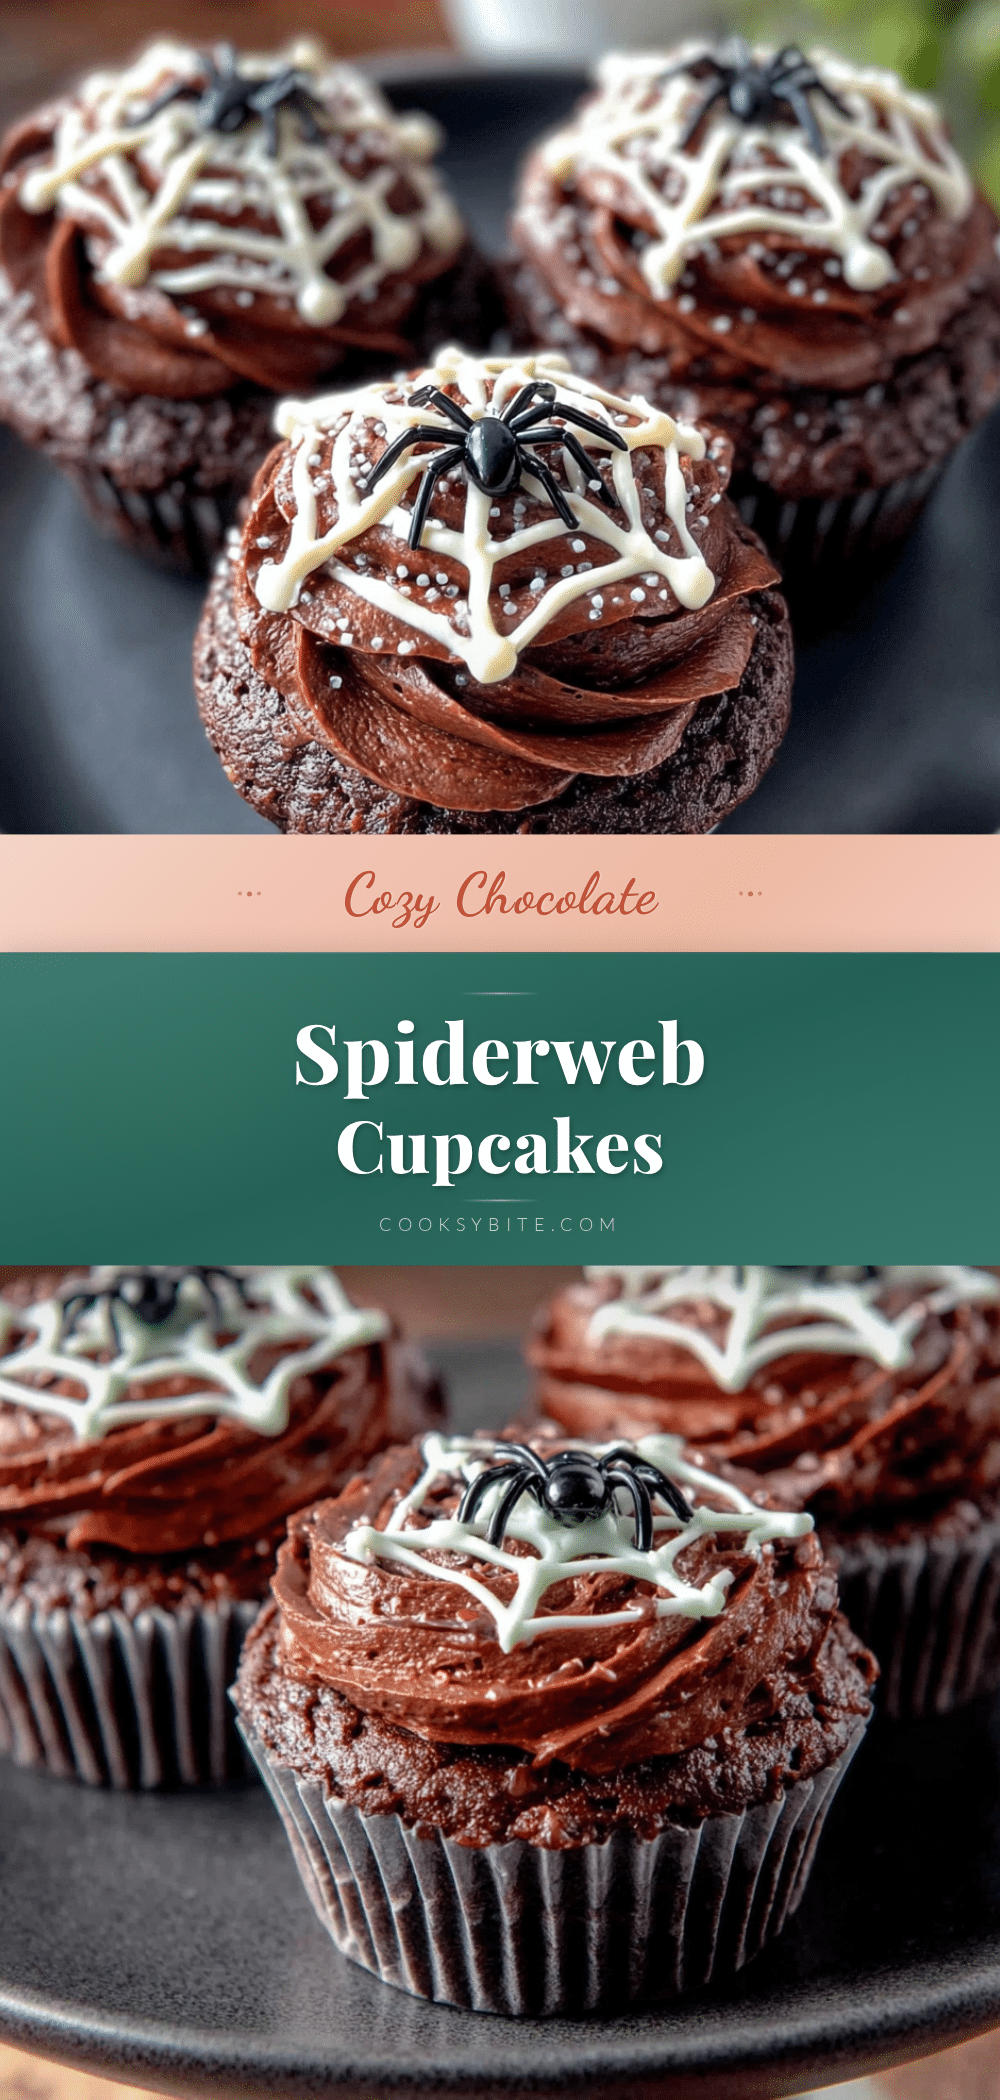
Cozy Chocolate Spiderweb Cupcakes: Easy Halloween Recipe
These Cozy Chocolate Spiderweb Cupcakes are a nostalgic Halloween treat with a rich, moist chocolate cake and silky fudge-like buttercream, topped with an easy spiderweb design. Perfect for parties or a cozy baking project, they come together in under an hour with simple ingredients.
- Prep Time: 15 minutes
- Cook Time: 20 minutes
- Total Time: 35 minutes
- Yield: 12 cupcakes 1x
- Category: Dessert
- Cuisine: American
Ingredients
- 1 ½ cups (190g) all-purpose flour
- 1 cup (200g) granulated sugar
- ½ cup (50g) unsweetened cocoa powder (natural, not Dutch-process)
- 1 teaspoon baking soda
- ½ teaspoon salt
- 1 large egg, at room temperature
- ½ cup (120ml) buttermilk, at room temperature
- ½ cup (120ml) vegetable oil
- ½ cup (120ml) hot water
- 1 teaspoon vanilla extract
- 1 cup (2 sticks, 226g) unsalted butter, softened
- 3 cups (360g) powdered sugar, sifted
- ½ cup (50g) unsweetened cocoa powder, sifted
- 3–4 tablespoons (45-60ml) heavy cream
- 1 teaspoon vanilla extract
- A pinch of salt
- 4 oz (115g) semi-sweet chocolate chips, melted and slightly cooled
- ¼ cup store-bought or homemade white frosting (or ½ cup powdered sugar + 1 tablespoon milk)
- Candy spiders (optional)
Instructions
- Preheat oven to 350°F (175°C). Line a 12-cup muffin tin with paper liners.
- In a large bowl, whisk together flour, sugar, cocoa powder, baking soda, and salt.
- In a separate bowl, whisk together egg, buttermilk, vegetable oil, and vanilla extract until smooth.
- Pour wet ingredients into dry ingredients and stir with a spatula until just combined (a few streaks of flour are okay).
- Slowly pour in hot water while stirring gently until batter is thin and shiny.
- Divide batter evenly among the 12 liners, filling each about ⅔ full.
- Bake for 18-20 minutes, or until a toothpick inserted into the center comes out clean or with a few moist crumbs. Cool in pan for 5 minutes, then transfer to a cooling rack to cool completely.
- While cupcakes cool, melt chocolate chips in a microwave-safe bowl in 30-second intervals, stirring after each, until smooth. Set aside to cool slightly.
- In a large bowl, beat softened butter with an electric mixer until creamy, about 2 minutes. Add sifted powdered sugar and cocoa powder, one cup at a time, beating on low. Add vanilla, salt, and 2 tablespoons heavy cream. Beat on medium-high for 3 minutes until light and fluffy. Add melted chocolate and beat for another minute. If too thick, add remaining cream, one tablespoon at a time.
- Once cupcakes are completely cool, pipe or spread chocolate frosting on each.
- Spoon white frosting into a small piping bag or zip-top bag. Snip off a tiny corner. Pipe a small circle of white frosting in the center of each cupcake, then pipe 4-5 concentric circles around it.
- Take a toothpick and gently drag it from the center outward through all the rings. Repeat 5-6 times around the cupcake, spacing the drags evenly. Wipe toothpick clean between drags.
- Place a candy spider on each web, or pipe a small dot of frosting and press it on. Let frosting set for about 10 minutes before serving.
Notes
For best results, ensure all ingredients are at room temperature. Do not overmix the batter. Cool cupcakes completely before frosting to prevent frosting from sliding off. For sharpest spiderweb lines, use a toothpick and wipe clean between drags. Store unfrosted cupcakes in the freezer for up to 2 months; make frosting fresh when ready to serve.
Nutrition
- Serving Size: 1 cupcake
- Calories: 420
- Sugar: 38
- Sodium: 280
- Fat: 22
- Saturated Fat: 12
- Carbohydrates: 55
- Fiber: 3
- Protein: 5
Keywords: Halloween cupcakes, chocolate spiderweb cupcakes, easy Halloween recipe, chocolate buttercream, spiderweb decoration, moist chocolate cake


