The power went out halfway through browning the meat. Classic, right? There I was, standing in my dark kitchen at 5:30 on a freezing Tuesday evening, holding a wooden spoon over a pan that had just started to sizzle. I had planned to make a completely different dish that night—something with beans, actually, and a lot more vegetables. But the universe had other plans, and honestly? I’m kind of glad it did.
I grabbed the wrong pack of meat from the freezer that morning. I was supposed to have ground turkey, but what thawed in the sink was a beautiful cut of chuck steak I had forgotten about. The power flickered, the smoke alarm beeped once (it always does), and I just stood there thinking, “Well, this is going to be a mess.” But I had this jar of smoked paprika staring at me from the spice rack, and for some reason, I thought, “Let’s just see what happens.”
What happened was a bowl of Cozy No Bean Texas Chili with Smoked Paprika that made me forget about the cold, the dark, and the fact that I had to eat dinner by candlelight. It was rich, it was smoky, it was exactly what a rough day needed. Maybe you’ve been there—standing in your kitchen when nothing goes right, and somehow, the thing that comes out of it is better than anything you planned. That’s this recipe. It’s the happy accident that became a staple.
Why You’ll Love This Recipe
Let me tell you why this chili has become my go-to for those nights when only comfort food will do. I’ve tested this recipe at least a dozen times now—tweaking the spice levels, adjusting the cooking time, even trying it in a slow cooker. It passed the ultimate test: my neighbor Dave, who claims to hate chili, asked for seconds.
- Quick & Easy: Comes together in about an hour, most of which is just letting it simmer and get all cozy on the stove.
- Simple Ingredients: You probably have most of this stuff already. No weird trips to specialty stores.
- Perfect for Cold Nights: This is the kind of meal you want when the wind is howling and you just need something warm in your belly.
- Crowd-Pleaser: Even people who swear they don’t like chili have gone back for more. It’s that good.
- Unbelievably Delicious: The smoked paprika gives it this deep, almost bacon-like flavor without any actual bacon. It’s magic, I swear.
What makes this different from every other chili recipe out there? It’s the technique. Instead of just dumping everything in a pot, I take the time to really brown the meat and let the spices bloom in the hot fat. It sounds fancy, but it’s just a few extra minutes that make a world of difference. And no beans—I know that’s controversial for some folks, but trust me on this one. The texture is all meat, all flavor, no filler.
This isn’t just good chili. It’s the kind that makes you close your eyes after the first bite. It’s comfort food that feels like a hug in a bowl—soul-soothing, warming, and exactly what you need after a long day.
What Ingredients You Will Need
This recipe uses simple, hearty ingredients to deliver that bold, smoky flavor without any fuss. Most of these are pantry staples, which makes this perfect for those nights when you don’t want to run to the store.
- Beef chuck, cut into 1/2-inch cubes (about 2 pounds) — I prefer chuck for its marbling and rich flavor. It breaks down beautifully during cooking.
- Olive oil, 2 tablespoons — for browning the meat and cooking the vegetables.
- Yellow onion, 1 large, diced — adds sweetness and depth to the base.
- Garlic cloves, 4 to 5, minced — because no chili is complete without it.
- Smoked paprika, 3 tablespoons — this is the star of the show. I use McCormick’s smoked paprika for its consistent quality and deep smoky flavor.
- Ground cumin, 2 tablespoons — warm, earthy, essential.
- Chili powder, 2 tablespoons — use a good quality one like Gebhardt’s for that authentic Texas chili taste.
- Dried oregano, 1 teaspoon — a little goes a long way.
- Tomato paste, 3 tablespoons — this adds richness and helps thicken the chili.
- Beef broth, 2 cups — low sodium is best so you can control the salt level.
- Fire-roasted diced tomatoes, 1 can (14.5 ounces) — the fire-roasting adds another layer of smoky goodness.
- Tomato sauce, 1 can (8 ounces) — for a smooth, rich tomato base.
- Bay leaves, 2 — they add a subtle herbal note as the chili simmers.
- Salt and black pepper, to taste — I usually start with 1 teaspoon salt and 1/2 teaspoon pepper.
- Optional garnishes: shredded cheddar cheese, sour cream, sliced jalapeños, chopped cilantro, diced red onion.
Ingredient Tips: For the beef, look for chuck with good marbling—it keeps the meat tender during the long simmer. If you can’t find chuck, brisket or bottom round work well too. The smoked paprika is non-negotiable in my book; regular paprika just won’t give you that deep, campfire-like flavor. And please, don’t skip the fire-roasted tomatoes. They add a subtle char that makes this chili taste like it’s been cooking all day.
Equipment Needed
You don’t need a fancy kitchen to make this chili, which is part of why I love it so much. Here’s what you’ll need:
- Large Dutch oven or heavy-bottomed pot (5 to 6 quarts) — I use my trusty Lodge enameled cast iron Dutch oven. It holds heat beautifully and distributes it evenly. If you don’t have one, any heavy pot with a lid will work.
- Sharp chef’s knife — for cutting the beef into cubes. A dull knife makes this job miserable.
- Cutting board — preferably wooden or plastic, something sturdy.
- Wooden spoon or spatula — for stirring and scraping up the browned bits from the bottom of the pot.
- Measuring spoons and cups — accuracy matters with the spices.
- Can opener — obviously.
- Ladle — for serving.
Budget-Friendly Tip: If you don’t have a Dutch oven, a deep stainless steel pot or even a slow cooker will work. Just be aware that the browning step is crucial, so you’ll need to do that on the stovetop first before transferring to a slow cooker if that’s your plan. I’ve also made this in a large non-stick skillet with high sides in a pinch—it works, but you’ll need to watch the liquid levels more carefully.
Preparation Method
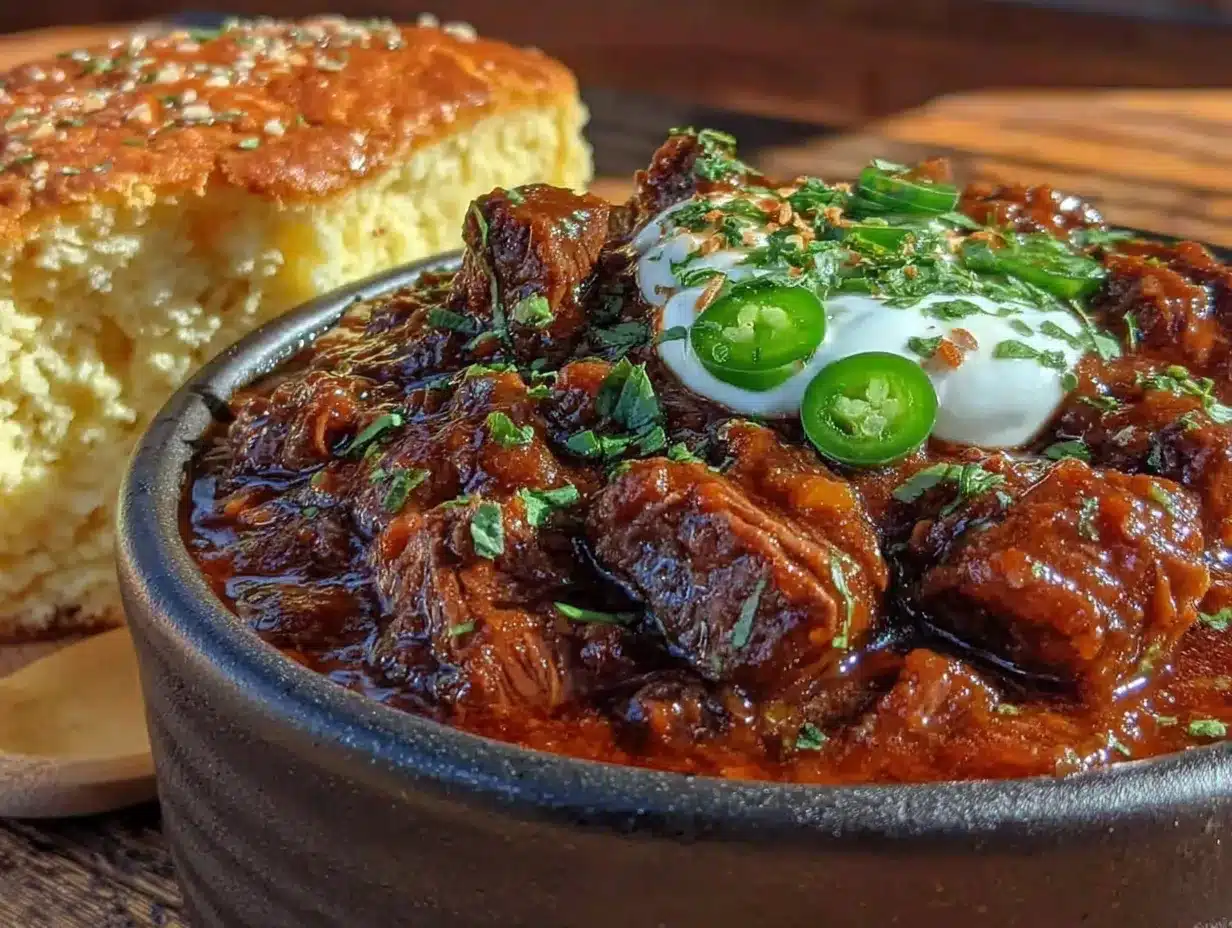
Alright, let’s get cooking. This might look like a lot of steps, but I promise it’s straightforward. Take your time with the browning—that’s where all the flavor lives.
- Prep the beef: Pat the beef chuck dry with paper towels. This is important—wet meat won’t brown properly. Cut it into 1/2-inch cubes, trying to keep them uniform so they cook evenly. Season generously with salt and pepper.
- Brown the meat in batches: Heat 1 tablespoon of olive oil in your Dutch oven over medium-high heat until it shimmers. Add half the beef cubes in a single layer—don’t crowd the pot. Let them cook undisturbed for 3-4 minutes until deeply browned on one side. Flip and brown the other side for 2-3 minutes. Transfer to a plate and repeat with the remaining oil and beef. This step takes about 10 minutes total, but it’s worth every second.
- Cook the aromatics: Reduce the heat to medium. Add the diced onion to the pot with the remaining fat. Cook for 5-6 minutes, stirring occasionally, until the onion is soft and translucent. Scrape up any browned bits from the bottom of the pot—that’s pure flavor. Add the minced garlic and cook for 30 seconds until fragrant.
- Bloom the spices: Add the smoked paprika, ground cumin, chili powder, and dried oregano to the pot. Stir constantly for about 1 minute until the spices are fragrant and have darkened slightly. This blooming step wakes up the spices and deepens their flavor. The kitchen will smell incredible at this point.
- Add the tomato paste: Stir in the tomato paste and cook for 2 minutes, stirring frequently. It will start to caramelize and turn a deeper red—that’s exactly what you want.
- Deglaze the pot: Pour in about 1/2 cup of the beef broth and scrape up any remaining browned bits from the bottom. This is where all that flavor gets incorporated into the chili.
- Combine everything: Return the browned beef to the pot. Add the fire-roasted diced tomatoes (with their juices), tomato sauce, remaining beef broth, and bay leaves. Stir everything together until well combined.
- Simmer low and slow: Bring the chili to a gentle boil, then reduce the heat to low. Cover and let it simmer for 45 minutes to 1 hour, stirring occasionally. The chili should be bubbling gently, not vigorously. After 45 minutes, remove the lid and let it simmer uncovered for another 15 minutes to thicken.
- Check for doneness: The beef should be tender enough to cut with a spoon. If it’s still a bit chewy, let it simmer for another 15-20 minutes. Taste and adjust seasoning with salt and pepper. Remove the bay leaves before serving.
- Rest before serving: Let the chili sit off the heat for 5-10 minutes before serving. This allows the flavors to meld together even more.
Pro Tip: If the chili seems too thick, add a splash more beef broth. If it’s too thin, let it simmer uncovered for a few more minutes to reduce. The consistency should be hearty and stew-like, not soupy.
Cooking Tips & Techniques
I’ve made this chili so many times that I’ve learned a few tricks the hard way. Let me save you some trouble.
Don’t rush the browning. I know it’s tempting to just dump all the meat in at once and call it a day, but you’ll end up with gray, steamed meat instead of beautifully browned chunks. The browning creates the Maillard reaction, which is fancy talk for “makes things taste amazing.” Take the extra 10 minutes. Your taste buds will thank you.
Watch your heat with the spices. Smoked paprika can burn quickly if the heat is too high. When you’re blooming the spices, keep the heat at medium and stir constantly. If you see black specks forming, you’ve gone too far. Start over with fresh spices—burnt paprika tastes bitter and will ruin the whole pot.
Let it rest. I made the mistake of serving this chili straight off the stove once, and it was good, but the next day? It was incredible. Chili always tastes better the next day after the flavors have had time to meld. If you can, make it a day ahead and reheat it gently.
Skim the fat if you want. Depending on how fatty your beef is, there might be a layer of rendered fat on top. You can skim it off with a spoon if you prefer a leaner chili, or stir it in for extra richness. I usually leave it because, well, flavor.
Multitasking tip: While the chili is simmering, you can prep your garnishes, set the table, or just sit down with a glass of wine and enjoy the smell. That’s my favorite part.
Variations & Adaptations
This recipe is pretty flexible, so feel free to make it your own. Here are some variations I’ve tried and loved:
- Spicy Version: Add 1-2 minced chipotle peppers in adobo sauce along with the garlic. It adds a smoky heat that pairs perfectly with the smoked paprika. I did this once when I needed an extra kick, and it was incredible.
- Milder Version: Cut the chili powder in half and use sweet paprika instead of smoked if the smoky flavor is too intense for some. My kids prefer it this way—it’s still cozy and warm, just less assertive.
- Slow Cooker Method: Brown the meat and cook the aromatics on the stovetop as directed, then transfer everything to a slow cooker. Cook on low for 6-8 hours or on high for 3-4 hours. This is perfect for busy days when you want dinner ready when you walk in the door.
- Add Vegetables: Stir in diced bell peppers or zucchini during the last 20 minutes of cooking for some extra nutrition. I’ve added diced carrots before too, and they add a subtle sweetness that balances the heat.
- Meat Swap: Ground beef, ground turkey, or even shredded brisket work well in place of cubed chuck. Just adjust the cooking time accordingly—ground meats cook faster.
Serving & Storage Suggestions
This chili is best served hot, straight from the pot. Ladle it into deep bowls and top with your favorite garnishes. I’m partial to a generous pile of shredded cheddar cheese, a dollop of sour cream, and some fresh cilantro. A few slices of jalapeño on top add a nice pop of color and heat.
For sides, you can’t go wrong with crusty bread or warm cornbread to soak up all that goodness. I also love serving it with a simple side salad dressed with lime vinaigrette to cut through the richness.
Storage: Leftover chili keeps well in an airtight container in the refrigerator for up to 5 days. The flavors actually get better after a day or two. To reheat, simply warm it in a pot over medium-low heat, stirring occasionally, until heated through. You can also microwave individual portions in 30-second intervals.
Freezing: This chili freezes beautifully. Let it cool completely, then transfer to freezer-safe containers or zip-top bags. It will keep for up to 3 months. Thaw overnight in the refrigerator before reheating. I like to freeze individual portions for quick lunches on busy days.
One thing I’ve noticed is that the chili thickens as it sits, so you might need to add a splash of broth or water when reheating to bring it back to the right consistency.
Nutritional Information & Benefits
Here’s an approximate nutritional breakdown per serving (based on 6 servings, without garnishes):
- Calories: 385
- Protein: 32g
- Fat: 22g
- Carbohydrates: 12g
- Fiber: 3g
- Sugar: 6g
- Sodium: 680mg
This chili is packed with protein from the beef, which helps keep you full and satisfied. The smoked paprika is rich in antioxidants called carotenoids, which have anti-inflammatory properties. Garlic and onions provide prebiotic fiber that supports gut health. And the tomatoes are loaded with lycopene, another powerful antioxidant.
For those watching their carb intake, this chili is naturally low-carb and gluten-free. Just be mindful of the garnishes—skip the cornbread and load up on cheese and sour cream instead. It’s also a great option for those following a paleo or Whole30 diet, as long as you check that your broth and spices are compliant.
Personally, I love that this recipe feels indulgent but is actually pretty balanced. It’s the kind of meal that nourishes you from the inside out, especially on a cold day when you need something warm and grounding.
Conclusion
This Cozy No Bean Texas Chili with Smoked Paprika started as a kitchen disaster and turned into one of my most-requested recipes. It’s proof that sometimes the best things come from happy accidents. The smoky depth, the tender chunks of beef, the way it warms you from the inside out—it’s everything I want in a bowl of comfort food.
I hope you give this recipe a try and make it your own. Add more spice, swap the meat, throw in some veggies—whatever feels right. That’s the beauty of chili; it’s forgiving and adaptable. And if you love it half as much as I do, you’ll be making it on repeat all winter long.
I’d love to hear how it turns out for you! Drop a comment below and let me know if you tried any variations, or share a photo of your bowl on Pinterest. Nothing makes me happier than seeing someone else fall in love with this recipe. Happy cooking, friends!
Frequently Asked Questions
Can I use ground beef instead of cubed chuck?
Absolutely! Ground beef works great, though the texture will be different. Brown it in the pot, breaking it up with a spoon, then proceed with the recipe. The cooking time will be shorter since ground beef cooks faster—about 30 minutes of simmering should do it.
Is this chili really spicy?
It has a mild to medium heat level, mostly from the chili powder and smoked paprika. It’s warming without being overwhelming. If you’re sensitive to spice, reduce the chili powder to 1 tablespoon. If you want more heat, add chipotle peppers or a pinch of cayenne.
Can I make this in an Instant Pot?
Yes! Use the sauté function to brown the meat and cook the aromatics, then add the remaining ingredients. Pressure cook on high for 25 minutes, then let the pressure release naturally for 10 minutes before quick releasing. The meat will be incredibly tender.
How do I thicken the chili if it’s too thin?
Let it simmer uncovered for an additional 15-20 minutes to allow excess liquid to evaporate. You can also mash a few of the beef cubes against the side of the pot to release their starches, which will naturally thicken the sauce. Avoid adding flour or cornstarch if you want to keep it gluten-free.
Can I omit the smoked paprika?
You can, but it won’t be the same recipe. The smoked paprika is what gives this chili its signature deep, smoky flavor. If you don’t have it, use regular paprika and add a few drops of liquid smoke for a similar effect. Or just embrace the change and call it your own version!
Pin This Recipe!
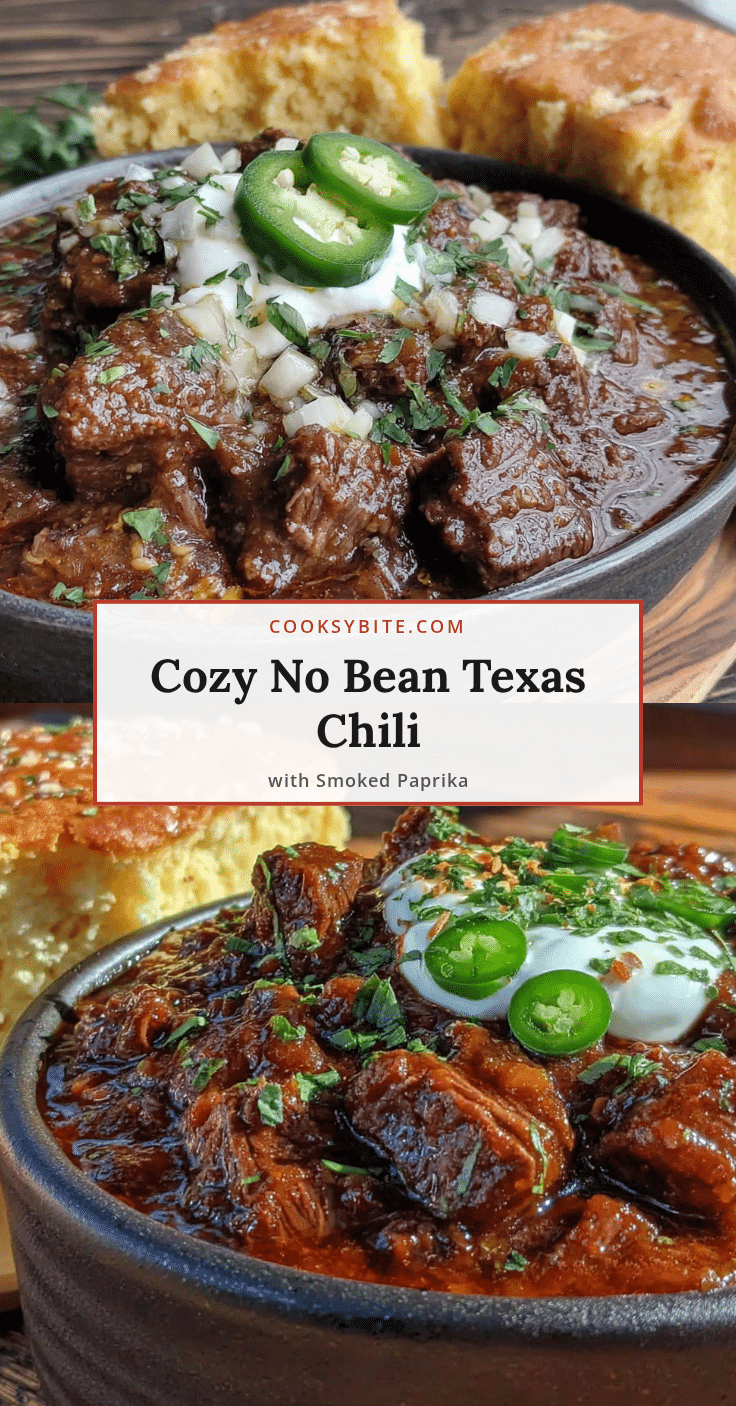
Cozy No Bean Texas Chili with Smoked Paprika
A rich, smoky, and hearty Texas chili made without beans, featuring tender beef chuck and a deep smoked paprika flavor. Perfect for cold nights and comfort food cravings.
- Prep Time: 15 minutes
- Cook Time: 1 hour 15 minutes
- Total Time: 1 hour 30 minutes
- Yield: 6 servings 1x
- Category: Main Course
- Cuisine: American (Texas)
Ingredients
- 2 pounds beef chuck, cut into 1/2-inch cubes
- 2 tablespoons olive oil
- 1 large yellow onion, diced
- 4 to 5 garlic cloves, minced
- 3 tablespoons smoked paprika
- 2 tablespoons ground cumin
- 2 tablespoons chili powder
- 1 teaspoon dried oregano
- 3 tablespoons tomato paste
- 2 cups low-sodium beef broth
- 1 can (14.5 ounces) fire-roasted diced tomatoes
- 1 can (8 ounces) tomato sauce
- 2 bay leaves
- Salt and black pepper to taste
- Optional garnishes: shredded cheddar cheese, sour cream, sliced jalapeños, chopped cilantro, diced red onion
Instructions
- Pat the beef chuck dry with paper towels and cut into 1/2-inch cubes. Season generously with salt and pepper.
- Heat 1 tablespoon olive oil in a large Dutch oven over medium-high heat. Add half the beef cubes in a single layer and cook undisturbed for 3-4 minutes until deeply browned. Flip and brown the other side for 2-3 minutes. Transfer to a plate. Repeat with remaining oil and beef.
- Reduce heat to medium. Add diced onion to the pot and cook for 5-6 minutes until soft and translucent, scraping up browned bits. Add minced garlic and cook for 30 seconds until fragrant.
- Add smoked paprika, ground cumin, chili powder, and dried oregano. Stir constantly for about 1 minute until fragrant.
- Stir in tomato paste and cook for 2 minutes, stirring frequently, until it caramelizes.
- Pour in 1/2 cup beef broth and scrape up any remaining browned bits from the bottom of the pot.
- Return browned beef to the pot. Add fire-roasted diced tomatoes (with juices), tomato sauce, remaining beef broth, and bay leaves. Stir to combine.
- Bring to a gentle boil, then reduce heat to low. Cover and simmer for 45 minutes to 1 hour, stirring occasionally. Remove lid and simmer uncovered for another 15 minutes to thicken.
- Check that beef is tender enough to cut with a spoon. Adjust seasoning with salt and pepper. Remove bay leaves before serving.
- Let chili rest off the heat for 5-10 minutes before serving.
Notes
For best flavor, brown the meat in batches and don’t rush the spice blooming step. Chili tastes even better the next day. If too thick, add more broth; if too thin, simmer uncovered longer. Smoked paprika is key—do not substitute with regular paprika.
Nutrition
- Serving Size: 1 serving (about 1.5
- Calories: 385
- Sugar: 6
- Sodium: 680
- Fat: 22
- Saturated Fat: 8
- Carbohydrates: 12
- Fiber: 3
- Protein: 32
Keywords: Texas chili, no bean chili, smoked paprika chili, beef chili, easy chili recipe, comfort food, gluten-free chili, low-carb chili


