For a while, I just accepted that baked chicken thighs weren’t going to have that crispy skin. You know the kind—the shatteringly golden, almost crackly exterior that makes you forget you’re eating something relatively healthy. Every recipe I tried promised it, but they always delivered skin that was either rubbery, soggy, or just… sad. I’d pull them out of the oven, sigh, and tell myself the flavor was good enough. But honestly? It wasn’t. I wanted that satisfying crunch without having to stand over a splattering skillet of hot oil. So I started tinkering. I tried different temperatures, different drying methods, different pans. What I landed on was a combination of techniques that finally gave me that crisp—paired with a sweet-tart apple cider glaze that makes the whole house smell like autumn. It took a few batches of trial and error (and a few sad, soggy thighs), but this recipe is the one that stuck. It’s the one I make when I need a weeknight dinner to feel just a little bit special.
Why You’ll Love This Recipe
I’ve tested this recipe more times than I care to count, and I can tell you with confidence: these are the crispiest baked chicken thighs you will ever make at home. The secret isn’t a fancy gadget or a complicated marinade. It’s about how you prep the skin and how you handle the heat.
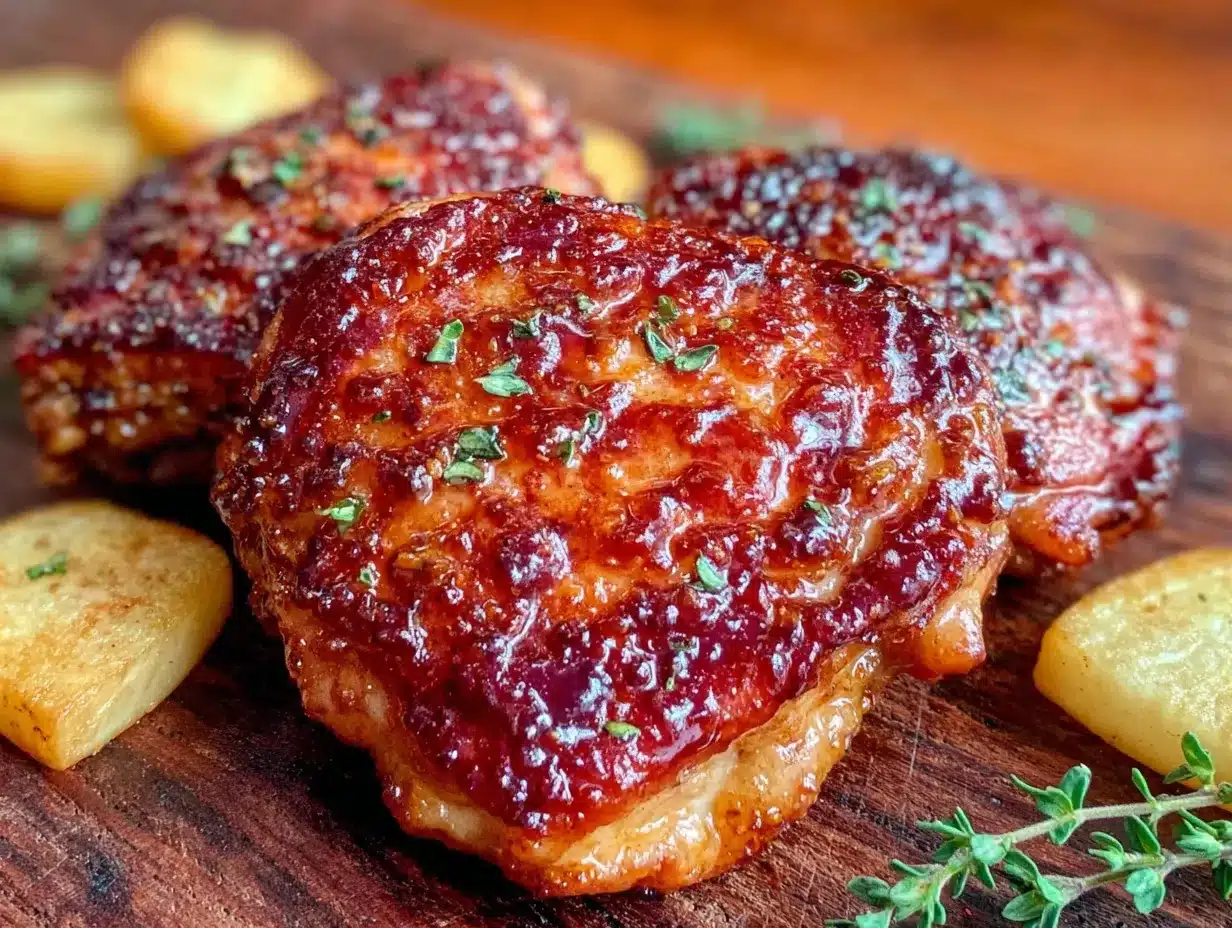
- Perfectly Crispy Skin: The combination of air-drying the skin and starting the chicken in a cold pan creates a crackling-crisp exterior that rivals fried chicken. No sputtering oil, no mess.
- Sweet & Savory Glaze: The apple cider reduction is tangy, slightly sweet, and deeply caramelized. It clings to the chicken without making the skin soggy—a balance I spent weeks perfecting.
- Simple Pantry Ingredients: You probably have most of these in your kitchen right now. No trips to a specialty store needed.
- Weeknight-Friendly: Most of the work is hands-off oven time. You can prep the glaze while the chicken roasts.
- Crowd-Pleaser: I’ve served these at casual dinners and holiday gatherings. They disappear every single time. Kids and adults alike fight over the crispy bits.
This isn’t just another baked chicken recipe. It’s the one that makes you close your eyes after the first bite. It’s comfort food reimagined—healthier, faster, but with the same soul-soothing satisfaction. Perfect for impressing guests without stress, or turning a simple Tuesday dinner into something memorable.
What Ingredients You Will Need
This recipe uses simple, wholesome ingredients to deliver bold flavor and satisfying texture without the fuss. Most are pantry staples, but a few key players do the heavy lifting.
- Bone-in, skin-on chicken thighs (6-8 thighs, about 2.5-3 lbs total): This is non-negotiable for the crispiest results. The bone keeps the meat juicy, and the skin is what we’re after. I prefer thighs from Bell & Evans or Mary’s Free Range Chicken for the best flavor and texture.
- Apple cider (1 cup, not vinegar): Look for unfiltered, raw apple cider if you can find it. It has a more complex, tangy flavor that reduces beautifully. Martinelli’s is my go-to brand.
- Apple cider vinegar (2 tablespoons): This brightens the glaze and cuts through the richness of the chicken.
- Honey or maple syrup (2 tablespoons): Adds sweetness to balance the tart apple cider. Maple syrup gives a slightly deeper, earthier sweetness. Use whichever you have on hand.
- Dijon mustard (1 tablespoon): Adds a subtle tang and helps emulsify the glaze. It’s not overpowering, I promise.
- Garlic (3 cloves, minced): Fresh garlic is best. Pre-minced jarred garlic can be used in a pinch, but the flavor won’t be as bright.
- Fresh thyme (4-5 sprigs): Adds an earthy, slightly floral note that pairs beautifully with apple. Dried thyme works too—use 1 teaspoon.
- Kosher salt and freshly ground black pepper: Don’t skimp on the salt. It’s essential for drawing moisture out of the skin, which helps it crisp.
- Olive oil or avocado oil (1 tablespoon): Just a little to help the seasoning stick and encourage browning.
- Optional for garnish: Fresh parsley or chives, chopped. A sprinkle of flaky sea salt right before serving.
Equipment Needed
You don’t need much for this recipe, which is part of its beauty. Here’s what I use:
- Baking sheet or cast iron skillet: A rimmed baking sheet works perfectly. I prefer a cast iron skillet because it holds heat evenly and gives the skin an extra-crispy bottom. If using a baking sheet, line it with parchment paper or foil for easier cleanup.
- Wire rack: This is a game-changer. Placing the chicken on a wire rack set inside the baking sheet allows hot air to circulate all around the thighs. The skin crisps evenly, and the bottom doesn’t get soggy. If you don’t have one, you can flip the chicken halfway through, but the rack is worth the investment.
- Small saucepan: For reducing the apple cider glaze. A heavy-bottomed one works best to prevent burning.
- Instant-read thermometer: Essential for perfectly cooked chicken. You’re looking for 165°F (74°C) in the thickest part of the thigh, near the bone. I use a Thermapen—it’s fast and accurate.
- Paper towels: For drying the chicken skin thoroughly. This is the most important step for crispiness.
- Pastry brush: For applying the glaze. A silicone one is easiest to clean.
Preparation Method
This method is a little different from what you might be used to, but trust me—it works. The key is starting the chicken in a cold oven. This allows the fat to render slowly, giving you that impossibly crispy skin.
-
Prep the chicken. Pat the chicken thighs dry with paper towels. And I mean really dry. Get in between the skin and the meat if you can. Place them on a plate, uncovered, and let them sit in the refrigerator for at least 1 hour, or up to overnight. This air-drying step is non-negotiable for the crispiest skin. If you’re short on time, 30 minutes will still help.
-
Make the glaze. In a small saucepan, combine the apple cider, apple cider vinegar, honey (or maple syrup), Dijon mustard, and minced garlic. Add the fresh thyme sprigs. Bring to a boil over medium-high heat, then reduce the heat to medium-low and let it simmer. Stir occasionally. You want it to reduce by about half, until it’s syrupy and coats the back of a spoon. This takes about 15-20 minutes. Remove the thyme sprigs and set the glaze aside. It will thicken more as it cools.
-
Season the chicken. About 30 minutes before you’re ready to cook, take the chicken out of the fridge. Pat it dry one more time (you’ll be surprised how much moisture comes out). Season generously on both sides with kosher salt and freshly ground black pepper. Drizzle with the olive oil and rub it all over. Let it sit at room temperature for 20-30 minutes. This helps it cook more evenly.
-
Set up your pan. Place a wire rack inside a rimmed baking sheet or cast iron skillet. Arrange the chicken thighs on the rack, skin-side up. Make sure they’re not touching—crowding the pan will trap steam and prevent crisping.
-
Start in a cold oven. Place the baking sheet in the cold oven. Then set the oven to 425°F (220°C). Yes, cold oven. This slow start renders the fat gently, creating that shatteringly crisp skin. Bake for 25 minutes.
-
Glaze and finish. After 25 minutes, carefully remove the pan from the oven. Brush the glaze generously over the skin of each thigh. Return the pan to the oven and bake for another 15-20 minutes, or until the internal temperature reaches 165°F (74°C) in the thickest part. The skin should be deep golden brown and crackling.
-
Rest and serve. Let the chicken rest on the rack for 5-10 minutes. This allows the juices to redistribute. Brush with a little more glaze right before serving. Sprinkle with fresh parsley or chives and a pinch of flaky sea salt if you’re feeling fancy.
Cooking Tips & Techniques
I learned these the hard way, so you don’t have to.
- Don’t skip the air-dry. I know it feels like a waste of time, but this is the single most important step for crispy skin. Moisture is the enemy of crispiness. The fridge air helps evaporate surface moisture, and the salt draws out even more from the skin. I once skipped this step out of impatience and ended up with sad, flabby skin. Never again.
- Cold oven, hot results. Starting in a cold oven sounds counterintuitive, but it allows the fat to render slowly and evenly. If you start in a hot oven, the skin tightens and sears too quickly, trapping the fat underneath. The result is greasy, not crispy.
- Don’t over-glaze. Apply a thin, even layer. Too much glaze will make the skin soggy. If you want extra flavor, you can brush on a second coat in the last 5 minutes of baking.
- Use a thermometer. Chicken thighs are forgiving, but they’re best at 165°F (74°C). Going much higher can dry them out. I’ve pulled them at 160°F and let carryover cooking finish the job, but 165°F is the safe zone.
- Let them rest. I know it’s hard, but don’t skip the rest. The juices need time to settle. If you cut into them right away, all that goodness runs out onto the plate.
Variations & Adaptations
This recipe is a great base to play with. Here are a few ways I’ve adapted it:
- Spicy Maple Glaze: Add 1/2 teaspoon of red pepper flakes or a minced chipotle pepper in adobo sauce to the glaze while it simmers. The heat cuts through the sweetness beautifully.
- Herb-Crusted: After seasoning with salt and pepper, sprinkle the skin with a mixture of dried rosemary, sage, and a little garlic powder before baking. The herbs toast in the oven and add incredible flavor.
- Balsamic Apple Glaze: Swap half the apple cider with balsamic vinegar. The balsamic adds a deeper, more complex tang that’s fantastic with the chicken. This version is my favorite for fall dinner parties.
- Honey Mustard Variation: Omit the apple cider and use 1/2 cup honey and 1/4 cup Dijon mustard instead. Reduce the apple cider vinegar to 1 tablespoon. It’s a classic combination that never fails.
- Dietary Adaptations: This recipe is naturally gluten-free and dairy-free. For a lower-sugar option, skip the honey and let the natural sweetness of the apple cider carry the glaze. It will be tangier but still delicious.
Serving & Storage Suggestions
These chicken thighs are incredibly versatile. Here’s how I like to serve and store them.
Serving: Serve the chicken hot, right off the rack, with that final brush of glaze. I love pairing them with something simple to soak up the juices—mashed potatoes, roasted root vegetables, or a crisp green salad with a tangy vinaigrette. The glaze also makes a fantastic sauce for rice or quinoa. For a truly cozy meal, serve them alongside a batch of simple roasted vegetables.
Storage: Leftover chicken thighs can be stored in an airtight container in the refrigerator for up to 4 days. The skin will lose some of its crispiness, but the flavor will still be fantastic.
Reheating: To bring back some of that crisp, reheat them in a 375°F (190°C) oven on a wire rack for 10-15 minutes. Avoid the microwave—it will make the skin rubbery. You can also reheat them in an air fryer at 350°F (175°C) for 5-7 minutes.
Freezing: You can freeze the cooked chicken thighs for up to 3 months. Wrap them individually in plastic wrap and place them in a freezer-safe bag. Thaw overnight in the refrigerator and reheat as directed above.
Flavor Development: Honestly, the flavor gets even better the next day. The glaze seeps into the meat a little more, and the tanginess deepens. I often make a double batch just for leftovers.
Nutritional Information & Benefits
Here’s an approximate breakdown per serving (based on 2 thighs with glaze):
- Calories: 380-420
- Protein: 32g
- Fat: 24g
- Saturated Fat: 6g
- Carbohydrates: 12g
- Sugar: 10g
- Sodium: 580mg
Health Benefits: Chicken thighs are a great source of high-quality protein, iron, and B vitamins. The skin provides healthy fats that help you feel full and satisfied. Apple cider is rich in antioxidants and may support gut health. This recipe is a balanced meal that doesn’t sacrifice flavor for nutrition.
Dietary Considerations: This recipe is naturally gluten-free, dairy-free, and nut-free. For a lower-carb option, serve with roasted vegetables instead of potatoes. The sugar content comes from the honey and apple cider, which you can reduce if needed.
Conclusion
This recipe is the answer to the question I used to ask myself every time I baked chicken: “Why isn’t the skin crispy?” It took some trial and error, but now I have a method that delivers every single time. The combination of air-drying, a cold oven start, and that tangy-sweet apple cider glaze is pure magic. It’s the kind of dinner that feels like a special occasion but comes together with almost no effort.
I hope you give this recipe a try and make it your own. Maybe you’ll add a little more heat, or swap the honey for maple syrup, or serve it over a bed of greens. That’s the beauty of a good base recipe—it’s a starting point for your own kitchen adventures. If you make it, I’d love to hear how it turned out. Drop a comment below and let me know what you think. And if you’re looking for another showstopping main dish, you might enjoy this decadent red wine chocolate cake for dessert. Happy cooking!
Frequently Asked Questions
Can I use boneless, skinless chicken thighs?
You can, but the results won’t be the same. The skin is what gets crispy, and the bone helps keep the meat juicy. If you use boneless, skinless thighs, reduce the cooking time by about 10-15 minutes and check for doneness at 160°F (71°C).
Can I make the glaze ahead of time?
Absolutely! The glaze can be made up to 3 days in advance. Store it in an airtight container in the refrigerator. Let it come to room temperature before brushing it on the chicken, or warm it slightly to loosen it up.
Why start in a cold oven?
Starting in a cold oven allows the fat to render slowly and evenly. If you start in a hot oven, the skin tightens and sears too quickly, trapping the fat underneath. This results in greasy, not crispy, skin.
Can I use chicken breasts instead?
I don’t recommend it for this recipe. Chicken breasts cook much faster and dry out easily. The skin also doesn’t crisp as well because there’s less fat to render. Stick with thighs for the best results.
How do I reheat leftovers without losing crispiness?
The oven or air fryer is your best friend here. Reheat in a 375°F (190°C) oven on a wire rack for 10-15 minutes, or in an air fryer at 350°F (175°C) for 5-7 minutes. Avoid the microwave at all costs—it will make the skin rubbery.
Pin This Recipe!

Crispy Baked Chicken Thighs with Apple Cider Glaze

These crispy baked chicken thighs feature shatteringly golden skin and a sweet-tart apple cider glaze. The secret is air-drying the skin and starting in a cold oven for perfectly rendered, crackling-crisp results every time.
- Prep Time: 1 hour 30 minutes (includes air-drying and resting)
- Cook Time: 40-45 minutes
- Total Time: 2 hours 15 minutes
- Yield: 4 servings 1x
- Category: Main Course
- Cuisine: American
Ingredients
- 6–8 bone-in, skin-on chicken thighs (about 2.5–3 lbs total)
- 1 cup apple cider (unfiltered, if possible)
- 2 tablespoons apple cider vinegar
- 2 tablespoons honey or maple syrup
- 1 tablespoon Dijon mustard
- 3 cloves garlic, minced
- 4–5 sprigs fresh thyme (or 1 teaspoon dried)
- Kosher salt and freshly ground black pepper, to taste
- 1 tablespoon olive oil or avocado oil
- Optional: fresh parsley or chives, chopped, and flaky sea salt for garnish
Instructions
- Prep the chicken: Pat chicken thighs dry with paper towels. Place on a plate, uncovered, and refrigerate for at least 1 hour or up to overnight to air-dry the skin.
- Make the glaze: In a small saucepan, combine apple cider, apple cider vinegar, honey (or maple syrup), Dijon mustard, minced garlic, and fresh thyme sprigs. Bring to a boil over medium-high heat, then reduce heat to medium-low and simmer until reduced by half and syrupy, about 15-20 minutes. Remove thyme sprigs and set aside.
- Season the chicken: About 30 minutes before cooking, remove chicken from fridge. Pat dry again. Season generously on both sides with kosher salt and black pepper. Drizzle with olive oil and rub all over. Let sit at room temperature for 20-30 minutes.
- Set up the pan: Place a wire rack inside a rimmed baking sheet or cast iron skillet. Arrange chicken thighs skin-side up on the rack, ensuring they are not touching.
- Start in a cold oven: Place the pan in a cold oven. Set oven to 425°F (220°C). Bake for 25 minutes.
- Glaze and finish: After 25 minutes, remove pan from oven. Brush glaze generously over the skin of each thigh. Return to oven and bake for another 15-20 minutes, or until internal temperature reaches 165°F (74°C) in the thickest part. Skin should be deep golden brown and crackling.
- Rest and serve: Let chicken rest on the rack for 5-10 minutes. Brush with a little more glaze before serving. Garnish with fresh parsley or chives and a pinch of flaky sea salt, if desired.
Notes
Don’t skip the air-drying step—it’s crucial for crispy skin. Starting in a cold oven allows fat to render slowly. Apply glaze in a thin layer to avoid sogginess. Let chicken rest before serving to retain juices.
Nutrition
- Serving Size: 2 thighs
- Calories: 380420
- Sugar: 10
- Sodium: 580
- Fat: 24
- Saturated Fat: 6
- Carbohydrates: 12
- Protein: 32
Keywords: crispy baked chicken thighs, apple cider glaze, bone-in chicken thighs, easy weeknight dinner, gluten-free, dairy-free


