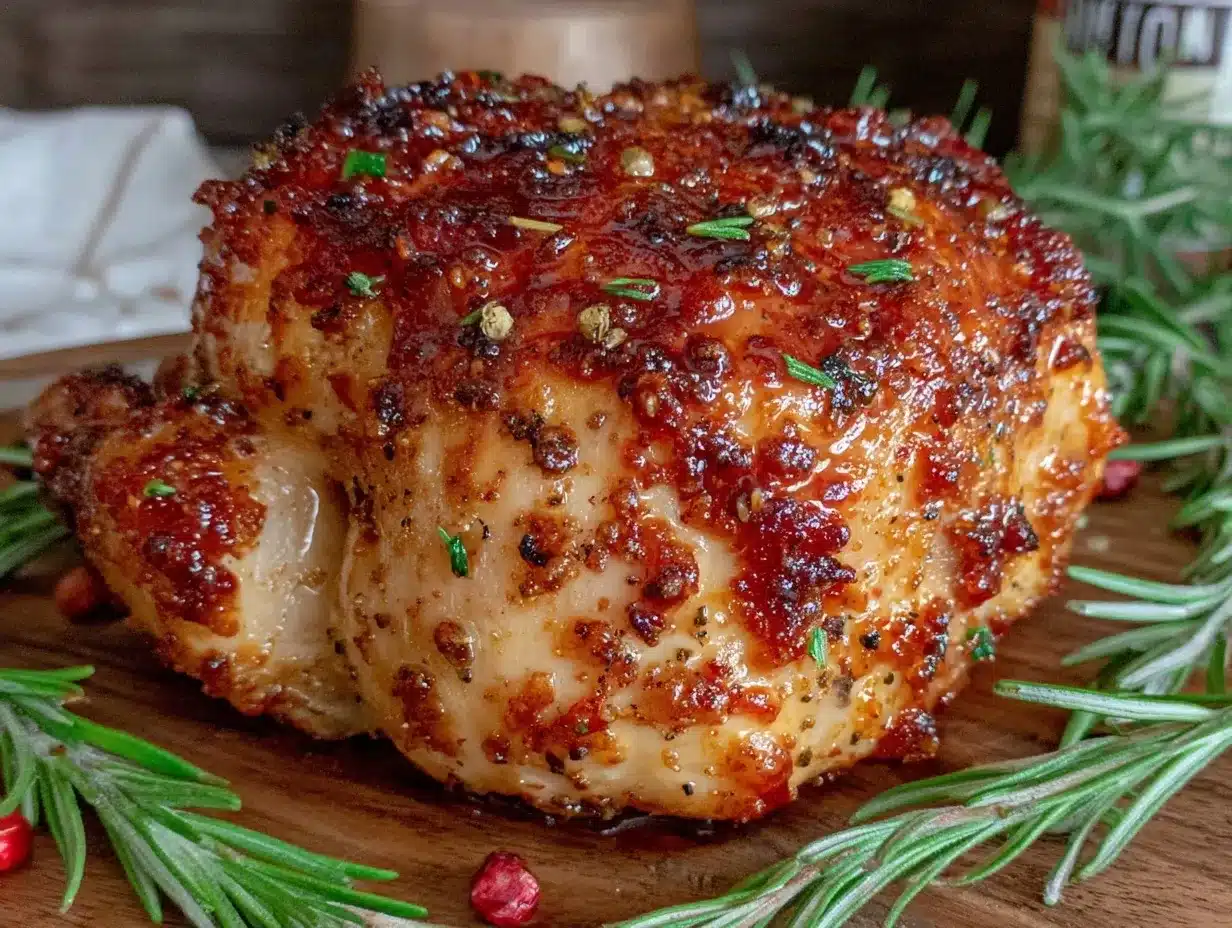
Let me tell you, the scent of sizzling spices and roasted chicken wafting from the grill is enough to make any backyard gathering feel like a celebration. The first time I tried making crispy beer can chicken with a flavorful dry rub, I was instantly hooked—the kind of moment where you pause, take a deep breath, and just smile because you know you’re onto something truly special. Years ago, when I was knee-high to a grasshopper, my grandma would always roast chicken on lazy Sunday afternoons, but this beer can chicken recipe? It feels like a modern twist that brings the same warmth with a little extra crunch and depth of flavor.
I stumbled upon this recipe on a rainy weekend, trying to recreate that smoky, crispy skin I’d enjoyed at a local BBQ joint. Honestly, it’s dangerously easy and provides pure, nostalgic comfort that brightens up any potluck or family dinner. My family couldn’t stop sneaking bites off the cooling rack (and I can’t really blame them). Whether you’re aiming to impress guests or just want a sweet treat for your kids, this crispy beer can chicken with flavorful dry rub is going to become a staple in your grilling rotation. I’ve tested this recipe more times than I can count—in the name of research, of course—and it’s always a hit, perfect for gifting or those casual weekend feasts that feel like a warm hug.
Why You’ll Love This Recipe
Honestly, this crispy beer can chicken with flavorful dry rub isn’t just another grilled bird—it’s the kind that makes you close your eyes after the first bite. Here’s why this recipe stands out from the rest:
- Quick & Easy: Comes together in under 1 hour, perfect for busy weeknights or last-minute weekend BBQs.
- Simple Ingredients: No fancy grocery trips needed; you likely already have everything in your kitchen pantry and fridge.
- Perfect for Outdoor Gatherings: Great for backyard cookouts, casual parties, or family picnics.
- Crowd-Pleaser: Always gets rave reviews from kids and adults alike—smoky, juicy, with that crave-worthy crispy skin.
- Unbelievably Delicious: The dry rub strikes the perfect balance of savory, smoky, and slightly sweet, making every bite a flavor bomb.
What makes this recipe different? Well, I blend a dry rub packed with spices that cling to the chicken like a magic cloak, locking in moisture while creating that signature crispy skin. Plus, the beer can method helps steam the chicken from the inside, keeping it juicy and tender. It’s comfort food reimagined—healthier, faster, but with all the soul-soothing satisfaction you crave. Whether you’re impressing guests without the stress or turning a simple meal into a memorable feast, this recipe has got your back.
What Ingredients You Will Need
This recipe uses simple, wholesome ingredients to deliver bold flavor and satisfying texture without the fuss. You’ll find these are mostly pantry staples, which makes it ideal for spontaneous grill nights or planned celebrations.
- Whole Chicken (about 4-5 pounds / 1.8-2.3 kg) – Fresh or thawed, make sure it’s patted dry for crispy skin.
- Beer Can – Choose a standard 12 oz (355 ml) can of your favorite beer (lager or ale works well) to steam the chicken from inside.
- Olive Oil (2 tbsp / 30 ml) – Helps the dry rub stick and promotes crispiness.
- Brown Sugar (2 tbsp / 25 g) – Adds a touch of caramelized sweetness to the rub.
- Paprika (1 tbsp / 7 g) – For that smoky, vibrant color and flavor.
- Garlic Powder (1 tsp / 3 g) – Classic savory punch.
- Onion Powder (1 tsp / 3 g) – Adds depth to the rub.
- Ground Cumin (1 tsp / 2 g) – For a warm, earthy undertone.
- Dried Oregano (1 tsp / 1 g) – A hint of herbal brightness.
- Cayenne Pepper (¼ tsp / 0.5 g) – Just enough heat to keep it interesting.
- Salt (1 tbsp / 15 g) – I recommend kosher salt for best texture and flavor balance.
- Black Pepper (1 tsp / 2 g) – Freshly ground for that punchy finish.
You can swap the beer can for a can of sparkling water or juice if you prefer a non-alcoholic option. Also, if you want to make it gluten-free, double-check your beer choice or opt for a gluten-free brand. The rub can be mixed ahead and stored in an airtight jar for up to 2 weeks, making future cookouts a breeze.
Equipment Needed
- Grill or Charcoal BBQ: Ideally with a lid for indirect cooking. Gas grills work well too.
- Beer Can Chicken Roaster (Optional): A metal stand designed to hold the can and chicken steady. If you don’t have one, no worries—you can balance the chicken directly on the beer can carefully.
- Meat Thermometer: To check the internal temperature and avoid overcooking. This is a game-changer for juicy chicken.
- Mixing Bowl: For combining the dry rub spices.
- Tongs and Heat-Resistant Gloves: For safely handling the hot chicken and equipment.
If you’re on a budget, you can skip the specialized roaster and just use an empty, cleaned beer can. Just be cautious when removing the chicken after cooking. I’ve used both, and while the roaster adds stability, it’s not essential.
Preparation Method
- Prepare Your Chicken: Remove any giblets from the cavity and pat the chicken dry inside and out with paper towels. Dry skin is key for that crispy finish.
- Mix the Dry Rub: In a bowl, combine 2 tbsp brown sugar, 1 tbsp paprika, 1 tsp garlic powder, 1 tsp onion powder, 1 tsp cumin, 1 tsp dried oregano, ¼ tsp cayenne pepper, 1 tbsp kosher salt, and 1 tsp freshly ground black pepper. Stir until evenly blended.
- Oil and Rub: Rub 2 tbsp olive oil all over the chicken, including under the skin if you can (careful!). Then generously coat the chicken with the dry rub, making sure to cover every inch for flavor and crispy texture. Don’t forget inside the cavity.
- Prepare the Beer Can: Open a 12 oz (355 ml) can of your chosen beer and drink or pour out about half (or save for the cook!). You want the beer to steam gently, not overflow.
- Mount the Chicken: Place the beer can on a sturdy surface. Carefully lower the chicken cavity over the can, balancing the bird upright. If you have a roaster stand, place the chicken in it for stability.
- Preheat the Grill: Heat your grill to medium heat (~375°F / 190°C). Set it up for indirect cooking—meaning the heat source is on one side, the chicken on the other. This allows slow roasting without burning.
- Grill the Chicken: Place the chicken upright on the grill grate, away from direct flames. Close the lid. Cook for approximately 1 hour to 1 hour 15 minutes, or until the internal temperature reaches 165°F (74°C) in the thickest part of the thigh.
- Check for Doneness: Use a meat thermometer inserted into the thigh without touching bone. The juices should run clear, and the skin should be crispy and golden brown.
- Rest the Chicken: Carefully remove the chicken (use tongs and gloves—it’s hot!). Let it rest for 10 minutes before carving. This locks in the juices and makes slicing easier.
- Serve and Enjoy: Carve the chicken and serve with your favorite sides. The crispy skin and flavorful rub will have everyone coming back for seconds.
If you find the skin isn’t as crispy as you’d like, you can finish it off with a quick 5-minute sear over direct heat (watch closely!). Also, if your grill runs hot, rotate the chicken occasionally for even cooking.
Cooking Tips & Techniques
One thing I learned early on is that patience is your best friend with beer can chicken. Letting it cook low and slow over indirect heat is what gives you that tender meat and crackly skin. Rushing with high heat just leads to burnt spices and dry meat—trust me, I’ve been there.
Another tip: don’t skip drying the chicken thoroughly before applying the rub. Moisture is the enemy of crispiness. Also, apply the rub liberally—this isn’t the time to be shy. The spices form a flavorful crust that’s worth every pinch.
When handling the beer can chicken setup, be gentle but confident. The can makes the bird a bit wobbly, so if you don’t have a roaster stand, place the chicken on a sturdy baking sheet while prepping. Using a meat thermometer is non-negotiable here; guessing internal temps is a recipe for disappointment.
Lastly, multitasking during grilling helps. While the chicken roasts, prep sides or sauces so everything comes together seamlessly. I often set a timer for 30-minute intervals to check and rotate the chicken, keeping an eye on flare-ups.
Variations & Adaptations
- Spicy Kick: Add extra cayenne or smoked chipotle powder to the dry rub for a smoky, fiery twist.
- Herb Lover’s Version: Swap out some paprika and cumin for fresh chopped rosemary, thyme, and sage mixed into the rub.
- Non-Alcoholic Steam: Use a can of sparkling water or apple juice instead of beer, keeping the steaming effect without the alcohol.
- Oven Roasted: If you don’t have a grill, you can roast the beer can chicken upright in a preheated oven at 375°F (190°C) for about 1 hour 15 minutes.
- Allergy-Friendly: For a gluten-free option, confirm your spices are gluten-free, and skip any rub ingredients that might contain additives.
I once tried adding a maple syrup glaze in the last 10 minutes on the grill—it brought a lovely sweet sheen that balanced the smoky rub perfectly. It’s a fun way to surprise your guests!
Serving & Storage Suggestions
Serve your crispy beer can chicken hot off the grill, letting the skin shine golden and crackly. It pairs beautifully with grilled veggies, creamy coleslaw, or a fresh garden salad. For drinks, a cold beer or a crisp white wine complements the smoky flavors nicely.
To store leftovers, let the chicken cool completely, then wrap tightly in foil or place in an airtight container. Refrigerate for up to 3 days. Reheat gently in the oven at 325°F (160°C) covered with foil to keep it moist. Avoid microwaving if you want to keep the skin crispy.
Flavors actually develop and deepen after a day, so if you’re planning ahead, this recipe works well as a make-ahead meal. Just skip reheating the skin if you’re okay with softer skin the next day—still delicious!
Nutritional Information & Benefits
This crispy beer can chicken recipe packs a protein punch, with roughly 250-300 calories per serving (about 6 oz / 170 g cooked chicken). It’s naturally gluten-free, low in carbs, and high in essential nutrients like B vitamins, selenium, and zinc.
The dry rub’s spices have antioxidant properties—paprika adds vitamin A, while cumin aids digestion. Using olive oil ties in healthy fats, making this dish a balanced choice. Just watch the salt content if you’re sodium-sensitive and adjust accordingly.
From a wellness perspective, this recipe feels like a treat without tipping the scales. It’s a fun way to enjoy flavorful poultry without heavy sauces or breading, keeping things lighter but still satisfying.
Conclusion
All in all, this crispy beer can chicken with flavorful dry rub is a winner you’re going to want to bookmark. It’s easy, tasty, and packs that perfect crispy skin and juicy meat combo that feels like a warm hug on a plate. Customize the rub and beer to suit your tastes, and you’ll find yourself coming back to this recipe time and time again.
I love how it brings people together—whether it’s a casual family dinner or a larger gathering—and always sparks compliments. Give it a try, and let me know in the comments how it turns out or if you’ve put your own spin on the rub. Happy grilling, friends!
Frequently Asked Questions
What type of beer works best for beer can chicken?
A light lager or ale is best since it won’t overpower the chicken’s flavor. Avoid overly bitter or hoppy beers, as they can impart a strong taste.
Can I use this recipe for smaller or larger chickens?
Yes! Adjust cooking time accordingly—smaller chickens cook faster, larger ones take longer. Always rely on internal temperature (165°F / 74°C) to determine doneness.
Is it safe to cook chicken on a beer can?
Yes, as long as you use a clean, unopened can and handle carefully. The beer steams the chicken from inside, keeping it juicy.
Can I prepare the dry rub in advance?
Absolutely! Store it in an airtight container for up to 2 weeks. This saves time and helps flavors meld.
How do I get extra crispy skin on my beer can chicken?
Make sure the chicken skin is thoroughly dried before applying oil and rub. Cook over indirect heat, and if needed, finish with a quick sear over direct heat at the end.
Pin This Recipe!
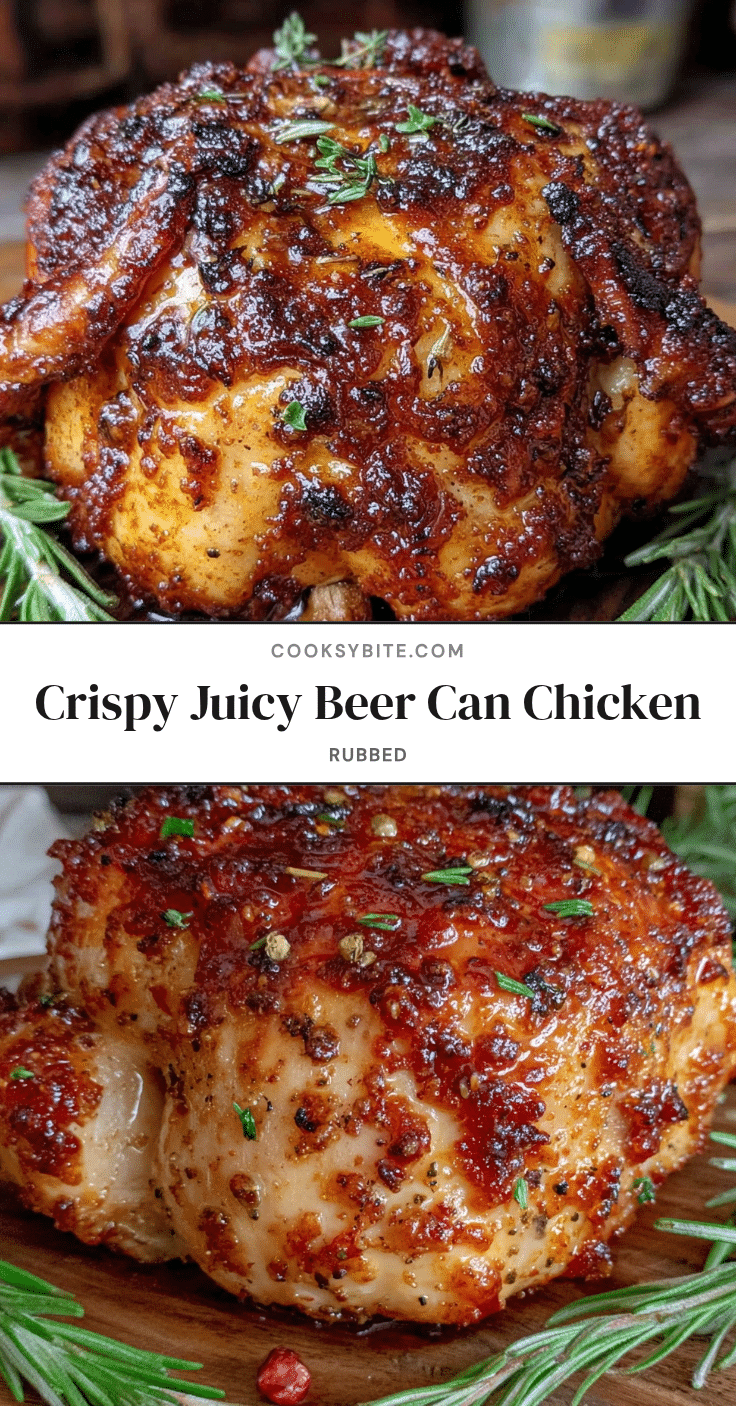
Crispy Beer Can Chicken Recipe with Easy Flavorful Dry Rub
A quick and easy beer can chicken recipe featuring a flavorful dry rub that creates crispy skin and juicy meat, perfect for backyard gatherings and family dinners.
- Prep Time: 15 minutes
- Cook Time: 1 hour 15 minutes
- Total Time: 1 hour 30 minutes
- Yield: 4-6 servings 1x
- Category: Main Course
- Cuisine: American
Ingredients
- Whole Chicken (about 4-5 pounds / 1.8-2.3 kg), fresh or thawed, patted dry
- 1 standard 12 oz (355 ml) can of beer (lager or ale)
- 2 tbsp (30 ml) olive oil
- 2 tbsp (25 g) brown sugar
- 1 tbsp (7 g) paprika
- 1 tsp (3 g) garlic powder
- 1 tsp (3 g) onion powder
- 1 tsp (2 g) ground cumin
- 1 tsp (1 g) dried oregano
- 1/4 tsp (0.5 g) cayenne pepper
- 1 tbsp (15 g) kosher salt
- 1 tsp (2 g) freshly ground black pepper
Instructions
- Remove any giblets from the chicken cavity and pat the chicken dry inside and out with paper towels.
- In a mixing bowl, combine brown sugar, paprika, garlic powder, onion powder, cumin, dried oregano, cayenne pepper, kosher salt, and black pepper. Stir until evenly blended.
- Rub olive oil all over the chicken, including under the skin if possible. Then generously coat the chicken with the dry rub, covering every inch including inside the cavity.
- Open the beer can and pour out or drink about half of the beer to allow gentle steaming.
- Place the beer can on a sturdy surface and carefully lower the chicken cavity over the can, balancing the bird upright. Use a beer can chicken roaster stand if available for stability.
- Preheat the grill to medium heat (~375°F / 190°C) and set up for indirect cooking with the heat source on one side and the chicken on the other.
- Place the chicken upright on the grill grate away from direct flames and close the lid.
- Grill the chicken for approximately 1 hour to 1 hour 15 minutes, or until the internal temperature reaches 165°F (74°C) in the thickest part of the thigh.
- Use a meat thermometer to check doneness; juices should run clear and skin should be crispy and golden brown.
- Carefully remove the chicken using tongs and heat-resistant gloves and let it rest for 10 minutes before carving.
- Carve and serve with your favorite sides.
Notes
Dry the chicken thoroughly before applying the rub for best crispiness. Use indirect heat to cook low and slow. Finish with a quick sear over direct heat if skin is not crispy enough. Rotate chicken occasionally if grill runs hot. The dry rub can be made ahead and stored in an airtight container for up to 2 weeks. For non-alcoholic steaming, substitute beer with sparkling water or apple juice. Adjust cooking time for different chicken sizes and always check internal temperature.
Nutrition
- Serving Size: Approximately 6 oz (
- Calories: 275
- Sugar: 3
- Sodium: 700
- Fat: 15
- Saturated Fat: 3.5
- Carbohydrates: 5
- Fiber: 1
- Protein: 30
Keywords: beer can chicken, crispy chicken, dry rub chicken, grilled chicken, backyard BBQ, easy chicken recipe, flavorful chicken