That crunch? It’s calling me, loud and clear. I want crispy quick refrigerator dill pickles right now and have everything except the patience for traditional canning. Honestly, who has days to wait when the craving hits? The way those bright, tangy pickles snap between your teeth is oddly satisfying — like a little celebration in your mouth that you can whip up in just a day. The vinegar’s sharp tang blends so perfectly with fresh dill and garlic, and somehow the whole kitchen smells like summer in a jar. I’m not even sure why I didn’t try making these sooner, because this recipe has become my go-to for when I need a salty, crunchy snack without the fuss. There’s something about the quick turnaround that makes these pickles feel like a secret weapon — like I’m cheating the system, but in a delicious, totally legit way. They’re not just any pickles; they have that perfect balance of snap and flavor that makes me close my eyes for a second after every bite. No long waits, no complicated equipment, just pure pickle joy. And I trust this recipe because I’ve tested it enough times to know the timing and ratios that get me that flawless crunch every single time. It sticks with me because it’s the kind of recipe that feels personal — like a little culinary win you can count on, whether it’s for a spontaneous snack or to impress friends at a last-minute barbecue. Honestly, I’m pretty sure once you try these, you’ll keep them on speed dial in your fridge too.
Why You’ll Love This Recipe
Making crispy quick refrigerator dill pickles has become one of those kitchen hacks I swear by. They come together fast, taste incredible, and don’t require a pantry full of exotic ingredients or complicated steps. Here’s why this recipe stands out:
- Quick & Easy: Ready in just 24 hours — perfect for when traditional pickling times feel like forever.
- Simple Ingredients: You probably have everything you need right in your kitchen — dill, garlic, cucumbers, vinegar.
- Perfect for Any Occasion: Whether it’s a casual snack, a last-minute addition to a party spread, or a tangy side for sandwiches, these pickles fit right in.
- Crowd-Pleaser: Kids and adults alike love the crisp texture and balanced flavor — no one can resist that satisfying crunch.
- Unbelievably Delicious: The combination of fresh dill, garlic, and a touch of spice makes these pickles stand apart from store-bought jars.
What really makes this recipe different? It’s the technique — soaking the cucumbers in a well-balanced vinegar brine with fresh aromatics overnight helps the flavors infuse deeply without losing that coveted crunch. Plus, I use a pinch of pickling salt and a splash of sugar to get the taste just right. It’s not just quick; it’s my best version of dill pickles, tested enough times to trust the results every time. Honestly, this recipe is like comfort food with a tangy twist — satisfying, quick, and reliably delicious. It’s the kind of pickle that makes you pause and appreciate the little things — a crisp bite, a perfect zing, and that unmistakable homemade feeling.
What Ingredients You Will Need
This recipe uses simple, wholesome ingredients to deliver bold flavor and satisfying crunch without fuss or fancy trips to specialty stores. Most are pantry staples, and substitutions are easy if needed.
- Cucumbers (about 4-5 medium Kirby or Persian cucumbers, sliced into spears or rounds) — firm and fresh cucumbers are key to crisp pickles.
- White vinegar (2 cups / 480 ml) — provides that sharp tang essential to dill pickles.
- Water (2 cups / 480 ml) — balances the vinegar’s acidity for perfect brine strength.
- Pickling salt (2 tablespoons) — dissolves well and doesn’t cloud the brine (Morton’s kosher salt works great here).
- Granulated sugar (1 tablespoon) — just a touch to round out the flavors.
- Fresh dill (4-5 sprigs) — the star herb that brings that unmistakable dill flavor.
- Garlic cloves (3-4, peeled and smashed) — adds a punchy aromatic depth.
- Black peppercorns (1 teaspoon) — for a subtle spice layer.
- Red pepper flakes (optional, 1/2 teaspoon) — if you want a little heat.
- Mustard seeds (optional, 1 teaspoon) — classic pickling spice for extra flavor complexity.
For best texture, I recommend using small to medium cucumbers that are firm and freshly picked if possible. If you want to try a low-sodium option, swap pickling salt for sea salt but expect a slightly different flavor. And if you’re avoiding garlic, fresh dill alone still makes a great pickle, though garlic really amps up the aroma. These ingredients combine to create a brine that’s bright, tangy, and perfectly balanced, making your refrigerator dill pickles a standout snack or side.
Equipment Needed
- Quart-sized glass jars or any airtight container — I prefer glass to avoid any off-flavors and to see the beautiful pickles as they soak.
- Mixing bowl or measuring jug — to mix your brine.
- A sharp knife and cutting board — for slicing cucumbers efficiently.
- Measuring spoons and cups — for accurate ingredient ratios.
- Optional: a funnel — handy for pouring brine into jars without spills.
If you don’t have glass jars, any BPA-free plastic container will work, but glass is best for flavor and durability. I’ve tried wide-mouth mason jars and regular recycled pickle jars, both work fine as long as they seal tightly. Keeping your knives sharp helps prevent bruising the cucumbers, which can affect crispness. And if you’re on a budget, repurposed jars from store-bought pickles or jams work perfectly too — just make sure they’re cleaned and sterilized well.
Preparation Method
- Wash and slice the cucumbers. Rinse 4-5 medium Kirby cucumbers under cold water and pat dry. Slice into spears about 3-4 inches long or into 1/4-inch thick rounds — whatever you prefer. The spears hold up great for snacking, while rounds work well for sandwiches. (Prep time: 5-7 minutes)
- Make the brine. In a mixing bowl or large measuring jug, combine 2 cups (480 ml) white vinegar, 2 cups (480 ml) water, 2 tablespoons pickling salt, and 1 tablespoon granulated sugar. Stir until salt and sugar fully dissolve. The balance of vinegar to water is crucial for the right tang and crispness. (Prep time: 3-4 minutes)
- Pack the jars. Into each clean quart-sized glass jar, add 4-5 sprigs fresh dill, 3-4 smashed garlic cloves, 1 teaspoon black peppercorns, and optional 1 teaspoon mustard seeds and 1/2 teaspoon red pepper flakes for some heat. Then tightly pack the cucumber slices upright or layered. Don’t overfill; leave about 1/2 inch headspace at the top. (Prep time: 5 minutes)
- Pour the brine. Carefully pour the brine over the cucumbers and aromatics until fully submerged. You can use a clean utensil to push down any floating cucumbers gently. Seal the jar tightly with its lid. (Prep time: 2 minutes)
- Refrigerate and wait. Place the sealed jars in the fridge for at least 24 hours. The pickles will develop flavor quickly, and the first crunch test usually happens after a day. For deeper flavor, you can wait up to 3 days, but honestly, the 24-hour mark is when they’re perfectly crispy and tangy. (Wait time: 24 hours minimum)
- Enjoy! Once pickles have reached your preferred flavor and crunch, open a jar and dig in. They keep well refrigerated for up to 2 weeks, so feel free to snack or serve as a bold, crunchy side. (Serving prep: none)
If your pickles turn out a little soft, it usually means the cucumbers weren’t as fresh or got bruised during slicing. Next time, try chilling the cucumbers before slicing or using a crisper cucumber variety. Also, keeping the brine cold and sealed tight helps maintain that coveted snap. I learned this the hard way after a batch turned mushy, but now it’s foolproof.
Cooking Tips & Techniques
Getting that perfect crunch in your refrigerator dill pickles isn’t magic — it’s a few simple tricks that I always keep in mind. First, always start with fresh, firm cucumbers. I swear by Kirby cucumbers because they hold their shape and don’t go soggy quickly. Sometimes, I even soak them in ice water for 30 minutes before slicing to boost crispness.
Don’t skip the pickling salt — it’s different from table salt and helps keep the cucumbers crisp without clouding the brine. Also, smashing the garlic cloves releases their aroma but doesn’t overpower the pickles, which is key. If you want extra snap, adding a few grape leaves or horseradish leaves to the jar is an old-school trick that works wonders.
One mistake I made early on was overfilling jars or not fully submerging the cucumbers in brine. Air pockets lead to soft spots or uneven flavor. Make sure everything is covered, and if needed, use a clean weight or smaller jar to press cucumbers down.
Multitasking tip: While the pickles chill, you can prep a batch of cherry chocolate brownies for dessert or whip up some pink champagne jello shots for your next gathering. That way, you’ve got snacks and sweets covered without stress.
Lastly, always refrigerate these pickles after making. They’re quick pickles, not canned, so keeping them cold preserves flavor and safety.
Variations & Adaptations
This crispy quick refrigerator dill pickle recipe is pretty flexible, so feel free to tailor it to your taste or dietary needs.
- Garlic-Free Version: Simply omit garlic for a milder, herb-forward pickle. Add extra dill or a pinch of celery seed for flavor.
- Spicy Pickles: Increase red pepper flakes to 1 teaspoon or add a sliced jalapeño for a fiery kick.
- Low-Sodium Option: Use sea salt or reduce pickling salt slightly, but expect less crunch and a milder taste.
- Different Vinegar: Swap white vinegar for apple cider vinegar for a fruity twist — it changes the flavor but keeps the crispness.
- Quick Bread & Butter Pickles: Add 1/4 cup sugar and a few thinly sliced onions for a sweeter, tangier version.
One variation I tried recently was using Persian cucumbers sliced thin for rounds and adding fresh tarragon alongside dill. The result was a delicate, almost floral pickle that disappeared in a flash. You can also experiment by changing the spices — coriander seeds or bay leaves can add a new dimension if you want to mix things up.
Serving & Storage Suggestions
Serve these refrigerator dill pickles chilled for the best crunch and flavor pop. They’re fantastic as a snack straight from the jar, or sliced on sandwiches, burgers, or alongside fried chicken. I like to arrange a small pickle platter with other crunchy veggies and dips for easy entertaining.
For storage, keep the pickles sealed tight in the fridge. They stay crisp and tasty for up to two weeks, but honestly, they rarely last that long in my house! To reheat (if you want warm pickles for a recipe), gently warm in a pan for a minute or two, but be aware they’ll lose some crunch.
Flavors actually deepen the longer they sit, so if you can wait the full 48 hours, you’ll get a more intense, harmonious bite — but again, 24 hours hits that sweet spot perfectly. These pickles pair especially well with rich, creamy foods like potato salad or alongside a hearty sandwich.
Nutritional Information & Benefits
Each serving (about 3-4 spears) of these crispy quick refrigerator dill pickles contains approximately 10-15 calories, making them a low-calorie snack with a lot of flavor punch. They’re naturally gluten-free and low-carb, fitting nicely into keto or paleo diets. The vinegar helps support digestion, and fresh dill adds antioxidants and vitamins.
Pickles are also great for a sodium boost if you’re active, though be mindful if you’re watching salt intake. Using fresh garlic and herbs adds not just flavor but potential immune-supporting benefits. I appreciate that these pickles satisfy snack cravings without guilt and add a bright note to any meal.
Conclusion
Crispy quick refrigerator dill pickles have become a staple in my kitchen for a reason — they’re fast, flavorful, and just downright satisfying. Whether you want a crunchy snack or a tangy side for sandwiches and burgers, this recipe hits the mark every time. Customize it with your favorite spices or try the variations to make it your own. I love how this recipe brings a little homemade magic to something so simple, and I’m confident it’ll become a favorite for you too. I’d love to hear how your pickles turn out or any twists you try — sharing those moments always makes cooking more fun. So grab those cucumbers and get pickling!
Frequently Asked Questions
How long do refrigerator dill pickles last in the fridge?
They typically stay fresh and crunchy for up to 2 weeks when kept sealed and refrigerated.
Can I use regular table salt instead of pickling salt?
It’s best to use pickling salt as it dissolves well and doesn’t cloud the brine. Table salt may contain additives that affect flavor and clarity.
What cucumbers are best for making quick pickles?
Kirby or Persian cucumbers are ideal because they’re firm and less watery, which helps keep the pickles crisp.
Can I make these pickles without garlic?
Yes! Omitting garlic will result in a milder flavor, but fresh dill and spices still make delicious pickles.
Is it safe to eat refrigerator pickles after 24 hours?
Yes, they’re safe and often ready after 24 hours, though the flavor and crunch improve if you wait up to 48 hours.
Pin This Recipe!

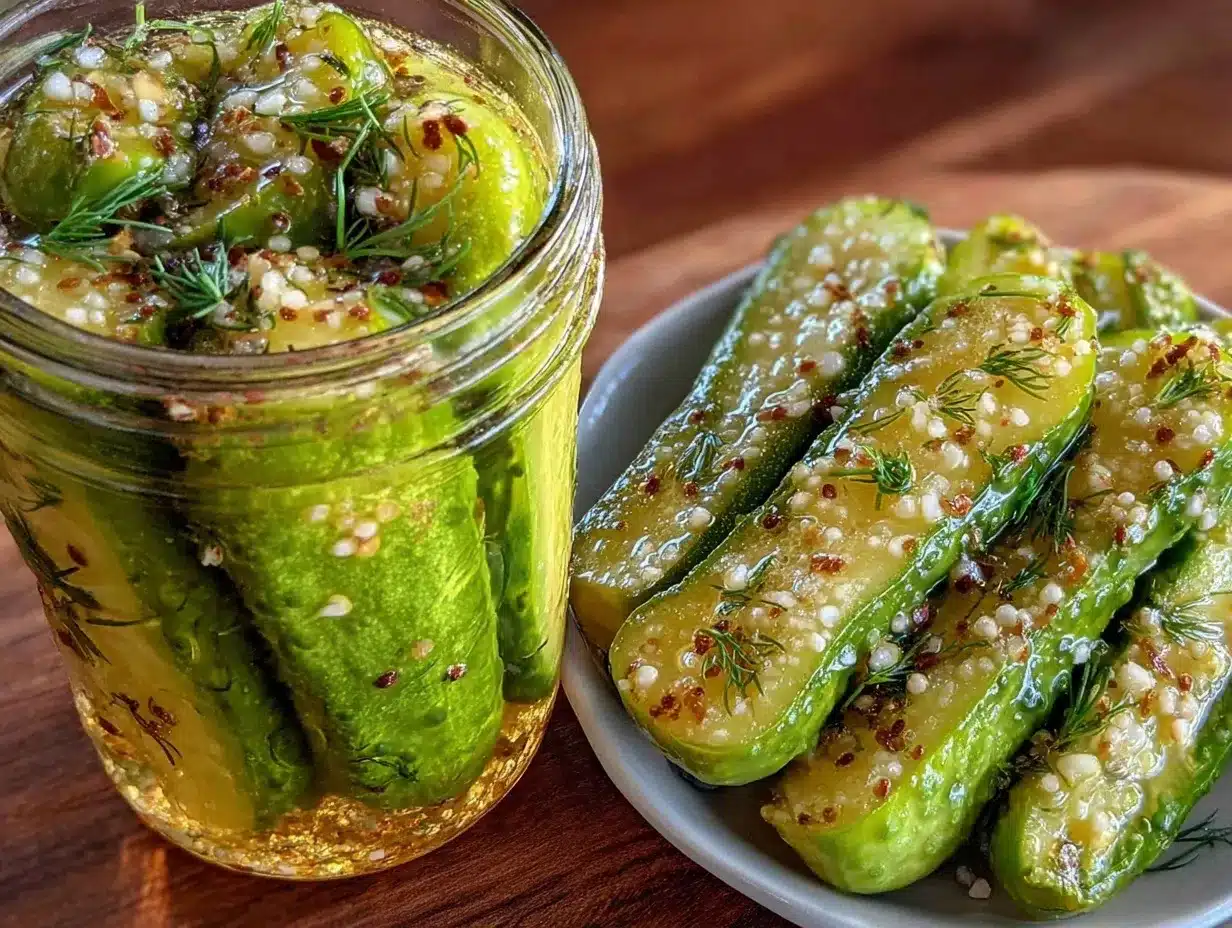
Crispy Quick Refrigerator Dill Pickles Recipe Ready in 24 Hours
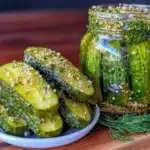
A quick and easy recipe for crispy refrigerator dill pickles that are ready in just 24 hours, featuring fresh dill, garlic, and a perfectly balanced vinegar brine.
- Prep Time: 15 minutes
- Cook Time: 0 minutes
- Total Time: 24 hours
- Yield: 4-5 servings 1x
- Category: Snack
- Cuisine: American
Ingredients
- 4–5 medium Kirby or Persian cucumbers, sliced into spears or rounds
- 2 cups (480 ml) white vinegar
- 2 cups (480 ml) water
- 2 tablespoons pickling salt
- 1 tablespoon granulated sugar
- 4–5 sprigs fresh dill
- 3–4 garlic cloves, peeled and smashed
- 1 teaspoon black peppercorns
- 1/2 teaspoon red pepper flakes (optional)
- 1 teaspoon mustard seeds (optional)
Instructions
- Wash and slice the cucumbers into spears about 3-4 inches long or into 1/4-inch thick rounds.
- In a mixing bowl or large measuring jug, combine 2 cups white vinegar, 2 cups water, 2 tablespoons pickling salt, and 1 tablespoon granulated sugar. Stir until salt and sugar fully dissolve.
- Into each clean quart-sized glass jar, add 4-5 sprigs fresh dill, 3-4 smashed garlic cloves, 1 teaspoon black peppercorns, and optional 1 teaspoon mustard seeds and 1/2 teaspoon red pepper flakes.
- Tightly pack the cucumber slices upright or layered into the jars, leaving about 1/2 inch headspace at the top.
- Pour the brine over the cucumbers and aromatics until fully submerged. Use a clean utensil to push down any floating cucumbers gently. Seal the jar tightly with its lid.
- Place the sealed jars in the refrigerator for at least 24 hours to develop flavor and crunch. For deeper flavor, wait up to 3 days.
- Once pickles have reached your preferred flavor and crunch, open a jar and enjoy. Keep refrigerated and consume within 2 weeks.
Notes
Use fresh, firm Kirby or Persian cucumbers for best crunch. Keep brine cold and cucumbers fully submerged to maintain crispness. Soaking cucumbers in ice water before slicing can improve texture. Avoid overfilling jars and ensure airtight sealing. Pickling salt is preferred over table salt to avoid cloudy brine.
Nutrition
- Serving Size: About 3-4 spears
- Calories: 1015
- Sugar: 1
- Sodium: 400
- Carbohydrates: 3
- Fiber: 0.5
Keywords: quick pickles, refrigerator dill pickles, crispy pickles, easy pickling, dill pickle recipe, homemade pickles, quick refrigerator pickles