My neighbor Maria watched me fumbling with a piping bag one Saturday morning, trying to get frosting to cooperate for my daughter’s birthday party. She didn’t say anything at first. Then she just handed me a piece of something wrapped in parchment paper from her kitchen. “Try this instead,” she said with a shrug. “Less stress, more party.”
That piece turned out to be a blondie. But not just any blondie—it was studded with rainbow sprinkles and tasted exactly like the corner piece of a birthday cake. You know, that perfect part with the most frosting and the crunchiest edge? Yeah, that’s what this was. I almost dropped it when I took the first bite. Honestly, I’d been so focused on making a layered cake that I forgot what hosting was actually about—enjoying the people, not stressing over the dessert.
These birthday cake blondies changed everything for me. They have that nostalgic, buttery vanilla flavor we all associate with celebration cakes, but they come together in one bowl with zero fuss. No layering, no crumb coating, no piping bags. Just pure, sprinkle-filled happiness that makes everyone at the table smile. And let me tell you—when I brought these to the next potluck, they disappeared faster than any cake I’d ever made. People kept coming back for “just one more,” and honestly, I was right there with them.
These blondies are the kind of dessert that makes you look like a hero without breaking a sweat. Perfect for birthday parties, holiday gatherings, or any Tuesday that needs a little extra joy. If you’ve ever spent hours on a complicated dessert only to watch it get devoured in five minutes, you know exactly why this recipe is about to become your new best friend.
Why You’ll Love This Recipe
I’ve tested this recipe at least a dozen times across different ovens, different sprinkle brands, and different crowd sizes. Here’s why it works every single time:
- Quick & Easy: From start to finish, these blondies are ready in under 30 minutes. No stand mixer required, no chilling time, no complicated steps. Just mix, bake, and serve.
- Simple Ingredients: You probably have everything in your pantry right now. Butter, sugar, eggs, flour, vanilla, and sprinkles. That’s it. No special extracts or hard-to-find items.
- Perfect for Parties: These are built for a crowd. They slice cleanly, travel well, and look gorgeous on a platter. Plus, they’re easy to scale up if you’re feeding a big group.
- Crowd-Pleaser: Kids love the sprinkles, adults love the nostalgic flavor, and everyone loves how they’re not too sweet. I’ve yet to meet someone who didn’t reach for seconds.
- Unbelievably Delicious: The texture is what gets me every time. Crispy, buttery edges with a soft, chewy center. It’s like the best parts of a sugar cookie and a birthday cake had a perfect little baby.
What makes this recipe different from others? It’s the ratio. I spent a lot of time tweaking the butter-to-sugar balance so these blondies stay soft for days without getting greasy. And the sprinkle distribution—I learned the hard way that if you just fold them in, they all sink to the bottom. My method keeps them suspended throughout the batter so every bite has that pop of color and sweetness.
This isn’t just another blondie recipe. It’s the one you’ll pull out for every celebration, the one your friends will start requesting, the one that makes you feel like you’ve got this hosting thing figured out. And honestly, that feeling is the best part.
What Ingredients You Will Need
This recipe uses simple, everyday ingredients to deliver that unmistakable birthday cake flavor. The magic is in how they come together—nothing fancy, just well-chosen staples that do exactly what they’re supposed to do.
- Unsalted butter, melted and slightly cooled (1 cup / 226g) – I prefer using unsalted so I can control the salt level. Kerrygold or Land O’Lakes work beautifully here. Melting the butter gives these blondies that dense, fudgy texture that makes them so addictive.
- Light brown sugar, packed (1 cup / 200g) – This is non-negotiable for the chewy texture. Brown sugar has molasses in it, which keeps the blondies soft and gives them that warm, caramel-like depth. Dark brown sugar works too, but the flavor will be richer and less birthday-cake-like.
- Granulated sugar (½ cup / 100g) – The combination of brown and white sugar gives you the best of both worlds: chewiness from the brown sugar and crisp edges from the white. Don’t skip it.
- Large eggs, room temperature (2) – Room temperature eggs mix more evenly into the melted butter, creating a smoother batter. If you forget to take them out ahead of time, place them in a bowl of warm water for 5 minutes.
- Vanilla extract, pure (2 teaspoons) – This is where the birthday cake flavor comes from. Use pure vanilla extract, not imitation, if you can. It makes a noticeable difference. I like Nielsen-Massey or Simply Organic.
- Almond extract (½ teaspoon, optional) – This is my secret weapon. A tiny bit of almond extract gives blondies that classic “cake batter” flavor. It’s totally optional but highly recommended if you want that nostalgic taste.
- All-purpose flour (1¾ cups / 220g) – Scoop and level your flour for accuracy. Spoon it into your measuring cup and level it off with a knife. Scooping directly from the bag can pack in too much flour and make the blondies dry.
- Baking powder (1 teaspoon) – This gives the blondies just enough lift without making them cakey. We want them dense but not heavy.
- Salt (½ teaspoon) – Salt balances the sweetness and enhances the vanilla flavor. Don’t skip it, even if you’re using salted butter.
- Rainbow sprinkles (¾ cup / 120g) – Here’s the thing about sprinkles: not all are created equal. Avoid the tiny round “nonpareils” that bleed color everywhere. Look for jimmies—those long, cylinder-shaped sprinkles. They hold their shape and color during baking. I use Betty Crocker or Wilton brand sprinkles and they work perfectly.
Ingredient Substitutions: If you need to make these gluten-free, swap the all-purpose flour with a good 1:1 gluten-free baking flour blend. I’ve used Bob’s Red Mill with great results. For a dairy-free version, use a plant-based butter stick (not margarine from a tub) and make sure your sprinkles are dairy-free—some brands use confectioner’s glaze that isn’t vegan. The texture will be slightly different but still delicious.
Equipment Needed
You don’t need a lot of fancy equipment for this recipe, which is part of why I love it. Here’s what you’ll need:
- 9×13-inch baking pan – This is the perfect size for getting thick, chewy blondies. A metal pan works best for even browning. Glass pans can work too, but they tend to bake slower and the edges might not get as crispy.
- Parchment paper – Line your pan with parchment paper, leaving some overhang on the long sides. This creates “handles” that let you lift the entire slab of blondies out cleanly for easy slicing. Trust me on this one.
- Large mixing bowl – Any large bowl works. I use a sturdy ceramic bowl because it doesn’t slide around when I’m mixing.
- Whisk – For combining the wet ingredients. A silicone whisk is gentle on your bowls.
- Rubber spatula – For folding in the sprinkles and scraping every last bit of batter into the pan. I prefer a sturdy silicone spatula that can handle thick batter.
- Measuring cups and spoons – Accuracy matters, especially with the flour. Use dry measuring cups for dry ingredients and liquid measuring cups for wet ingredients.
- Cooling rack – Letting the blondies cool completely in the pan on a wire rack prevents the bottoms from getting soggy.
If you don’t have a 9×13 pan, you can use two 8×8 square pans. Just reduce the baking time by a few minutes and keep an eye on them. I’ve also made these in a disposable aluminum pan for potlucks—they work fine, just watch the baking time because aluminum conducts heat differently.
Preparation Method
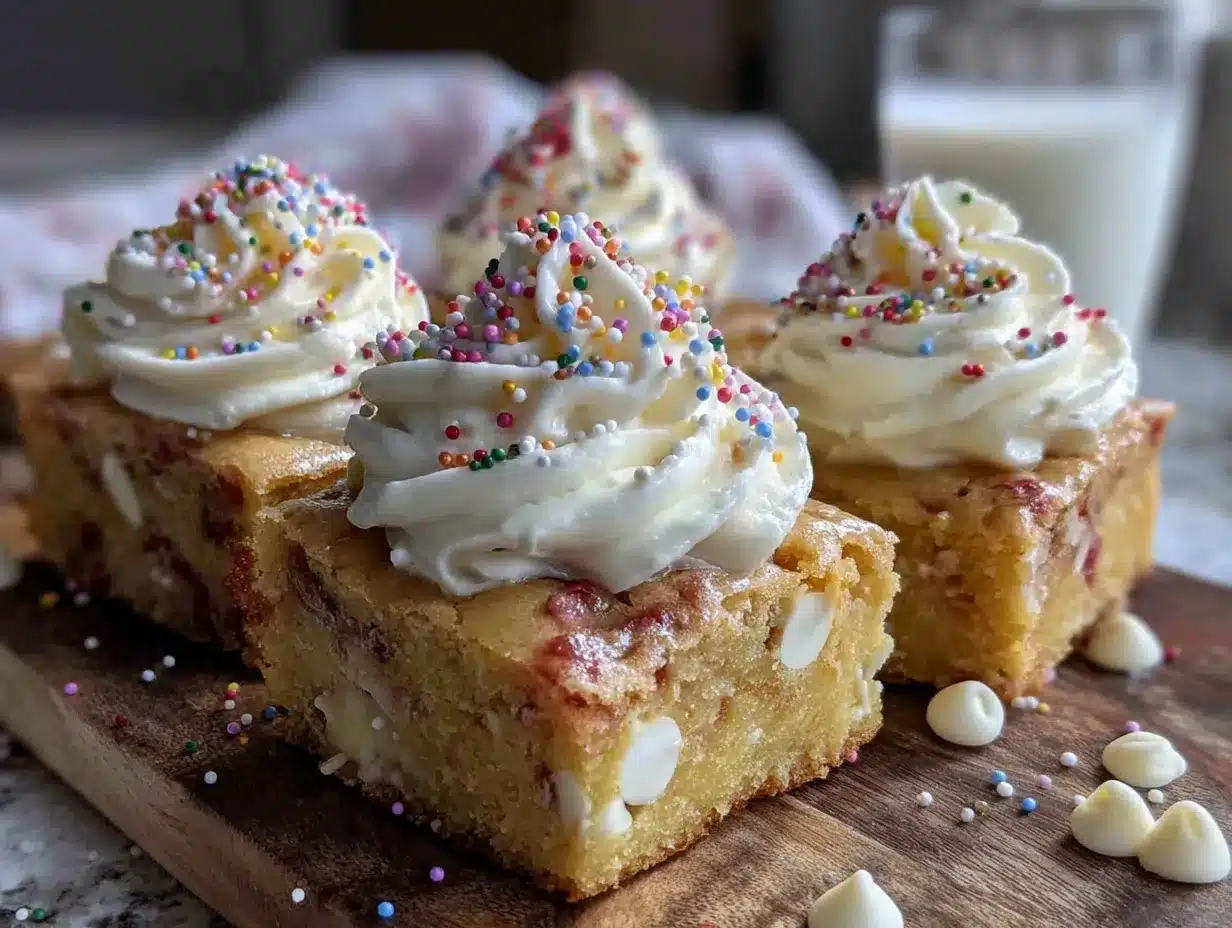
Preheat your oven to 350°F (175°C). Line your 9×13-inch baking pan with parchment paper, leaving about 2 inches of overhang on the two long sides. Lightly spray the parchment with nonstick cooking spray—this extra step ensures absolutely zero sticking.
- Melt the butter – Place 1 cup (226g) of unsalted butter in a microwave-safe bowl and heat in 30-second intervals until fully melted. Let it cool for about 5 minutes. You want it warm, not hot—if it’s too hot, it will cook the eggs when you add them. I learned this the hard way when I ended up with scrambled egg bits in my batter. Not cute.
- Combine the sugars – In your large mixing bowl, whisk together the melted butter, 1 cup (200g) packed light brown sugar, and ½ cup (100g) granulated sugar. Whisk until smooth and well combined, about 1 minute. The mixture should look like wet sand and smell amazing.
- Add the eggs and vanilla – Add the 2 room-temperature eggs, one at a time, whisking well after each addition. Then add 2 teaspoons of vanilla extract and ½ teaspoon of almond extract (if using). Whisk until the mixture is smooth, glossy, and slightly thickened—about 30 seconds. This is where the birthday cake flavor really starts to come through.
- Mix the dry ingredients – In a separate small bowl, whisk together 1¾ cups (220g) all-purpose flour, 1 teaspoon baking powder, and ½ teaspoon salt. This ensures the baking powder and salt are evenly distributed throughout the flour. I used to skip this step and just dump everything in together, but I ended up with pockets of baking powder that tasted metallic. Not worth it.
- Combine wet and dry – Gradually add the flour mixture to the wet ingredients, folding gently with your rubber spatula. Mix just until you see the last streak of flour disappear. Overmixing at this stage develops gluten and makes the blondies tough. We want them tender, so stop as soon as it comes together.
- Fold in the sprinkles – Here’s the trick: reserve about 2 tablespoons of sprinkles to sprinkle on top later. Gently fold the remaining sprinkles into the batter with your spatula. Use as few strokes as possible—just 3 or 4 folds. The sprinkles will bleed a little color into the batter, which is totally fine and actually gives the blondies that pretty pastel look.
- Transfer to the pan – Scrape the batter into your prepared pan and spread it evenly using your spatula. The batter will be thick and slightly sticky—that’s normal. Sprinkle the reserved 2 tablespoons of sprinkles over the top, pressing them in gently with your fingers. This gives the blondies that beautiful, bakery-style finish.
- Bake – Place the pan on the middle rack of your preheated oven and bake for 20-25 minutes. Start checking at 20 minutes. The edges should be golden brown and pulling away from the sides of the pan. The center will look slightly underdone and might jiggle just a tiny bit—that’s perfect. A toothpick inserted in the center should come out with a few moist crumbs, not wet batter.
- Cool completely – Place the pan on a wire rack and let the blondies cool completely in the pan. This is the hardest part, I know. But if you cut them while they’re warm, they’ll fall apart. Trust me, I’ve been there. Patience pays off with clean, beautiful squares.
- Slice and serve – Once completely cool, use the parchment paper handles to lift the entire slab out of the pan. Place it on a cutting board and slice into 24 squares using a sharp knife. Wipe the knife clean between cuts for the neatest edges.
Cooking Tips & Techniques
After making these blondies more times than I can count, here are the things I wish someone had told me from the start:
Don’t overbake them. This is the number one mistake people make. Blondies continue to cook from residual heat even after you pull them out of the oven. If they look perfectly done in the oven, they’ll be overdone by the time they cool. Pull them out when the center still looks slightly soft and underbaked. You want that gooey, fudgy texture, not a dry cake.
Sprinkle placement matters. I mentioned this earlier, but it bears repeating: jimmies are your friend. Nonpareils (those tiny round balls) will turn your batter into a tie-dye mess. Also, don’t stir the sprinkles too aggressively. Gently fold them in, or you’ll end up with streaks of color that look pretty but uneven.
Room temperature eggs are not optional. Cold eggs seize up melted butter, creating a lumpy batter that doesn’t bake evenly. If you’re in a rush, place the eggs in a bowl of warm water for 5 minutes before using them. It makes a real difference.
Let them cool fully. I know it’s torture. I’ve definitely snuck a warm corner piece while telling myself “it’s quality control.” And honestly? Warm blondies are delicious. But if you want clean, Instagram-worthy squares, you need to wait. The structure sets as they cool. Cutting too early is like trying to cut a sandcastle before the tide goes out.
Scale up for a crowd. If you’re hosting a big party, this recipe doubles beautifully. Just use a half-sheet pan (18×13 inches) and increase the baking time by about 5-8 minutes. Keep a close eye on the edges—they’ll tell you when they’re done.
Variations & Adaptations
One of the best things about this recipe is how easily it adapts. Here are some of my favorite variations:
Chocolate Chip Birthday Cake Blondies: Add ½ cup of white chocolate chips along with the sprinkles. The white chocolate melts into little pockets of sweetness that complement the vanilla flavor perfectly. I did this for a friend’s baby shower and they were gone in twenty minutes.
Confetti Cake Blondies with Cream Cheese Frosting: If you want to go full celebration mode, let the blondies cool completely and spread a thin layer of cream cheese frosting on top. Use 4 ounces of cream cheese, 2 tablespoons of butter, 1 cup of powdered sugar, and ½ teaspoon of vanilla. Beat until smooth and spread over the blondies. Add more sprinkles on top for that classic birthday cake look.
Lemon Birthday Blondies: Replace the almond extract with 1 tablespoon of fresh lemon zest and 2 tablespoons of lemon juice. Use yellow sprinkles instead of rainbow. These are perfect for spring gatherings and Easter brunch. The lemon cuts through the sweetness beautifully.
Gluten-Free Version: Substitute the all-purpose flour with a 1:1 gluten-free baking flour blend that contains xanthan gum. I’ve had great results with King Arthur Measure for Measure. The texture is slightly more tender, but the flavor is spot-on.
Funfetti Cookie Bars: For a thicker, more cookie-like texture, press the batter into an 8×8 pan instead of a 9×13. Bake for 25-30 minutes. You’ll get taller bars with a softer center and crispier edges—like a giant funfetti cookie.
Serving & Storage Suggestions
These blondies are incredibly versatile when it comes to serving. Here’s how I like to do it:
Serving Temperature: Room temperature is ideal. The texture is at its best—chewy, soft, and perfectly dense. If you’ve refrigerated them, let them sit out for about 30 minutes before serving. For an extra treat, warm individual blondies in the microwave for about 10 seconds and serve with a scoop of vanilla ice cream. The warm blondie with cold ice cream is pure magic.
Presentation Tips: For parties, I arrange the blondies on a large wooden board or a white cake stand. The colorful sprinkles pop against a neutral background. You can also stack them in a pyramid on a plate—it looks impressive and makes it easy for guests to grab one. For a more elegant presentation, cut them into smaller bite-sized squares and serve in mini cupcake liners.
What to Serve Alongside: These blondies pair beautifully with a cold glass of milk, a hot cup of coffee, or a scoop of vanilla or strawberry ice cream. For birthday parties, I like to set up a “blondie bar” with toppings like whipped cream, chocolate sauce, caramel sauce, and extra sprinkles. Let guests build their own dessert—it’s interactive and fun.
Storage Instructions: Store leftover blondies in an airtight container at room temperature for up to 5 days. Place a piece of bread in the container to keep them soft—the bread absorbs excess moisture and the blondies stay chewy. Replace the bread every other day if you’re storing them longer. Do not refrigerate them unless you absolutely have to, as refrigeration dries them out.
Freezing Instructions: These blondies freeze beautifully. Wrap individual squares tightly in plastic wrap, then place them in a freezer-safe bag or container. They’ll keep for up to 3 months. To thaw, let them sit at room temperature for about 30 minutes, or microwave for 15-20 seconds. I always keep a stash in my freezer for unexpected guests or late-night cravings.
Flavor Development: Here’s a little secret—these blondies actually taste better the next day. The flavors meld together overnight, and the texture becomes even more fudgy. So if you’re planning a party, bake them a day ahead. Your future self will thank you.
Nutritional Information & Benefits
Per serving (1 blondie, based on 24 servings):
| Nutrient | Amount |
|---|---|
| Calories | 185 |
| Total Fat | 9g |
| Saturated Fat | 5g |
| Cholesterol | 35mg |
| Sodium | 95mg |
| Total Carbohydrates | 25g |
| Dietary Fiber | 0.5g |
| Sugars | 17g |
| Protein | 2g |
These blondies are a treat, no question about it. But they’re made with real ingredients—butter, eggs, vanilla—which is more than you can say for most packaged desserts. The butter provides a small amount of vitamin A, and the eggs add protein and B vitamins. Plus, there’s something to be said for the joy they bring. A little sweetness shared with people you love? That’s good for the soul.
Dietary Considerations: This recipe contains gluten, dairy, and eggs. For a gluten-free version, use a 1:1 gluten-free flour blend. For a dairy-free version, use plant-based butter. For an egg-free version, you can try using a flax egg (1 tablespoon ground flaxseed mixed with 3 tablespoons water per egg), but the texture will be denser and less tender. I haven’t tested a vegan version extensively, so proceed with caution.
Conclusion
These birthday cake blondies are more than just a dessert—they’re a shortcut to happiness. They bring that nostalgic birthday cake flavor without the stress of layering, frosting, and decorating. They’re the kind of recipe that makes you look like a pro even when you’re just having fun in the kitchen.
I love that I can make these for any occasion—birthday parties, potlucks, holiday gatherings, or just a random Tuesday that needs a little brightness. They always get the same reaction: smiles, seconds, and requests for the recipe. And honestly, that never gets old.
So go ahead and make these for your next gathering. Customize them with different sprinkles or add-ins. Make them your own. And when everyone asks for the recipe, just smile and say, “Oh, it’s nothing really.” Because that’s the beauty of a great recipe—it makes the complicated feel simple.
I’d love to hear how these turn out for you! Drop a comment below and let me know what occasion you made them for, or tag me in your photos. Happy baking, friends!
Frequently Asked Questions
Can I use salted butter instead of unsalted?
Yes, you can. Just reduce the added salt in the recipe to ¼ teaspoon instead of ½ teaspoon. The blondies will still taste great, but you might notice a slightly saltier finish. I prefer unsalted because it gives me more control over the final flavor.
Why did my sprinkles bleed color into the batter?
This usually happens when you use the wrong type of sprinkles. Nonpareils (the tiny round balls) and some cheap grocery store sprinkles are prone to bleeding. Stick with jimmies—those long, cylinder-shaped sprinkles—from trusted brands like Betty Crocker or Wilton. Also, fold them in gently and don’t overmix.
Can I make these blondies in advance for a party?
Absolutely! In fact, I recommend it. These blondies taste even better the next day because the flavors have time to meld together. Bake them up to 2 days ahead, store them in an airtight container at room temperature, and slice them just before serving. They stay perfectly soft and chewy.
How do I know when the blondies are done baking?
The edges should be golden brown and pulling away from the sides of the pan. The center will look slightly underdone and might jiggle a tiny bit when you gently shake the pan. A toothpick inserted in the center should come out with a few moist crumbs attached—not wet batter, but not completely clean either. Remember, they continue to bake from residual heat after you pull them out.
Can I freeze these blondies?
Yes, they freeze beautifully! Wrap individual squares tightly in plastic wrap, then place them in a freezer-safe bag or container. They’ll keep for up to 3 months. To thaw, let them sit at room temperature for about 30 minutes, or microwave for 15-20 seconds. I always keep a stash in my freezer for last-minute gatherings.
Pin This Recipe!
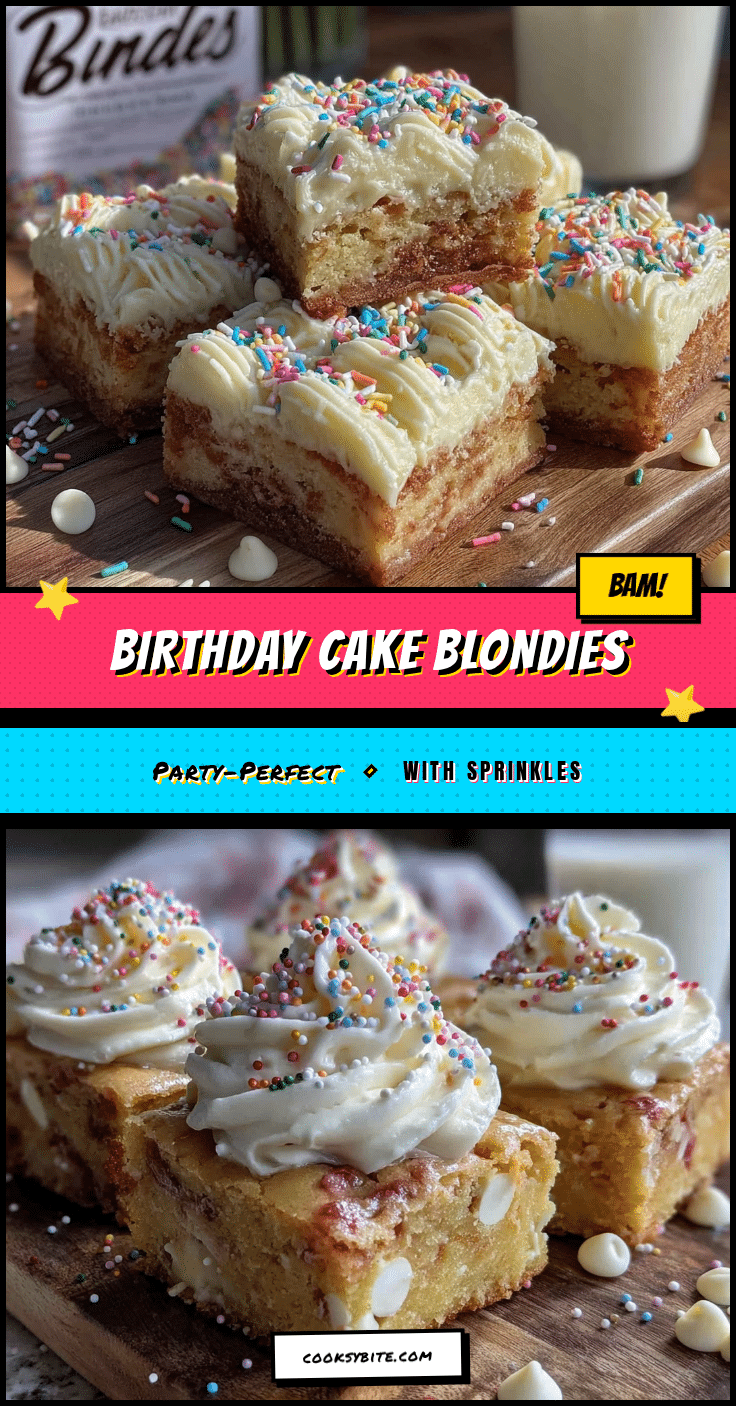
Easy Birthday Cake Blondies: Best Sprinkle Recipe
These birthday cake blondies have that nostalgic, buttery vanilla flavor we all associate with celebration cakes, but they come together in one bowl with zero fuss. No layering, no crumb coating, no piping bags—just pure, sprinkle-filled happiness.
- Prep Time: 10 minutes
- Cook Time: 20-25 minutes
- Total Time: 30-35 minutes
- Yield: 24 servings 1x
- Category: Dessert
- Cuisine: American
Ingredients
- 1 cup (226g) unsalted butter, melted and slightly cooled
- 1 cup (200g) light brown sugar, packed
- ½ cup (100g) granulated sugar
- 2 large eggs, room temperature
- 2 teaspoons pure vanilla extract
- ½ teaspoon almond extract (optional)
- 1¾ cups (220g) all-purpose flour
- 1 teaspoon baking powder
- ½ teaspoon salt
- ¾ cup (120g) rainbow sprinkles (jimmies)
Instructions
- Preheat oven to 350°F (175°C). Line a 9×13-inch baking pan with parchment paper, leaving about 2 inches of overhang on the two long sides. Lightly spray the parchment with nonstick cooking spray.
- Melt 1 cup (226g) unsalted butter in a microwave-safe bowl in 30-second intervals until fully melted. Let cool for about 5 minutes until warm, not hot.
- In a large mixing bowl, whisk together the melted butter, 1 cup (200g) packed light brown sugar, and ½ cup (100g) granulated sugar until smooth and well combined, about 1 minute.
- Add the 2 room-temperature eggs, one at a time, whisking well after each addition. Then add 2 teaspoons vanilla extract and ½ teaspoon almond extract (if using). Whisk until smooth, glossy, and slightly thickened, about 30 seconds.
- In a separate small bowl, whisk together 1¾ cups (220g) all-purpose flour, 1 teaspoon baking powder, and ½ teaspoon salt.
- Gradually add the flour mixture to the wet ingredients, folding gently with a rubber spatula just until the last streak of flour disappears. Do not overmix.
- Reserve about 2 tablespoons of sprinkles for the top. Gently fold the remaining sprinkles into the batter with a few strokes (3-4 folds).
- Scrape the batter into the prepared pan and spread evenly. Sprinkle the reserved 2 tablespoons of sprinkles over the top, pressing them in gently with your fingers.
- Bake on the middle rack for 20-25 minutes. Start checking at 20 minutes. The edges should be golden brown and pulling away from the sides; the center will look slightly underdone and may jiggle slightly. A toothpick inserted in the center should come out with a few moist crumbs.
- Place the pan on a wire rack and let the blondies cool completely in the pan.
- Once completely cool, use the parchment paper handles to lift the slab out of the pan. Place on a cutting board and slice into 24 squares using a sharp knife, wiping the knife clean between cuts.
Notes
Don’t overbake; pull out when center still looks slightly soft. Use jimmies (long cylinder-shaped sprinkles) to avoid color bleeding. Room temperature eggs are important. Let blondies cool completely before slicing for clean squares. These taste even better the next day.
Nutrition
- Serving Size: 1 blondie
- Calories: 185
- Sugar: 17
- Sodium: 95
- Fat: 9
- Saturated Fat: 5
- Carbohydrates: 25
- Fiber: 0.5
- Protein: 2
Keywords: birthday cake blondies, sprinkle blondies, funfetti blondies, easy blondie recipe, one bowl blondies


