I want garlic butter chicken thighs right now, and I have everything except the willpower to stand at the stove stirring something complicated. That is the exact thought that hit me at 5:47 PM on a Tuesday, staring into my fridge like it owed me dinner. I had chicken thighs in the freezer, a sad bag of broccoli, and half a head of cauliflower that was judging me from the crisper drawer. The craving was specific—rich, savory, buttery, with that garlic hit that makes you close your eyes for a second. I didn’t want a recipe that required separate pans or multiple timers. I wanted one pan, minimal mess, and dinner that felt like I actually tried.
So I grabbed a cast iron skillet (my go-to for everything), threw the chicken in skin-side down, and let the fat render while I chopped vegetables. The garlic went in right at the end so it wouldn’t burn, and the butter melted into everything like it knew exactly what I needed. Honestly, that first bite made me wonder why I ever bother with complicated weeknight dinners. The chicken was juicy, the veggies were caramelized at the edges, and the whole thing came together in about 35 minutes with just one pan to wash. This is the kind of meal that reminds you why cooking at home is worth it—simple ingredients, zero stress, and results that taste like you spent way more effort than you actually did. If you are looking for a dinner that delivers every single time without the drama, this one is for you.
Why You’ll Love This Recipe
I have tested this recipe at least a dozen times across different ovens, different pans, and different levels of exhaustion. Here is what I learned: it works every single time, and here is why you will keep coming back to it.
- One Pan, Minimal Cleanup : Everything cooks together in a single skillet or sheet pan. No juggling multiple dishes, no scrubbing burnt-on messes. Dinner is done, and so is the cleanup.
- Simple Ingredients : Chicken thighs, butter, garlic, and whatever vegetables you have on hand. No fancy grocery runs or obscure spices required.
- Perfect for Busy Weeknights : From start to finish, this meal takes about 35 minutes. Active prep time is maybe 10 minutes. The oven does the rest.
- Crowd-Pleaser : I have served this to picky kids, skeptical in-laws, and friends who claim they don’t like dark meat. Empty plates every time.
- Unbelievably Juicy : Chicken thighs are naturally forgiving, but the garlic butter basting takes them to another level. The meat stays tender and moist, even if you get distracted and leave it in a few extra minutes.
What makes this recipe different from other one-pan chicken dinners is the technique. Instead of dumping everything in the pan at once, you sear the chicken first to develop that golden, crispy skin. Then you add the vegetables and garlic butter, letting everything roast together so the flavors meld without the garlic burning. It is a small step that makes a huge difference. And honestly, this is the kind of meal that makes you feel like you have your life together, even on days when you absolutely do not.
What Ingredients You Will Need
This recipe relies on simple, everyday ingredients that come together to create something genuinely delicious. No weird substitutions, no hard-to-find items. Just honest food that works.
- Bone-in, skin-on chicken thighs (4-6 thighs, about 1.5-2 lbs total) — The skin crisps up beautifully and keeps the meat moist. You can use boneless thighs, but reduce cooking time by about 10 minutes.
- Unsalted butter (4 tablespoons, softened) — I use Kerrygold for the flavor, but any good unsalted butter works. Salted butter is fine too; just reduce added salt slightly.
- Fresh garlic (6-8 cloves, minced) — Do not use pre-minced garlic here. Fresh garlic makes a real difference in flavor. Trust me on this one.
- Broccoli florets (2 cups, about 1 small head) — Cut into even-sized pieces so they cook evenly. You can swap with cauliflower or green beans.
- Cauliflower florets (2 cups, about 1/2 medium head) — I like the contrast of textures between the broccoli and cauliflower. Both get beautifully caramelized edges.
- Cherry tomatoes (1 cup, halved) — They burst in the oven and create a little pan sauce that is incredible spooned over the chicken.
- Olive oil (2 tablespoons) — For searing the chicken and coating the vegetables. Use a good quality extra virgin if you have it.
- Salt (1 teaspoon, plus more for seasoning) — I use kosher salt. Diamond Crystal is my preference for its clean flavor and easy pinchability.
- Black pepper (1/2 teaspoon, freshly ground) — Freshly ground makes a difference here. Pre-ground pepper just does not hit the same.
- Dried thyme (1 teaspoon) — Optional but lovely. Adds an earthy note that pairs beautifully with garlic and butter.
- Red pepper flakes (1/4 teaspoon, optional) — For a tiny kick of heat. I add this about half the time, depending on my mood.
- Fresh parsley (2 tablespoons, chopped, for garnish) — Adds a pop of color and freshness at the end. Totally optional but worth it.
For the vegetables, feel free to use what you have on hand. Zucchini, bell peppers, asparagus, or green beans all work beautifully. Just cut them to similar sizes so they cook evenly. If you are using heartier vegetables like carrots or potatoes, parboil them for 5 minutes first or cut them smaller.
Equipment Needed
You do not need a fully stocked kitchen to make this recipe. Here is what you will actually use:
- Large oven-safe skillet (12-inch cast iron or stainless steel) — Cast iron gives the best sear, but any oven-safe skillet works. If you do not have one, use a regular skillet for searing and transfer to a baking sheet.
- Cutting board — A sturdy wooden or plastic board for prepping vegetables and trimming chicken.
- Chef’s knife — A sharp 8-inch knife makes quick work of chopping garlic and vegetables.
- Tongs — For flipping the chicken without tearing the skin. Silicone-tipped tongs are gentle on non-stick pans.
- Small bowl — For mixing the garlic butter compound.
- Instant-read thermometer — Optional but highly recommended. Chicken is done at 165°F (74°C), but thighs taste best at 175-180°F (80-82°C) where the collagen breaks down.
- Aluminum foil — For tenting the chicken while it rests.
If you do not have a cast iron skillet, do not stress. A stainless steel or non-stick oven-safe pan works fine. Just make sure it can handle oven temperatures up to 400°F (200°C). I have used my grandmother’s old stainless steel pan for this recipe dozens of times with great results. The key is getting a good sear on the chicken before it goes in the oven.
Preparation Method
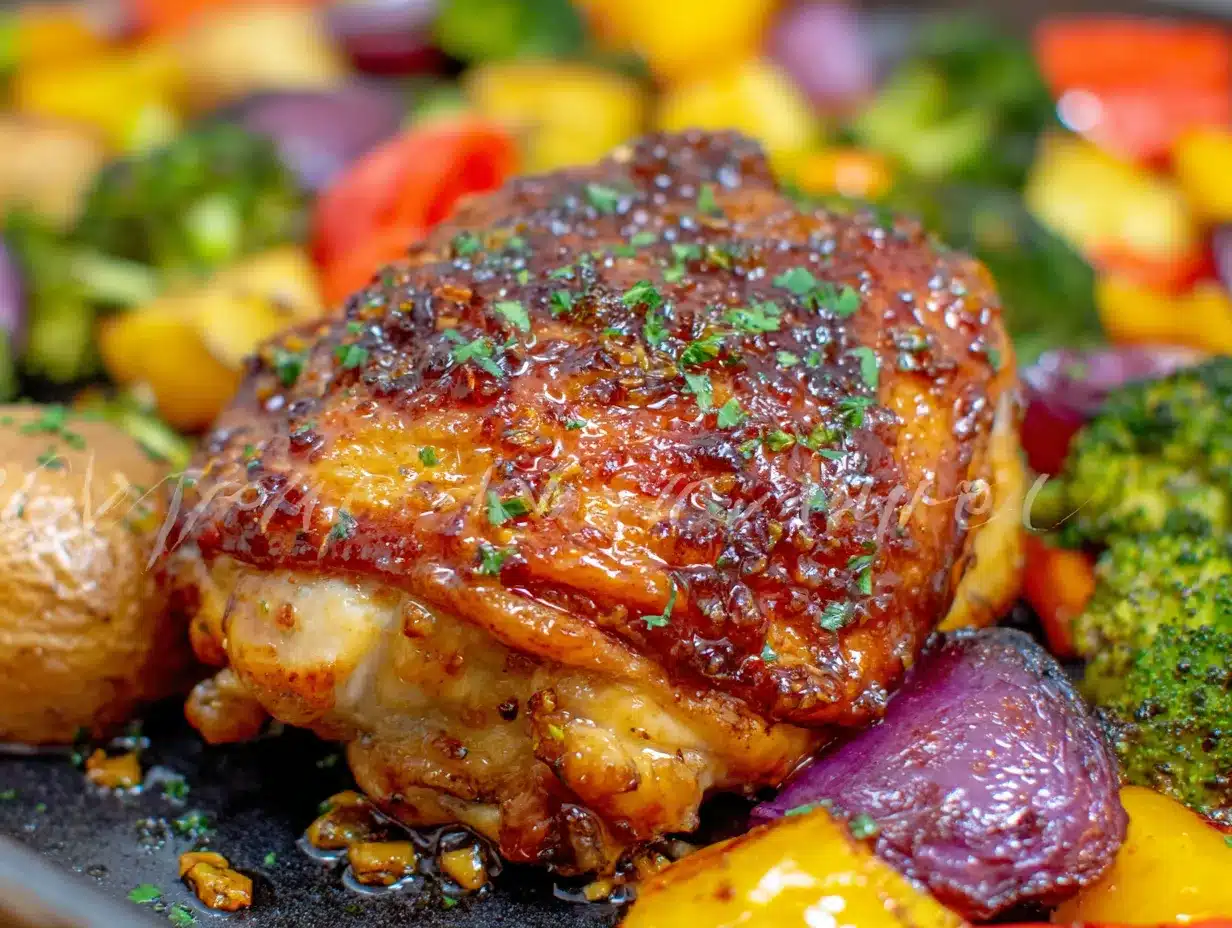
Let me walk you through this step by step. I have made this recipe so many times that I could do it in my sleep, but I will break it down clearly so you get perfect results on your first try.
- Preheat your oven to 400°F (200°C). Position the rack in the middle. Give the oven a full 15-20 minutes to come to temperature. A properly preheated oven makes a real difference in how the chicken skin crisps.
- Pat the chicken thighs dry with paper towels. This is non-negotiable. Moisture is the enemy of crispy skin. Get them as dry as you can, then season generously on both sides with salt and pepper. Let them sit at room temperature for 10-15 minutes while you prep the vegetables.
- Prepare the garlic butter. In a small bowl, mash the softened butter with the minced garlic, dried thyme (if using), and a pinch of salt. Mix until well combined. Set aside at room temperature. Do not refrigerate or it will be too hard to spread later.
- Prep the vegetables. Cut the broccoli and cauliflower into even florets—about 1-2 inches across. Halve the cherry tomatoes. Toss everything in a bowl with 1 tablespoon of olive oil, a pinch of salt, and a few grinds of black pepper.
- Heat your skillet over medium-high heat. Add the remaining 1 tablespoon of olive oil. Wait until the oil shimmers—this takes about 2 minutes. You want the pan hot enough that the chicken sizzles immediately when it hits the surface.
- Sear the chicken, skin-side down. Place the thighs in the skillet, skin side down, without crowding. Work in batches if your pan is small. Let them cook undisturbed for 5-6 minutes. The skin should be deep golden brown and crispy. Do not move them around or peek too early—let the crust form.
- Flip the chicken. Using tongs, carefully flip each thigh. Cook for 2 minutes on the other side. The second side does not need as much time since it will finish in the oven.
- Add the vegetables and garlic butter. Scatter the seasoned vegetables around the chicken thighs. Drop small spoonfuls of the garlic butter over each piece of chicken and dot the remaining butter among the vegetables. The butter will melt and coat everything as it roasts.
- Transfer to the oven. Place the skillet in the preheated oven. Roast for 20-25 minutes, depending on the size of your thighs. At the 15-minute mark, give the vegetables a quick stir so they cook evenly and get those caramelized edges.
- Check for doneness. The chicken is ready when an instant-read thermometer inserted into the thickest part (not touching bone) reads 175-180°F (80-82°C). The skin should be crispy and deep golden, and the vegetables should be tender with browned edges.
- Rest and garnish. Remove the skillet from the oven. Tent loosely with foil and let the chicken rest for 5 minutes. This allows the juices to redistribute. Sprinkle with fresh parsley and red pepper flakes if using.
- Serve immediately. Spoon the pan juices and vegetables over the chicken. The tomatoes will have burst into a little sauce that is absolutely delicious.
One thing I learned the hard way: if your vegetables are not browning enough after 15 minutes, switch the oven to broil for the last 3-4 minutes. Watch it closely so nothing burns. That extra blast of heat gives you those gorgeous caramelized edges that make the dish look restaurant-worthy.
Cooking Tips & Techniques
After making this recipe more times than I can count, here are the things I wish someone had told me from the start.
Patience with the sear is everything. The biggest mistake people make is moving the chicken too soon. Let it sit in that hot pan for a full 5-6 minutes without touching it. The skin will release naturally when it is ready. If you try to flip it and it sticks, give it another minute. I ruined my first few attempts by being impatient and ending up with torn skin stuck to the pan.
Room temperature chicken cooks more evenly. Let the chicken sit out for 15-20 minutes before cooking. Cold chicken straight from the fridge will lower the pan temperature and steam instead of sear. This is a small step that makes a noticeable difference.
Garlic burns fast. That is why I mix it into the butter rather than adding it directly to the hot pan. The butter protects the garlic and allows it to infuse slowly in the oven. If you add minced garlic directly to the hot skillet, it will turn bitter and acrid within seconds. I learned this the hard way and had to start over.
Do not overcrowd the pan. If you are cooking for a crowd, use two skillets or work in batches. When the pan is too full, the chicken steams instead of searing, and you lose that crispy skin. I once tried to fit eight thighs in a single pan, and the result was edible but nowhere near as good.
Use an instant-read thermometer. Chicken thighs are forgiving, but they are best taken to 175-180°F (80-82°C), not the standard 165°F (74°C). At that higher temperature, the collagen breaks down and the meat becomes incredibly tender and juicy. The thermometer takes the guesswork out completely.
Let it rest. I know you are hungry, but those 5 minutes of resting time are crucial. The juices need to redistribute so they do not run out all over your plate when you cut into the chicken. Tent it loosely with foil to keep it warm.
Variations & Adaptations
This recipe is endlessly adaptable. Here are some variations I have tried and loved.
Lemon Herb Version: Add the zest of one lemon and 2 tablespoons of fresh lemon juice to the garlic butter. Swap the dried thyme for fresh rosemary or oregano. The brightness cuts through the richness beautifully. I make this version in spring when I want something a little lighter.
Spicy Honey Garlic: Add 2 tablespoons of honey and 1 teaspoon of sriracha or gochujang to the garlic butter. The sweet-spicy combination is addictive. Serve with rice to soak up the extra sauce. My husband requests this version at least once a week.
Low-Carb/Keto Adaptation: This recipe is already low-carb as written. Swap the cherry tomatoes for additional broccoli or cauliflower to reduce carbs further. The butter and chicken provide plenty of healthy fats. I have served this to keto friends who could not believe it was diet-friendly.
Sheet Pan Method: If you do not have an oven-safe skillet, sear the chicken in a regular pan, then transfer everything to a rimmed baking sheet lined with parchment paper. Roast for 20-25 minutes. The vegetables might get a bit more caramelized on the sheet pan, which is honestly a bonus.
Dairy-Free Version: Substitute the butter with a good quality olive oil or vegan butter. Add an extra tablespoon of oil to compensate for the missing fat. The flavor profile changes slightly but is still delicious. I have made this for dairy-free guests and received compliments.
Add Potatoes: If you want a heartier meal, add 1-2 cups of baby potatoes or diced Yukon Gold potatoes. Parboil them for 5 minutes first, then toss with the vegetables. They will soak up all the garlic butter goodness and become incredibly creamy inside.
Serving & Storage Suggestions
This dish is versatile enough for both casual weeknight dinners and company-worthy meals. Here is how to serve and store it.
Serving: Serve the chicken and vegetables directly from the skillet for a rustic presentation. Spoon the pan juices over everything. The dish pairs beautifully with crusty bread to soak up the garlic butter sauce, or with rice or quinoa. For a lighter meal, serve over a bed of arugula or mixed greens. The warm pan juices will wilt the greens slightly, creating a warm salad effect.
Complementary Sides: A simple green salad with lemon vinaigrette cuts through the richness. Roasted asparagus or green beans make excellent additions. If you are feeling indulgent, serve with creamy mashed potatoes or polenta. For a complete meal, try my other one-pan dinner recipes that follow the same easy approach.
Storage: Store leftovers in an airtight container in the refrigerator for up to 4 days. The flavors actually deepen overnight as the garlic butter continues to infuse the chicken and vegetables. I often make a double batch specifically for leftovers.
Reheating: The best way to reheat is in a 350°F (175°C) oven for 10-15 minutes. This restores the crispy skin better than the microwave. If you are in a hurry, microwave in 30-second bursts, but the skin will not be as crispy. For meal prep, portion the chicken and vegetables separately and reheat in a skillet with a splash of water or broth.
Freezing: This dish freezes well for up to 3 months. Let it cool completely, then transfer to a freezer-safe container. Thaw overnight in the refrigerator and reheat in the oven. The vegetables will be softer after freezing, so consider adding fresh vegetables when reheating.
Nutritional Information & Benefits
This recipe is not only delicious but also packed with nutritional benefits. Here is a rough breakdown per serving (based on 4 servings, using bone-in thighs and the listed vegetables):
| Nutrient | Amount Per Serving |
|---|---|
| Calories | 485 |
| Protein | 35g |
| Fat | 32g |
| Saturated Fat | 12g |
| Carbohydrates | 12g |
| Fiber | 4g |
| Sugar | 5g |
| Sodium | 720mg |
Chicken thighs are an excellent source of high-quality protein, B vitamins, and minerals like selenium and phosphorus. The skin provides healthy fats that help your body absorb fat-soluble vitamins from the vegetables. Broccoli and cauliflower are cruciferous vegetables rich in fiber, vitamin C, vitamin K, and antioxidants. Garlic has been studied for its immune-boosting and anti-inflammatory properties.
This recipe is naturally gluten-free, low-carb, and can be made dairy-free with a simple substitution. It is suitable for most dietary patterns, including paleo and keto. If you are watching your sodium, reduce the added salt and use unsalted butter. The vegetables provide plenty of volume and nutrients without adding many calories, making this a satisfying meal that supports overall health.
Conclusion
This easy garlic butter chicken thighs recipe has become my go-to for those nights when I want something that feels special but does not require a ton of effort. The combination of crispy skin, tender meat, caramelized vegetables, and that rich garlic butter sauce is honestly hard to beat. It is the kind of meal that makes you look forward to leftovers the next day.
I encourage you to make this recipe your own. Swap in whatever vegetables you have on hand, adjust the seasoning to your taste, and experiment with the variations. Cooking should be flexible and fun, not rigid and stressful. That is the whole point of a one-pan meal—less fuss, more flavor, and more time to actually enjoy your dinner.
If you try this recipe, I would love to hear how it turned out. Leave a comment below with your favorite vegetable combinations or any tweaks you made. Share your photos on social media and tag me so I can see your beautiful creations. And if you are looking for another easy weeknight winner, check out my collection of simple dinner recipes that make busy nights feel effortless. Happy cooking, friends!
Frequently Asked Questions
Can I use boneless, skinless chicken thighs for this recipe?
Absolutely, but the cooking time will be shorter—about 15-18 minutes in the oven instead of 20-25. The skinless version will not get crispy, so consider searing them well for color. The garlic butter will still keep them moist and flavorful. Just check the internal temperature to avoid overcooking.
What if I don’t have an oven-safe skillet?
No problem at all. Sear the chicken in any skillet, then transfer everything to a rimmed baking sheet lined with parchment paper. Roast as directed. The vegetables might even get a bit more caramelized on the sheet pan. Just make sure to spread everything in a single layer for even cooking.
Can I prep this recipe ahead of time?
Yes, with a few adjustments. You can season the chicken and prep the vegetables up to 24 hours in advance. Store them separately in the refrigerator. When ready to cook, let the chicken sit at room temperature for 15 minutes before searing. You can also make the garlic butter up to a week ahead and keep it refrigerated.
How do I prevent the garlic from burning?
Mixing the garlic into the butter before adding it to the pan is the key. The butter acts as a protective barrier and allows the garlic to infuse slowly in the oven. If you add minced garlic directly to the hot skillet, it will burn within seconds. Also, adding the garlic butter after searing, just before the oven, helps prevent burning.
What are the best vegetables to use in this recipe?
Broccoli and cauliflower are my favorites because they hold up well to roasting and develop beautiful caramelized edges. Other great options include asparagus, green beans, zucchini, bell peppers, and cherry tomatoes. If using softer vegetables like zucchini, add them halfway through roasting so they do not turn mushy. Root vegetables like carrots or potatoes benefit from being cut smaller or parboiled first.
Pin This Recipe!
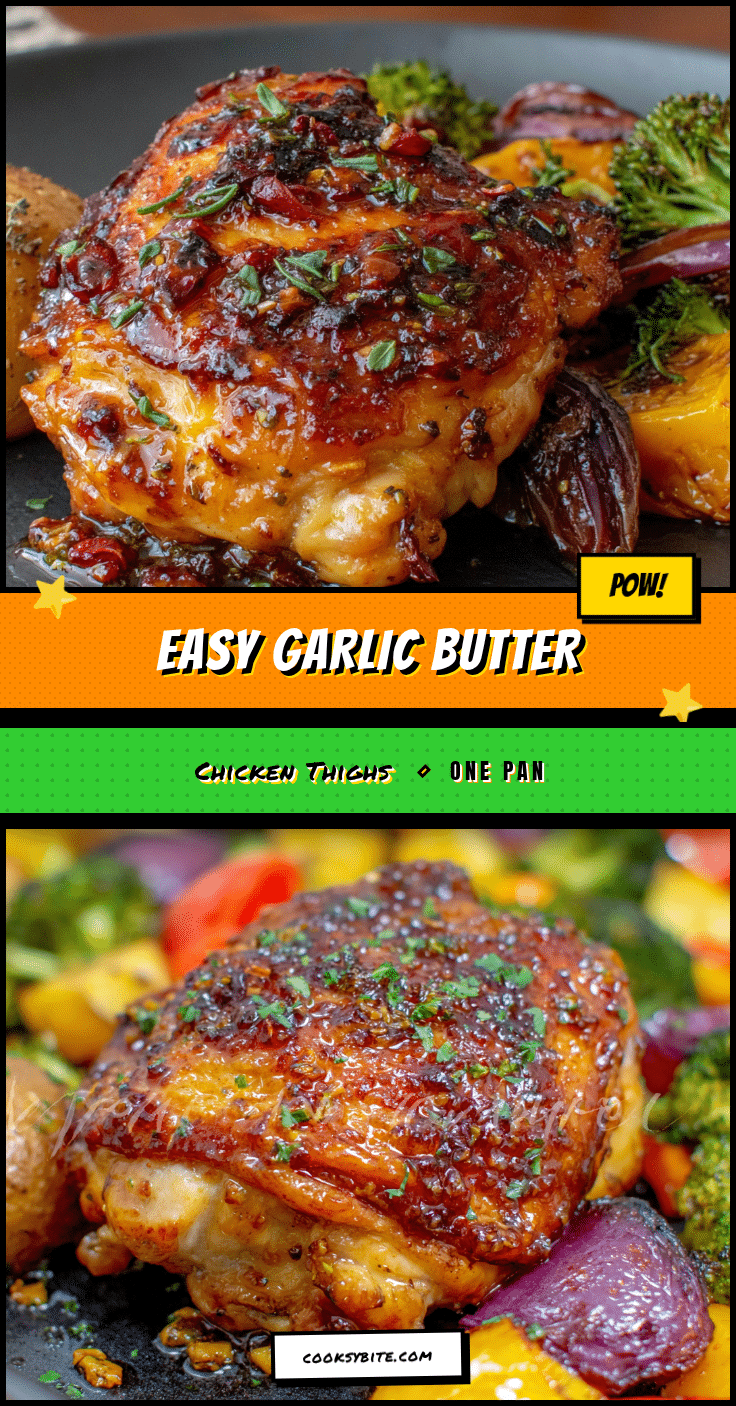
Easy Garlic Butter Chicken Thighs Recipe (One Pan)

Juicy, crispy-skinned chicken thighs roasted with garlic butter and caramelized vegetables in a single pan. This 35-minute weeknight dinner is simple, flavorful, and requires minimal cleanup.
- Prep Time: 10 minutes
- Cook Time: 25 minutes
- Total Time: 35 minutes
- Yield: 4 servings 1x
- Category: Main Course
- Cuisine: American
Ingredients
- 4–6 bone-in, skin-on chicken thighs (about 1.5–2 lbs total)
- 4 tablespoons unsalted butter, softened
- 6–8 cloves fresh garlic, minced
- 2 cups broccoli florets (about 1 small head)
- 2 cups cauliflower florets (about 1/2 medium head)
- 1 cup cherry tomatoes, halved
- 2 tablespoons olive oil
- 1 teaspoon kosher salt, plus more for seasoning
- 1/2 teaspoon freshly ground black pepper
- 1 teaspoon dried thyme (optional)
- 1/4 teaspoon red pepper flakes (optional)
- 2 tablespoons fresh parsley, chopped (for garnish)
Instructions
- Preheat your oven to 400°F (200°C). Position the rack in the middle.
- Pat the chicken thighs dry with paper towels. Season generously on both sides with salt and pepper. Let sit at room temperature for 10-15 minutes.
- In a small bowl, mash the softened butter with the minced garlic, dried thyme (if using), and a pinch of salt. Set aside at room temperature.
- Cut the broccoli and cauliflower into even florets (about 1-2 inches across). Halve the cherry tomatoes. Toss everything in a bowl with 1 tablespoon olive oil, a pinch of salt, and a few grinds of black pepper.
- Heat your skillet over medium-high heat. Add the remaining 1 tablespoon olive oil. Wait until the oil shimmers (about 2 minutes).
- Sear the chicken, skin-side down, in the hot skillet without crowding. Cook undisturbed for 5-6 minutes until deep golden brown and crispy.
- Flip the chicken using tongs. Cook for 2 minutes on the other side.
- Scatter the seasoned vegetables around the chicken thighs. Drop small spoonfuls of the garlic butter over each piece of chicken and dot the remaining butter among the vegetables.
- Transfer the skillet to the preheated oven. Roast for 20-25 minutes. At the 15-minute mark, stir the vegetables.
- Check for doneness: an instant-read thermometer inserted into the thickest part (not touching bone) should read 175-180°F (80-82°C).
- Remove the skillet from the oven. Tent loosely with foil and let the chicken rest for 5 minutes. Sprinkle with fresh parsley and red pepper flakes if using.
- Serve immediately, spooning pan juices and vegetables over the chicken.
Notes
For extra caramelized vegetables, switch the oven to broil for the last 3-4 minutes. Let chicken rest 5 minutes before serving. If using boneless thighs, reduce oven time by about 10 minutes. For dairy-free, substitute butter with olive oil or vegan butter.
Nutrition
- Serving Size: 1 serving (about 1 c
- Calories: 485
- Sugar: 5
- Sodium: 720
- Fat: 32
- Saturated Fat: 12
- Carbohydrates: 12
- Fiber: 4
- Protein: 35
Keywords: garlic butter chicken thighs, one pan chicken, easy weeknight dinner, crispy chicken thighs, roasted chicken and vegetables


