I swore I hated meringue cookies for years. Like, a solid decade. Too sweet, too fragile, too fussy—why bother when a chocolate chip cookie exists?
Then last October, my friend Maria showed up to our neighborhood potluck with a platter of these ghost-shaped meringues, and I caught myself eating my fourth one before I even said hello. The look on her face when she saw me reaching for another—pure, quiet victory. She didn’t say a word. Just smiled.
That’s the thing about these Easy Ghost Meringue Cookies. They sneak up on you. Light as air, with this perfect vanilla sweetness that dissolves on your tongue, and honestly? They’re the cutest thing you’ll put on a dessert table all season. I spent the next week texting Maria for her recipe, testing batches in my tiny kitchen, and learning exactly why these little ghosts work so well for Halloween parties.
Maybe you’ve been there—skeptical of something that looks too simple to be good, only to find yourself standing over the counter, grabbing “just one more.” These ghost meringues have that effect on people. And the best part? They’re ridiculously easy to make. No complicated piping skills required. No fancy equipment. Just four ingredients and about twenty minutes of hands-on time.
I’ve made these for three Halloween parties now, and they disappear faster than anything else on the table. Kids love them. Adults pretend they’re for the kids but eat half the batch themselves. If you’re hosting a spooky gathering this year and want something that looks impressive without causing kitchen stress, this is your recipe.
Why You’ll Love This Recipe
Let me tell you why these ghost meringues have become my go-to Halloween contribution. First, they’re practically foolproof once you know a few simple tricks—I’ve tested this recipe at least eight times to figure out exactly what works.
- Quick & Easy : Comes together in about 20 minutes of active prep time, then the oven does the rest. Perfect for busy Halloween week when you’ve got costumes to sort and pumpkins to carve.
- Simple Ingredients : Egg whites, sugar, vanilla extract, and cream of tartar. That’s it. You probably have everything in your kitchen right now.
- Perfect for Halloween Parties : These little ghosts are the star of any spooky spread. They look like they took hours of artistic piping work, but I promise you—anyone can make them look adorable.
- Crowd-Pleaser : Gluten-free, nut-free, and dairy-free. Every guest can enjoy them, which makes hosting so much easier when you’ve got dietary restrictions to navigate.
- Unbelievably Delicious : The texture is what gets everyone. Crisp on the outside, slightly chewy in the center, with that pure vanilla flavor that reminds you of old-fashioned candy.
What makes these different from other meringue recipes? I use a specific technique—adding the sugar slowly and whipping until the mixture forms stiff, glossy peaks—that creates the most stable meringue. No weeping, no cracking, no sad deflated ghosts. Plus, the cream of tartar is non-negotiable here; it stabilizes the egg whites and gives you that perfect marshmallow texture.
This is the kind of recipe that makes you look like a baking hero without breaking a sweat. Your guests will ask for the recipe, your kids will beg to help, and you’ll feel that warm glow of having pulled off something genuinely impressive.
What Ingredients You Will Need
This recipe uses simple, pantry-friendly ingredients to create something that feels special. Here’s what you’ll need, plus a few notes from my testing sessions.
- 4 large egg whites, room temperature (separate them carefully—any yolk will ruin the meringue. I crack each egg into a small bowl first, then transfer the white to the mixing bowl. Saves you from ruining a whole batch if one yolk breaks.)
- 1 cup (200g) granulated sugar (regular white sugar works best. Don’t substitute brown sugar or powdered sugar—the texture won’t be right. I’ve tried both, and trust me, stick with granulated.)
- 1/2 teaspoon cream of tartar (this is your insurance policy. It stabilizes the egg whites and helps them hold their shape. You can substitute 1 teaspoon of lemon juice or white vinegar in a pinch, but cream of tartar gives the most reliable results.)
- 1 teaspoon vanilla extract (pure vanilla extract makes a difference here. Imitation vanilla works too, but the flavor won’t be as rich. I use Nielsen-Massey vanilla because it’s worth the splurge for the depth it adds.)
For decorating:
- Mini chocolate chips or black decorating gel (for the ghost eyes. Mini chips give a cute, slightly rustic look. Black gel is easier to apply and looks more polished. Both work great—I use mini chips when I’m feeling lazy and gel when I want them to look fancy.)
Ingredient tips from my kitchen:
- Room temperature egg whites whip up to much more volume than cold ones. Leave your eggs on the counter for about 30 minutes before starting. If you forget (I do, constantly), place the eggs in a bowl of warm water for 5 minutes.
- Make sure your mixing bowl and whisk attachment are completely clean and dry. Any trace of grease will prevent the egg whites from whipping properly. I wipe my bowl with a bit of lemon juice on a paper towel before starting—old pastry chef trick.
- For the sugar, I’ve tested this with both organic and regular granulated sugar, and both work fine. Just make sure it’s not clumpy. If your sugar has been sitting around for a while, sift it first.
Equipment Needed
You don’t need much for this recipe, which is part of why I love it. Here’s what I use:
- Electric stand mixer or hand mixer (you can whip egg whites by hand with a whisk, but your arm will hate you. A stand mixer with the whisk attachment is ideal. My KitchenAid gets a workout every October.)
- Large mixing bowl (glass or metal works best. Avoid plastic bowls—they can retain grease even after washing.)
- Piping bag with a large round tip (a #12 or #1A tip works perfectly. If you don’t have a piping bag, a zip-top bag with the corner snipped off works just fine. I’ve done both, and honestly, the zip-top bag is easier for beginners.)
- Baking sheets lined with parchment paper (parchment is non-negotiable here. Wax paper will stick, and silicone mats can sometimes cause meringues to spread too much.)
- Small bowl for separating eggs (trust me on this one—crack each egg into a small bowl first before adding the white to your main bowl. One broken yolk won’t ruin your whole batch this way.)
- Cooling rack (for letting your ghosts cool completely before storing.)
Budget-friendly tip: A $2 piping bag set from the grocery store works great. Or just use a sturdy zip-top bag. I’ve made dozens of batches with the bag method, and nobody can tell the difference.
Preparation Method
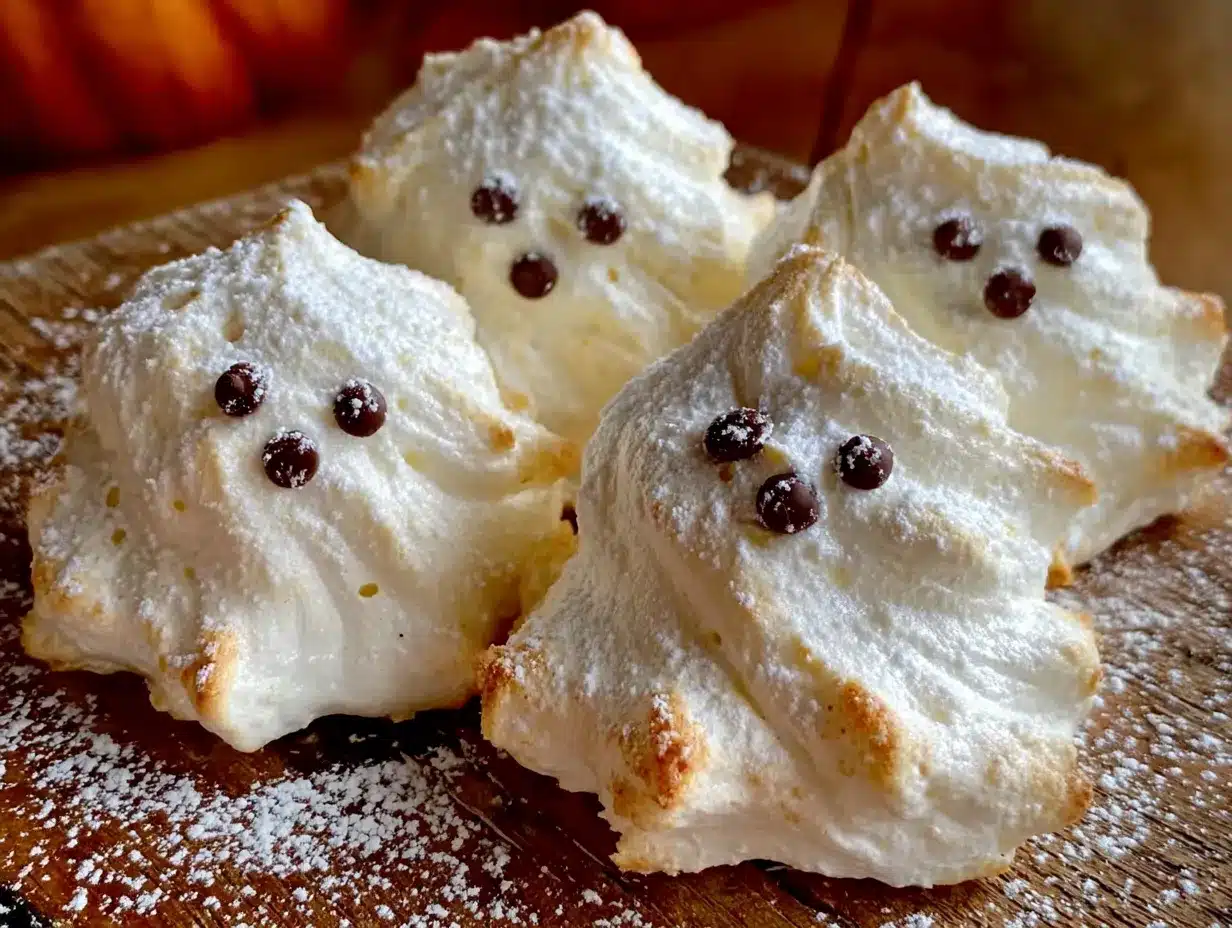
Let me walk you through this step by step. I’ve made enough mistakes with meringue to know exactly where things can go wrong, so I’ll share all my hard-earned lessons.
Step 1: Preheat and prepare.
Preheat your oven to 200°F (95°C). Line two baking sheets with parchment paper. Set aside.
Step 2: Whip the egg whites.
Place your room-temperature egg whites in the clean, dry bowl of your stand mixer. Add the cream of tartar. Start mixing on medium speed until the egg whites become frothy and bubbly—about 1 to 2 minutes. You’ll see lots of tiny bubbles forming, and the mixture will look like thin foam.
Step 3: Add the sugar slowly.
Here’s the most important part: with the mixer running on medium speed, start adding the sugar one tablespoon at a time. I know it feels tedious, but this gradual addition is what creates stable meringue. If you dump all the sugar in at once, your meringue will deflate and never reach stiff peaks. Take about 2 to 3 minutes to add all the sugar.
Step 4: Whip to stiff peaks.
Once all the sugar is added, increase the speed to medium-high and whip until the meringue forms stiff, glossy peaks. This usually takes about 5 to 7 minutes. How do you know when it’s ready? Lift the whisk attachment—the meringue should stand up in a sharp peak that doesn’t droop. Also, rub a tiny bit between your fingers. If it feels gritty, keep whipping. If it feels smooth, you’re done.
Step 5: Add vanilla.
Add the vanilla extract and whip for another 30 seconds until combined. The meringue should look thick, glossy, and luxurious—like marshmallow fluff but shinier.
Step 6: Pipe the ghosts.
Transfer the meringue to your piping bag fitted with a large round tip. Hold the bag straight up and down, about 1/2 inch above the parchment paper. Pipe a round blob for the body, then pull straight up to create a little peak on top. Release pressure, then pull away. That peak becomes the ghost’s head. Space them about 2 inches apart—they don’t spread much, but you want room to work.
Step 7: Add the eyes.
Before the meringue dries, gently press two mini chocolate chips into each ghost for eyes. If using black decorating gel, wait until the ghosts are baked and cooled, then dot on the eyes. I prefer the gel method for a cleaner look, but chocolate chips give them a charming, slightly goofy expression.
Step 8: Bake low and slow.
Place the baking sheets in the preheated oven and bake for 1 hour and 30 minutes. The meringues should be dry to the touch and easily lift off the parchment paper. They’ll look pale and slightly matte—that’s perfect.
Step 9: Cool completely.
Turn off the oven and leave the meringues inside with the door slightly ajar for another 30 minutes. This gradual cooling prevents cracking. Then transfer them to a wire rack to cool completely.
Step 10: Store or serve.
Once completely cool, serve immediately or store in an airtight container at room temperature for up to two weeks. Don’t refrigerate them—they’ll absorb moisture and get sticky.
Cooking Tips & Techniques
I’ve learned a few things the hard way, so let me save you some trouble.
Humidity is your enemy. Meringue hates humidity. If it’s a rainy day, your meringues might end up sticky and soft. Pick a dry day to make these, or run a dehumidifier in your kitchen. I learned this one the hard way during a particularly damp October—my ghosts looked more like sad blobs.
Don’t overbake. The low temperature is crucial. If your oven runs hot, your ghosts will brown and crack. I use an oven thermometer because my oven lies to me. Set it to 200°F and let them dry out slowly. They should be crisp all the way through but still white.
Room temperature eggs really matter. Cold eggs don’t whip up as well. I set mine out on the counter while I prep everything else. If I forget, I place them in a bowl of warm water for 5 minutes.
Make ahead for parties. These are perfect for make-ahead hosting. Bake them up to a week before your party and store them in an airtight container. They stay perfectly crisp. Just don’t add the gel eyes until right before serving—the gel can soften the meringue over time.
Don’t open the oven. I know you’ll want to peek. Don’t. Opening the oven door lets in cool air and can cause your meringues to crack or collapse. Trust the process and wait until the timer goes off.
Variations & Adaptations
Once you’ve mastered the basic ghost, here are some fun ways to switch things up.
Pumpkin Spice Ghosts: Add 1 teaspoon of pumpkin pie spice along with the vanilla. The warm spices pair beautifully with the vanilla and give these a fall twist. I made these for a Friendsgiving and they were gone in minutes.
Chocolate Ghosts: Swap 2 tablespoons of sugar for 2 tablespoons of unsweetened cocoa powder. Sift it in with the sugar to avoid lumps. The chocolate version looks spookier—almost like shadow ghosts—and tastes amazing.
Peppermint Ghosts: Add 1/2 teaspoon of peppermint extract instead of vanilla. Crush some candy canes and sprinkle them on top before baking for a festive winter version. These are great for Christmas parties too.
Vegan Version: Use aquafaba (the liquid from a can of chickpeas) instead of egg whites. 3 tablespoons of aquafaba equals about one egg white. Whip it the same way, but it takes a bit longer to reach stiff peaks. The texture is slightly different—a little less crisp—but still delicious and totally plant-based.
Colorful Ghosts: Add a few drops of gel food coloring after the stiff peaks form. Whip just until combined. Purple, green, or orange ghosts are perfect for Halloween. Just don’t use liquid food coloring—it will deflate your meringue.
Serving & Storage Suggestions
These ghosts are best served at room temperature, right off the baking sheet or arranged on a pretty platter. I like to pile them on a cake stand for maximum visual impact—they look like a cloud of tiny ghosts floating upward.
For a Halloween party, I arrange them around a bowl of punch or scatter them on the dessert table next to cupcakes and cookies. They also make adorable party favors—fill small cellophane bags with a few ghosts, tie with orange ribbon, and hand them out as guests leave.
Storage: Keep them in an airtight container at room temperature for up to two weeks. Don’t refrigerate—they’ll absorb moisture and turn sticky. If you live in a humid climate, add a silica gel packet to the container to keep them crisp.
Freezing: You can freeze baked meringues for up to three months. Place them in a single layer in a freezer-safe container with parchment paper between layers. Thaw at room temperature for about 30 minutes before serving. They’ll be just as crisp as the day you made them.
Flavors actually improve after a day or two—the vanilla mellows and becomes more rounded. I usually make these two days before a party for the best flavor.
Nutritional Information & Benefits
These ghost meringues are surprisingly light. Each cookie has about:
- Calories: 25-30
- Fat: 0g
- Carbohydrates: 6g
- Sugar: 6g
- Protein: 0.5g
They’re naturally gluten-free, dairy-free, nut-free, and low in calories compared to most cookies. Egg whites are a good source of protein without the fat of the yolk, and they contain riboflavin and selenium.
That said, these are still a treat—they’re mostly sugar, after all. But if you’re looking for a Halloween dessert that won’t weigh you down or trigger common allergies, these ghosts are a fantastic option. I love that I can offer something to every guest regardless of their dietary needs.
Conclusion
These Easy Ghost Meringue Cookies have become my signature Halloween contribution, and I think they’ll become yours too. They’re simple enough for a weeknight baking session with kids, impressive enough for a grown-up dinner party, and delicious enough that nobody believes they’re gluten-free and dairy-free.
I love watching people’s faces when they see these little ghosts on the dessert table. Kids squeal. Adults smile. And then everyone reaches for one, and suddenly the platter is empty and people are asking for the recipe. That’s the magic of a recipe that looks like it took hours but actually came together in twenty minutes.
Don’t be afraid to make these your own. Add food coloring, change up the extracts, experiment with different eye shapes. The beauty of meringue is that it’s forgiving once you know the basics. And now you do.
I’d love to hear how your ghosts turn out! Drop a comment below and tell me about your Halloween party plans, or tag me in your photos if you share them online. Happy haunting, and happy baking!
Frequently Asked Questions
Can I make these without a stand mixer?
Absolutely! A hand mixer works perfectly. It might take a minute or two longer to reach stiff peaks, but the results are the same. Whisking by hand is possible but will take 10-15 minutes of vigorous work—definitely a workout for your arm.
Why did my meringues turn out sticky?
Sticky meringues usually mean they weren’t baked long enough, or the humidity was too high. Make sure they’re completely dry to the touch before removing them from the oven. If you live in a humid climate, try baking them for an extra 15-20 minutes at the same low temperature.
Can I use liquid egg whites from a carton?
I don’t recommend it. Carton egg whites often contain stabilizers that prevent them from whipping up properly. Fresh egg whites give you the best volume and stability. Save the carton stuff for omelets.
How do I know when stiff peaks are reached?
Lift the whisk attachment straight up. The meringue should form a sharp peak that stands up straight without drooping. Also, the mixture should look glossy and smooth, not grainy. Rub a tiny bit between your fingers—if it feels smooth, you’re done. If it feels gritty, keep whipping.
Can I pipe different shapes besides ghosts?
Definitely! Use the same meringue to pipe pumpkins (round blobs with a small stem), witches hats (flat circles with pointed tops), or even little bats (two small rounds connected). Just adjust your piping technique and add decorations accordingly. The baking time stays the same.
Pin This Recipe!
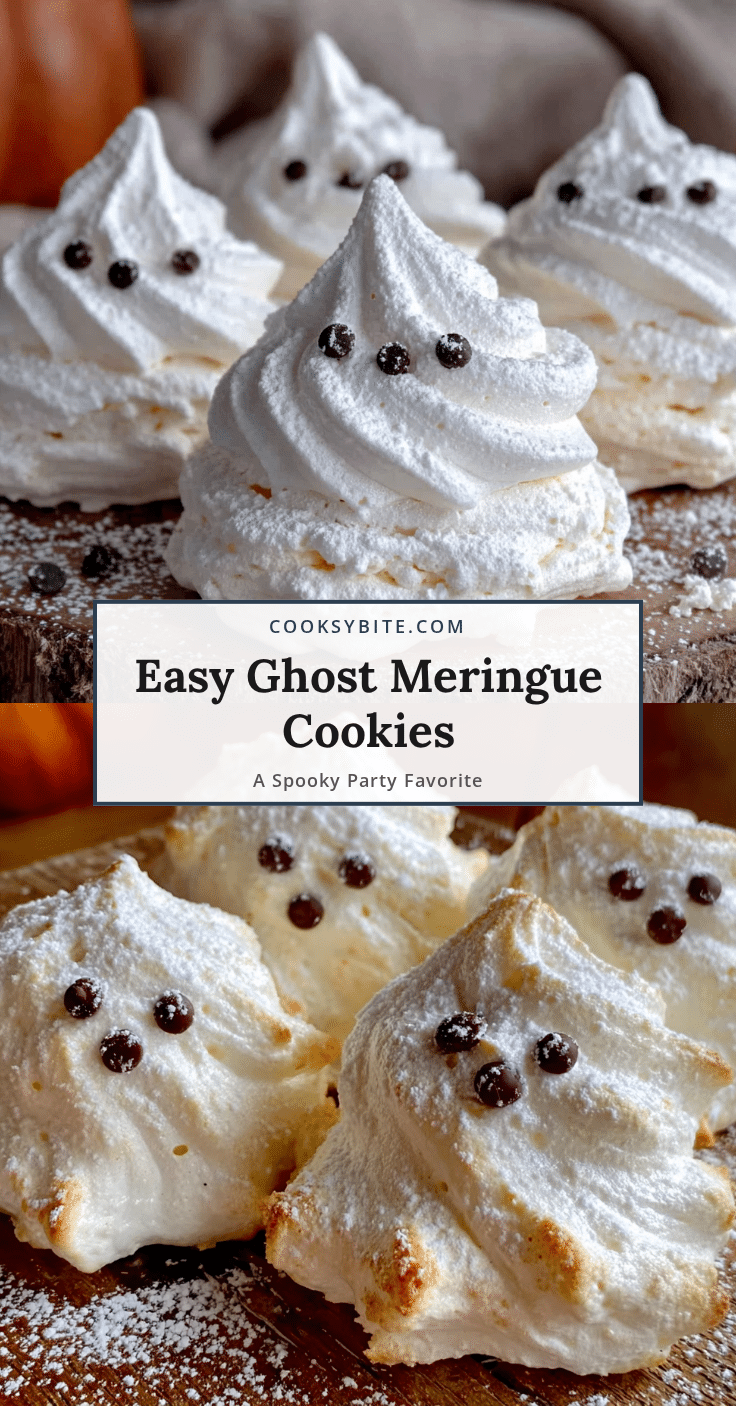
Easy Ghost Meringue Cookies: Best Spooky Halloween Treat
Light as air ghost-shaped meringue cookies with a perfect vanilla sweetness that dissolves on your tongue. Made with just four ingredients and about twenty minutes of hands-on time, these adorable gluten-free, dairy-free treats are the perfect Halloween party dessert.
- Prep Time: 20 minutes
- Cook Time: 1 hour 30 minutes
- Total Time: 2 hours 20 minutes
- Yield: 24 servings 1x
- Category: Dessert
- Cuisine: American
Ingredients
- 4 large egg whites, room temperature
- 1 cup (200g) granulated sugar
- 1/2 teaspoon cream of tartar
- 1 teaspoon vanilla extract
- Mini chocolate chips or black decorating gel (for ghost eyes)
Instructions
- Preheat your oven to 200°F (95°C). Line two baking sheets with parchment paper.
- Place room-temperature egg whites in a clean, dry mixing bowl. Add cream of tartar. Mix on medium speed until frothy and bubbly, about 1 to 2 minutes.
- With the mixer running on medium speed, add sugar one tablespoon at a time over 2 to 3 minutes.
- Increase speed to medium-high and whip until stiff, glossy peaks form, about 5 to 7 minutes. The meringue should stand up in a sharp peak and feel smooth when rubbed between fingers.
- Add vanilla extract and whip for another 30 seconds until combined.
- Transfer meringue to a piping bag fitted with a large round tip. Pipe ghost shapes onto prepared baking sheets: pipe a round blob for the body, then pull straight up to create a peak for the head. Space about 2 inches apart.
- If using mini chocolate chips, gently press two into each ghost for eyes before the meringue dries. If using black decorating gel, wait until after baking and cooling.
- Bake for 1 hour and 30 minutes, until meringues are dry to the touch and easily lift off the parchment.
- Turn off the oven and leave meringues inside with the door slightly ajar for 30 minutes to cool gradually.
- Transfer to a wire rack to cool completely. Serve immediately or store in an airtight container at room temperature for up to two weeks.
Notes
Humidity is the enemy of meringue—make on a dry day. Don’t open the oven during baking. Room temperature eggs are essential for proper volume. For best results, use an oven thermometer to ensure accurate temperature. Meringues can be made up to a week ahead and stored in an airtight container. If using black gel eyes, add after baking and cooling to prevent softening.
Nutrition
- Serving Size: 1 cookie
- Calories: 28
- Sugar: 6
- Sodium: 10
- Carbohydrates: 6
- Protein: 0.5
Keywords: ghost meringue cookies, Halloween cookies, easy meringue, gluten-free Halloween dessert, dairy-free cookies, spooky treats, meringue ghosts


