My niece Lucy showed up at my door at 4 PM on a Saturday, already half-dressed as a bat, asking if we could “do a Halloween thing.” I had a box of instant chocolate pudding, some Oreos that were definitely not fresh, and a bag of gummy worms I’d bought for movie night three weeks ago. No fancy cake, no elaborate bake time—just a fridge and a prayer that this would work. Honestly, I was winging it, and I told her as much.
She didn’t care. She wanted dirt. Specifically, she wanted something that looked like mud with worms crawling out of it, and she wanted it in under twenty minutes. That’s how these Easy Halloween Dirt Cups with Gummy Worms were born—out of a last-minute request and a pantry that barely cooperated. We crushed cookies on my counter (crumbs went everywhere, sorry not sorry), layered pudding into little cups, and stuck gummy worms in at weird angles so they looked like they were escaping. Lucy laughed so hard she snorted.
That moment—messy, chaotic, and completely improvised—is exactly why this recipe stuck with me. It’s not about perfection. It’s about making something fun with what you’ve got, and watching a kid’s face light up when they realize dessert is also a tiny graveyard. These Easy Halloween Dirt Cups with Gummy Worms are the kind of recipe that saves you when you forget to plan ahead, which, let’s face it, happens more often than we’d like to admit.
Why You’ll Love This Recipe
I’ve tested this recipe about six times now (yes, I ate pudding for dinner twice last week), and here’s what I’ve learned: it’s basically foolproof. You don’t need to be a baker. You don’t need a mixer. You just need a spoon, a bowl, and the willingness to get a little chocolate on your fingers.
Here’s what makes these dirt cups stand out:
- Quick & Easy: From start to finish, you’re looking at about 15 minutes of active work. The hardest part is waiting for the pudding to set, and even that only takes 5 minutes if you use instant mix.
- Simple Ingredients: No fancy grocery trips. You probably have everything already—pudding mix, milk, Oreos, gummy worms, and maybe some cool whip if you’re feeling fancy.
- Perfect for Halloween Parties: These are the kind of treat that disappears first at any gathering. Kids love them, adults secretly love them, and nobody judges you for eating three in one sitting.
- Crowd-Pleaser: I’ve brought these to school parties, family dinners, and even a work potluck. Every single time, someone asks for the recipe. Every single time.
- Unbelievably Delicious: The texture combo is next-level—creamy pudding, crunchy cookie crumbs, and chewy gummy worms. It’s like a party in a cup, and I’m not sorry for saying that.
What makes my version different from the dozens you’ll find online? I use a trick that keeps the cookie crumbs from getting soggy. It’s a small thing, but it makes a huge difference. I spread the crushed Oreos on a baking sheet and toast them for just 3 minutes. It dries them out just enough so they stay crunchy even after sitting in the fridge overnight. Trust me on this one—it’s the difference between good dirt cups and great dirt cups.
This recipe isn’t just good—it’s the kind that makes you close your eyes after the first bite. It’s comfort food reimagined for Halloween, with all the spooky fun but none of the stress. Perfect for impressing little monsters without spending hours in the kitchen.
What Ingredients You Will Need
This recipe uses simple, pantry-friendly ingredients to deliver that classic dirt cup texture and taste. Nothing weird, nothing expensive—just the good stuff you probably already have.
- 1 box (3.9 oz) instant chocolate pudding mix – I prefer Jell-O brand for its smooth texture, but store brands work fine too. Make sure it’s instant, not cook-and-serve—you want the quick-set version.
- 2 cups cold whole milk – Whole milk gives the richest, creamiest pudding. You can use 2% or even oat milk in a pinch, but the texture will be slightly less luxurious. (I’ve tried almond milk, and it works but feels a little thin.)
- 1 (8 oz) tub Cool Whip, thawed – This makes the pudding extra light and fluffy. You can substitute homemade whipped cream if you’re feeling ambitious, but honestly, Cool Whip is easier and holds up better in the fridge.
- 1 (14.3 oz) package Oreo cookies – You’ll use the whole package, including the cream filling. Don’t bother separating them—the cream adds a subtle sweetness that balances the chocolate.
- 1 (5 oz) bag gummy worms – Go for the classic bright-colored ones. They look more dramatic against the dark “dirt.” I’ve tried sour worms too, and they add a nice tangy contrast.
- Optional: 1 tablespoon butter, melted – This is my secret trick for toasting the cookie crumbs. It helps them get extra crispy and adds a slight richness.
- Optional: Halloween sprinkles or candy eyes – For extra decoration. Because why not?
For the pudding, I’ve tested this with both sugar-free and regular instant pudding. The sugar-free version works fine, but the texture is slightly less creamy. If you’re watching your sugar intake, go for it—just know the flavor isn’t quite as indulgent. My personal preference is the full-fat, full-sugar version for Halloween treats. It’s a party, after all.
When it comes to Oreos, I’ve tried Double Stuf and regular. Double Stuf works, but the extra cream makes the crumbs slightly greasier. Stick with regular Oreos for the best texture. And if you’re feeling adventurous, try the Halloween-themed Oreos with orange filling—they add a fun pop of color when you crush them.
For the gummy worms, look for the soft, chewy variety—not the hard candies. The texture contrast is what makes these dirt cups so satisfying. I’ve also used gummy spiders and bats for themed variations, but worms are the classic choice for a reason.
Equipment Needed
You don’t need much for this recipe, which is part of its charm. Here’s what I use:
- Mixing bowls – One large bowl for the pudding, one medium bowl for crushing cookies. Glass or stainless steel works best—plastic bowls tend to hold onto odors.
- Whisk or electric mixer – A whisk works fine, but an electric mixer makes the pudding come together faster. I’ve used both, and honestly, the whisk gives me a better arm workout.
- Rolling pin or food processor – For crushing Oreos. A rolling pin and a zip-top bag is the low-tech method, and it’s actually more satisfying. If you use a food processor, pulse gently—you want crumbs, not dust.
- Baking sheet – If you’re using my toasted crumb trick, you’ll need a small baking sheet lined with parchment paper.
- 6-8 small cups or glasses – Clear plastic cups are ideal because you can see the layers. I use 8-ounce disposable cups for parties, but small mason jars or even juice glasses work great too.
- Spatula – For scraping every last bit of pudding out of the bowl. Waste not, want not.
- Spoon or piping bag – A spoon works perfectly for layering, but a piping bag makes it look more polished. I usually just use a spoon because I’m lazy and it tastes the same either way.
If you don’t have a food processor, don’t sweat it. Put the Oreos in a zip-top bag, seal it tight, and go to town with a rolling pin. It’s a great way to release some Halloween stress, honestly. My niece loves this part—she calls it “smashing the cookies.”
For the cups, I’ve found that clear plastic cups from the party supply store work best. They’re cheap, disposable, and let everyone see the layers. If you’re serving these at a party, you can find Halloween-themed cups with spiders or ghosts on them. It adds an extra touch without any extra work.
Preparation Method
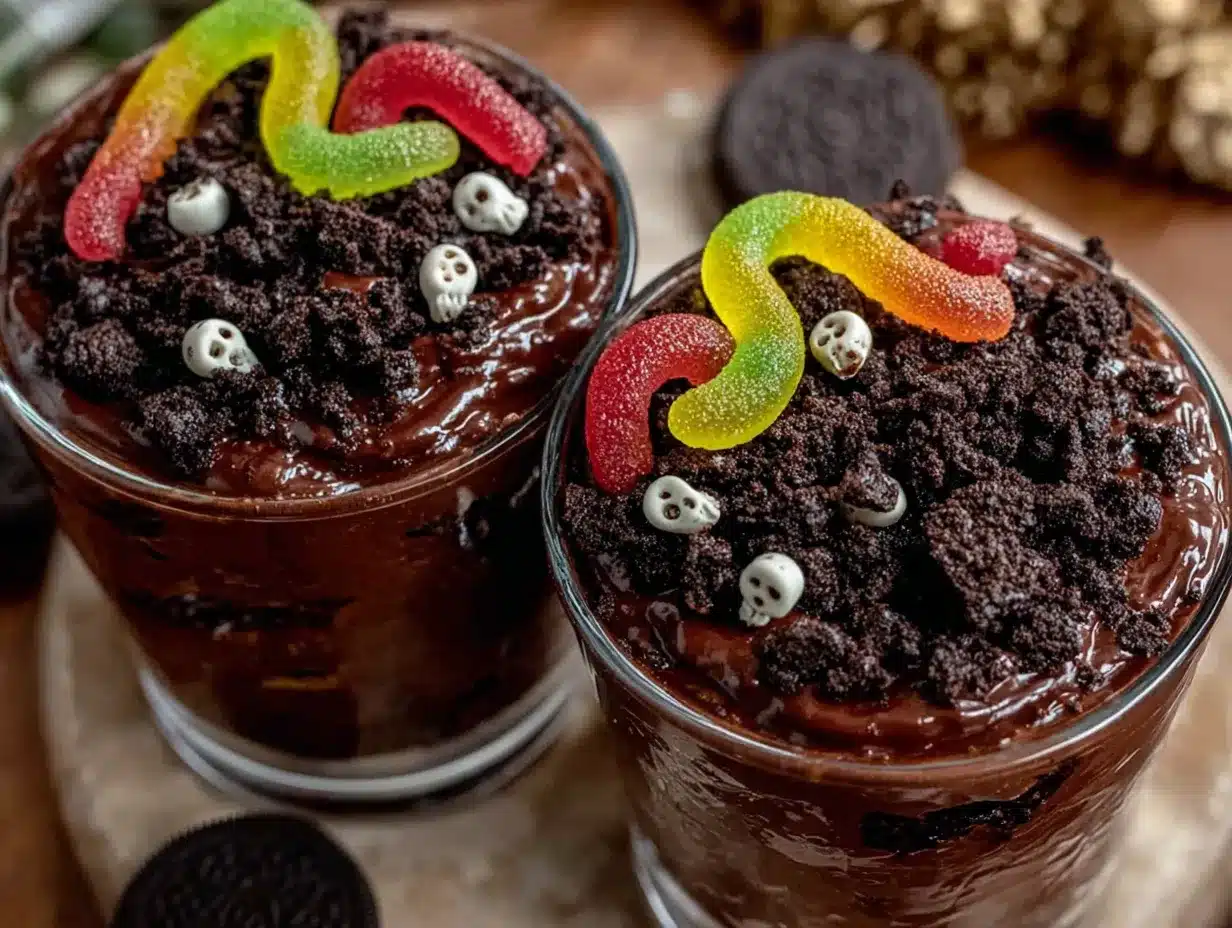
Let me walk you through this step by step. I’ve made these dirt cups so many times that I could do it in my sleep, but I’ll slow down for you.
- Make the pudding. In a large mixing bowl, whisk together the instant chocolate pudding mix and 2 cups cold milk. Whisk for about 2 minutes until it thickens. It should look like, well, pudding—smooth and glossy. If you see lumps, keep whisking. Pro tip: Use a balloon whisk, not a flat one. It incorporates air better and gives you a lighter texture.
- Fold in the Cool Whip. Add the thawed Cool Whip to the pudding and gently fold it in with a spatula. Don’t stir vigorously—you want to keep the air bubbles intact. The mixture should turn a lighter shade of brown and look almost mousse-like. This is your “dirt” base, and it should be fluffy, not dense.
- Crush the Oreos. Place the entire package of Oreos (cream filling included) in a zip-top bag. Seal it, then crush them with a rolling pin until you have a mix of fine crumbs and small chunks. You don’t want powder—you want texture. Think of it like gravel, not sand. If you’re using a food processor, pulse 5-6 times and check the consistency.
- Toast the crumbs (my secret step). Preheat your oven to 350°F. Spread the crushed Oreos on a parchment-lined baking sheet. Drizzle with 1 tablespoon melted butter if you’re using it, and toss to coat. Bake for 3 minutes exactly. Let them cool completely before using. This step is optional, but I promise it makes a difference—the crumbs stay crunchy even after sitting in the fridge overnight.
- Layer the cups. Start with a layer of cookie crumbs at the bottom of each cup. Use about 2 tablespoons per cup. Press them down gently with the back of a spoon to create a solid base. This gives your dirt cups structure and prevents the pudding from seeping through.
- Add the pudding. Spoon or pipe the pudding mixture over the cookie layer. Fill each cup about two-thirds full. Tap the cups gently on the counter to settle the pudding and remove any air bubbles. You want a smooth, even layer.
- Top with more crumbs. Sprinkle another layer of cookie crumbs over the pudding. This is your “dirt” surface, so make it generous—about 2 tablespoons per cup. Don’t press down this time; leave it loose and crumbly for that realistic dirt look.
- Add the gummy worms. This is the fun part. Take 2-3 gummy worms per cup and push them into the dirt at different angles. Some should be fully buried, some halfway out, some crawling over the edge. Get creative with it—the more chaotic, the better. I like to have one worm “escaping” over the rim of the cup.
- Chill before serving. Refrigerate the cups for at least 30 minutes before serving. This lets the pudding set completely and the flavors meld together. If you’re making them ahead, they’ll keep in the fridge for up to 2 days—just add the gummy worms right before serving so they don’t get too soft.
A few notes from my kitchen disasters: If your pudding doesn’t set properly, you might have used too much milk or not whisked enough. Add an extra tablespoon of pudding mix and whisk again. If your cookie crumbs get clumpy after toasting, break them up with your fingers before layering. And if you accidentally eat all the gummy worms before they make it into the cups? Been there. Buy an extra bag.
Cooking Tips & Techniques
I’ve made every mistake in the book with these dirt cups, so you don’t have to. Here’s what I’ve learned the hard way:
The soggy crumb problem. The first time I made these, I layered everything and put them in the fridge overnight. By morning, the cookie crumbs had turned into a sad, mushy paste. That’s when I started toasting the crumbs. The 3-minute bake time dries them out just enough that they stay crunchy. It’s a game-changer, and I won’t make these any other way now.
Timing is everything. If you’re making these for a party, assemble them no more than 4 hours ahead of time. The pudding will stay fresh, and the crumbs won’t have time to get soggy. If you need to prep earlier, make the pudding and crush the cookies separately, then layer everything just before serving.
The worm placement trick. Don’t just stick the worms in straight up and down. Push them in at angles, curl some around the edge, and let a few drape over the side of the cup. It looks more realistic and more fun. I’ve found that 3 worms per cup is the sweet spot—any more and it looks crowded, any fewer and it looks sad.
Multitasking strategy. While the pudding is setting in the fridge, crush and toast your cookies. While the crumbs are cooling, prep your cups. This way, everything comes together in about 15 minutes flat. I’ve timed myself, and I can make a batch of 8 cups in 12 minutes when I’m in the zone.
The consistency check. Your pudding mixture should be thick enough to hold its shape when spooned. If it’s too runny, your layers will blur together. If it’s too thick, it won’t settle evenly. The perfect texture is like thick Greek yogurt—spoonable but not stiff.
Variations & Adaptations
One of the best things about this recipe is how customizable it is. Here are some variations I’ve tried and loved:
Dairy-Free Dirt Cups: Use almond milk or oat milk for the pudding, and swap the Cool Whip for a dairy-free whipped topping like CocoWhip. I’ve tested this with oat milk, and the texture is surprisingly close to the original. Just make sure your pudding mix is dairy-free—some brands contain milk solids.
Gluten-Free Version: Use gluten-free chocolate sandwich cookies (Glutino makes a good one) and double-check your pudding mix. Most instant pudding is gluten-free, but always read the label. The texture will be slightly different, but the flavor is still spot-on.
Peanut Butter Dirt Cups: Add 2 tablespoons of creamy peanut butter to the pudding mixture before folding in the Cool Whip. It adds a rich, nutty flavor that pairs beautifully with the chocolate. I’ve also drizzled melted peanut butter over the top for extra drama.
Spooky Spider Cups: Instead of gummy worms, use gummy spiders or candy eyes. Top each cup with a plastic spider ring for a fun party favor. This is a great option if you’re serving kids who might be squeamish about worms (though I’ve never met a kid who didn’t love them).
Pumpkin Dirt Cups: For a fall twist, use pumpkin spice pudding instead of chocolate. Layer with crushed graham crackers instead of Oreos, and top with candy corn. It’s a completely different dessert but just as easy. I made these for Thanksgiving last year, and they were a hit.
Individual vs. Large Format: You can make this as a single large dish instead of individual cups. Use a 9×9 glass dish, layer everything the same way, and let guests scoop their own portions. It’s less cute but more practical for big parties.
Serving & Storage Suggestions
These dirt cups are best served cold, straight from the fridge. The contrast between the cool, creamy pudding and the crunchy cookie crumbs is what makes them so satisfying. I like to serve them on a tray with extra gummy worms scattered around for decoration.
For a Halloween party, pair them with other spooky treats like pink champagne jello shots for the adults and a bowl of popcorn balls for the kids. The combination of sweet and savory keeps everyone happy. If you’re going all out on a Halloween dessert table, these dirt cups also look great next to red wine chocolate cake for a sophisticated touch.
Storage: Cover each cup with plastic wrap or a lid and refrigerate for up to 2 days. The cookie crumbs will start to soften after 24 hours, so for best results, eat them within the first day. I don’t recommend freezing these—the pudding gets grainy and the texture falls apart.
Reheating: Don’t. These are meant to be served cold. If you want a warm dessert, make a different recipe. (But honestly, why would you want warm dirt?)
Flavor development: The pudding actually gets better after a few hours in the fridge. The flavors meld together, and the texture becomes more mousse-like. If you can resist eating them immediately, let them chill for at least 2 hours. I promise it’s worth the wait.
Nutritional Information & Benefits
Let’s be real—these are a treat, not a health food. But here’s the breakdown if you’re curious:
| Nutrient | Per Serving (1 cup) |
|---|---|
| Calories | 380 |
| Total Fat | 16g |
| Saturated Fat | 9g |
| Carbohydrates | 55g |
| Sugar | 38g |
| Protein | 5g |
| Calcium | 10% DV |
These values are estimates and will vary based on the specific brands you use. If you’re watching your sugar intake, use sugar-free pudding and light Cool Whip to cut the sugar by about half. You can also use reduced-fat Oreos, though I personally think the full-fat version tastes better.
On the positive side, this recipe does contain calcium from the milk and a small amount of iron from the chocolate. The gummy worms don’t offer much nutritionally, but they do make people smile—and that counts for something, right?
For dietary considerations: This recipe contains dairy and gluten. It can be made dairy-free and gluten-free with the substitutions I mentioned earlier. It’s not suitable for vegans unless you use vegan pudding, whipped topping, and cookies.
Conclusion
These Easy Halloween Dirt Cups with Gummy Worms are the kind of recipe that saves your sanity during the chaos of October. They’re quick, they’re fun, and they’re guaranteed to make kids (and adults) smile. No fancy techniques, no expensive ingredients, no stress—just good old-fashioned dessert that happens to look like a graveyard.
I love this recipe because it reminds me of that afternoon with Lucy, when we made a mess and laughed until our stomachs hurt. That’s what Halloween should be about—not perfection, but joy. So go ahead and customize these however you want. Add extra worms. Use different cookies. Make them your own. And when someone asks for the recipe, tell them it came from a last-minute panic and a bag of gummy worms.
If you make these, I’d love to hear about it. Drop a comment below or tag me in your photos. Did your kids love them? Did you add a twist I haven’t thought of? Share your dirt cup adventures—I’m always looking for new ideas. And if you’re looking for more Halloween treats, check out my full collection of recipes for more spooky inspiration. Happy Halloween, and happy eating!
Frequently Asked Questions
Can I make these dirt cups ahead of time?
Yes, you can make them up to 2 days in advance. Just wait to add the gummy worms until right before serving so they stay firm and chewy. The cookie crumbs will soften slightly over time, but they’ll still taste great.
Can I use homemade pudding instead of instant?
You can, but it changes the texture. Homemade pudding is thinner and won’t set as firmly. If you go that route, use less milk or add a cornstarch slurry to thicken it. I’ve tried it, and instant works better for this specific recipe.
How many cups does this recipe make?
This recipe makes 6-8 servings, depending on the size of your cups. I use 8-ounce cups and get 8 full cups. If you use smaller cups (like 4-ounce shot glasses), you’ll get 12-14 mini dirt cups—perfect for parties.
Can I use a different type of cookie?
Absolutely. Chocolate wafer cookies, graham crackers, or even crushed pretzels work well. Just keep in mind that different cookies have different textures and sweetness levels. I’ve used gluten-free chocolate cookies with great results.
How do I keep the gummy worms from getting sticky?
Add them right before serving. If you add them too early, the moisture from the pudding will make them sticky and soft. For best results, store the gummy worms separately and let everyone add their own—it’s also a fun activity for kids.
Pin This Recipe!
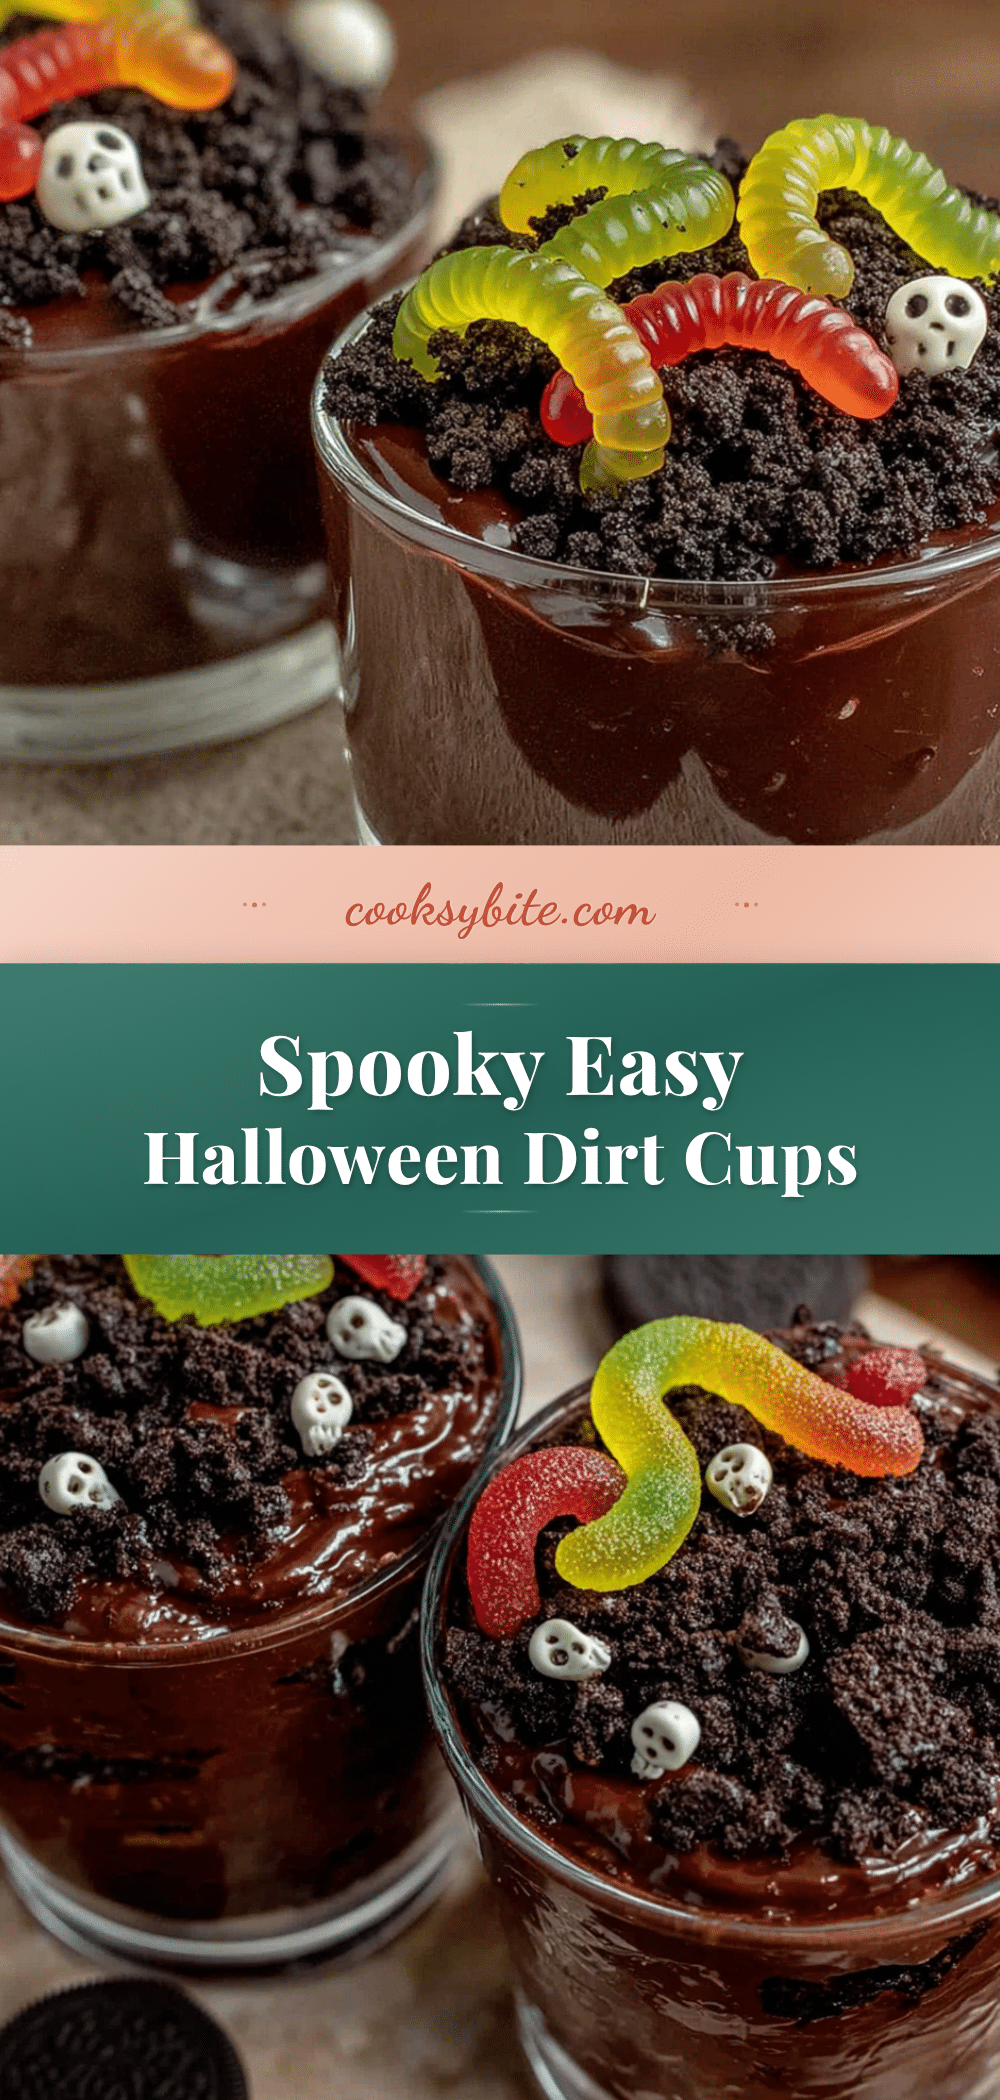
Easy Halloween Dirt Cups with Gummy Worms
These Easy Halloween Dirt Cups with Gummy Worms are a quick, no-bake dessert made with instant chocolate pudding, crushed Oreos, and gummy worms. Perfect for last-minute Halloween parties, they come together in about 15 minutes and are guaranteed to delight kids and adults alike.
- Prep Time: 15 minutes
- Cook Time: 3 minutes
- Total Time: 18 minutes (plus 30 minutes chilling)
- Yield: 8 servings 1x
- Category: Dessert
- Cuisine: American
Ingredients
- 1 box (3.9 oz) instant chocolate pudding mix
- 2 cups cold whole milk
- 1 (8 oz) tub Cool Whip, thawed
- 1 (14.3 oz) package Oreo cookies
- 1 (5 oz) bag gummy worms
- Optional: 1 tablespoon butter, melted
- Optional: Halloween sprinkles or candy eyes
Instructions
- Make the pudding: In a large mixing bowl, whisk together the instant chocolate pudding mix and 2 cups cold milk for about 2 minutes until thickened.
- Fold in the Cool Whip: Add the thawed Cool Whip to the pudding and gently fold with a spatula until light and mousse-like.
- Crush the Oreos: Place the entire package of Oreos in a zip-top bag and crush with a rolling pin until you have a mix of fine crumbs and small chunks.
- Toast the crumbs (optional but recommended): Preheat oven to 350°F. Spread crushed Oreos on a parchment-lined baking sheet. Drizzle with melted butter if using, toss to coat, and bake for 3 minutes. Let cool completely.
- Layer the cups: Start with a layer of cookie crumbs (about 2 tablespoons) at the bottom of each cup. Press down gently.
- Add the pudding: Spoon or pipe the pudding mixture over the cookie layer, filling each cup about two-thirds full. Tap cups gently to settle.
- Top with more crumbs: Sprinkle another layer of cookie crumbs (about 2 tablespoons) over the pudding. Leave loose and crumbly.
- Add the gummy worms: Push 2-3 gummy worms per cup into the dirt at different angles, some partially buried, some escaping over the rim.
- Chill before serving: Refrigerate for at least 30 minutes before serving. For best results, add gummy worms just before serving.
Notes
To keep cookie crumbs from getting soggy, toast them for 3 minutes at 350°F. Add gummy worms just before serving to keep them firm. For dairy-free, use almond or oat milk and dairy-free whipped topping. For gluten-free, use gluten-free chocolate sandwich cookies.
Nutrition
- Serving Size: 1 cup
- Calories: 380
- Sugar: 38
- Sodium: 380
- Fat: 16
- Saturated Fat: 9
- Carbohydrates: 55
- Fiber: 2
- Protein: 5
Keywords: Halloween dirt cups, gummy worms, no-bake dessert, chocolate pudding, Oreo crumbs, easy Halloween treat


