I was standing in the frozen foods aisle last Tuesday, grabbing a bag of chicken nuggets for a quick dinner, when I saw a box of crescent rolls sitting on the end cap. And just like that—I was seven years old again, standing on a wobbly step stool in my Aunt Carol’s tiny kitchen, watching her wrap strips of dough around hot dogs with the kind of concentration usually reserved for brain surgery. She called them “spooky mummies,” and she only made them once a year, on Halloween night, right before we’d head out trick-or-treating in our too-big costumes.
I honestly hadn’t thought about those mummy dogs in years. But there, in the middle of the grocery store with my cart half-full and my toddler trying to throw a bag of frozen peas onto the floor, the memory hit me so hard I almost laughed out loud. Aunt Carol passed away a few years ago, and I never got her recipe for anything—she was one of those cooks who just knew, you know? She never wrote anything down. So I grabbed that can of crescent rolls, threw it in the cart, and decided I was going to figure it out myself. Let me tell you, it took three tries before I got the dough-to-hot-dog ratio right. The first batch? Let’s just say the mummies looked more like sad, lumpy bandages.
But that’s the thing about recipes like these—they’re not about perfection. They’re about the feeling of biting into something warm and slightly ridiculous while wearing a vampire cape. I’ve made these Easy Mummy Crescent Dogs for every Halloween party since, and they always disappear first. Maybe you’ve been there—standing in a kitchen, trying to recreate a taste from your past, hoping you’ll get it just right. This is that recipe. And honestly, it’s even better than I remember.
Why You’ll Love This Recipe
These aren’t just any hot dogs wrapped in dough. I’ve tested this recipe more times than I care to admit, tweaking the bake time, the dough temperature, even the angle of the strips. What I landed on is the perfect balance of crispy, golden crescent exterior and juicy, warm hot dog inside. Here’s why this version stands out:
- Quick & Easy: From fridge to table in under 25 minutes. Seriously—if you can open a can and wrap dough, you can make these. Perfect for those chaotic Halloween evenings when you’re juggling costumes, candy, and a hundred other things.
- Simple Ingredients: You only need three ingredients—crescent rolls, hot dogs, and mustard or ketchup for the eyes. Chances are you already have everything in your kitchen right now.
- Perfect for Halloween Parties: Whether it’s a school potluck, a neighborhood gathering, or just a spooky movie night at home, these mummy dogs fit right in. They’re festive without being fussy.
- Crowd-Pleaser: Kids absolutely love them, but I’ve seen adults grab three at a party without shame. There’s something about the mummy look that makes everyone smile.
- Unbelievably Delicious: The crescent dough gets all flaky and golden, while the hot dog stays perfectly juicy. It’s comfort food at its simplest and best.
What makes this recipe different from the dozens of other versions out there? It’s the little things—letting the dough sit at room temperature for five minutes so it’s easier to work with, cutting the strips just wide enough to wrap without tearing, and baking at the right temperature so the bottoms don’t get soggy. I’ve made every mistake so you don’t have to. This is the version that works, every single time.
And honestly? This recipe isn’t just good—it’s the kind that makes you close your eyes after the first bite. It’s Halloween nostalgia in edible form. Healthier than a candy bar, faster than a store-bought snack, and way more fun. Perfect for impressing your kid’s classmates without any actual stress, or turning a simple weeknight into something memorable.
What Ingredients You Will Need
This recipe uses the simplest ingredients to deliver big flavor and maximum fun. No fancy grocery trips needed—you likely have everything except maybe the hot dogs already in your fridge. Here’s what you’ll need:
For the Mummy Dogs
- 1 can (8 oz) refrigerated crescent roll dough – I recommend Pillsbury for the most consistent results, but any brand works. Look for the sheet-style crescent dough if you can find it—it saves you from having to press the perforations together. If you only have the perforated rolls, just pinch the seams together firmly.
- 8 hot dogs – Use your favorite brand. I prefer all-beef hot dogs for better flavor and texture, but turkey or chicken hot dogs work great too. For a healthier option, look for uncured or nitrate-free varieties. If you’re feeding little kids, you can even use mini hot dogs or cocktail sausages—just adjust the dough strip size accordingly.
- Mustard or ketchup – For the mummy eyes. Yellow mustard gives a nice pop of color and a tangy flavor that contrasts beautifully with the salty hot dog. Ketchup works too, and kids often prefer it. You can also use sriracha or sriracha mayo for a spicy adult version.
Optional Add-Ons
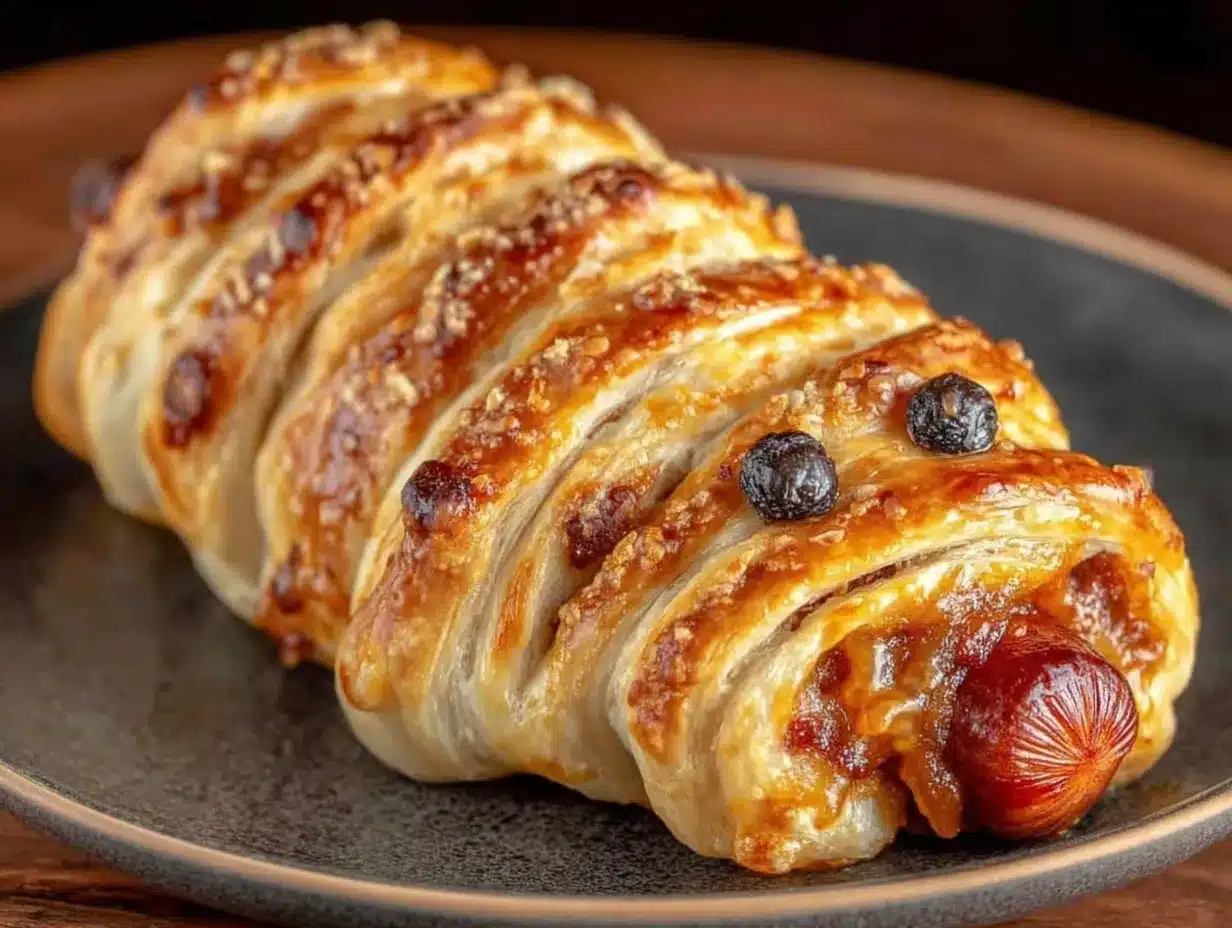
- Everything bagel seasoning – Sprinkle on top before baking for extra crunch and flavor. I tried this on a whim and now I can’t stop.
- Grated Parmesan cheese – A light sprinkle adds a savory, salty kick that complements the dough perfectly.
- Garlic powder or onion powder – A pinch mixed into the dough or sprinkled on top gives the mummies a little savory depth.
- Melted butter with garlic and herbs – Brush over the baked mummy dogs for a glossy finish and extra flavor. I do this when I’m serving them at adult parties.
Ingredient Tips from My Kitchen
I’ve learned a few things the hard way. First, make sure your crescent dough is cold but not rock-hard straight from the fridge. Let it sit on the counter for about five minutes before unrolling—this prevents the dough from cracking when you cut the strips. Second, pat the hot dogs dry with a paper towel before wrapping. Excess moisture can make the dough soggy on the bottom. And third, if you’re using turkey or chicken hot dogs, look for ones that are plump and juicy—some leaner varieties can dry out during baking. I recommend Applegate or Hebrew National for consistently good results.
For the mustard eyes, I’ve found that a toothpick works better than a piping bag for tiny dots. Just dip the tip into the mustard and dab it onto the dough. If you want the eyes to look more “alive,” add a tiny dot of ketchup in the center of the mustard—it gives them a creepy, bloodshot look that kids find hilarious.
Equipment Needed
You don’t need a fancy kitchen to pull these off. Here’s what you’ll need:
- Baking sheet – A standard half-sheet pan works perfectly. Line it with parchment paper or a silicone baking mat for easy cleanup. I’ve forgotten the parchment before, and let me tell you, scrubbing baked-on mustard off a pan is not fun.
- Sharp knife or pizza cutter – For cutting the crescent dough into strips. A pizza cutter makes quick work of it, but a sharp chef’s knife works just as well. Avoid using a dull knife—it will drag and tear the dough.
- Small bowl – For holding the mustard or ketchup for the eyes. You can also use a small piping bag or a squeeze bottle if you’re feeling fancy.
- Toothpicks or skewers – For applying the mustard dots. A toothpick gives you precise control. I’ve also used the tip of a chopstick in a pinch.
- Pastry brush (optional) – If you’re brushing on melted butter or egg wash before baking. A silicone brush is easiest to clean.
- Cooling rack – Not strictly necessary, but it helps the mummy dogs stay crispy on the bottom if you let them cool for a minute or two on a rack.
Budget-friendly tip: If you don’t have a pizza cutter, a regular butter knife works fine. Just make sure it’s sharp enough to cut through the dough cleanly. And if you don’t have a pastry brush, you can use the back of a spoon to spread melted butter—it’s not as neat, but it gets the job done.
Preparation Method
Let’s get to the fun part. Here’s how to make these Easy Mummy Crescent Dogs step by step. Trust me, it’s easier than it looks.
- Preheat your oven to 375°F (190°C). Line a baking sheet with parchment paper or a silicone baking mat. This prevents sticking and makes cleanup a breeze. I’ve made these without parchment before, and while they didn’t stick too badly, the bottoms were definitely darker.
- Prepare the crescent dough. Unroll the can of crescent roll dough onto a clean cutting board. If you’re using the perforated rolls, press the seams together firmly with your fingers to create one solid sheet. If you’re using the sheet-style dough, you’re already ahead of the game. Let the dough sit for about 2-3 minutes at room temperature—it will be more pliable and less likely to crack when you cut it.
- Cut the dough into strips. Using a sharp knife or pizza cutter, slice the dough lengthwise into 8 even strips, each about ½ inch to ¾ inch wide. Don’t stress about perfection—slightly uneven strips just add to the “mummy” look. I’ve had strips that were all different widths, and they still turned out adorable.
- Wrap the hot dogs. Take one strip of dough and wrap it around a hot dog, starting at one end and working your way to the other. Leave a small gap near the top for the “face”—about ½ inch of the hot dog should be exposed. The dough should overlap slightly as you go, but don’t wrap it too tightly, or the dough won’t puff up properly. Repeat with the remaining hot dogs and dough strips. If the dough breaks (it happens!), just press it back together—it will seal as it bakes.
- Place on the baking sheet. Arrange the wrapped hot dogs on the prepared baking sheet, leaving about 2 inches of space between each one. They won’t spread much, but you want good air circulation for even browning.
- Bake for 12-15 minutes. Pop the baking sheet into the preheated oven and bake until the crescent dough is golden brown and cooked through. The hot dogs should be heated through and slightly plump. If you’re using turkey or chicken hot dogs, check them at the 12-minute mark—they can dry out if overbaked.
- Add the eyes. Remove the mummy dogs from the oven and let them cool on the baking sheet for 2-3 minutes. While they’re still warm, use a toothpick to dab two small dots of mustard or ketchup onto the exposed hot dog area to create the eyes. You can also use sriracha for a spicier version. For a fun twist, add a tiny dot of ketchup in the center of the mustard eyes—it gives them a creepy, bloodshot look.
- Serve immediately. These are best enjoyed warm, right after baking. The dough is at its flakiest, and the hot dog is perfectly juicy. If you’re serving them at a party, you can keep them warm in a low oven (200°F) for up to 30 minutes.
Sensory cues to watch for: When the dough is ready, it should be a deep golden brown with visible flaky layers. You’ll smell the buttery, toasty aroma of baked crescent rolls mixed with the savory scent of hot dogs. The dough should feel firm but give slightly when pressed. If the bottoms are browning too quickly, move the baking sheet to a higher rack in the oven.
My personal efficiency tip: While the oven is preheating, I set up a little assembly line—hot dogs on one side, dough strips on the other, toothpick and mustard ready to go. It makes the wrapping process go much faster, especially if you’re making a double batch for a party. And trust me, you’ll want a double batch.
Cooking Tips & Techniques
After making these mummy dogs more times than I can count (including a memorable batch where I forgot to preheat the oven—don’t ask), I’ve picked up a few tricks that make all the difference.
Don’t overwork the dough. Crescent roll dough is delicate, and handling it too much can make it tough. When you’re pressing the seams together or cutting the strips, use a light touch. If the dough starts to feel sticky or warm, pop it in the fridge for 5 minutes to firm up.
Use room-temperature hot dogs. Cold hot dogs straight from the fridge can cause the dough to cook unevenly. Let them sit on the counter for 10-15 minutes before wrapping. This is especially important if you’re using turkey or chicken hot dogs, which are leaner and more sensitive to temperature changes.
Leave the face exposed. This is the most common mistake I see. If you wrap the dough all the way to the top of the hot dog, you won’t have room for the eyes, and the mummy effect is lost. Leave about ½ inch of the hot dog visible at the top. It also helps the hot dog cook through properly.
Space them out on the baking sheet. I learned this one the hard way. If the mummy dogs are too close together, they’ll steam instead of bake, and the bottoms will be soggy. Give them at least 2 inches of space. If you’re making a large batch, use two baking sheets.
Brush with butter for extra flavor. Before baking, brush the dough lightly with melted butter. It gives the mummies a beautiful golden sheen and adds a rich, buttery flavor. I sometimes mix a pinch of garlic powder or dried parsley into the butter for extra savory notes.
Watch the bake time. Ovens vary, so start checking at the 12-minute mark. The dough should be golden brown and puffed up. If the tops are browning too quickly but the bottoms are still pale, tent the mummy dogs loosely with foil for the last 2-3 minutes of baking.
My biggest failure: I once tried to make these with low-fat crescent dough and fat-free hot dogs. Big mistake. The dough was dry and crackly, and the hot dogs turned into sad, shriveled little things. Stick with the full-fat versions for the best texture and flavor. You’re not making these every day, right? Enjoy the indulgence.
Variations & Adaptations
One of the best things about this recipe is how easy it is to customize. Here are some of my favorite variations:
Spicy Mummy Dogs: Swap the regular hot dogs for spicy chorizo or jalapeño cheddar sausages. Use sriracha or sriracha mayo for the eyes instead of mustard. I made these for a Halloween party last year, and they were gone in minutes. The spicy kick pairs beautifully with the buttery crescent dough.
Vegetarian Mummy Dogs: Use plant-based hot dogs or sausages. I’ve tried this with both Beyond Meat and Field Roast brands, and they both work well. Just be aware that plant-based hot dogs can be a bit softer, so handle them gently when wrapping. Brush with a little olive oil before baking for extra richness.
Cheesy Mummy Dogs: Before wrapping, slice the hot dog lengthwise (not all the way through) and stuff a thin strip of cheddar or mozzarella cheese inside. The cheese will melt as it bakes, creating a gooey, delicious surprise. Just be careful—the cheese gets hot and can drip onto the baking sheet.
Mini Mummy Bites: Use cocktail sausages or mini hot dogs instead of full-sized ones. Cut the crescent dough into smaller strips (about ¼ inch wide) and wrap each mini sausage. Bake for 8-10 minutes instead of 12-15. These are perfect for kids’ parties or as appetizers for adult gatherings.
Sweet Mummy Dogs: This one sounds weird, but trust me. Use breakfast sausage links instead of hot dogs, and swap the mustard eyes for a drizzle of maple syrup or honey. The sweet-savory combination is surprisingly addictive. I made these for a Halloween brunch once, and they were a hit.
Gluten-Free Version: Use gluten-free crescent roll dough (brands like Schär or Pillsbury’s gluten-free option work well) and gluten-free hot dogs. The dough might be a bit more fragile, so handle it gently. Bake according to the package directions, checking frequently.
Air Fryer Adaptation: Preheat your air fryer to 350°F (175°C). Place the wrapped mummy dogs in a single layer in the basket (you may need to work in batches). Cook for 6-8 minutes, flipping halfway through, until the dough is golden and crispy. The air fryer gives an extra-crispy exterior that I honestly love.
Serving & Storage Suggestions
These mummy dogs are best served warm, right after baking. The crescent dough is at its flakiest, and the hot dog is perfectly juicy. Here’s how to make the most of them:
Serving Temperature: Serve immediately after adding the eyes. If you’re making them ahead for a party, keep them warm in a low oven (200°F) for up to 30 minutes. I’ve also served them at room temperature, and they’re still delicious—just not as crispy.
Presentation Ideas: Arrange the mummy dogs on a platter lined with black or orange napkins for a festive touch. Add a small bowl of mustard or ketchup for dipping. For a spooky effect, arrange them on a bed of shredded lettuce or kale to look like “grass.” You can also stick little toothpick flags with ghost or pumpkin shapes into the hot dogs.
Complementary Dishes: These pair beautifully with other Halloween snacks. Try serving them alongside a bowl of warm queso or nacho cheese for dipping, a platter of veggie sticks with ranch dressing, or a batch of “witches’ brew” punch. For a full meal, add a simple side salad or some roasted potato wedges.
Storage Instructions: If you have leftovers (unlikely, but possible), let them cool completely, then store them in an airtight container in the refrigerator for up to 3 days. The dough will soften slightly, but they’ll still taste great.
Reheating Methods: For best results, reheat in a preheated oven at 350°F for 5-7 minutes, or in an air fryer at 350°F for 3-4 minutes. The microwave works in a pinch (30-45 seconds), but the dough will be soft, not crispy. I don’t recommend freezing these—the dough gets soggy when thawed.
Flavor Development: Honestly, these are best fresh. The magic is in that first bite of warm, flaky dough and juicy hot dog. But if you do have leftovers, they make a fun lunch the next day—just don’t expect the same crispy texture.
Nutritional Information & Benefits
Let’s be real—these mummy dogs are a treat, not a health food. But they’re not as bad as you might think, especially if you make a few smart swaps.
Estimated Nutritional Values (per mummy dog, using standard ingredients):
- Calories: 220-260
- Protein: 8-10g
- Carbohydrates: 18-22g
- Fat: 13-16g
- Sodium: 550-700mg
Health Benefits of Key Ingredients: Hot dogs provide a decent amount of protein, which helps keep you full and satisfied. Crescent roll dough offers carbohydrates for quick energy—perfect for fueling up before a night of trick-or-treating. If you use turkey or chicken hot dogs, you’ll cut the fat and calories significantly. And if you add a sprinkle of everything bagel seasoning, you’ll get a little extra fiber and flavor without any added sugar.
Dietary Considerations: This recipe can be made gluten-free (see variations above) and vegetarian (using plant-based hot dogs). It’s not suitable for vegan diets unless you use vegan crescent dough and plant-based hot dogs. The main allergens are wheat (crescent rolls) and soy (often in hot dogs), so check labels if you’re cooking for someone with allergies.
My Personal Wellness Perspective: I think balance is everything. These mummy dogs are a fun, occasional treat—perfect for Halloween, but not something you’d eat every day. Pair them with a side of veggie sticks or a piece of fruit, and you’ve got a meal that’s both festive and reasonably balanced. And honestly, the joy they bring is worth every calorie.
Conclusion
These Easy Mummy Crescent Dogs are everything a Halloween snack should be—fun, simple, and absolutely delicious. They’re the kind of recipe that brings people together, whether you’re making them with your kids, bringing them to a party, or just enjoying a spooky night in. I’ve made them for Halloween parties, school events, and lazy October evenings, and they never fail to make everyone smile.
What I love most about this recipe is how forgiving it is. You don’t need to be a professional chef to make these look adorable. The dough might tear, the strips might be uneven, the eyes might be a little wonky—and that’s exactly what makes them perfect. Each mummy has its own personality, just like the people who make them.
I’d love to hear how yours turn out! Did you try any fun variations? Did your kids get creative with the eyes? Drop a comment below and share your spooky creations. And if you’re looking for more easy Halloween recipes, don’t forget to check out our spiderweb dip and ghost banana pops—they’re just as fun and just as simple.
Happy Halloween, and happy snacking! Remember, the best recipes are the ones that make you smile—and these mummy dogs definitely do that.
Frequently Asked Questions
Can I make these mummy dogs ahead of time?
You can assemble them up to 24 hours in advance. Wrap the hot dogs with the dough strips, place them on a parchment-lined baking sheet, cover tightly with plastic wrap, and refrigerate. Bake them just before serving for the best texture. If you bake them ahead, reheat in the oven or air fryer to crisp up the dough again.
Can I use homemade crescent dough instead of canned?
Absolutely! Homemade crescent dough works beautifully, though it will take more time. Use your favorite recipe for buttery, flaky dough. Just roll it out into a rectangle, cut it into strips, and proceed as directed. The bake time might be slightly longer—start checking at the 14-minute mark.
What if my dough keeps tearing when I wrap the hot dogs?
This usually happens when the dough is too cold or too dry. Let it sit at room temperature for 5-7 minutes before cutting and wrapping. If it still tears, just press the dough back together—it will seal as it bakes. You can also try using a slightly thicker strip of dough for more stability.
Can I make these in a microwave?
Technically, yes, but I don’t recommend it. The microwave will cook the hot dog through, but the dough will be soft and chewy instead of flaky and golden. If you’re in a pinch, microwave on high for 45-60 seconds, but the texture won’t be the same. The oven or air fryer is definitely the way to go.
How do I get the mustard eyes to look neat?
Use a toothpick or the tip of a skewer for precise dots. Dip the tip into the mustard, then gently dab it onto the hot dog. If you want perfectly round eyes, you can also use a small piping tip or a squeeze bottle with a fine nozzle. For a fun, messy look, just let the kids do it—they’ll love it.
Pin This Recipe!
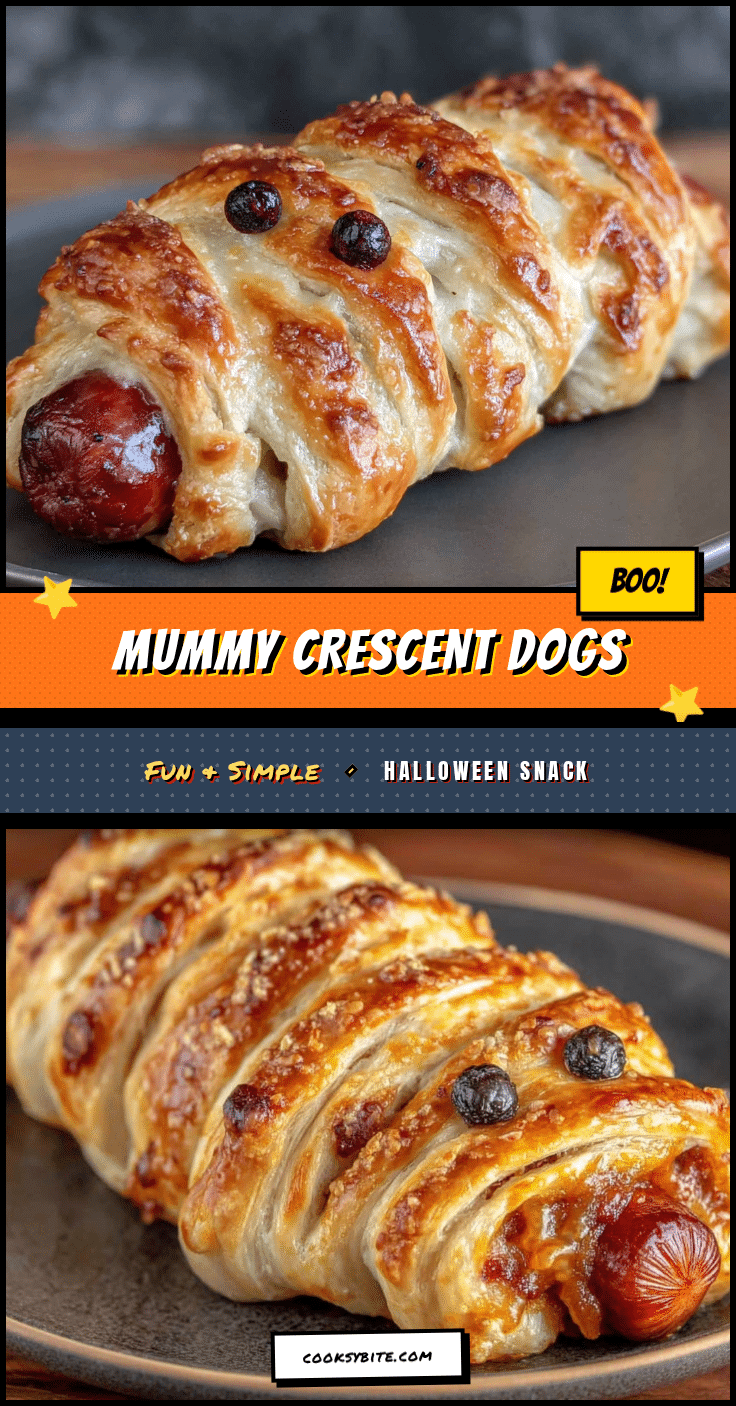
Easy Mummy Crescent Dogs: Best Halloween Snack Recipe
These Easy Mummy Crescent Dogs are a fun, simple, and delicious Halloween snack made with just three ingredients. Perfect for parties, they feature flaky crescent dough wrapped around juicy hot dogs with mustard eyes.
- Prep Time: 10 minutes
- Cook Time: 15 minutes
- Total Time: 25 minutes
- Yield: 8 servings 1x
- Category: Appetizer
- Cuisine: American
Ingredients
- 1 can (8 oz) refrigerated crescent roll dough
- 8 hot dogs
- Mustard or ketchup (for the eyes)
- Optional: Everything bagel seasoning
- Optional: Grated Parmesan cheese
- Optional: Garlic powder or onion powder
- Optional: Melted butter with garlic and herbs
Instructions
- Preheat your oven to 375°F (190°C). Line a baking sheet with parchment paper or a silicone baking mat.
- Unroll the crescent roll dough onto a clean cutting board. If using perforated rolls, press the seams together firmly to create one solid sheet. Let the dough sit for 2-3 minutes at room temperature.
- Using a sharp knife or pizza cutter, slice the dough lengthwise into 8 even strips, each about ½ inch to ¾ inch wide.
- Take one strip of dough and wrap it around a hot dog, starting at one end and working your way to the other. Leave a small gap near the top for the ‘face’—about ½ inch of the hot dog should be exposed. Repeat with remaining hot dogs and dough strips.
- Arrange the wrapped hot dogs on the prepared baking sheet, leaving about 2 inches of space between each one.
- Bake for 12-15 minutes, until the crescent dough is golden brown and cooked through.
- Remove from the oven and let cool on the baking sheet for 2-3 minutes. While still warm, use a toothpick to dab two small dots of mustard or ketchup onto the exposed hot dog area to create the eyes.
- Serve immediately. These are best enjoyed warm.
Notes
Let crescent dough sit at room temperature for 5 minutes before unrolling to prevent cracking. Pat hot dogs dry before wrapping to avoid soggy bottoms. For best results, use full-fat crescent dough and hot dogs. Leftovers can be stored in an airtight container in the refrigerator for up to 3 days and reheated in the oven or air fryer.
Nutrition
- Serving Size: 1 mummy dog
- Calories: 240
- Sugar: 4
- Sodium: 625
- Fat: 14.5
- Saturated Fat: 5
- Carbohydrates: 20
- Protein: 9
Keywords: Halloween, mummy dogs, crescent dogs, hot dog appetizer, easy snack, party food, kid-friendly


