I was standing in my kitchen last Tuesday, staring at the jar of sourdough discard in my fridge—the one I’d been meaning to use for three days—when the smell of garlic and rosemary from my neighbor’s open window drifted in. And just like that, I was seven years old, sitting on the cool tile floor of my Aunt Rosa’s tiny apartment in Brooklyn, watching her punch down a mound of dough with her bare fists. She’d always let me sprinkle the rosemary on top, telling me to “be generous, kid—it’s the soul of the bread.” She passed away five years ago, and I haven’t made focaccia since. Not because I didn’t want to, but because I was scared I’d mess it up. But that smell—that sharp, piney, garlicky hit—made me grab the flour before I could talk myself out of it. Honestly, I didn’t even know if sourdough discard would work for focaccia. I just knew I needed to try. And let me tell you, the first time I pulled this golden, bubbly loaf out of the oven, I almost cried. It wasn’t perfect—the bubbles were a little uneven, and I’d forgotten to oil the pan enough, so the bottom stuck a bit—but the taste was exactly right. That warm, salty, herby bite with a glass of red wine? That was my aunt, right there in my kitchen. Maybe you’ve been there—chasing a memory through a recipe, hoping it’ll taste the same as it did when you were a kid. This Easy Rosemary Garlic Sourdough Focaccia is that recipe for me. And the best part? It’s ready in under two hours, no hours-long fermentation required. You don’t need to be a bread expert to pull this off. You just need a little patience, a lot of olive oil, and that jar of discard you’ve been ignoring.
Why You’ll Love This Recipe
Let me be real with you—I’ve tested this recipe seven times. Seven. The first batch was a flat, dense disaster. The third one burned on the bottom because I didn’t shift the rack. But by the fifth, I had it dialed in: a focaccia that’s crispy on the outside, airy and chewy on the inside, with those signature bubbles that make you feel like a professional baker. This isn’t just another bread recipe—it’s the one I bring to every potluck, every dinner party, and every Tuesday night when I need carbs and comfort fast.
- Quick & Easy: From mixing to eating in under two hours. No overnight rise, no complicated folds. Perfect for a weeknight when you’re tired and hungry.
- Simple Ingredients: You probably have everything already—flour, olive oil, salt, garlic, rosemary, and that sourdough discard sitting in your fridge.
- Perfect for Busy Weeknights: This focaccia comes together while you’re making soup or salad. It’s the side dish that steals the show without stealing your time.
- Crowd-Pleaser: I’ve served this to kids who “don’t like bread” and adults who “don’t eat carbs.” Everyone reaches for seconds. It’s that good.
- Unbelievably Delicious: The combination of crispy, garlicky edges and soft, springy crumb is pure comfort. Close-your-eyes-after-the-first-bite good.
What makes this different from every other focaccia recipe? It uses sourdough discard for flavor, not just fermentation. That means you get that tangy, complex taste without waiting 18 hours. Plus, I’ve cracked the code on getting those beautiful bubbles without a stand mixer—just a bowl, a spatula, and a little patience. This is comfort food reimagined for real life: faster, easier, but with the same soul-soothing satisfaction. Perfect for impressing guests without stress, or turning a simple Wednesday dinner into something memorable.
What Ingredients You Will Need
This recipe uses simple, wholesome ingredients to deliver bold flavor and satisfying texture without the fuss. Most of these are pantry staples, so you might not even need a grocery run. Here’s what you’ll grab:
For the Dough
- All-purpose flour – 3 cups (360g). I’ve tested this with bread flour too, and it works fine—just a slightly chewier crumb. King Arthur Flour is my go-to for consistent results.
- Sourdough discard – 1 cup (240g), unfed and straight from the fridge. This is the star—it adds that subtle tang without the long wait. If you don’t have discard, you can use active starter, but the flavor will be milder.
- Warm water – 1 cup (240ml), about 100°F. Too hot and you’ll kill the yeast; too cold and the rise will be slow. Think bathwater temperature.
- Olive oil – ¼ cup (60ml), plus extra for the pan. Use a good-quality extra virgin here—it’s a key flavor, not just a cooking fat. I like California Olive Ranch for a fruity, peppery note.
- Salt – 1½ teaspoons (9g). Fine sea salt dissolves better than kosher in this dough.
- Instant yeast – 1 teaspoon (3g). This gives the focaccia a reliable rise in a short time. If you only have active dry, proof it in the warm water with a pinch of sugar for 5 minutes first.
- Honey or sugar – 1 teaspoon (5g). Just a touch to feed the yeast and balance the sourness. Maple syrup works too.
For the Topping
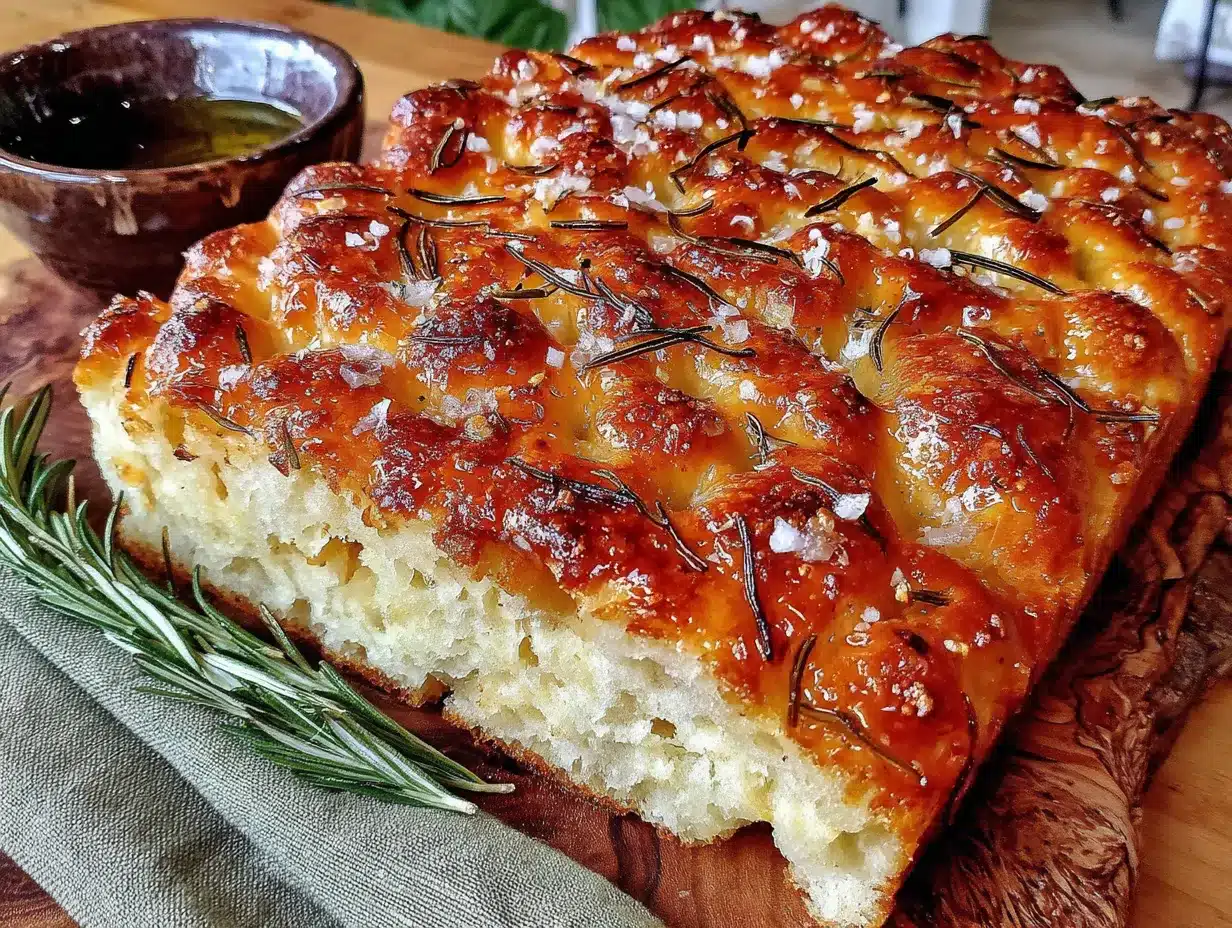
- Fresh rosemary – 2 tablespoons, finely chopped. Dried works in a pinch, but fresh gives that aromatic pop. I grow my own on the windowsill—it’s impossible to kill.
- Garlic – 3 cloves, thinly sliced or minced. Don’t use pre-minced jarred stuff; it’s too wet and will burn. Fresh cloves, sliced thin, get sweet and caramelized in the oven.
- Flaky sea salt – 1 teaspoon, for sprinkling. Maldon is my favorite—those big, crunchy crystals make a difference. Skip table salt here; it’s too fine and will make the bread salty.
- Extra olive oil – 2 tablespoons, for drizzling before baking. Be generous—focaccia should drink olive oil.
Substitution Notes: For a gluten-free version, swap the all-purpose flour with a 1:1 gluten-free baking blend. The texture will be denser, but still delicious. If you’re avoiding yeast, you can double the sourdough discard to 2 cups and skip the instant yeast—just expect a longer rise (about 3-4 hours). And if you’re out of rosemary, try thyme or oregano for a different herbal vibe.
Equipment Needed
You don’t need a fancy bakery setup for this. Here’s what you’ll actually use:
- Large mixing bowl – A 4-quart bowl is perfect. I use a glass one so I can see the dough rise.
- 9×13-inch baking pan – A metal or glass pan works. My first attempt was in a ceramic dish, and the bottom didn’t crisp up. Stick with metal for the best crust.
- Bench scraper or spatula – For folding the dough. A rubber spatula works fine; a bench scraper is just easier to handle.
- Kitchen towel or plastic wrap – To cover the dough while it rises. I use a clean dish towel—it breathes better than plastic.
- Measuring cups and spoons – For accuracy. I’ve eyeballed ingredients before and ended up with a brick. Trust me, measure.
- Oven thermometer – Optional but helpful. My oven runs 25°F hot, so I always double-check. Focaccia is forgiving, but consistent heat helps those bubbles form.
Preparation Method
Alright, let’s make some bread. Set a timer for 1 hour 45 minutes—that’s your total from start to finish. Here’s the step-by-step:
- Mix the dough (5 minutes): In your large bowl, combine the warm water, sourdough discard, olive oil, honey, and instant yeast. Stir until the yeast dissolves and the mixture looks cloudy. Add the flour and salt. Mix with a spatula or your hands until a shaggy, sticky dough forms. It’ll look rough—that’s fine. Don’t overmix; you just want everything combined.
- First rise (45 minutes): Cover the bowl with a kitchen towel and let it sit in a warm spot. I put mine near the stove while I’m cooking dinner. After 30 minutes, give it a quick fold: grab the edge of the dough, stretch it up, and fold it over the center. Turn the bowl 90 degrees and repeat 4 times. This builds strength without kneading. Cover and let it rest the remaining 15 minutes.
- Prepare the pan (5 minutes): Pour 2 tablespoons of olive oil into your 9×13 pan. Use your fingers to spread it all over the bottom and sides. Don’t skimp—this is what creates that crispy, golden crust. Transfer the dough to the pan. It’ll be sticky, so oil your hands lightly. Gently stretch the dough to fit the pan. If it resists, let it rest 10 minutes and try again. Don’t force it; you’ll deflate the bubbles.
- Second rise (30 minutes): Cover the pan with a towel and let the dough rise until it’s puffy and almost doubled. This is where the magic happens. While you wait, preheat your oven to 425°F (220°C) with a rack in the middle position.
- Dimple the dough (5 minutes): Uncover the pan. Oil your fingers again and press them straight down into the dough, creating deep dimples all over. Don’t be shy—push all the way to the bottom. These dimples hold the oil and toppings. Drizzle the remaining 2 tablespoons of olive oil over the top, letting it pool in the wells.
- Add toppings (3 minutes): Scatter the sliced garlic and chopped rosemary evenly over the dough. Sprinkle with flaky sea salt. Don’t skimp on the salt—it balances the sourness and makes the crust sing.
- Bake (25-30 minutes): Place the pan in the oven and bake until the focaccia is deep golden brown on top and the bottom sounds hollow when tapped. Rotate the pan halfway through for even browning. If the top is browning too fast but the bottom isn’t done, tent loosely with foil for the last 5 minutes.
- Cool and serve (10 minutes): Let the focaccia cool in the pan for 5 minutes, then transfer to a wire rack. Don’t skip this—it finishes cooking and keeps the bottom from getting soggy. Slice with a serrated knife or tear with your hands. Serve warm or at room temperature.
Troubleshooting Tip: If your dough didn’t rise much, your water might have been too cold or your yeast was expired. Next time, use a thermometer and check the yeast date. If the focaccia is dense, you probably overmixed or didn’t let it rise long enough. It’s still edible—just call it “rustic.”
Cooking Tips & Techniques
Here’s what I learned the hard way so you don’t have to. First, olive oil is your best friend. Don’t be stingy with it in the pan or on top. That oil creates a barrier that keeps the dough from sticking and gives you those crispy, almost-fried edges. I once tried to cut back to save calories—big mistake. The bread stuck to the pan and tore apart. Never again.
Second, the dimpling step isn’t optional. I know it feels weird to poke holes in your beautiful risen dough, but those dimples are what make focaccia focaccia. They trap the oil and toppings, creating little pockets of flavor. Press deep and press confidently. If the dough deflates a bit, that’s okay—it’ll puff back up in the oven.
Third, don’t rush the second rise. I’ve tried to speed it up by putting the pan in a warm oven (turned off, with the light on), and it worked, but the texture wasn’t as airy. Patience pays off here. If you’re short on time, you can skip the second rise and go straight to baking—the focaccia will be denser, like a thick flatbread, but still tasty.
Finally, use a serrated knife to cut it. A chef’s knife will squish those beautiful air pockets. I learned this after serving a flat, sad-looking focaccia to my book club. They were nice about it, but I knew better.
Variations & Adaptations
This recipe is a blank canvas. Here are a few ways I’ve played with it:
- Cheesy Garlic Focaccia: Sprinkle ½ cup of shredded Parmesan or crumbled feta over the top before baking. The cheese gets crispy and salty—perfect alongside a bowl of tomato soup.
- Everything Bagel Focaccia: Skip the rosemary and garlic. Instead, brush the top with an egg wash and sprinkle with everything bagel seasoning. I brought this to a brunch potluck and it vanished in 10 minutes.
- Sun-Dried Tomato & Olive: Press ¼ cup of chopped sun-dried tomatoes and ¼ cup of sliced Kalamata olives into the dimples before baking. It’s like a trip to the Mediterranean without leaving your kitchen.
- Gluten-Free Version: Use a 1:1 gluten-free flour blend and add 1 teaspoon of xanthan gum if the blend doesn’t include it. The dough will be stickier and the crumb more cake-like, but it’s still delicious. I made this for a friend with celiac and she asked for the recipe.
- Spicy Focaccia: Add ½ teaspoon of red pepper flakes to the dough and another ½ teaspoon on top with the rosemary. The heat pairs beautifully with the garlic and olive oil.
Serving & Storage Suggestions
Serve this focaccia warm, straight from the oven, with a bowl of good olive oil and balsamic vinegar for dipping. It’s also amazing alongside a big Italian salad, a bowl of minestrone, or grilled chicken. For breakfast, I toast leftover slices and top them with a fried egg—trust me on this. The crispy edges and runny yolk are a match made in heaven.
To store, wrap the cooled focaccia tightly in foil or plastic wrap and keep it at room temperature for up to 2 days. Don’t refrigerate it—the fridge dries out bread faster than a desert. For longer storage, slice it and freeze in a zip-top bag for up to 3 months. To reheat, pop frozen slices directly into a 350°F oven for 5-7 minutes, or toast them. The flavor actually gets better after a day—the garlic and rosemary have time to mellow and meld.
One note: if you’re making this ahead for a party, bake it the morning of, cool completely, and reheat in a 350°F oven for 10 minutes before serving. It’ll taste freshly baked.
Nutritional Information & Benefits
Per serving (1/8 of the recipe): approximately 220 calories, 8g fat, 32g carbs, 2g fiber, 5g protein. This is a rough estimate—your numbers will vary based on oil and toppings.
This focaccia isn’t health food, but it does have some redeeming qualities. The olive oil provides heart-healthy monounsaturated fats and antioxidants. Garlic and rosemary are both anti-inflammatory and packed with vitamins. And sourdough fermentation breaks down some of the gluten and phytic acid, making the bread easier to digest. If you’re watching your sodium, use less flaky salt on top. For a lower-carb option, you can try a keto flour blend, but I won’t lie—the texture won’t be the same. Sometimes, you just need real bread, and that’s okay.
Conclusion
This Easy Rosemary Garlic Sourdough Focaccia is proof that you don’t need hours or a bakery degree to make incredible bread at home. It’s the recipe I turn to when I need a little comfort, a little nostalgia, and a lot of flavor without a lot of fuss. Whether you’re making it for a weeknight dinner, a weekend gathering, or just because you’ve been staring at your sourdough discard too long, this focaccia delivers. Play with the toppings, make it your own, and don’t stress about perfection. The first time I made it, I forgot the salt. It was still good. Give it a try, and let me know in the comments how it turned out—I’d love to hear about your variations and memories. Happy baking!
Frequently Asked Questions
Can I use active sourdough starter instead of discard?
Yes, absolutely. The texture will be similar, but the flavor will be milder since active starter is less tangy. Reduce the water slightly (by about 2 tablespoons) to account for the starter’s hydration.
Why didn’t my focaccia get those big bubbles?
Big bubbles come from a wet, well-hydrated dough and a hot oven. Make sure your dough is sticky—don’t add extra flour. Also, don’t press out the air when you transfer it to the pan. Handle it gently.
Can I make this without yeast?
You can, but the rise will take longer. Double the sourdough discard to 2 cups and skip the instant yeast. Expect a first rise of 3-4 hours and a second rise of 1-2 hours. The flavor will be more sour and complex.
How do I know when my focaccia is fully baked?
It should be deep golden brown on top and sound hollow when you tap the bottom. If you have an instant-read thermometer, the internal temperature should be 200-210°F.
Can I use dried rosemary instead of fresh?
Yes, but use half the amount (1 tablespoon) and rub it between your palms to release the oils. Dried rosemary can be a bit tough, so sprinkle it on after baking if you prefer a softer texture.
Pin This Recipe!
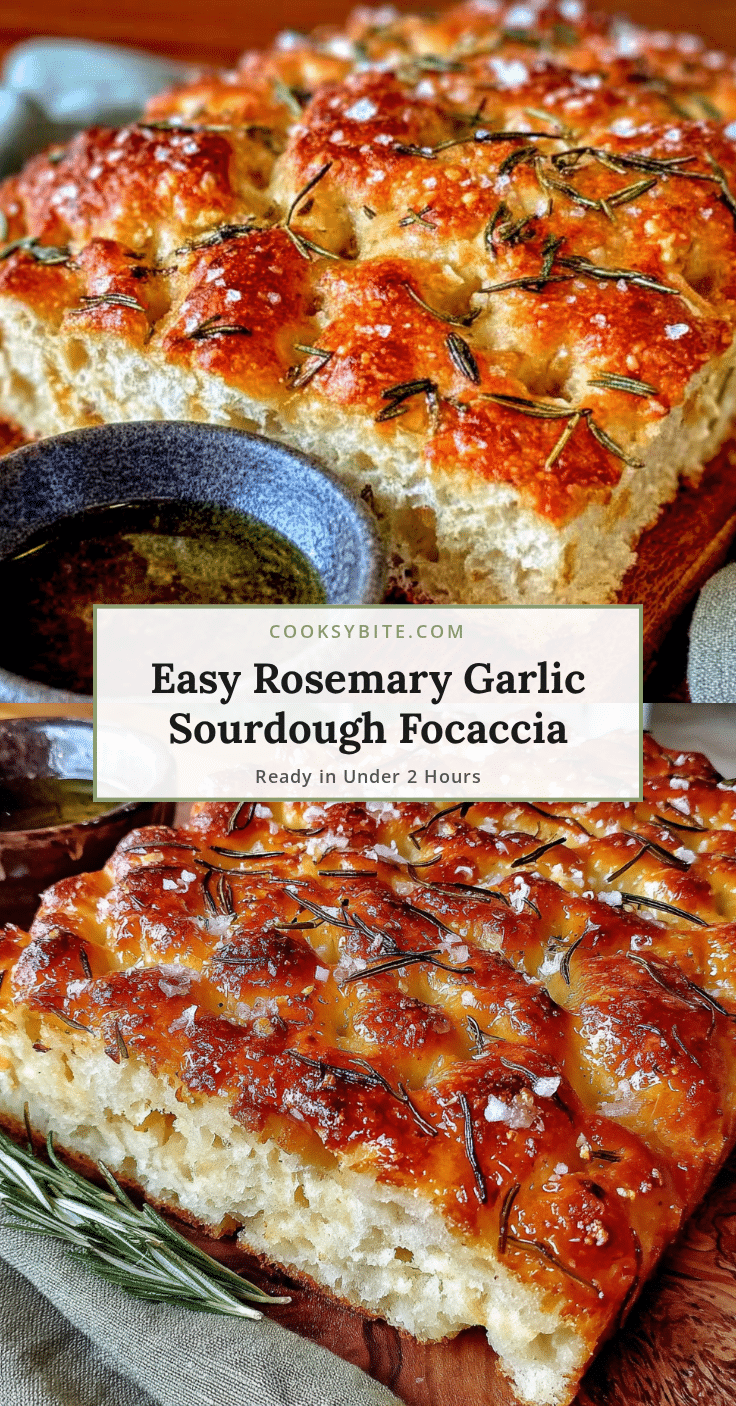
Easy Rosemary Garlic Sourdough Focaccia in Under 2 Hours
This quick and easy sourdough focaccia uses discard for tangy flavor without the long wait. Crispy on the outside, airy and chewy on the inside, it’s ready in under two hours and perfect for weeknights or impressing guests.
- Prep Time: 15 minutes
- Cook Time: 30 minutes
- Total Time: 1 hour 45 minutes
- Yield: 8 servings 1x
- Category: Bread
- Cuisine: Italian
Ingredients
- 3 cups (360g) all-purpose flour
- 1 cup (240g) sourdough discard, unfed
- 1 cup (240ml) warm water (about 100°F)
- ¼ cup (60ml) olive oil, plus extra for the pan
- 1½ teaspoons (9g) fine sea salt
- 1 teaspoon (3g) instant yeast
- 1 teaspoon (5g) honey or sugar
- 2 tablespoons fresh rosemary, finely chopped
- 3 cloves garlic, thinly sliced or minced
- 1 teaspoon flaky sea salt (e.g., Maldon)
- 2 tablespoons extra olive oil for drizzling
Instructions
- Mix the dough (5 minutes): In a large bowl, combine warm water, sourdough discard, olive oil, honey, and instant yeast. Stir until yeast dissolves. Add flour and salt. Mix with a spatula or hands until a shaggy, sticky dough forms. Do not overmix.
- First rise (45 minutes): Cover the bowl with a kitchen towel and let it sit in a warm spot. After 30 minutes, give it a quick fold: grab the edge of the dough, stretch it up, and fold it over the center. Turn the bowl 90 degrees and repeat 4 times. Cover and let rest the remaining 15 minutes.
- Prepare the pan (5 minutes): Pour 2 tablespoons of olive oil into a 9×13-inch baking pan. Spread it all over the bottom and sides. Transfer the dough to the pan. Oil your hands lightly and gently stretch the dough to fit the pan. If it resists, let it rest 10 minutes and try again.
- Second rise (30 minutes): Cover the pan with a towel and let the dough rise until puffy and almost doubled. Meanwhile, preheat the oven to 425°F (220°C) with a rack in the middle position.
- Dimple the dough (5 minutes): Uncover the pan. Oil your fingers and press them straight down into the dough, creating deep dimples all over. Drizzle the remaining 2 tablespoons of olive oil over the top, letting it pool in the wells.
- Add toppings (3 minutes): Scatter sliced garlic and chopped rosemary evenly over the dough. Sprinkle with flaky sea salt.
- Bake (25-30 minutes): Place the pan in the oven and bake until deep golden brown on top and the bottom sounds hollow when tapped. Rotate the pan halfway through. If the top browns too fast, tent loosely with foil for the last 5 minutes.
- Cool and serve (10 minutes): Let the focaccia cool in the pan for 5 minutes, then transfer to a wire rack. Slice with a serrated knife or tear with your hands. Serve warm or at room temperature.
Notes
For best results, use a metal pan for a crispy bottom. Don’t skip the dimpling step—it traps oil and toppings. If the dough doesn’t rise much, check water temperature and yeast freshness. For a gluten-free version, use a 1:1 gluten-free flour blend and add xanthan gum if needed. Leftovers can be stored at room temperature for up to 2 days or frozen for up to 3 months.
Nutrition
- Serving Size: 1/8 of recipe
- Calories: 220
- Sugar: 1
- Sodium: 350
- Fat: 8
- Saturated Fat: 1
- Carbohydrates: 32
- Fiber: 2
- Protein: 5
Keywords: sourdough focaccia, rosemary garlic focaccia, easy focaccia, quick focaccia, sourdough discard recipe, homemade bread, Italian bread


