My husband claimed he hated Halloween food. For years. Every October, he’d roll his eyes at the themed snacks I’d pin to my board, muttering something about “gimmicky food for kids.” Then, last year, I made these Spooky Mummy Hot Dogs for a neighbor’s get-together, honestly just to use up some leftover crescent roll dough. I came back from answering the door to find him standing at the kitchen island, a half-eaten mummy in his hand, ketchup on his chin. “These are… actually really good,” he said, not quite meeting my eyes. And that, my friends, is how a skeptic became the biggest fan of the spookiest snack on the block.
I mean, let’s be real. Halloween night is chaotic. You’ve got costumes to wrangle, candy to hand out, and a general feeling of sugar-fueled pandemonium. The last thing you need is a complicated recipe that takes over your kitchen. These mummy hot dogs are the opposite of that. They’re fun, they’re fast, and they’re the one thing that will actually get eaten before the sugar crash hits. Maybe you’ve been there—staring at a Pinterest fail while your kid asks for the fifth time if it’s time to go trick-or-treating. This recipe is your save.
The beauty of these little guys is that they look impressive without any actual effort. You just wrap, bake, and add eyes. It’s the kind of recipe that makes you look like a Halloween hero without breaking a sweat. And the best part? They taste like buttery, flaky goodness wrapped around a classic, salty hot dog. It’s the perfect savory snack to balance out all that candy. Honestly, this is the recipe that stays with you because it’s not just about the food—it’s about the moment. The laughter when someone’s mummy loses an eye, the crunch of the dough, the satisfied silence as everyone digs in. That’s why I keep making them.
Why You’ll Love This Recipe
Let me tell you why these Spooky Mummy Hot Dogs have become my non-negotiable Halloween tradition. I’ve tested this recipe through three Halloweens, two different ovens, and one memorable incident where I forgot to set a timer (the mummies were… crispy, but still devoured). Through it all, this version has proven itself to be the absolute best.
- Quick & Easy: From fridge to table in under 25 minutes. Seriously. You can make these while your kids are putting on their shoes.
- Simple Ingredients: You need exactly three main things—hot dogs, crescent roll dough, and mustard. You probably have them all right now.
- Perfect for Halloween Night: Whether you’re hosting a pre-trick-or-treat party or just need a fast dinner before the chaos, these fit the bill perfectly.
- Crowd-Pleaser: I have yet to meet a kid (or adult, for that matter) who doesn’t think these are the coolest thing ever.
- Unbelievably Delicious: The contrast between the flaky, buttery dough and the snappy hot dog is pure comfort food magic.
What makes this recipe different from all the other versions out there? It’s the technique. Instead of wrapping the dough in a tight spiral, I leave a little gap between the strips. This creates that perfectly ragged, “mummy” look without the dough puffing up into a solid breadstick. It’s a small tweak, but it makes all the difference between a mummy that looks like it just escaped a tomb and one that looks like a sad, overstuffed pastry.
This recipe isn’t just good—it’s the kind that makes you close your eyes after the first bite. It’s Halloween comfort food reimagined: faster, funnier, and with the same soul-soothing satisfaction as a warm, buttery roll. Perfect for impressing the neighborhood kids without any stress, or turning a simple weeknight into a memorable Halloween moment.
What Ingredients You Will Need
This recipe uses the most straightforward, pantry-friendly ingredients to deliver maximum flavor and that perfect spooky presentation. You don’t need to hunt down any weird specialty items—just grab these basics from your fridge and pantry.
- Hot dogs: 8 standard-sized beef or pork hot dogs. I personally prefer Hebrew National for their snappy texture and rich flavor, but any brand you love will work. You can also use turkey or chicken hot dogs for a lighter option.
- Crescent roll dough: 1 can (8 ounces) of refrigerated crescent roll dough. I recommend Pillsbury for its consistent flakiness. Do NOT use the seamless sheet version—you want the one that’s perforated into triangles so you can easily cut them into strips.
- Mustard: 1 tablespoon yellow mustard for the “eyes.” You can also use ketchup, sriracha, or even small dots of cream cheese for a milder look. For the most classic mummy face, yellow mustard is the way to go.
- Egg wash (optional but recommended): 1 large egg, beaten with 1 tablespoon of water. This gives the dough a gorgeous golden-brown finish. If you’re in a rush, you can skip it, but it really makes them look bakery-worthy.
- Sesame seeds or poppy seeds (optional): A sprinkle adds a fun texture and makes the mummies look even more “finished.” Totally optional, but I love the little crunch.
Ingredient Selection Tips: For the best texture, use standard-sized hot dogs, not the jumbo ones. The dough strips need to wrap around them neatly, and jumbo dogs will leave you with too much exposed dough. Also, make sure your crescent roll dough is cold from the fridge—warm dough is sticky and harder to cut into clean strips.
Substitution Guidance: Need a gluten-free option? Use gluten-free crescent roll dough (check your freezer section) and gluten-free hot dogs. For a dairy-free version, skip the egg wash and brush the dough with a little olive oil instead. If you’re vegetarian, swap the hot dogs for vegetarian sausages or even cheese sticks for a fun twist.
Equipment Needed
You don’t need a professional kitchen to pull these off. I’ve made these mummies in a tiny apartment oven and a fancy new range, and they turn out perfectly every time. Here’s what you’ll need:
- Baking sheet: A standard half-sheet pan works perfectly. Line it with parchment paper or a silicone baking mat for easy cleanup.
- Sharp knife or pizza cutter: You’ll need this to cut the crescent roll dough into thin strips. A pizza cutter makes the job incredibly fast and even.
- Pastry brush: For applying the egg wash. If you don’t have one, you can use a folded paper towel—just be gentle.
- Small bowl: For whisking the egg wash.
- Toothpicks (optional): If your dough strips are being stubborn, a toothpick can help secure the ends so they don’t unravel during baking.
- Parchment paper: Trust me, this makes cleanup so much easier. The mustard eyes can leave little stains on the pan.
Budget-Friendly Options: No pizza cutter? A clean ruler or even a butter knife will work for cutting the dough. No pastry brush? Just use your fingers to dab on the egg wash—it’s not fancy, but it gets the job done.
Preparation Method
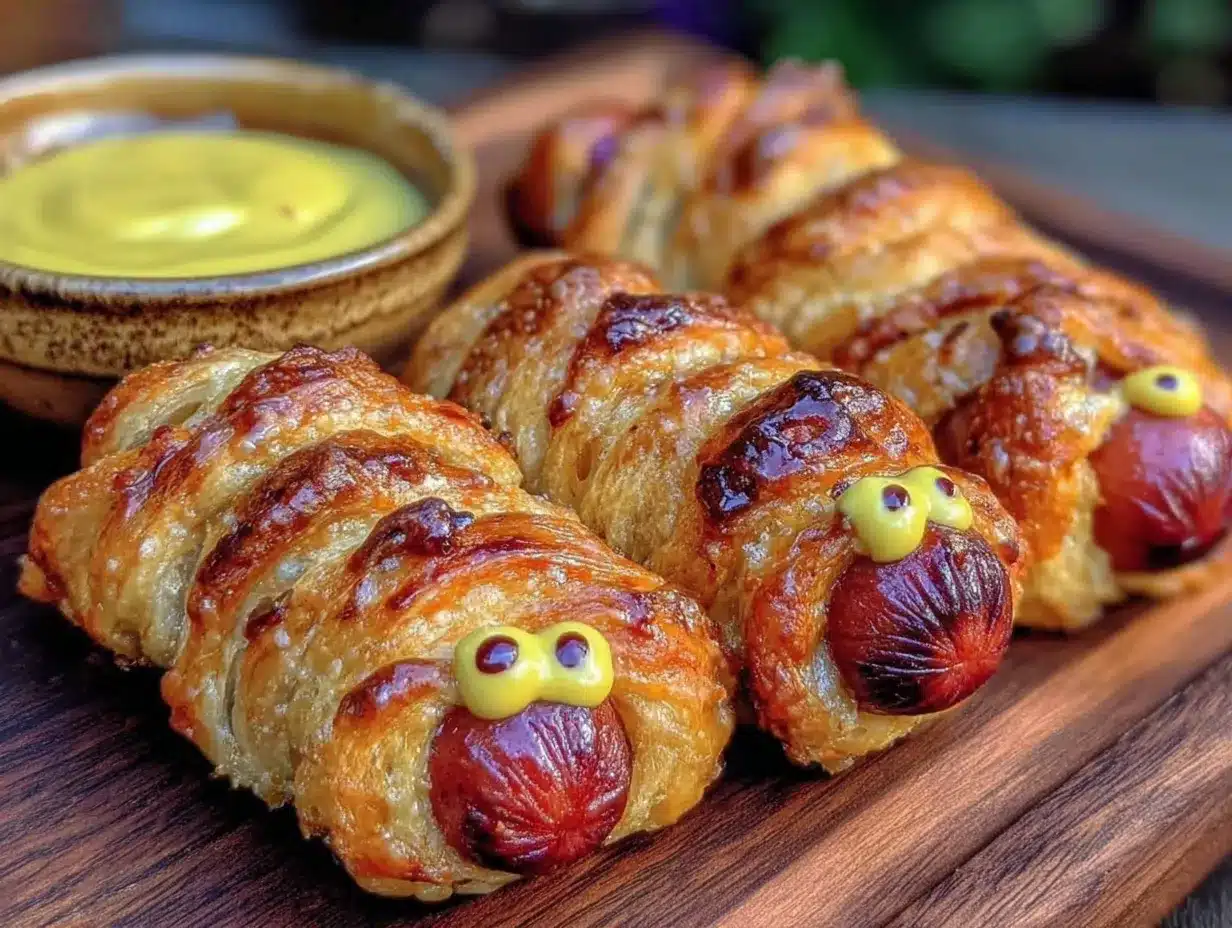
Alright, let’s make some mummies! This is where the magic happens. Follow these steps carefully, and you’ll have a tray of spooky snacks that look like they took hours.
- Preheat your oven to 375°F (190°C). Line your baking sheet with parchment paper. This is a small step that makes a huge difference—no stuck-on dough, no scrubbing.
- Prepare your dough. Open the can of crescent roll dough carefully—I’ve had it pop open dramatically and scare the cat. Unroll the dough and separate it along the perforations into 8 triangles. You’ll have 8 triangles total.
- Cut the strips. Using a sharp knife or pizza cutter, cut each triangle lengthwise into 3 thin strips. You should end up with 24 long, thin strips of dough. Don’t worry if they’re not perfectly even—the ragged look adds to the mummy effect.
- Wrap the hot dogs. Take one hot dog and start wrapping a dough strip around it, starting at one end and working your way to the other. Leave a small gap (about ¼ inch) between each wrap. This is the secret to the mummy look! The dough will puff up during baking, so those gaps create the perfect bandaged appearance. Leave a small space at the top of the hot dog for the eyes.
- Repeat with remaining hot dogs. Each hot dog needs about 3 strips of dough. If you run out, just cut another triangle into strips. Place the wrapped hot dogs on your prepared baking sheet, leaving about an inch of space between each one.
- Apply the egg wash. In your small bowl, whisk together the egg and water. Using your pastry brush, gently brush each mummy with the egg wash. This gives them that gorgeous golden-brown color. If you’re using sesame seeds, sprinkle them on now.
- Bake for 12-15 minutes. Keep an eye on them! You want the dough to be golden brown and puffed, and the hot dogs to be heated through. My oven runs a little hot, so I check at the 12-minute mark. The smell at this point is incredible—buttery and savory.
- Add the eyes. Let the mummies cool on the baking sheet for 2-3 minutes—they’re very hot! Then, using a toothpick or the tip of a knife, dab two small dots of mustard onto the exposed hot dog at the top. This creates the mummy’s eyes. Don’t be shy—make them look a little googly!
- Serve immediately. These are best enjoyed warm, right out of the oven. The dough is flaky, the hot dog is juicy, and the mustard eyes add a tiny tangy pop.
Troubleshooting Tip: If your dough strips keep unraveling while you’re wrapping, you can secure the end with a tiny dab of water or a toothpick. Just remember to remove the toothpick before serving!
Cooking Tips & Techniques
I’ve made these mummies more times than I can count, and I’ve learned a few things the hard way. Let me save you the trouble.
The dough gap is everything. I learned this lesson after making my first batch that looked like doughy blobs instead of mummies. If you wrap the dough too tightly with no gaps, it puffs up into a solid cylinder and you lose the bandaged look entirely. Leave those little spaces—it’s the single most important tip I can give you.
Don’t overbake. I once got distracted by a costume emergency (a torn cape, if you must know) and left the mummies in for 18 minutes. The dough was still tasty, but the hot dogs were starting to split and the mustard eyes looked sad and dried out. Set a timer, and if your oven runs hot, check at the 10-minute mark.
Multitasking strategy: While the mummies are baking, set out your serving platter and any dipping sauces. I like to have ketchup, mustard, and even a little ranch dressing ready. This way, the moment they come out of the oven, you’re ready to serve.
Consistency tip: For the most uniform mummies, try to cut your dough strips to the same width. I use a ruler as a guide—about ½ inch wide is perfect. This helps them bake evenly.
Variations & Adaptations
One of the best things about this recipe is how easy it is to customize. Here are some variations I’ve tried and loved.
- Cheesy Mummies: Before wrapping the hot dog, cut a slit lengthwise and stuff it with a strip of cheddar or mozzarella cheese. The cheese melts out slightly during baking, making it look like the mummy is oozing… something spooky.
- Spicy Mummies: Use spicy Italian sausages instead of hot dogs, and add a sprinkle of red pepper flakes to the dough before baking. These are a huge hit with adults who want a little heat.
- Veggie Mummies: Swap the hot dog for a vegetarian sausage or a cheese stick. For a truly plant-based version, use vegan hot dogs and vegan crescent roll dough (check the freezer section).
- Breakfast Mummies: Use breakfast sausages instead of hot dogs. These are fantastic for a Halloween morning breakfast before school or a costume party brunch.
Personal Variation: My favorite twist is the “Franken-mummy.” I cut the hot dog into three pieces before wrapping, then reassemble them on the baking sheet with a small gap between each piece. It looks like the mummy is falling apart—super spooky and always gets a laugh.
Serving & Storage Suggestions
These mummies are best served warm, straight from the oven. I like to arrange them on a large platter with a bowl of ketchup in the center for dipping. For a full Halloween spread, pair them with spiderweb guacamole and some witch finger cookies for dessert.
Storage: If you have leftovers (unlikely, but possible), store them in an airtight container in the refrigerator for up to 3 days. The dough will soften a bit, but they’re still tasty.
Reheating: The best way to reheat them is in the oven or an air fryer. Pop them in a 350°F (175°C) oven for 5-7 minutes, or until the dough is crispy again. The microwave works in a pinch, but the dough will be soft rather than flaky.
Make-Ahead Tip: You can assemble the mummies up to 4 hours ahead of time and keep them in the refrigerator, covered. Just pop them in the oven when you’re ready to bake. Add the mustard eyes after baking, as the mustard can dry out and discolor if it sits too long.
Nutritional Information & Benefits
Let’s be honest—these are a treat, not a health food. But here’s the breakdown so you can plan your Halloween menu accordingly.
Per serving (2 mummies):
- Calories: ~320
- Fat: 22g
- Carbohydrates: 22g
- Protein: 10g
- Sodium: 780mg
Dietary Considerations: This recipe can be made gluten-free (using GF dough and hot dogs) and dairy-free (skip the egg wash or use oil). It’s naturally nut-free, which is great for school parties. The main allergens are wheat and eggs (from the dough and egg wash).
Health Benefits: While these aren’t a superfood, they do provide protein from the hot dogs and a small amount of iron. The crescent roll dough offers quick energy—perfect for fueling up before a night of trick-or-treating. My personal perspective? Halloween is about fun and tradition. These mummies are a way to create a joyful memory, and that’s good for the soul.
Conclusion
So there you have it—my tried-and-true recipe for Spooky Mummy Hot Dogs that turned a Halloween food skeptic into a believer. These little guys are proof that you don’t need fancy ingredients or hours in the kitchen to create something memorable. They’re fun, they’re fast, and they taste absolutely delicious.
I encourage you to make these your own. Add cheese, change up the dipping sauce, or let your kids go wild with the mustard eyes. The best recipes are the ones that adapt to your family’s personality. Honestly, I can’t wait to hear how yours turn out!
If you make these mummies, please come back and leave a comment below. Tell me about your Halloween night, your kids’ reactions, or any fun variations you tried. And if you’re looking for another crowd-pleasing Halloween snack, don’t miss my recipe for pumpkin cheese ball—it’s perfect for grown-up gatherings. Happy Halloween, and happy snacking!
Frequently Asked Questions
Can I use puff pastry instead of crescent roll dough?
Yes, you can! Puff pastry will give you a flakier, more buttery result. Just thaw it according to the package directions, cut it into thin strips, and proceed with the recipe. Keep in mind that puff pastry may take a minute or two longer to bake.
How do I keep the dough from unraveling?
Make sure you’re leaving a small gap between the wraps—this gives the dough room to puff up and hold its shape. If a strip is particularly stubborn, you can secure the end with a tiny dab of water or a toothpick (just remember to remove it before serving).
Can I make these in an air fryer?
Absolutely! Preheat your air fryer to 350°F (175°C). Place the mummies in a single layer in the basket (you may need to work in batches). Cook for 8-10 minutes, or until the dough is golden brown and the hot dogs are heated through. The air fryer makes them extra crispy!
What can I use instead of mustard for the eyes?
You have lots of options! Small dots of ketchup, sriracha, or even cream cheese work beautifully. For a less spicy option, use a tiny dab of mayonnaise. My kids actually prefer “googly eyes” made from small pieces of black olive or a dot of black food coloring gel.
How far in advance can I prepare these?
You can assemble the wrapped mummies up to 4 hours ahead of time and keep them covered in the refrigerator. Bake them just before serving for the best texture. I recommend adding the mustard eyes after baking, as they can dry out and become discolored if they sit too long.
Pin This Recipe!
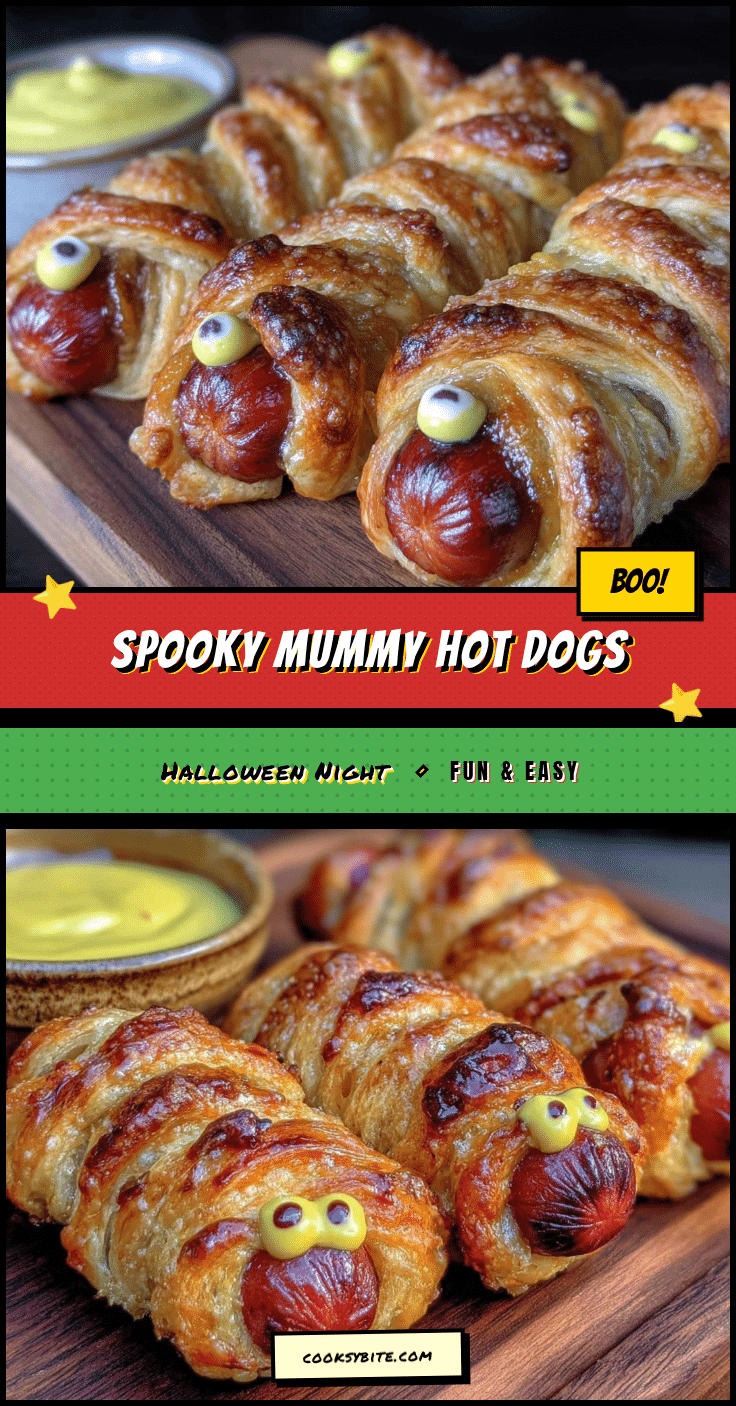
Easy Spooky Mummy Hot Dogs for a Perfect Halloween Night
These Spooky Mummy Hot Dogs are a quick and easy Halloween snack made with hot dogs wrapped in crescent roll dough, baked until golden, and finished with mustard eyes. Perfect for a fun, savory treat before trick-or-treating.
- Prep Time: 10 minutes
- Cook Time: 15 minutes
- Total Time: 25 minutes
- Yield: 4 servings (2 mummies per serving) 1x
- Category: Appetizer
- Cuisine: American
Ingredients
- 8 standard-sized beef or pork hot dogs (e.g., Hebrew National)
- 1 can (8 ounces) refrigerated crescent roll dough (e.g., Pillsbury)
- 1 tablespoon yellow mustard (for eyes)
- 1 large egg, beaten with 1 tablespoon water (optional egg wash)
- Sesame seeds or poppy seeds (optional, for garnish)
Instructions
- Preheat oven to 375°F (190°C). Line a baking sheet with parchment paper.
- Open the can of crescent roll dough and separate along perforations into 8 triangles.
- Using a sharp knife or pizza cutter, cut each triangle lengthwise into 3 thin strips (24 strips total).
- Take one hot dog and wrap a dough strip around it, starting at one end and working to the other, leaving about ¼ inch gap between wraps. Leave a small space at the top for eyes.
- Repeat with remaining hot dogs, using about 3 strips per hot dog. Place wrapped hot dogs on prepared baking sheet, about 1 inch apart.
- If using egg wash, brush each mummy with the egg mixture. Sprinkle with sesame or poppy seeds if desired.
- Bake for 12-15 minutes, until dough is golden brown and puffed, and hot dogs are heated through.
- Let cool on baking sheet for 2-3 minutes. Using a toothpick or knife tip, dab two small dots of mustard onto the exposed hot dog at the top for eyes.
- Serve immediately.
Notes
For the best mummy look, leave small gaps between dough strips so they puff up like bandages. If dough unravels, secure with a dab of water or a toothpick (remove before serving). Mustard eyes can be substituted with ketchup, sriracha, or cream cheese. Assemble up to 4 hours ahead and refrigerate; add eyes after baking.
Nutrition
- Serving Size: 2 mummies
- Calories: 320
- Sugar: 4
- Sodium: 780
- Fat: 22
- Saturated Fat: 8
- Carbohydrates: 22
- Protein: 10
Keywords: Halloween, mummy hot dogs, crescent roll, spooky snack, easy appetizer, kid-friendly


