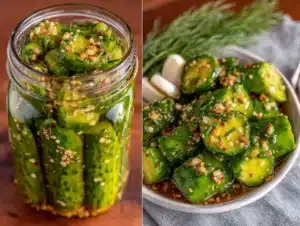
Honestly, I thought making dill pickles at home without a proper canning setup sounded like a mistake until I tried this easy tangy dill pickle refrigerator pickles recipe. The idea of skipping the traditional lengthy pickling process and still ending up with crunchy, flavorful pickles seemed too good to be true. My first attempts with homemade pickles were soggy or bland, and I was pretty stubborn about sticking to store-bought jars—because, you know, who has hours to wait for pickles to ferment? But then a friend insisted I give refrigerator pickles a shot, promising it would be fast, tangy, and actually good. Skeptical, I dove in one weekend, slicing cucumbers late into the evening, and by the third day, the kitchen smelled like a deli with a punch of dill and garlic. The crunch was on point, and the tang hit just right—not too sour, not too mild.
What pulled me in was how straightforward this recipe is, with no fancy equipment or special ingredients. Just fresh cucumbers, a simple brine, and some patience in the fridge. It stuck with me because it’s one of those recipes that changes your snack game quietly but firmly. Now, whenever I crave something crisp and zesty, I reach for these pickles over anything from the store. They’ve become my go-to for sandwiches, burgers, or just a quick bite straight from the jar. There’s something quietly satisfying about having a homemade jar of tangy dill pickles in the fridge, ready whenever you want.
It’s not flashy, but it’s reliable—and honestly, that’s why I trust this recipe. It’s the kind of culinary win that sneaks up on you, then stays in your routine for good.
Why You’ll Love This Recipe
After testing countless pickle recipes and tweaking brines, this easy tangy dill pickle refrigerator pickles recipe has proven itself over and over. It’s not just a quick fix; it’s a consistently delicious way to enjoy homemade pickles without fuss.
- Quick & Easy: Ready to eat in just 3 days, perfect for busy cooks who want fresh pickles fast.
- Simple Ingredients: Uses pantry staples like vinegar, garlic, and dill—no hunting down specialty spices.
- Perfect for Any Occasion: Whether it’s a casual weeknight dinner or a backyard BBQ, these pickles bring the right zing.
- Crowd-Pleaser: Always a hit whether served with sandwiches, burgers, or as a tangy snack on their own.
- Unbelievably Delicious: The brine is balanced just right—tangy, garlicky, and herbaceous without overpowering the crisp cucumber crunch.
What sets this recipe apart is the refrigerator method, which keeps the pickles crisp and fresh-tasting without the risk of over-fermentation. The dill and garlic flavors soak in naturally, and the vinegar base is just strong enough to deliver that classic pickle tang. Plus, I’ve found that slicing the cucumbers somewhat thick keeps them from turning mushy—a trick I picked up after a few less-than-stellar batches.
This recipe isn’t just good—it’s the kind of tangy dill pickle that makes you pause and appreciate the simple things in life. It’s a small kitchen success that adds a little joy to sandwiches and snacks alike.
What Ingredients You Will Need
This recipe uses simple, wholesome ingredients to deliver bold flavor and satisfying texture without the fuss. Most of these are pantry staples, so you likely have everything on hand.
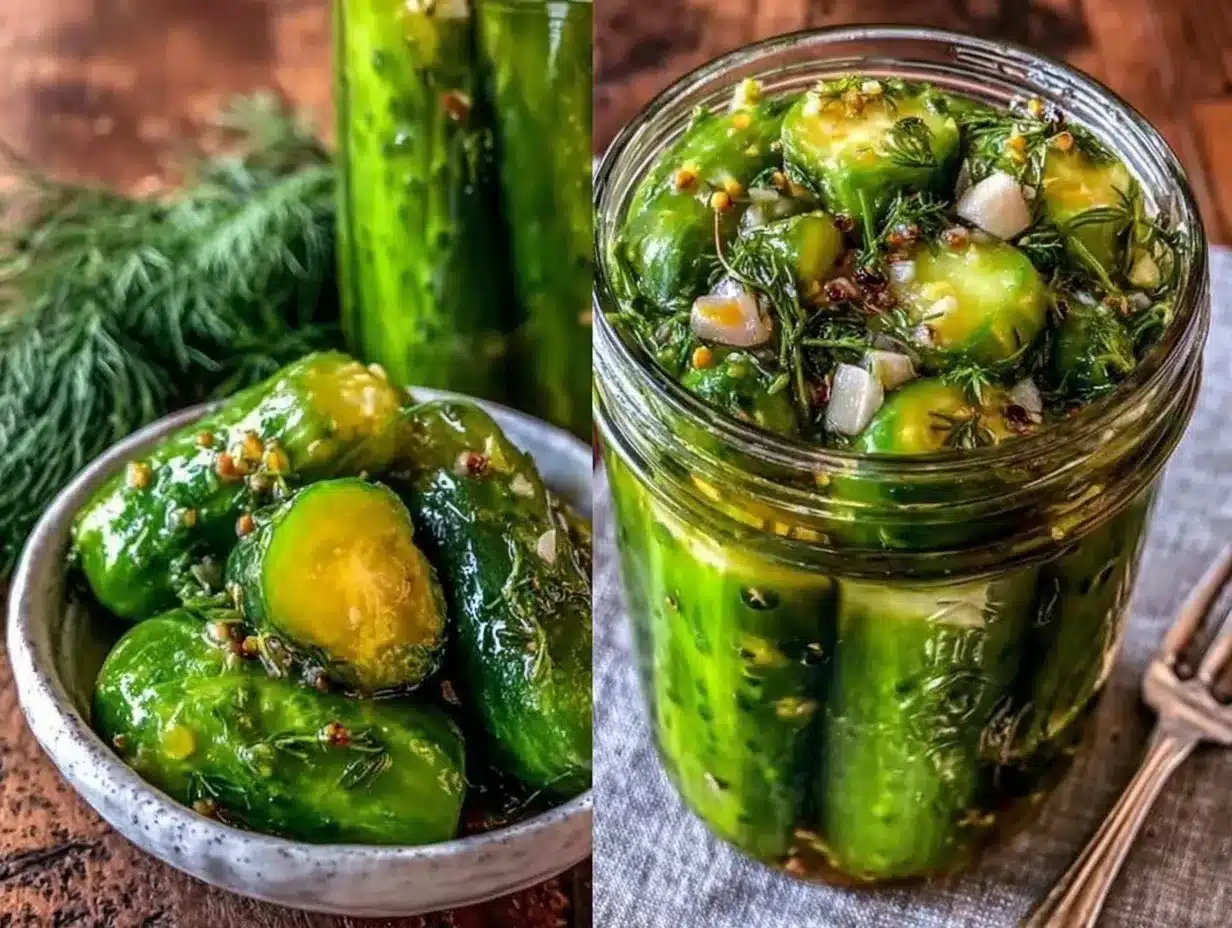
- Cucumbers: 4 medium Kirby cucumbers or pickling cucumbers, sliced into ¼-inch thick rounds or spears (Kirbys hold up best for crunch)
- White vinegar: 1 cup (240 ml), the acidic base for that classic tang (apple cider vinegar works too, for a slightly sweeter note)
- Water: 1 cup (240 ml), to balance the vinegar’s intensity
- Granulated sugar: 1 tablespoon, just enough to round out the acidity
- Kosher salt: 1 tablespoon, essential for brine and flavor (avoid iodized salt which can cloud the brine)
- Fresh dill: 3-4 sprigs, stems included (if unavailable, 1 teaspoon dried dill works but fresh is definitely better)
- Garlic cloves: 3, peeled and lightly smashed (adds that unmistakable punch)
- Pickling spices: 1 teaspoon (optional, but I like a bit of mustard seed and peppercorns for complexity)
- Red pepper flakes: ¼ teaspoon (optional, for a subtle heat that wakes up the tang)
If you want to experiment, you can swap out the cucumbers for zucchini in summer months or add a few slices of fresh jalapeño for extra zing. For a gluten-free version, this recipe is naturally safe as it contains no wheat ingredients.
Equipment Needed
Making these easy tangy dill pickle refrigerator pickles requires minimal equipment, which is part of the charm.
- Quart-sized glass jar with lid: A classic mason jar works perfectly, and glass keeps the flavors pure. Plastic containers can absorb flavors and odors.
- Measuring cups and spoons: For precise brine ratios (a small kitchen scale helps too if you want to be exact).
- Sharp knife and cutting board: For slicing cucumbers evenly—thick slices keep the crunch intact.
- Mixing bowl or saucepan: To combine and warm the brine ingredients (warming dissolves the sugar and salt nicely).
- Tongs or fork: To press cucumbers into the jar without bruising.
If you don’t have a mason jar handy, any clean, airtight container will do. Just make sure it seals tightly to keep the pickles fresh in the fridge. I’ve also found that a wide-mouth jar makes it easier to pack cucumbers and herbs without squishing them.
Preparation Method
- Wash and slice the cucumbers: Rinse 4 medium Kirby cucumbers thoroughly. Slice off the ends, then cut into ¼-inch thick rounds or spears depending on your preference. Even thickness helps the pickles absorb the brine uniformly. (Time: 5 minutes)
- Prepare the brine: In a small saucepan, combine 1 cup (240 ml) white vinegar, 1 cup (240 ml) water, 1 tablespoon granulated sugar, and 1 tablespoon kosher salt. Heat gently over medium heat, stirring until sugar and salt dissolve completely. Remove from heat and let cool to room temperature. (Time: 5-7 minutes)
- Pack the jar: Place 3-4 sprigs fresh dill, 3 smashed garlic cloves, 1 teaspoon pickling spices, and ¼ teaspoon red pepper flakes (if using) into the bottom of a clean quart-sized jar. Then tightly pack the cucumber slices or spears into the jar, leaving about ½ inch of headspace at the top. (Time: 5 minutes)
- Pour in the brine: Once cooled, pour the brine over the cucumbers until they are completely submerged. Use a utensil to press down gently if needed. Seal the jar tightly with its lid. (Time: 2 minutes)
- Refrigerate: Place the jar in the refrigerator for at least 3 days before tasting. The pickles will develop more flavor the longer they sit, up to 2 weeks. (Time: 3 days minimum)
- Check and serve: After 3 days, taste a pickle. If it’s tangy and crisp enough for your liking, enjoy! If not, give it another day or two. Always use clean utensils to remove pickles to maintain freshness. (Time: varies)
Watch out for cloudy brine—that’s normal with kosher salt but if it smells off or mold appears, discard and make a fresh batch. The cucumbers should stay firm and crunchy; if they soften too much, try slicing thicker next time or reducing the brine time.
Cooking Tips & Techniques
From my kitchen experiments and a few failures, I’ve picked up some handy tips to keep your easy tangy dill pickle refrigerator pickles spot-on:
- Keep the brine cool: Always pour cooled brine over cucumbers to avoid cooking them prematurely and losing that crisp texture.
- Use fresh, firm cucumbers: Look for Kirby or pickling cucumbers, which have a tighter skin and fewer seeds. Avoid overly large or soft cucumbers.
- Don’t skip the salt: It’s crucial for flavor and for keeping pickles crisp. Kosher salt is best, but if you only have table salt, reduce by half to avoid over-salting.
- Slice thickness matters: Thicker slices (¼ inch) hold up better during refrigeration. Thin slices tend to turn mushy fast.
- Press down the cucumbers: Make sure the cucumbers are fully submerged in the brine to prevent spoilage. Using a clean weight or utensil helps.
- Patience pays off: The flavor improves day by day. Try not to rush the process, even though it’s tempting.
One time, I got impatient and tried the pickles after just 24 hours—it was like eating soggy cucumbers with a hint of garlic. Lesson learned! Now I always wait the full 3 days, and the result is a crisp, nicely tangy pickle that feels anything but homemade.
Variations & Adaptations
While this recipe nails the classic tangy dill pickle, it’s also a great base for customization:
- Spicy Dill Pickles: Add sliced jalapeños or a dash more red pepper flakes for a fiery twist.
- Garlic Lovers’ Pickles: Double the garlic cloves for a bolder, pungent flavor that’s perfect for garlic fans.
- Low-Sodium Version: Cut the salt in half and increase soaking time to 4-5 days to balance flavor without losing crunch.
- Herb Variations: Swap dill for fresh tarragon or add fresh thyme sprigs for a unique herbal profile.
- Sweet & Tangy: Increase sugar to 2 tablespoons for a sweeter pickle that’s great alongside spicy dishes.
For a different texture, try slicing cucumbers into ribbons with a vegetable peeler and layering them in the jar. I once made a batch with fresh lemon slices added to the brine for a citrusy pop—it turned out surprisingly refreshing! And if you want to experiment with fermentation, you might enjoy my collection of pickled and fermented recipes that includes some fun twists.
Serving & Storage Suggestions
These easy tangy dill pickle refrigerator pickles are best served cold, straight from the fridge. They add crunch and zest to sandwiches, burgers, and salads. Personally, I love pairing them with a juicy homemade burger or alongside a creamy egg salad sandwich.
To store, keep the sealed jar refrigerated. The pickles stay fresh and crisp for up to 2 weeks. After that, they tend to soften and lose some tang. When removing pickles, always use clean utensils to avoid contamination. If you want to keep a larger batch longer, you can transfer some pickles and brine to smaller jars and refrigerate separately.
Reheating isn’t really necessary or recommended for these pickles since they shine cold. However, the flavor improves when allowed to rest for a day or two, so making them ahead is ideal.
If you’re looking for a fun way to serve these at a party, try stacking them on a charcuterie board alongside soft cheeses and cured meats. They also complement richer desserts, like the moist red wine chocolate cake I recently made, where the tangy contrast is unexpectedly delicious.
Nutritional Information & Benefits
One serving of these easy tangy dill pickle refrigerator pickles (about 2-3 spears) contains roughly 10-15 calories, thanks to the low-calorie cucumbers and vinegar brine. They’re naturally gluten-free, fat-free, and low-carb, making them a great snack for many diets.
Cucumbers bring hydration and a small dose of antioxidants, while the vinegar may support digestion and blood sugar regulation. The garlic adds immune-boosting compounds, and dill contributes flavonoids that have anti-inflammatory properties.
Just watch the sodium if you’re on a low-salt diet, as pickles can pack a salty punch. You can always adjust salt levels in the recipe to suit your needs. For a wholesome, crunchy snack that satisfies cravings without guilt, these refrigerator pickles fit the bill.
Conclusion
This easy tangy dill pickle refrigerator pickles recipe has quietly become a staple in my kitchen. It’s a no-nonsense, reliably delicious way to enjoy homemade pickles without the fuss of traditional canning. Whether you’re a pickle purist or just looking for a quick tangy snack, this recipe gives you crunchy, flavorful pickles in days—not weeks.
Feel free to tweak the garlic, heat, and sweetness to make these pickles your own. That’s the beauty of refrigerator pickles: they’re forgiving and flexible. I love how simple ingredients come together to create something so satisfying—something that makes a sandwich sing or a snack plate pop.
If you try this recipe, share your variations or favorite ways to enjoy your pickles in the comments. There’s nothing quite like swapping tips with fellow home cooks who appreciate the humble pickle. Here’s to crunchy, tangy bites that brighten up ordinary meals!
FAQs
How long do refrigerator pickles last?
Refrigerator pickles typically last up to 2 weeks in the fridge. After that, they may lose crunch and flavor.
Can I use regular cucumbers instead of Kirby cucumbers?
You can, but Kirby or pickling cucumbers hold their crunch better. Larger slicing cucumbers may get soggy faster.
Do I need to sterilize the jars for refrigerator pickles?
It’s best to use clean jars, but sterilization isn’t necessary since pickles stay refrigerated and aren’t shelf-stable.
Can I make these pickles spicy?
Yes! Add sliced jalapeños or increase red pepper flakes in the brine for a spicy kick.
Why did my pickles turn out soggy?
Common causes include using overly ripe cucumbers, slicing too thin, or pouring hot brine over cucumbers. Try thicker slices and cool brine next time.
Pin This Recipe!

Easy Tangy Dill Pickle Refrigerator Pickles Recipe for Perfect Homemade Pickles
A quick and easy refrigerator pickle recipe that delivers crunchy, tangy dill pickles in just 3 days without traditional canning.
- Prep Time: 10 minutes
- Cook Time: 7 minutes
- Total Time: 3 days and 17 minutes
- Yield: About 1 quart jar (4 servings) 1x
- Category: Condiment
- Cuisine: American
Ingredients
- 4 medium Kirby cucumbers or pickling cucumbers, sliced into ¼-inch thick rounds or spears
- 1 cup (240 ml) white vinegar (apple cider vinegar optional)
- 1 cup (240 ml) water
- 1 tablespoon granulated sugar
- 1 tablespoon kosher salt
- 3–4 sprigs fresh dill, stems included (or 1 teaspoon dried dill)
- 3 garlic cloves, peeled and lightly smashed
- 1 teaspoon pickling spices (optional)
- ¼ teaspoon red pepper flakes (optional)
Instructions
- Wash and slice the cucumbers: Rinse 4 medium Kirby cucumbers thoroughly. Slice off the ends, then cut into ¼-inch thick rounds or spears depending on your preference.
- Prepare the brine: In a small saucepan, combine 1 cup white vinegar, 1 cup water, 1 tablespoon granulated sugar, and 1 tablespoon kosher salt. Heat gently over medium heat, stirring until sugar and salt dissolve completely. Remove from heat and let cool to room temperature.
- Pack the jar: Place 3-4 sprigs fresh dill, 3 smashed garlic cloves, 1 teaspoon pickling spices, and ¼ teaspoon red pepper flakes (if using) into the bottom of a clean quart-sized jar. Then tightly pack the cucumber slices or spears into the jar, leaving about ½ inch of headspace at the top.
- Pour in the brine: Once cooled, pour the brine over the cucumbers until they are completely submerged. Use a utensil to press down gently if needed. Seal the jar tightly with its lid.
- Refrigerate: Place the jar in the refrigerator for at least 3 days before tasting. The pickles will develop more flavor the longer they sit, up to 2 weeks.
- Check and serve: After 3 days, taste a pickle. If it’s tangy and crisp enough for your liking, enjoy! If not, give it another day or two. Always use clean utensils to remove pickles to maintain freshness.
Notes
Use fresh, firm Kirby or pickling cucumbers for best crunch. Always pour cooled brine over cucumbers to avoid softening. Slice cucumbers about ¼ inch thick to maintain firmness. Keep cucumbers fully submerged in brine to prevent spoilage. Use clean utensils when removing pickles to maintain freshness. Pickles improve in flavor after 3 days and can be stored up to 2 weeks refrigerated.
Nutrition
- Serving Size: 2-3 pickle spears
- Calories: 12
- Sugar: 1
- Sodium: 600
- Carbohydrates: 3
- Fiber: 0.5
- Protein: 0.3
Keywords: dill pickles, refrigerator pickles, homemade pickles, quick pickles, tangy pickles, easy pickles, crunchy pickles