I need a lunchbox win today. Not a complicated one, not something that requires me to chop vegetables at 6:30 AM while my coffee is still too hot to drink. Something my kid will actually eat, not trade, not bring back home squished in the bottom of a bag. And I have everything except… well, nothing actually. I have turkey. I have cheese. I have tortillas. That’s the whole list. And honestly, that feels like enough.
This is how the easy turkey and cheese roll-ups were born in my kitchen on a Tuesday morning when I was running late and refusing to make another sad sandwich. I grabbed a flour tortilla, laid down a slice of deli turkey, added a piece of cheddar, rolled it tight, and sliced it into pinwheels. My kid looked at them like I’d just handed her a gourmet meal. She ate every single one and asked for more the next day. So I made them again. And again. And somewhere around the fourth time, I realized this wasn’t just a quick fix—it was a legitimate recipe worth sharing.
These roll-ups have become my secret weapon for busy mornings, after-school snacks, and even grown-up lunchboxes when I’m working from home and can’t be bothered to cook. They take five minutes, require zero cooking skills, and somehow feel more special than a regular sandwich. I think that’s the thing about simple food done right—it just works.
Why You’ll Love This Recipe
Let me tell you why these easy turkey and cheese roll-ups have earned a permanent spot in my weekly rotation. I’ve tested them with picky eaters, hungry teenagers, and adults who claim they don’t like “kid food.” Everyone agrees—these are good.
- Quick & Easy: Five minutes flat. I timed it. That’s from pulling ingredients out of the fridge to having a container of sliced pinwheels ready to go. Perfect for those mornings when you hit snooze one too many times.
- Simple Ingredients: Three main ingredients. Maybe four if you count the cream cheese spread. You probably have all of them right now. No grocery store detours needed.
- Perfect for Lunchboxes: These hold up beautifully in a lunchbox. No sogginess, no falling apart, no weird textures after sitting for a few hours. They actually taste better at room temperature.
- Crowd-Pleaser: I’ve packed these for school lunches, picnic lunches, road trips, and even casual get-togethers. Kids devour them. Adults sneak them when they think no one is watching.
- Unbelievably Delicious: There’s something about the combination of soft tortilla, savory turkey, creamy cheese, and that little bit of tang from the spread. It’s simple, but it’s perfect.
What makes this recipe different from just throwing together a sandwich? It’s the rolling technique and the cream cheese layer. That thin spread acts as glue, holding everything together and adding a richness that takes these from basic to brilliant. The pinwheel shape also makes them more fun to eat—and let’s face it, food is always better when it looks like a tiny spiral.
This is comfort food without the fuss. It’s the kind of recipe that makes you feel like you’ve got your life together, even when you definitely don’t. And honestly, we all need more of those moments.
What Ingredients You Will Need
This recipe uses simple, everyday ingredients to create something that feels surprisingly satisfying. No fancy shopping list required—just grab these staples from your fridge and pantry.
For the Roll-Ups
- Flour tortillas (8-inch size works best) – Look for soft, pliable tortillas. Burrito-sized ones make larger rolls, while taco-sized ones work well for smaller lunchboxes. I prefer Mission or Guerrero brands for consistent texture.
- Sliced deli turkey (about 2-3 slices per tortilla) – Oven-roasted, smoked, or honey turkey all work great. I like getting thick-sliced from the deli counter for better texture, but pre-packaged slices are fine too. For the best flavor, try a honey-roasted turkey breast.
- Sliced cheese (1-2 slices per tortilla) – Cheddar, provolone, Swiss, or American all melt beautifully inside the roll. I usually go with sharp cheddar for its bold flavor, but provolone gives a milder, creamier result.
- Cream cheese (2 tablespoons per tortilla, softened) – This is the secret ingredient. It acts as a spreadable glue that holds everything together and adds a tangy richness. Full-fat cream cheese works best, but reduced-fat is fine too.
Optional Add-Ins

- Lettuce leaves (romaine or butter lettuce) – Adds crunch. Pat them completely dry before adding, or they’ll make the tortilla soggy.
- Thinly sliced cucumber – Adds freshness and a mild crunch.
- Ranch dressing or honey mustard – Spread a thin layer instead of or in addition to cream cheese for extra flavor.
- Sprouts or shredded carrots – For added texture and nutrition.
Ingredient Selection Tips
I recommend using room-temperature cream cheese for easiest spreading. If you forgot to take it out of the fridge, microwave it for 10-15 seconds until softened but not melted. For the tortillas, slightly warm them in the microwave for 10 seconds to make them more pliable and less likely to crack when rolling.
If you’re looking for a gluten-free option, use gluten-free tortillas or large lettuce leaves instead. For a dairy-free version, use dairy-free cream cheese and your favorite plant-based cheese slices. The roll-ups will still hold together beautifully.
Equipment Needed
You don’t need much for this recipe. That’s kind of the point.
- Cutting board – Any size works. I use a large wooden one for rolling.
- Butter knife or offset spatula – For spreading cream cheese evenly.
- Sharp knife – A serrated knife works best for slicing through tortillas without squishing them. A chef’s knife is fine too, just use a gentle sawing motion.
- Toothpicks – Optional, but helpful if you’re making larger rolls that might want to uncurl.
- Lunchbox or storage container – A small airtight container keeps the roll-ups fresh and prevents them from drying out.
If you don’t have a sharp knife, a pizza cutter actually works surprisingly well for slicing these pinwheels. I’ve used that trick on camping trips when my knife collection was limited, and it worked perfectly. For the cream cheese spread, a regular butter knife is fine, but an offset spatula gives you more control for an even layer.
Preparation Method
These easy turkey and cheese roll-ups come together in five minutes flat. Here’s exactly how I do it.
- Soften the cream cheese – Take your cream cheese out of the fridge about 10 minutes before you start, or microwave it for 10-15 seconds. You want it spreadable but not runny. If it’s too cold, it will tear the tortilla when you try to spread it.
- Warm the tortillas – Place tortillas on a plate and microwave for 10-15 seconds. This makes them flexible and prevents cracking. Don’t skip this step, especially if your tortillas have been sitting in the fridge. I learned this the hard way after my first attempt ended with a torn tortilla and a frustrated sigh.
- Spread the cream cheese – Lay one warm tortilla flat on your cutting board. Using your butter knife or offset spatula, spread a thin, even layer of softened cream cheese over the entire surface. Go all the way to the edges—this acts as glue for the roll. A thin layer is all you need; too much will make the roll-ups messy.
- Layer the turkey – Place 2-3 slices of deli turkey flat on top of the cream cheese. Overlap them slightly to cover the tortilla evenly. If you’re using thicker slices, two may be enough. For thinner slices, go with three. The turkey should cover about 80% of the tortilla surface.
- Add the cheese – Lay 1-2 slices of cheese on top of the turkey. I usually place them in the center, leaving about an inch of space at the top edge of the tortilla. This helps the roll stay sealed. If you’re using shredded cheese, sprinkle about 1/4 cup evenly across the turkey layer.
- Add optional fillings – If you’re including lettuce, cucumber, or other add-ins, place them in a thin line along the center of the tortilla. Don’t overstuff—less is more here. Too many fillings will make the roll difficult to close and slice cleanly.
- Roll it up tightly – Starting from the bottom edge closest to you, roll the tortilla away from you, keeping it as tight as possible without tearing. Use your fingers to tuck and hold the filling in place as you go. When you reach the end, press gently to seal the seam. The cream cheese should help it stick.
- Slice into pinwheels – Using a sharp knife, slice the rolled tortilla into 1-inch rounds. A gentle sawing motion works best—don’t press straight down or you’ll squish the roll. You should get about 6-8 pinwheels per tortilla, depending on how thick you slice them.
- Secure if needed – If the roll-ups seem loose, insert a toothpick through the center of each pinwheel to hold them together. This is especially helpful if you’re packing them for a lunchbox where they might get jostled around.
- Pack and serve – Place the pinwheels in a container and refrigerate until ready to serve. They’re best eaten within 24 hours, though they’ll keep for up to 2 days in the fridge.
One thing I’ve learned through trial and error: don’t skip the cream cheese step. I once tried making these with just turkey and cheese, thinking the cheese would hold everything together on its own. It didn’t. The roll-ups fell apart, the cheese slid around, and I ended up with a sad pile of ingredients instead of neat little pinwheels. The cream cheese is non-negotiable—it’s the glue that makes this work.
Another tip: if you’re packing these for a school lunchbox, slice them slightly thicker (about 1.5 inches) so they hold up better during transport. Thinner slices are prettier for serving at home but can get squished in a backpack.
Cooking Tips & Techniques
After making these easy turkey and cheese roll-ups probably fifty times by now, I’ve picked up a few tricks that make a real difference.
Keep the tortillas warm. Cold tortillas crack when you roll them. Warm ones bend like a dream. Ten seconds in the microwave is all it takes. If you’re making a big batch, warm them one at a time as you go, or wrap a stack in a damp paper towel and microwave for 30 seconds.
Don’t overfill. I know it’s tempting to pile on the turkey and cheese, but trust me—less is more. Overstuffed roll-ups are impossible to close and fall apart when you slice them. Aim for a thin, even layer of each ingredient. You want every bite to have a balance of flavors without the tortilla bursting at the seams.
Use a serrated knife for slicing. This was a game-changer for me. A serrated knife cuts through the tortilla without compressing the roll, giving you clean, pretty pinwheels. If you use a straight-edged knife, use a gentle sawing motion rather than pressing down.
Chill before slicing. If you have time, refrigerate the rolled tortillas for 10-15 minutes before slicing. This firms up the cream cheese and makes the roll easier to cut cleanly. I don’t always have time for this step, but when I do, the results are noticeably better.
Make them the night before. These roll-ups actually taste better after sitting in the fridge for a few hours. The flavors meld together, and the texture firms up. I often make a batch while I’m cleaning up dinner and pack them straight into lunchboxes for the next morning. Saves me so much time.
One mistake I made early on: I used low-fat cream cheese to save calories. Don’t do that. It’s too watery and makes the tortilla soggy. Full-fat cream cheese gives you that creamy texture and stays put. If you’re watching calories, just use a thinner layer.
Variations & Adaptations
These easy turkey and cheese roll-ups are incredibly versatile. Here are some of my favorite variations.
Mediterranean Roll-Ups: Swap the turkey for sliced roasted red peppers and add a layer of hummus instead of cream cheese. Throw in some crumbled feta and a few Kalamata olives. It’s a completely different flavor profile that’s perfect for adult lunchboxes.
Italian-Inspired Roll-Ups: Use provolone cheese, add a layer of pesto under the cream cheese, and swap the turkey for salami or prosciutto. Roll and slice as usual. These taste like a fancy Italian sub in pinwheel form.
Breakfast Roll-Ups: Use cream cheese mixed with a little everything bagel seasoning. Add turkey and a slice of cheddar. These are perfect for a quick breakfast on the go, especially if you’re heading out the door early.
Veggie-Packed Roll-Ups: Keep the turkey but add thin slices of bell pepper, cucumber, and shredded carrots. The extra crunch makes these more satisfying and adds a nutritional boost. My kids don’t even notice the vegetables when they’re hidden inside the roll.
Low-Carb Version: Use large lettuce leaves instead of tortillas. Butter lettuce or romaine leaves work best. Spread the cream cheese on the lettuce, layer turkey and cheese, and roll up tightly. These are lighter but still delicious.
I’ve also experimented with different spreads—ranch dressing, honey mustard, even a thin layer of guacamole. Each one gives the roll-ups a completely different personality. My personal favorite is a mix of cream cheese and a little bit of sriracha for a spicy kick. It’s not for everyone, but I love the heat.
Serving & Storage Suggestions
These roll-ups are best served cold or at room temperature. I actually prefer them after they’ve sat in the fridge for an hour or two—the flavors have time to meld, and the texture firms up nicely.
For lunchboxes, pack the pinwheels in a small airtight container. If you’re including them in a bento-style lunch, they pair beautifully with fresh fruit, baby carrots, and a small treat. My kids love them alongside apple slices and a handful of grapes.
For serving at home, arrange the pinwheels on a platter with a small bowl of ranch dressing or honey mustard for dipping. They make a great appetizer for parties or playdates, and they disappear fast—I always make extra because people go back for seconds.
Storage Instructions: Store leftover roll-ups in an airtight container in the refrigerator for up to 2 days. They will keep their texture best if you place a paper towel in the container to absorb any excess moisture. I don’t recommend freezing these—the cream cheese gets watery when thawed, and the tortilla becomes mushy.
Reheating: These are meant to be eaten cold or at room temperature, so reheating isn’t necessary. If you prefer them warm, you can microwave a few pinwheels for 10-15 seconds, but the texture won’t be as firm. Honestly, I think they’re best straight from the fridge.
One thing I’ve noticed: the flavors actually deepen after a day in the fridge. The cream cheese melds with the turkey and cheese, creating a more cohesive taste. So don’t worry if you make them a day ahead—they’ll be even better.
Nutritional Information & Benefits
These easy turkey and cheese roll-ups are surprisingly balanced for such a simple snack. Here’s a rough estimate per serving (about 6 pinwheels made from one tortilla):
- Calories: Approximately 320-380 calories, depending on cheese and cream cheese amounts
- Protein: 22-28 grams
- Carbohydrates: 18-22 grams
- Fat: 18-22 grams
- Fiber: 2-3 grams
Turkey is an excellent source of lean protein, which helps keep you full and satisfied throughout the morning or afternoon. Cheese adds calcium and vitamin D for bone health. The cream cheese provides a small amount of fat that helps with nutrient absorption and adds to the satiety factor.
If you’re watching your sodium intake, look for low-sodium deli turkey and reduced-sodium cheese. You can also use whole wheat tortillas for added fiber. For a lighter version, use reduced-fat cream cheese and part-skim mozzarella instead of cheddar—this cuts the calories by about 80 per serving.
These roll-ups are naturally low in sugar (less than 2 grams per serving) and can be made gluten-free or dairy-free with simple substitutions. They’re a great option for anyone looking for a quick, protein-packed snack that doesn’t require cooking.
Conclusion
These easy turkey and cheese roll-ups have saved me more mornings than I can count. They’re the kind of recipe that feels almost too simple to share, but then you remember how many people struggle with lunchbox ideas and realize that sometimes the simplest solutions are the most valuable.
What I love most about this recipe is how adaptable it is. You can change the cheese, swap the spread, add vegetables, or experiment with different meats. It’s a template, not a rigid formula. And once you get the basic technique down, you’ll find yourself making variations for breakfast, snacks, and even party appetizers.
I hope you give these a try and make them your own. Maybe you’ll add a little mustard, or use pepper jack cheese for heat, or stuff them with extra veggies. Whatever you do, I’d love to hear about it. Drop a comment below and tell me how your roll-ups turned out—or share your own twist on the recipe. Your version might just become someone else’s new favorite lunchbox staple.
Happy rolling, friends. Your lunchboxes are about to get a whole lot more exciting.
Frequently Asked Questions
Can I make these turkey and cheese roll-ups ahead of time?
Absolutely! In fact, they taste better after sitting in the fridge for a few hours. Make them the night before and pack them straight into lunchboxes in the morning. They’ll keep well for up to 2 days in an airtight container.
What’s the best cheese to use for these roll-ups?
Sharp cheddar is my go-to for its bold flavor, but provolone, Swiss, mozzarella, and American cheese all work great. The key is using sliced cheese rather than shredded, as slices create a more even layer that holds together better when rolling.
How do I keep the roll-ups from falling apart?
The cream cheese is your secret weapon here. Spread a thin, even layer over the entire tortilla before adding other ingredients. It acts as glue that holds everything together. Also, roll the tortilla as tightly as possible without tearing it, and let it chill in the fridge for 10 minutes before slicing.
Can I use gluten-free tortillas for this recipe?
Yes, gluten-free tortillas work perfectly. Just make sure to warm them slightly before rolling, as gluten-free tortillas can be more brittle than regular flour tortillas. Corn tortillas are also an option, though they’re smaller and may tear more easily.
How can I add more vegetables to these roll-ups?
Thinly sliced cucumber, bell pepper, shredded carrots, and lettuce leaves all work beautifully. Just make sure to pat any wet vegetables completely dry before adding them, or they’ll make the tortilla soggy. I like to put the vegetables in a thin line down the center of the tortilla before rolling.
Pin This Recipe!
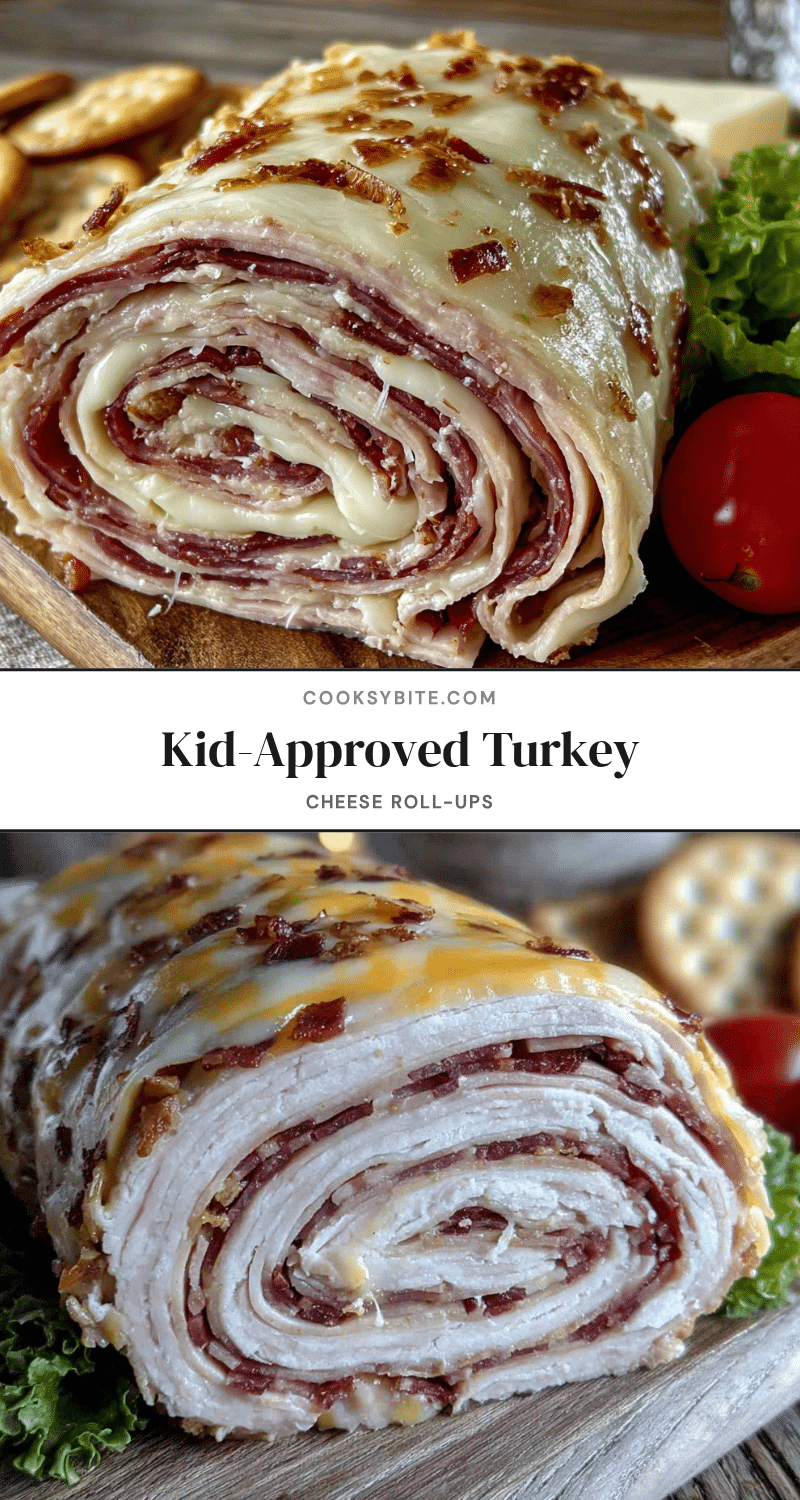
Easy Turkey and Cheese Roll-Ups: Best 5-Minute Lunchbox

These easy turkey and cheese roll-ups are a quick, 5-minute lunchbox solution made with flour tortillas, deli turkey, cheese, and cream cheese. They’re perfect for busy mornings, after-school snacks, and even grown-up lunchboxes.
- Prep Time: 5 minutes
- Cook Time: 0 minutes
- Total Time: 5 minutes
- Yield: 4 servings 1x
- Category: Lunch
- Cuisine: American
Ingredients
- 4 (8-inch) flour tortillas
- 8–12 slices deli turkey (about 2–3 slices per tortilla)
- 4–8 slices cheese (cheddar, provolone, Swiss, or American; 1–2 slices per tortilla)
- 8 tablespoons cream cheese, softened (2 tablespoons per tortilla)
- Optional: lettuce leaves (romaine or butter lettuce), thinly sliced cucumber, ranch dressing or honey mustard, sprouts or shredded carrots
Instructions
- Soften the cream cheese: Take cream cheese out of the fridge about 10 minutes before starting, or microwave for 10-15 seconds until spreadable but not runny.
- Warm the tortillas: Place tortillas on a plate and microwave for 10-15 seconds to make them flexible and prevent cracking.
- Spread the cream cheese: Lay one warm tortilla flat on a cutting board. Spread a thin, even layer of softened cream cheese over the entire surface, going all the way to the edges.
- Layer the turkey: Place 2-3 slices of deli turkey flat on top of the cream cheese, overlapping slightly to cover about 80% of the tortilla surface.
- Add the cheese: Lay 1-2 slices of cheese on top of the turkey, leaving about an inch of space at the top edge of the tortilla.
- Add optional fillings: If using, place lettuce, cucumber, or other add-ins in a thin line along the center of the tortilla. Do not overstuff.
- Roll it up tightly: Starting from the bottom edge closest to you, roll the tortilla away from you, keeping it as tight as possible without tearing. Press gently to seal the seam.
- Slice into pinwheels: Using a sharp knife (serrated works best), slice the rolled tortilla into 1-inch rounds using a gentle sawing motion. You should get about 6-8 pinwheels per tortilla.
- Secure if needed: If roll-ups seem loose, insert a toothpick through the center of each pinwheel to hold them together.
- Pack and serve: Place pinwheels in an airtight container and refrigerate until ready to serve. Best eaten within 24 hours, but will keep for up to 2 days in the fridge.
Notes
Don’t skip the cream cheese step—it acts as glue to hold the roll-ups together. For best results, use room-temperature cream cheese and warm tortillas. If packing for school lunchboxes, slice slightly thicker (1.5 inches) to prevent squishing. These taste better after sitting in the fridge for a few hours as flavors meld together. Full-fat cream cheese is recommended; low-fat versions can make the tortilla soggy.
Nutrition
- Serving Size: 6 pinwheels (from 1
- Calories: 350
- Sugar: 2
- Sodium: 800
- Fat: 20
- Saturated Fat: 10
- Carbohydrates: 20
- Fiber: 2
- Protein: 25
Keywords: turkey and cheese roll-ups, lunchbox ideas, easy lunch, 5-minute recipe, pinwheels, kid-friendly lunch, no-cook lunch


