Grabbing a package of tortillas from the fridge when I realized I had absolutely nothing ready for lunch the next day. A half-empty block of cream cheese staring at me from the dairy drawer, some leftover turkey slices from Sunday dinner, and about fifteen minutes before I needed to pick up the kids from school. That was the moment these Easy Turkey Pinwheel Lunchbox Roll-Ups with Cream Cheese were born—not out of careful planning, but out of pure, last-minute desperation.
I remember standing there, staring into the fridge like it might magically produce something edible. The clock was ticking, and I could already hear the chaos of after-school activities approaching. I had tried those store-bought lunch kits before, you know, the ones that cost way too much and leave you feeling like you failed at feeding your family properly. Not today. I spotted the cream cheese and thought, well, that’s a start. The turkey was already sliced, and somewhere in the back I found a bag of fresh spinach that was still good. Honestly, it felt like a small miracle.
I rolled everything up as tight as I could, sliced it into little rounds, and threw them into containers. The next day, my kids came home asking if I could make those “spiral sandwiches” again. That’s when I knew I had stumbled onto something real. These aren’t just another lunch idea—they are the lunch idea that actually works when you have zero time and even less energy. No cooking, no complicated steps, just a simple combination that somehow tastes like you tried way harder than you did.
Why You’ll Love This Recipe
Let me tell you why these pinwheels have become my go-to lunch solution. After testing this recipe at least a dozen times (and yes, I’ve had a few that unrolled into a sad mess), I can confidently say this version is bulletproof. Here’s what makes them special:
- Quick & Easy: From fridge to lunchbox in under 15 minutes. No joke. You can literally make these while waiting for your coffee to brew in the morning.
- Simple Ingredients: Cream cheese, turkey, tortillas, and a few extras you probably already have. No fancy grocery trips or obscure ingredients that you’ll use once and forget about.
- Perfect for Lunchboxes: These hold up beautifully in a lunchbox for hours. No sogginess, no falling apart—just neat little spirals that stay intact until lunchtime.
- Crowd-Pleaser: I’ve packed these for school lunches, road trips, picnics, and even as a quick snack for myself. Kids love them, adults sneak them, and nobody complains.
- Unbelievably Delicious: The creamy texture of the spread paired with the savory turkey and the slight chew of the tortilla—it’s simple but somehow addictive. You’ll find yourself making extra just for snacking.
What sets this recipe apart from other pinwheel recipes is the cream cheese technique. Most recipes just spread it on and hope for the best. I learned the hard way that room temperature cream cheese is non-negotiable—cold cream cheese tears the tortilla every single time. Also, I add a tiny pinch of garlic powder and onion powder to the cream cheese mixture. It sounds weird for a kid-friendly lunch, but trust me, it makes the flavors pop without being overpowering. This isn’t just another version of turkey roll-ups. It’s the version that actually stays rolled, tastes amazing, and doesn’t stress you out.
These pinwheels have saved me on countless busy mornings when I had nothing planned. There is something deeply satisfying about opening a lunchbox and seeing those perfect little spirals staring back at you. It feels like you have your act together, even when you absolutely do not.
What Ingredients You Will Need
This recipe uses simple, everyday ingredients that come together to create something surprisingly satisfying. Most of these are probably in your kitchen right now, which is exactly the point.
For the Cream Cheese Spread
- 8 ounces cream cheese, softened to room temperature (this is crucial—cold cream cheese will tear your tortillas)
- 1 tablespoon mayonnaise (adds creaminess and helps the spread stay smooth; I prefer Hellmann’s or Duke’s)
- 1/2 teaspoon garlic powder (optional but recommended for depth of flavor)
- 1/2 teaspoon onion powder (optional but balances the savory notes beautifully)
- 1/4 teaspoon salt (enhances all the flavors without making it salty)
- 1/8 teaspoon black pepper (just a touch for subtle warmth)
For the Pinwheels
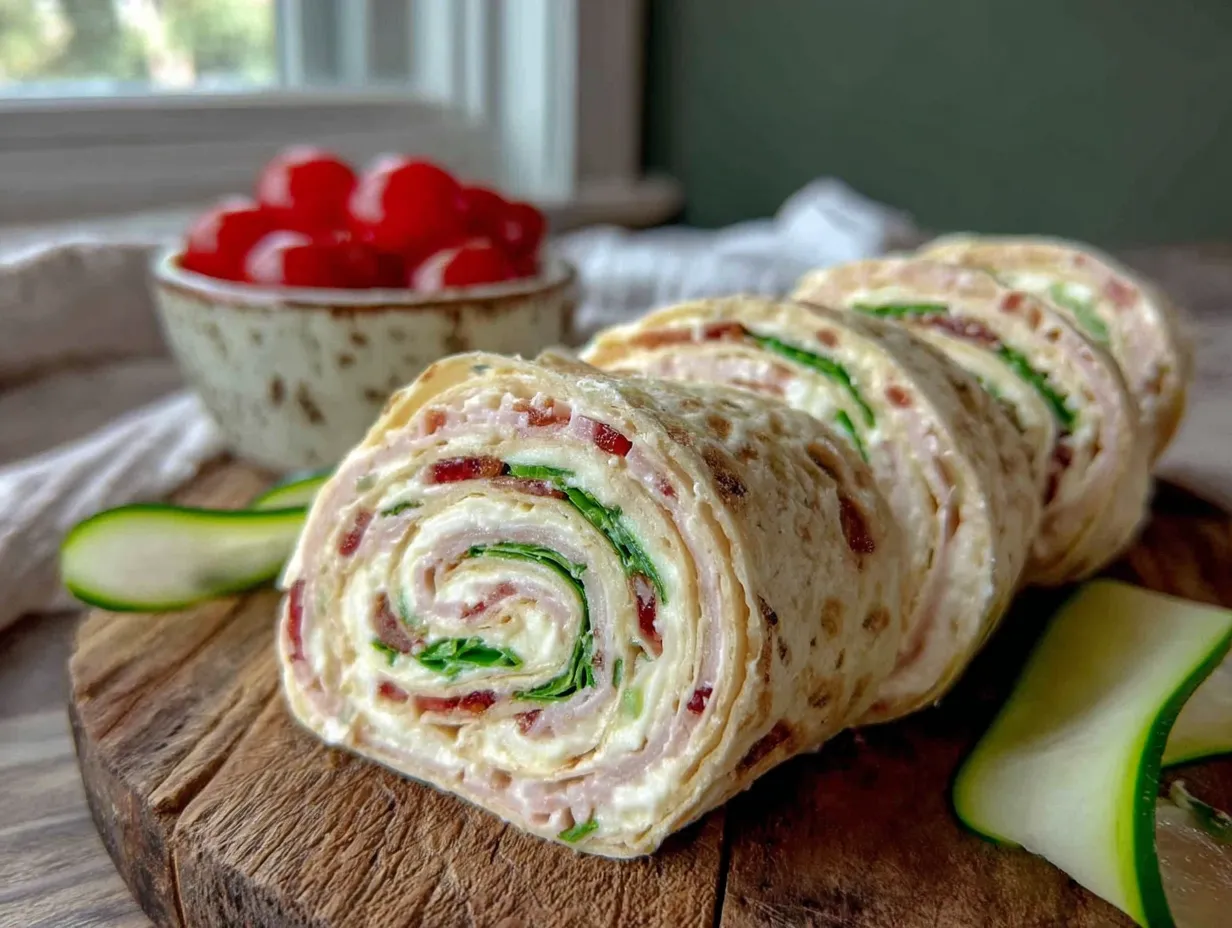
- 4 large flour tortillas (burrito size works best; I use Mission brand or any soft flour tortilla)
- 8 ounces sliced turkey breast (deli-style, oven-roasted or honey turkey both work great)
- 1 cup fresh spinach leaves, washed and dried thoroughly (wet spinach makes the tortillas soggy)
- 1/2 cup shredded cheddar cheese (optional, but adds a nice salty bite; you can use mozzarella or provolone instead)
- 1/4 cup sun-dried tomatoes, chopped (optional, for a pop of color and tangy flavor)
A quick note on ingredient selection: I’ve tested this with low-fat cream cheese, and honestly, it doesn’t spread as smoothly and the texture is less creamy. Full-fat cream cheese gives the best results. For the turkey, I recommend getting it sliced fresh from the deli counter rather than pre-packaged—it’s usually thicker and holds up better when rolled. If you’re using pre-packaged turkey, pat it dry with a paper towel to remove excess moisture.
For a gluten-free version, use gluten-free tortillas. They can be a bit more fragile, so handle them gently. Dairy-free cream cheese also works, though the texture will be slightly different. I’ve tried Kite Hill brand with good results.
Equipment Needed
You don’t need any fancy equipment for these pinwheels, which is honestly my favorite part. Here’s what you’ll need:
- Cutting board (a large one gives you room to work)
- Sharp knife (a serrated knife works best for clean slices without squishing the roll)
- Small mixing bowl (for combining the cream cheese spread)
- Rubber spatula (for spreading the cream cheese mixture evenly)
- Plastic wrap (for wrapping the rolls tightly before chilling)
- Baking sheet or large plate (to hold the wrapped rolls in the fridge)
- Toothpicks (optional, but helpful for holding the rolls together if they’re stubborn)
If you don’t have a serrated knife, a very sharp chef’s knife works too. Just be gentle when slicing—press straight down rather than sawing back and forth. I learned this after ruining a few rolls by hacking at them like a lumberjack. Also, plastic wrap is your best friend here. Without it, the rolls can dry out in the fridge. I keep a roll in my drawer specifically for pinwheel projects.
Preparation Method
Follow these steps carefully, and you’ll have perfect pinwheels every time. I’ve included all the little details I wish someone had told me when I first started making these.
- Soften the cream cheese: Take the cream cheese out of the fridge at least 30 minutes before you start. If you forgot (which I do all the time), microwave it in 10-second bursts until soft but not melted. You want it spreadable, not soupy.
- Make the spread: In a small bowl, combine the softened cream cheese, mayonnaise, garlic powder, onion powder, salt, and pepper. Mix until smooth and completely combined. Taste it—it should be creamy and savory with a slight tang. Adjust salt if needed.
- Prepare your work surface: Lay a tortilla flat on your cutting board. If your tortillas are cold, let them sit at room temperature for a few minutes—cold tortillas crack when you roll them. I learned this the hard way after a tortilla cracked right down the middle.
- Spread the cream cheese mixture: Using your rubber spatula, spread about 2-3 tablespoons of the cream cheese mixture evenly over the entire tortilla. Go all the way to the edges—this helps everything stick together. Don’t skimp on the edges, or your pinwheels will unroll.
- Layer the fillings: Place 2-3 slices of turkey evenly over the cream cheese, leaving a small border around the edges. Add a handful of spinach leaves, pressing them gently into the cream cheese so they stay put. Sprinkle shredded cheddar cheese and chopped sun-dried tomatoes if using.
- Roll it tight: Starting from one edge, roll the tortilla as tightly as you can without tearing it. Use your fingers to keep the filling tucked in as you roll. When you reach the end, press down gently to seal the seam. Think of it like rolling a sleeping bag—firm but gentle.
- Wrap and chill: Place the rolled tortilla seam-side down on a piece of plastic wrap. Wrap it tightly, twisting the ends like a candy wrapper. This keeps the roll compact and helps it hold its shape. Repeat with remaining tortillas. Refrigerate for at least 30 minutes (1 hour is better). This step is non-negotiable—chilling sets the cream cheese and makes slicing much cleaner.
- Slice into pinwheels: After chilling, unwrap each roll and place it on your cutting board. Using a sharp serrated knife, slice the roll into 1-inch thick rounds. Use a gentle sawing motion rather than pressing straight down. You should get about 6-8 pinwheels per tortilla, depending on how thick you slice them.
- Arrange and serve: Place the pinwheels in your lunchbox or serving dish. If they seem a bit loose, you can secure them with a toothpick through the center. For lunchboxes, I like to arrange them in a single layer with a small ice pack underneath to keep them fresh.
A few sensory cues to watch for: The cream cheese spread should be smooth and easily glide across the tortilla without pulling or tearing. When you roll, you should feel the tortilla give slightly but not crack. The finished pinwheels should look like neat little spirals with all the layers visible. If they look messy, you probably didn’t roll tight enough or chill them long enough—it happens to everyone.
Cooking Tips & Techniques
After making these pinwheels more times than I can count, I’ve picked up a few tricks that make a real difference. Here are the ones I wish I had known from the start.
The cream cheese temperature trap: I cannot stress this enough—room temperature cream cheese is everything. The first time I made these, I used cold cream cheese straight from the fridge. It tore the tortilla in three places, and the spread was lumpy and uneven. Now I set the cream cheese out when I start my morning coffee, and by the time I’m ready to assemble, it’s perfect. If you’re in a rush, cut the cream cheese into small cubes and microwave for 10 seconds. Flip and repeat until soft.
The moisture problem: Wet spinach is the enemy of a good pinwheel. If you wash your spinach, dry it thoroughly with a salad spinner or paper towels. Excess moisture makes the tortilla soggy and the pinwheels fall apart. I learned this after packing a lunchbox full of sad, droopy pinwheels that looked nothing like the pretty spirals I had imagined. Now I dry my spinach like my life depends on it.
The rolling technique: Start rolling from the side closest to you, using your fingers to keep the filling tucked in. Apply even pressure as you roll—not too tight or the filling squeezes out, not too loose or the pinwheels unravel. It took me about five tries to get the pressure right. Think of it like rolling a yoga mat: firm but not aggressive.
Multitasking strategy: I make these the night before while I’m cleaning up dinner. The chilling time happens overnight, and in the morning, I just slice and pack. This saves me about 10 minutes in the morning rush, which honestly feels like an hour when you’re trying to get everyone out the door.
Variations & Adaptations
One of the best things about this recipe is how adaptable it is. I’ve tried quite a few variations over the years, and here are my favorites:
Veggie Lover’s Pinwheels: Swap the turkey for roasted red peppers, cucumber slices, and shredded carrots. Add a layer of hummus under the cream cheese for extra flavor. This version is perfect for meatless Mondays or vegetarian friends. I made this for a playdate once, and the moms asked for the recipe before the kids finished eating.
Spicy Southwest Pinwheels: Add 1 tablespoon of diced green chiles to the cream cheese mixture, use pepper jack cheese instead of cheddar, and swap the turkey for sliced ham or roast beef. Top with a few cilantro leaves before rolling. This one has a nice kick without being overwhelming—great for adults who want something with more personality.
Sweet & Savory Pinwheels: Spread a thin layer of cream cheese, add turkey slices, then top with a few dried cranberries and a drizzle of honey. The combination of sweet and savory is surprisingly good. I made these for a holiday party appetizer, and they disappeared faster than anything else on the table.
Gluten-Free and Dairy-Free Adaptations: Use gluten-free tortillas (they’re more fragile, so spread the cream cheese gently) and dairy-free cream cheese. I’ve found that Kite Hill brand holds up well, though the texture is slightly softer. Also, you can use dairy-free shredded cheese or skip it entirely.
Breakfast Pinwheels: Swap the turkey for scrambled eggs and cooked bacon bits. Add a sprinkle of chives to the cream cheese. These are perfect for brunch or a grab-and-go breakfast. I made these for a road trip once, and they kept beautifully in a cooler for hours.
Serving & Storage Suggestions
These pinwheels are incredibly versatile when it comes to serving and storing. Here’s everything I’ve learned about keeping them at their best.
Serving temperature: Pinwheels are best served cold or at room temperature. If you’re packing them for lunch, they’ll be perfect by the time lunch rolls around. For parties or appetizers, arrange them on a platter with the spiral side facing up so everyone can see the layers. A few toothpicks through the center keep them from unrolling on the platter.
What to serve with them: These pair beautifully with fresh fruit, veggie sticks, or a small side salad. For lunchboxes, I add a handful of cherry tomatoes, some cucumber slices, and a small container of ranch dressing for dipping. If you’re serving them as appetizers, try them alongside a decadent red wine chocolate cake for a surprisingly elegant party spread.
Storage instructions: Store assembled (but unsliced) rolls tightly wrapped in plastic wrap in the refrigerator for up to 3 days. Once sliced, pinwheels are best eaten within 24 hours. The tortillas can start to dry out after that, and the spinach may release moisture. I don’t recommend freezing these—the texture of the cream cheese changes and the tortillas become rubbery.
Reheating note: These are meant to be served cold, so no reheating needed. If you’ve stored them in the fridge, just take them out about 10 minutes before serving to take the chill off. The flavors actually improve after a few hours in the fridge as everything melds together.
Make-ahead tip: You can prep the cream cheese spread up to 3 days in advance and keep it in an airtight container in the fridge. When you’re ready to assemble, just let it come to room temperature and stir before spreading. This makes morning assembly even faster.
Nutritional Information & Benefits
These pinwheels are surprisingly balanced for something that feels like a treat. Here’s a rough breakdown per serving (about 6 pinwheels, assuming 4 servings per recipe):
- Calories: Approximately 320-350 per serving
- Protein: 18-20 grams (thanks to the turkey and cream cheese)
- Carbohydrates: 22-25 grams
- Fat: 18-20 grams
- Fiber: 2-3 grams (from the spinach and tortilla)
- Sodium: 600-700 mg (varies based on turkey and cheese choices)
The protein content makes these a satisfying lunch option that keeps energy levels stable throughout the afternoon. The spinach adds a boost of iron and vitamins A and C, while the cream cheese provides calcium. If you’re watching your sodium, look for low-sodium turkey and skip the added salt in the cream cheese mixture.
For a lower-carb version, use low-carb tortillas or lettuce wraps instead. For a higher-protein version, add an extra slice of turkey to each roll. These are also naturally nut-free, making them a safe option for school lunchboxes with allergy restrictions.
Conclusion
These Easy Turkey Pinwheel Lunchbox Roll-Ups with Cream Cheese have honestly become a staple in my kitchen, and I think they’ll become one in yours too. They came from a moment of pure desperation, but they’ve turned into something I genuinely look forward to making. There’s something about those perfect little spirals that makes me feel like I’ve got this whole parenting thing figured out—even if just for a moment.
I love that this recipe gives you room to play. Add what you like, leave out what you don’t, and make it your own. That’s the beauty of a simple recipe—it’s a starting point, not a rulebook. Whether you’re packing school lunches, prepping for a road trip, or looking for an easy appetizer, these pinwheels deliver every single time.
If you make these, I’d love to hear how they turned out. Did you add something unexpected? Did your kids love them? Drop a comment below and share your version. And if you’re looking for more easy, family-friendly recipes, check out our full collection of recipes for more inspiration. Happy rolling!
Frequently Asked Questions
Can I make these pinwheels the night before?
Absolutely! In fact, I recommend it. Assemble the rolls, wrap them tightly in plastic wrap, and refrigerate overnight. In the morning, just slice and pack. The chilling time actually helps the flavors meld together and makes slicing much cleaner.
How do I keep the pinwheels from unrolling?
The key is chilling them for at least 30 minutes after rolling. This sets the cream cheese and helps everything hold together. Also, make sure you spread the cream cheese all the way to the edges of the tortilla—it acts like glue. If they’re still stubborn, use a toothpick through the center to secure them.
Can I use other types of meat instead of turkey?
Definitely! Ham, roast beef, chicken, or even salami all work beautifully. Just make sure the meat is thinly sliced so it rolls easily. I’ve made these with leftover roasted chicken shredded into small pieces, and they turned out great.
How long do these pinwheels last in the fridge?
Assembled rolls (unsliced) will keep for up to 3 days in the refrigerator when wrapped tightly. Once sliced, they’re best eaten within 24 hours. After that, the tortillas can start to dry out and the spinach may release moisture.
Can I freeze turkey pinwheels?
I don’t recommend freezing these. The cream cheese changes texture when thawed and becomes watery, and the tortillas turn rubbery. These are best made fresh or up to 3 days ahead and kept in the refrigerator.
Pin This Recipe!

Easy Turkey Pinwheel Lunchbox Roll-Ups with Cream Cheese

Quick and easy turkey pinwheel roll-ups made with cream cheese, turkey, spinach, and tortillas. Perfect for lunchboxes, picnics, and busy mornings.
- Prep Time: 15 minutes
- Cook Time: 0 minutes
- Total Time: 45 minutes (includes chilling time)
- Yield: 4 servings 1x
- Category: Lunch
- Cuisine: American
Ingredients
- 8 ounces cream cheese, softened to room temperature
- 1 tablespoon mayonnaise
- 1/2 teaspoon garlic powder
- 1/2 teaspoon onion powder
- 1/4 teaspoon salt
- 1/8 teaspoon black pepper
- 4 large flour tortillas (burrito size)
- 8 ounces sliced turkey breast (deli-style)
- 1 cup fresh spinach leaves, washed and dried
- 1/2 cup shredded cheddar cheese (optional)
- 1/4 cup sun-dried tomatoes, chopped (optional)
Instructions
- Soften the cream cheese: Take the cream cheese out of the fridge at least 30 minutes before starting. If in a rush, microwave in 10-second bursts until soft but not melted.
- Make the spread: In a small bowl, combine softened cream cheese, mayonnaise, garlic powder, onion powder, salt, and pepper. Mix until smooth and completely combined.
- Prepare your work surface: Lay a tortilla flat on a cutting board. Let cold tortillas sit at room temperature for a few minutes.
- Spread the cream cheese mixture: Using a rubber spatula, spread about 2-3 tablespoons of the cream cheese mixture evenly over the entire tortilla, going all the way to the edges.
- Layer the fillings: Place 2-3 slices of turkey evenly over the cream cheese. Add a handful of spinach leaves, pressing them gently into the cream cheese. Sprinkle shredded cheddar cheese and chopped sun-dried tomatoes if using.
- Roll it tight: Starting from one edge, roll the tortilla as tightly as possible without tearing. Use fingers to keep filling tucked in. Press down gently to seal the seam.
- Wrap and chill: Place the rolled tortilla seam-side down on plastic wrap. Wrap tightly, twisting the ends. Refrigerate for at least 30 minutes (1 hour is better).
- Slice into pinwheels: After chilling, unwrap each roll. Using a sharp serrated knife, slice into 1-inch thick rounds using a gentle sawing motion.
- Arrange and serve: Place pinwheels in lunchbox or serving dish. Secure with toothpicks if needed.
Notes
Room temperature cream cheese is crucial to prevent tearing tortillas. Dry spinach thoroughly to avoid sogginess. Chilling for at least 30 minutes is non-negotiable for clean slices. For gluten-free, use gluten-free tortillas; for dairy-free, use dairy-free cream cheese.
Nutrition
- Serving Size: 6 pinwheels
- Calories: 335
- Sugar: 3
- Sodium: 650
- Fat: 19
- Saturated Fat: 9
- Carbohydrates: 23
- Fiber: 2.5
- Protein: 19
Keywords: turkey pinwheels, lunchbox roll-ups, cream cheese pinwheels, easy lunch, kid-friendly, no-cook recipe


