There used to be a tiny bakery tucked behind the old hardware store on Maple Street called “The Enchanted Oven.” They made a black velvet cupcake every Halloween that was pure magic—dark as midnight with this impossibly creamy orange frosting that tasted like a creamsicle had a baby with a cloud. When they closed three years ago, I actually stood outside the locked door like a weirdo, peeking through the window. My kids asked me every single October if we could “get the black cupcakes from the lady with the sparkly glasses.” And every year, I had to say no.
After twelve attempts—twelve, people—I finally cracked it. The first batch was too dry. The second tasted like charcoal. The third looked like gray sludge. But batch number eight? That was the one where my youngest actually said, “Mom, this is better than the bakery.” I nearly cried right there over the mixing bowl. Honestly, I think the secret was letting the batter rest for ten minutes before baking, but we’ll get to that later.
These Kid-Approved Black Velvet Halloween Cupcakes with Orange Frosting are the result of pure stubbornness and a deep, almost embarrassing dedication to recreating a memory. The cupcakes are impossibly moist with a tender crumb, and the orange frosting is light, fluffy, and tastes like you’re eating a Halloween dream. Maybe you’ve been there—chasing a recipe from a place that no longer exists, wondering if you’ll ever get it right. Let me tell you, when you nail it, it’s worth every single failed batch.
Why You’ll Love This Recipe
Let me be real with you for a second. I’ve tested this recipe on three separate groups of kids (including my own two, who are brutally honest critics), and every single one gave it a thumbs up. That’s not easy to achieve when you’re dealing with black food coloring and orange frosting.
- Budget-Friendly Ingredients: You probably already have flour, sugar, cocoa powder, and buttermilk in your kitchen. No fancy extracts or imported decorations needed. I spent under $8 on ingredients for a full batch, and that included the food coloring.
- Quick & Easy: From start to finish, these come together in about 45 minutes. The batter takes ten minutes to mix, and the frosting is a simple five-minute whip. Perfect for a school night baking session with the kids.
- Picky Eater Approved: My nephew refuses to eat anything that “looks weird,” but he devoured two of these. The chocolate flavor is mild and familiar, so even kids who are suspicious of black food will go for it.
- Perfect for Halloween Parties: Whether it’s a classroom treat, a neighborhood gathering, or just a fun family activity, these cupcakes are the star of the show. They look dramatic without being scary.
- Leftovers Reheat Beautifully: I know, I know—cupcakes aren’t usually leftovers. But if you have any (unlikely), they stay moist in an airtight container for three days. The frosting holds its shape perfectly.
What makes this recipe different from every other black velvet cupcake out there? It’s the buttermilk. I tried versions with vinegar, with lemon juice, with sour cream—nothing gave me that tender, melt-in-your-mouth texture like real buttermilk. And the orange frosting? I use a combination of butter and cream cheese for stability, so it pipes beautifully without being too sweet. This isn’t just another Halloween cupcake recipe. It’s the one you’ll come back to year after year.
What Ingredients You Will Need
This recipe uses simple, everyday ingredients to create something that looks like it came from a professional bakery. The magic is in the combination, not in hard-to-find items.
For the Black Velvet Cupcakes
- All-purpose flour, 1 ½ cups (190g) – spoon and level it for accuracy. I use King Arthur Flour for consistent results.
- Granulated sugar, 1 cup (200g) – regular white sugar works best here. Don’t substitute brown sugar; it changes the color.
- Unsweetened cocoa powder, ¼ cup (22g) – I prefer Hershey’s Special Dark for a deeper black color, but any brand works.
- Baking soda, 1 teaspoon – make sure it’s fresh. Test it by dropping a pinch into vinegar; it should fizz immediately.
- Salt, ½ teaspoon – fine table salt dissolves better than coarse kosher salt in this recipe.
- Buttermilk, ½ cup (120ml) – full-fat is best for moisture. If you don’t have buttermilk, add 1 ½ teaspoons of lemon juice to regular milk and let it sit for 5 minutes.
- Vegetable oil, ½ cup (120ml) – use a neutral oil like canola or grapeseed. Olive oil will overpower the chocolate flavor.
- Large eggs, 2, room temperature – cold eggs can make the batter seize up. Leave them on the counter for 30 minutes before starting.
- Vanilla extract, 1 teaspoon – pure vanilla is worth the splurge here. Imitation vanilla has a chemical aftertaste.
- White vinegar, 1 teaspoon – this reacts with the baking soda to create lift. Don’t skip it.
- Black gel food coloring, 2-3 tablespoons – liquid food coloring won’t give you a true black. I use AmeriColor Super Black. Start with 2 tablespoons and add more if needed.
For the Orange Frosting
- Unsalted butter, ½ cup (113g), softened – let it sit out for at least an hour. Cold butter makes lumpy frosting.
- Cream cheese, 4 oz (113g), softened – full-fat block cream cheese, not the spreadable kind in a tub. Philadelphia is my go-to.
- Powdered sugar, 3 cups (360g) – sift it if it’s clumpy. No one wants lumpy frosting.
- Orange extract, 1 teaspoon – this is key for that real orange flavor. Orange juice will make the frosting too thin.
- Orange gel food coloring, 8-10 drops – use gel, not liquid, for a vibrant color without thinning the frosting.
- Heavy cream, 2-3 tablespoons – add slowly until you reach the desired consistency. You might not need all of it.
For Decoration (Optional)
- Halloween sprinkles – any shape works. I use a mix of orange stars and black bats.
- Edible glitter – orange or gold adds a fun sparkle that kids love.
Equipment Needed
You don’t need a professional bakery setup for these Kid-Approved Black Velvet Halloween Cupcakes with Orange Frosting. Here’s what I use, along with some budget-friendly alternatives.
- Standard 12-cup muffin tin – I’ve had my Wilton one for eight years. If you only have a 6-cup tin, just bake in batches and let the batter rest at room temperature.
- Paper cupcake liners – use black or orange liners for extra Halloween flair. I learned the hard way that white liners look gray after baking. Not cute.
- Electric hand mixer or stand mixer – a hand mixer works perfectly for the frosting. I’ve made the batter by hand with a whisk before, and it’s doable but takes elbow grease.
- Large mixing bowls – one for dry ingredients, one for wet. Glass or stainless steel is fine.
- Piping bag with star tip – I use a Wilton 1M tip for that classic rosette look. A zip-top bag with the corner snipped off works in a pinch.
- Cooling rack – necessary for even cooling. If you don’t have one, let the cupcakes cool in the pan for 5 minutes, then transfer them to a plate.
- Measuring cups and spoons – accuracy matters in baking. I keep a separate set just for dry ingredients to avoid cross-contamination.
My personal tip? Invest in a good piping bag. I ruined two batches of frosting with cheap bags that split at the seam. A reusable silicone bag costs about $8 and lasts forever.
Preparation Method
Alright, let’s make some magic happen. I’ve broken this down into simple steps so you can follow along without any stress. Trust me, if I can nail this after twelve attempts, you can nail it on your first try.
Step 1: Preheat and Prep
Preheat your oven to 350°F (175°C). Line your muffin tin with black or orange cupcake liners. This is non-negotiable—the liners help the cupcakes hold their shape and make cleanup a breeze. Set the tin aside.
Step 2: Mix the Dry Ingredients
In a large bowl, whisk together the flour, sugar, cocoa powder, baking soda, and salt. Make sure there are no lumps. I use a wire whisk and go at it for about 30 seconds. The cocoa powder tends to clump, so break those up with your fingers if needed.
Step 3: Combine the Wet Ingredients
In a separate bowl, whisk together the buttermilk, vegetable oil, eggs, vanilla extract, and white vinegar. Whisk until the eggs are fully incorporated and the mixture looks smooth. This should take about a minute.
Step 4: Add the Black Food Coloring
Here’s where it gets fun. Add 2 tablespoons of black gel food coloring to the wet ingredients and whisk until the color is evenly distributed. The mixture will look dark gray at this point. Don’t panic—it will darken after baking. If you want a deeper black, add another tablespoon. I usually use 2 ½ tablespoons for that “midnight” look.
Step 5: Combine Wet and Dry
Pour the wet ingredients into the dry ingredients and stir with a spatula until just combined. Do not overmix. You want to see a few streaks of flour remaining. Overmixing develops gluten and makes the cupcakes tough. Fold gently, about 15 strokes total.
Step 6: Let the Batter Rest
This is the step I learned from batch number eight. Let the batter sit at room temperature for 10 minutes. This allows the flour to fully hydrate and the baking soda to start reacting. The batter will thicken slightly and become glossy. Trust me on this one.
Step 7: Fill the Liners
Use a cookie scoop or a spoon to divide the batter evenly among the 12 liners. Fill each liner about ⅔ full. Don’t overfill, or the cupcakes will dome too much and crack. I use a 2-tablespoon scoop for perfect portions.
Step 8: Bake
Bake for 18-20 minutes, or until a toothpick inserted into the center of a cupcake comes out clean or with a few moist crumbs. My oven runs hot, so I check at 16 minutes. The cupcakes should spring back when lightly touched. Let them cool in the pan for 5 minutes, then transfer to a wire rack to cool completely. This is important—if you frost them while they’re warm, the frosting will melt into a sad puddle.
Step 9: Make the Orange Frosting
While the cupcakes are cooling, make the frosting. In a large bowl, beat the softened butter and cream cheese together with an electric mixer on medium speed until smooth and creamy, about 2 minutes. Scrape down the sides of the bowl. Add the powdered sugar one cup at a time, beating on low speed after each addition to avoid a sugar cloud. Add the orange extract and orange gel food coloring, then beat on medium-high speed for 2 minutes until light and fluffy. Add heavy cream one tablespoon at a time until you reach a pipeable consistency. The frosting should hold its shape when you lift the beaters.
Step 10: Frost and Decorate
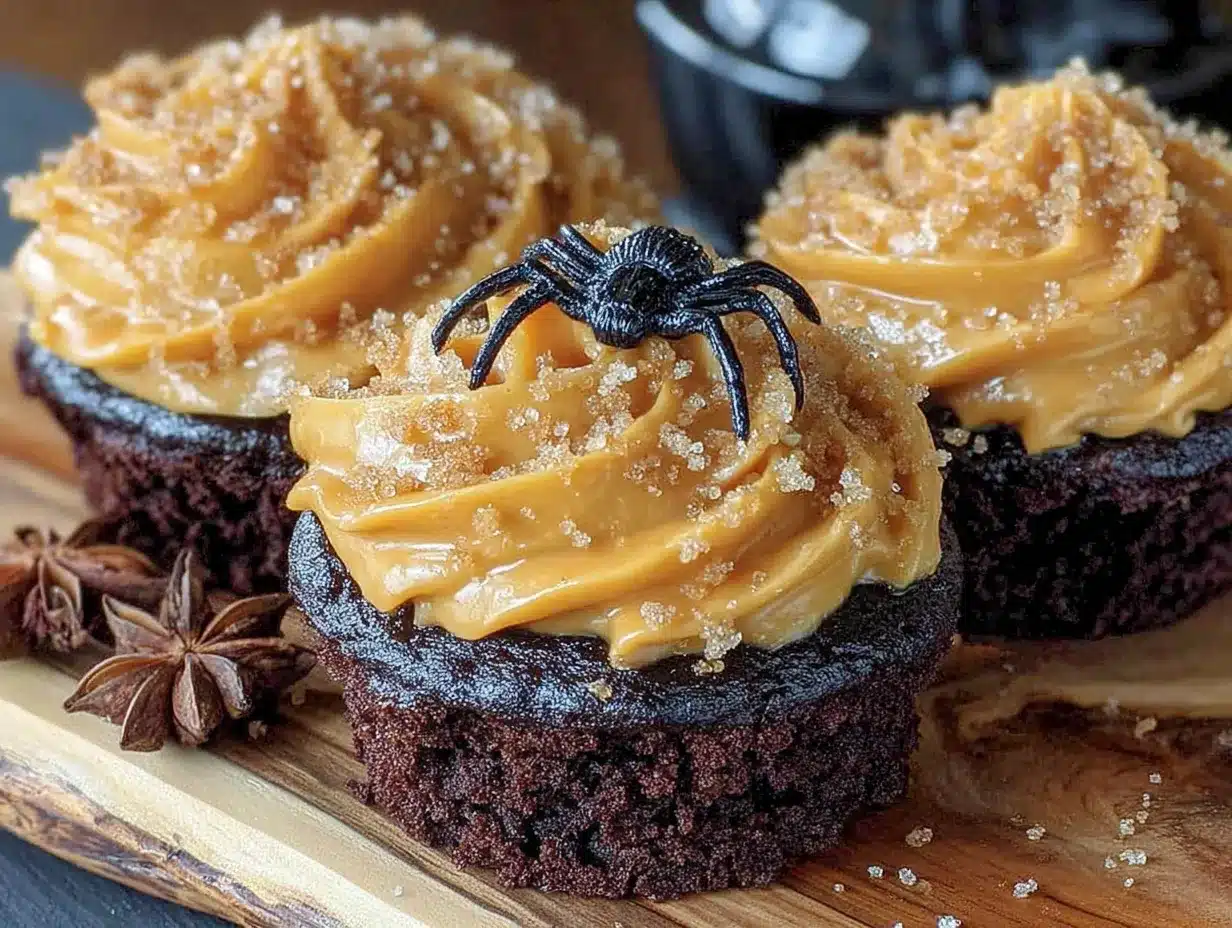
Transfer the frosting to a piping bag fitted with a star tip. Pipe a rosette onto each cooled cupcake, starting from the center and working outward in a spiral. Top with Halloween sprinkles and a dusting of edible glitter if you’re feeling fancy. Serve immediately or store in an airtight container.
Cooking Tips & Techniques
I’ve made every mistake in the book so you don’t have to. Here are the lessons I learned the hard way.
Don’t skip the vinegar. I know it sounds weird, but the white vinegar reacts with the baking soda to create carbon dioxide bubbles that make the cupcakes light and fluffy. I forgot it once, and the cupcakes came out flat and dense. Never again.
Use gel food coloring, not liquid. Liquid food coloring will throw off the liquid balance of your batter and give you a muddy gray color instead of true black. Gel coloring is concentrated, so you use less and get better results. I buy mine online in bulk—it lasts forever.
Room temperature ingredients matter. Cold eggs and cold buttermilk can make your batter lumpy and prevent the baking soda from activating properly. Set everything out on the counter 30 minutes before you start. I set a timer on my phone so I don’t forget.
Don’t overmix the batter. This is the number one mistake home bakers make. Mix until the flour is just incorporated, then stop. Overmixing develops gluten, which makes cupcakes tough and rubbery. You want them tender and soft.
Let the cupcakes cool completely. I know it’s tempting to frost them while they’re still warm, but patience pays off. Warm cupcakes will turn your beautiful orange frosting into a melted mess. I usually make the cupcakes the night before and frost them the next day.
Toast the sprinkles for extra crunch. This is a weird tip, but hear me out. Spread your Halloween sprinkles on a baking sheet and toast them at 300°F (150°C) for 3 minutes. They become extra crunchy and don’t get soggy on the frosting. My kids think I’m a genius.
Variations & Adaptations
One of the best things about this recipe is how adaptable it is. Here are some variations I’ve tried and loved.
Gluten-Free Version: Substitute the all-purpose flour with a 1:1 gluten-free baking flour blend. I use Bob’s Red Mill. Add an extra tablespoon of buttermilk to compensate for the drier texture. The cupcakes will be slightly denser but still delicious.
Dairy-Free Version: Use almond milk mixed with 1 ½ teaspoons of lemon juice instead of buttermilk, and substitute the butter and cream cheese in the frosting with dairy-free alternatives. Miyoko’s brand works really well. The frosting won’t be as stable, so pipe it right before serving.
Purple Velvet Cupcakes: Swap the black food coloring for purple gel coloring. This is a fun alternative for kids who think black is “too scary.” My daughter requested these for her birthday party last year. Use about 15 drops of purple gel for a vibrant color.
Chocolate Orange Frosting: Add 2 tablespoons of unsweetened cocoa powder to the frosting along with the orange extract. It gives a subtle chocolate-orange flavor that’s absolutely divine. Think Terry’s Chocolate Orange in cupcake form.
Mini Cupcakes: Use a mini muffin tin and bake for 10-12 minutes instead of 18-20. This yields about 36 mini cupcakes, perfect for classroom parties or snack bags. The frosting recipe makes enough for all of them.
Spider Web Decoration: Pipe the orange frosting in a spiral, then use a toothpick to drag lines from the center outward to create a spider web effect. It takes an extra 30 seconds per cupcake and looks incredibly impressive.
Serving & Storage Suggestions
These Kid-Approved Black Velvet Halloween Cupcakes with Orange Frosting are best served at room temperature. The frosting is soft and creamy, and the cake is tender and moist. If you’ve refrigerated them, let them sit out for 20 minutes before serving.
For a Halloween party spread, arrange the cupcakes on a black platter or a wooden board. Add some fake spider webs and plastic spiders around the edges for a spooky vibe. I like to serve them alongside a pitcher of orange punch or warm apple cider.
To store leftovers (if you have any), place the cupcakes in an airtight container in a single layer. If you need to stack them, put a sheet of parchment paper between the layers to prevent the frosting from sticking. They’ll stay fresh at room temperature for up to 3 days, or in the refrigerator for up to 5 days.
For longer storage, freeze the unfrosted cupcakes. Wrap each one tightly in plastic wrap, then place them in a freezer-safe bag. They’ll keep for up to 3 months. When you’re ready to serve, thaw them at room temperature for 2 hours, then frost and decorate. The frosting can also be frozen in a piping bag for up to 2 months. Just thaw it in the refrigerator overnight and re-whip it before using.
One thing I love about these cupcakes is that the flavors actually develop overnight. The chocolate becomes more pronounced, and the orange frosting mellows out. If you can plan ahead, make them a day in advance for the best flavor.
Nutritional Information & Benefits
Let’s be honest—these are a treat, not a health food. But that doesn’t mean they can’t fit into a balanced lifestyle. Here’s the estimated nutritional breakdown per cupcake (based on 12 servings):
| Nutrient | Amount |
|---|---|
| Calories | 345 |
| Total Fat | 18g |
| Saturated Fat | 8g |
| Carbohydrates | 44g |
| Sugar | 33g |
| Protein | 4g |
| Fiber | 1g |
The good news? Cocoa powder is rich in antioxidants called flavonoids, which can help reduce inflammation. Buttermilk adds calcium and probiotics for gut health. And the cream cheese in the frosting provides a small amount of protein and vitamin A. Are these a superfood? No. But they’re a fun, occasional treat that brings joy to Halloween celebrations.
For those with dietary concerns, this recipe contains gluten, dairy, and eggs. The gluten-free and dairy-free variations I mentioned earlier work beautifully. If you’re watching your sugar intake, you can reduce the sugar in the frosting by ½ cup, but the texture will be slightly less stable.
Conclusion
Here’s the thing about chasing a recipe from a closed bakery—it’s not really about the cupcakes. It’s about the memory of standing in that tiny shop with your kids, watching their eyes go wide when they saw the black velvet cupcakes with orange frosting. It’s about the way the lady with the sparkly glasses would always give them an extra sprinkle on top. And when you finally recreate that moment in your own kitchen, with your own kids gathered around the counter, it feels like you’ve brought a little piece of magic back into the world.
These Kid-Approved Black Velvet Halloween Cupcakes with Orange Frosting are more than just a recipe. They’re a tradition waiting to happen. Whether you make them for a school party, a family gathering, or just a random Tuesday in October, I promise they’ll bring smiles. My kids have already requested them for every Halloween from now until they leave for college.
So go ahead—preheat that oven, dig out your piping bag, and make some memories. And when you do, I’d love to hear about it. Drop a comment below and tell me how your batch turned out. Did your kids love them? Did you try a fun variation? Share a photo on social media and tag me—I can’t wait to see your creations. Happy Halloween, and happy baking!
Frequently Asked Questions
Can I use liquid food coloring instead of gel?
Technically yes, but I don’t recommend it. Liquid food coloring will make the batter too thin, and you’ll need a lot of it to get a true black color, which can affect the taste. Gel food coloring is more concentrated and gives better results with less product. It’s worth the extra dollar or two.
Why did my cupcakes turn out gray instead of black?
This usually happens for one of three reasons: you didn’t use enough food coloring, you used liquid coloring instead of gel, or your cocoa powder wasn’t dark enough. I recommend using a dark cocoa powder like Hershey’s Special Dark and starting with 2 tablespoons of black gel coloring. You can always add more.
Can I make these cupcakes ahead of time for a party?
Absolutely. You can bake the cupcakes up to 3 days in advance and store them in an airtight container at room temperature. Make the frosting up to 2 days ahead and keep it in the refrigerator. When you’re ready to serve, let the frosting come to room temperature, re-whip it for 30 seconds, then frost the cupcakes. This actually makes the process less stressful on party day.
My frosting turned out too thin. How do I fix it?
If your orange frosting is too runny, it’s usually because the butter or cream cheese was too soft, or you added too much heavy cream. To fix it, add more powdered sugar one tablespoon at a time until the frosting thickens up. If it’s still too thin, pop the bowl in the refrigerator for 15 minutes, then re-whip. That usually does the trick.
Can I freeze these cupcakes with the frosting on?
I don’t recommend it. The frosting can become grainy and lose its texture after freezing and thawing. If you want to freeze them, freeze the unfrosted cupcakes and make the frosting fresh when you’re ready to serve. The unfrosted cupcakes freeze beautifully for up to 3 months.
Pin This Recipe!
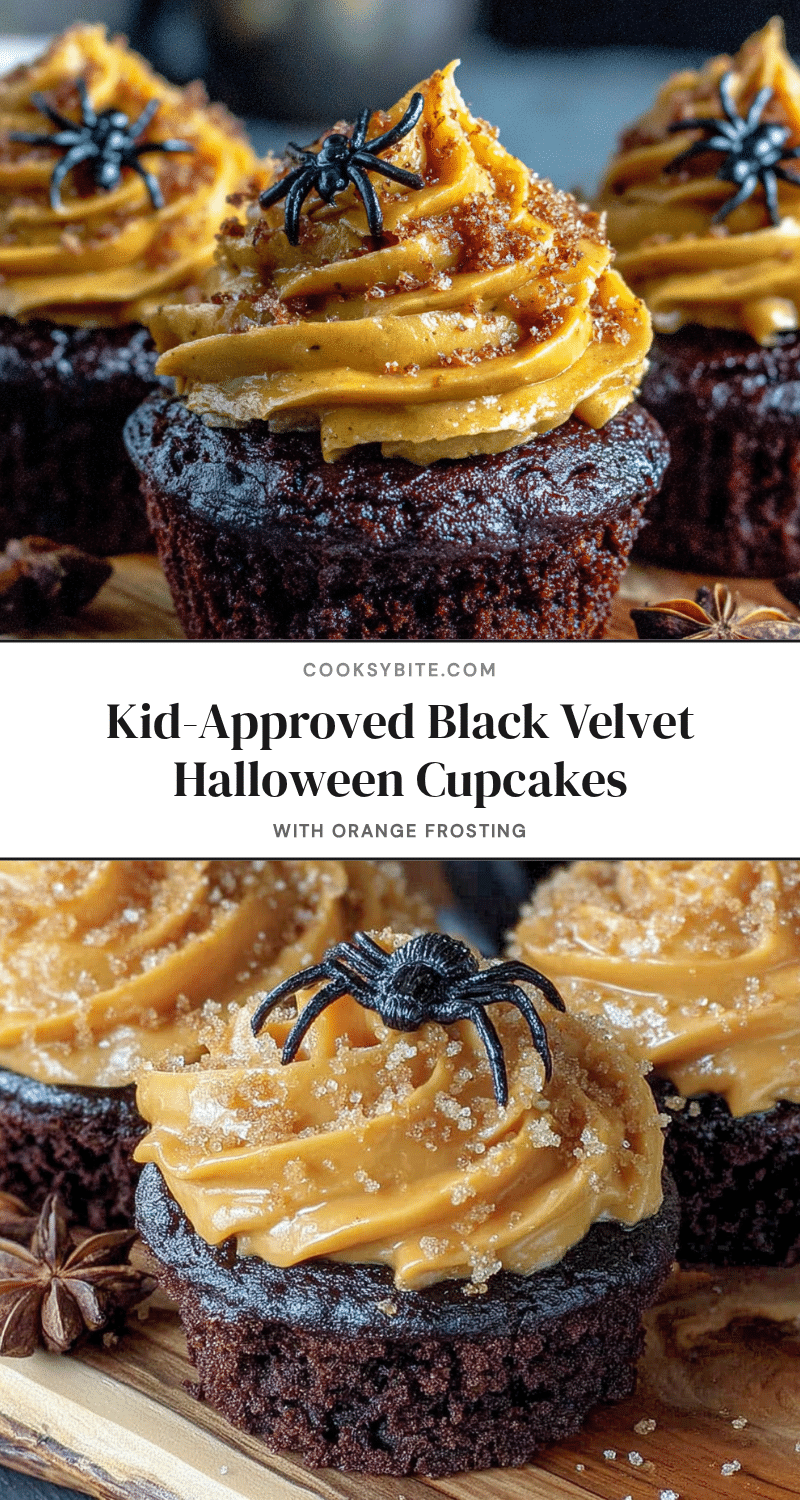
Kid-Approved Black Velvet Cupcakes: Best Halloween Treat
These impossibly moist black velvet cupcakes with creamy orange frosting taste like a Halloween dream. After twelve attempts, this recipe recreates the magic of a beloved closed bakery, using simple ingredients for a dramatic, kid-approved treat.
- Prep Time: 15 minutes
- Cook Time: 20 minutes
- Total Time: 45 minutes
- Yield: 12 servings 1x
- Category: Dessert
- Cuisine: American
Ingredients
- 1 ½ cups (190g) all-purpose flour
- 1 cup (200g) granulated sugar
- ¼ cup (22g) unsweetened cocoa powder
- 1 teaspoon baking soda
- ½ teaspoon salt
- ½ cup (120ml) buttermilk
- ½ cup (120ml) vegetable oil
- 2 large eggs, room temperature
- 1 teaspoon vanilla extract
- 1 teaspoon white vinegar
- 2–3 tablespoons black gel food coloring
- ½ cup (113g) unsalted butter, softened
- 4 oz (113g) cream cheese, softened
- 3 cups (360g) powdered sugar
- 1 teaspoon orange extract
- 8–10 drops orange gel food coloring
- 2–3 tablespoons heavy cream
- Halloween sprinkles (optional)
- Edible glitter (optional)
Instructions
- Preheat oven to 350°F (175°C). Line a 12-cup muffin tin with black or orange cupcake liners.
- In a large bowl, whisk together flour, sugar, cocoa powder, baking soda, and salt until no lumps remain.
- In a separate bowl, whisk together buttermilk, vegetable oil, eggs, vanilla extract, and white vinegar until smooth.
- Add 2 tablespoons black gel food coloring to the wet ingredients and whisk until evenly distributed. Add more if desired.
- Pour wet ingredients into dry ingredients and stir with a spatula until just combined (about 15 strokes). Do not overmix.
- Let the batter rest at room temperature for 10 minutes.
- Divide batter evenly among the 12 liners, filling each about ⅔ full.
- Bake for 18-20 minutes, or until a toothpick inserted in the center comes out clean or with a few moist crumbs. Cool in pan for 5 minutes, then transfer to a wire rack to cool completely.
- For the frosting: In a large bowl, beat softened butter and cream cheese with an electric mixer on medium speed until smooth and creamy, about 2 minutes. Scrape down sides.
- Add powdered sugar one cup at a time, beating on low after each addition. Add orange extract and orange gel food coloring, then beat on medium-high for 2 minutes until light and fluffy.
- Add heavy cream one tablespoon at a time until pipeable consistency is reached.
- Transfer frosting to a piping bag fitted with a star tip. Pipe a rosette onto each cooled cupcake. Top with sprinkles and edible glitter if desired.
Notes
Don’t skip the vinegar; it reacts with baking soda for lift. Use gel food coloring, not liquid. Room temperature ingredients are crucial. Let cupcakes cool completely before frosting. For extra crunch, toast sprinkles at 300°F for 3 minutes. Unfrosted cupcakes can be frozen for up to 3 months.
Nutrition
- Serving Size: 1 cupcake
- Calories: 345
- Sugar: 33
- Fat: 18
- Saturated Fat: 8
- Carbohydrates: 44
- Fiber: 1
- Protein: 4
Keywords: black velvet cupcakes, Halloween cupcakes, orange frosting, kid-friendly, chocolate cupcakes, Halloween dessert, black cupcakes, orange cream cheese frosting


