My sister’s voice came through the phone, full of surprise and just a hint of amusement. Honestly, I hadn’t thought of sugar cookies as a school-year kickoff treat until that very moment. But here I was, surrounded by flour dust and colorful icing tubes, turning a simple recipe into something that felt like a mini celebration for that first morning jitters bring.
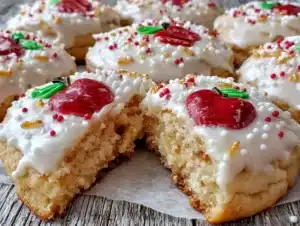
It’s funny how a batch of perfect frosted back to school sugar cookies with cute decorations can turn a hectic morning into a bright spot. The smell of vanilla and butter baking in the oven, the soft clink of cookie cutters against the dough, and the splash of red, green, and yellow icing piped onto tiny apple shapes made that chaotic week feel a little softer.
I remember one cookie in particular — a tiny book with pages outlined in white icing and a little red apple on the corner. It wasn’t just cute; it felt like a little good luck charm. And as I packed them into a tin, ready for the kids to take to school, I realized these cookies weren’t just about sugar and sprinkles. They were about creating moments, calm in the back-to-school storm.
This recipe stuck with me because it brings that calm and fun to the kitchen, even if you’re not exactly a pro decorator. It’s approachable, colorful, and, well, honestly pretty addictive. So if you’ve been wondering how to make back to school sugar cookies that look as good as they taste, you’re in the right place.
Why You’ll Love This Recipe
Making these perfect frosted back to school sugar cookies isn’t just about baking — it’s about creating something that feels special without stress. I’ve tested these cookies multiple times, tweaking the dough for the softest bite and the icing for that just-right sweetness and smooth finish. Here’s why you’ll want to give this recipe a try:
- Quick & Easy: The dough comes together in about 15 minutes, and you can bake a batch in under 30 minutes — perfect for busy mornings or last-minute school celebrations.
- Simple Ingredients: Pantry staples like butter, sugar, and flour keep this recipe fuss-free. No need for fancy or hard-to-find items.
- Perfect for Back to School: These cookies make a fun lunchbox surprise or a cute after-school snack that kids and parents both appreciate.
- Crowd-Pleaser: The soft texture and sweet, smooth frosting always get rave reviews — I’ve even caught grown-ups sneaking a few before the kids get home!
- Unbelievably Delicious: The balance of buttery cookie and creamy frosting is just right — not too sweet, not too plain. Plus, the cute decorations add that extra smile-inducing charm.
What sets this recipe apart is the frosting technique — I blend a touch of cream cheese with powdered sugar for an ultra-smooth, tangy finish that holds up well, even on busy school days. Plus, the sugar cookie dough is designed to keep its shape perfectly during baking, so your cute decorations stay neat and vibrant.
These aren’t just cookies; they’re a little slice of joy that turns the first day of school into something to look forward to. And honestly, once you’ve made these, you’ll find yourself wanting to keep the tradition going year after year.
What Ingredients You Will Need
This recipe uses simple, wholesome ingredients to deliver bold flavor and satisfying texture without the fuss. Most of these are pantry staples, so no extra grocery run necessary — just a bit of prep and some creativity with your decorations.
- For the Sugar Cookie Dough:
- 2 ¾ cups (345g) all-purpose flour – I prefer King Arthur for consistent results
- 1 teaspoon baking powder
- ½ teaspoon salt
- 1 cup (227g) unsalted butter, softened – room temp for easy creaming
- 1 ½ cups (300g) granulated sugar
- 1 large egg, room temperature
- 2 teaspoons pure vanilla extract
- Optional: 1 tablespoon whole milk (helps with dough pliability)
- For the Frosting:
- 4 ounces (115g) cream cheese, softened – adds a subtle tang and rich texture
- ½ cup (113g) unsalted butter, softened
- 3 cups (360g) powdered sugar, sifted
- 1 teaspoon vanilla extract
- 1–2 tablespoons milk or heavy cream, as needed for consistency
- For Decoration:
- Food coloring gels – I like AmeriColor for vibrant hues
- Sprinkles, edible markers, and small piping tips for detailing
Feel free to swap all-purpose flour with a gluten-free blend if needed. For a dairy-free version, substitute the cream cheese and butter with plant-based alternatives — just note the texture will be slightly different but still delicious.
In summer, I sometimes add a hint of lemon zest to the dough for a fresh twist, but for back to school, the classic vanilla and buttery flavor hits just right.
Equipment Needed
- Mixing bowls – one large for dough, one medium for frosting
- Electric mixer (handheld or stand) – makes creaming butter and sugar a breeze
- Measuring cups and spoons – precise measurements make all the difference here
- Rolling pin – essential for even cookie thickness
- Cookie cutters – I use a mix of apples, pencils, and book shapes to match the theme
- Baking sheets lined with parchment paper or silicone mats
- Wire cooling racks – to cool cookies completely before frosting
- Piping bags and a variety of small round and star tips for decoration
If you don’t have piping bags, you can use resealable plastic bags with a tiny corner snipped off. For cookie cutters, if you’re in a pinch, you can carefully use a knife to cut shapes freehand — but the cutters really speed things up.
Pro tip: Keep your rolling pin and cookie cutters lightly dusted with flour to prevent sticking. And if you’re like me, a silicone baking mat is worth every penny — no greasing, easy cleanup, and even baking.
Preparation Method
- Mix Dry Ingredients (5 minutes): In a medium bowl, whisk together 2 ¾ cups flour, 1 teaspoon baking powder, and ½ teaspoon salt. Set aside.
- Cream Butter and Sugar (7 minutes): Using your mixer, beat 1 cup softened butter and 1 ½ cups sugar on medium speed until light and fluffy — about 3 to 4 minutes. Don’t rush this step; it’s key for tender cookies.
- Add Egg and Vanilla (2 minutes): Beat in 1 large egg and 2 teaspoons vanilla extract until just combined.
- Combine Dry and Wet (3 minutes): Gradually add the dry ingredients to the wet mixture, mixing on low until incorporated. If the dough feels dry, add 1 tablespoon milk. The dough should be soft but not sticky.
- Chill Dough (30-60 minutes): Wrap dough in plastic and chill. This step helps cookies hold their shape during baking and makes rolling easier.
- Preheat Oven and Prepare Baking Sheets (5 minutes): Preheat oven to 350°F (175°C). Line baking sheets with parchment paper or silicone mats.
- Roll and Cut Dough (15-20 minutes): On a floured surface, roll out dough to about ¼-inch (6mm) thickness. Use your back to school themed cookie cutters to cut shapes. Transfer cookies to baking sheets, spaced about 1 inch apart.
- Bake (10-12 minutes): Bake until edges are just starting to turn golden but centers remain pale. This keeps the cookies soft and tender.
- Cool Completely (at least 30 minutes): Transfer cookies to wire racks to cool before frosting. If frosting warm cookies, the icing will melt and lose shape.
- Prepare Frosting (10 minutes): Beat 4 ounces cream cheese and ½ cup butter until creamy. Gradually add 3 cups powdered sugar and 1 teaspoon vanilla. Add milk or cream a tablespoon at a time until you reach spreadable consistency.
- Color and Decorate (time varies): Divide frosting into bowls, add food coloring gels as desired. Using piping bags, decorate cookies with fun back-to-school themes — apples, pencils, books, or just colorful swirls and sprinkles. Let frosting set for 1 hour before storing or packing.
Common hiccup: If your dough feels too sticky after chilling, dust your rolling surface and rolling pin with a bit more flour. Too dry? A splash of milk helps without making the dough soggy.
Personal tip: I like to frost half the batch with plain white and the other half in bright colors. It gives the kids choices and keeps the decorating fun.
Cooking Tips & Techniques
There’s a little art to getting those sugar cookies just right. Here’s what I’ve learned from baking these treats over several school years:
- Don’t overmix the dough: Once the flour goes in, mix just until combined. Overworking develops gluten, making cookies tough instead of soft and tender.
- Chill for shape: Chilling the dough is crucial. It prevents cookies from spreading too thin and losing the cute shapes you worked so hard to cut out.
- Watch your oven: Oven temperatures vary. Keep an eye on the first batch, and pull cookies out as soon as edges are slightly golden, centers will still look soft.
- Frosting consistency: For piping details, your frosting should be thick but spreadable. Add milk sparingly — too thin and your designs won’t hold.
- Practice makes perfect: Don’t stress over perfect decorations. Sometimes the cutest cookies are the ones with a little kid-scribble charm. I’ve made more than a few “imperfect” batches that were the biggest hit!
- Multitasking tip: While cookies cool, prepare your frosting and colors — it saves time and keeps the flow going.
Variations & Adaptations
This recipe is a great base for all sorts of fun twists. Here are a few ways I’ve mixed things up or adapted it for different needs:
- Gluten-free: Swap all-purpose flour with a 1-to-1 gluten-free baking flour blend. The texture might be a touch more crumbly but still tasty and perfect for decorated cookies.
- Vegan-friendly: Use vegan butter and substitute the egg with a flaxseed egg (1 tbsp ground flaxseed + 3 tbsp water, rested). Use dairy-free cream cheese and plant milk for frosting.
- Flavor twists: Add a teaspoon of almond extract instead of vanilla for a different but delicious profile. Or mix in a tablespoon of cocoa powder for chocolate sugar cookies.
- Decorating styles: Instead of frosting, try royal icing for that classic crisp finish. Or keep it simple with just sprinkles and colored sugar.
- Seasonal swaps: For a fall feel, decorate with tiny leaves or pumpkins instead of school supplies — same dough, new vibe.
One year I tried piping little chalkboard designs with edible markers — it was a hit, though a bit time-consuming. But hey, that’s what makes the back to school baking so much fun, right?
Serving & Storage Suggestions
These frosted sugar cookies are best served at room temperature. The frosting is creamy and soft, so chilling right before serving can make it a bit firmer and less sweet.
They’re perfect on their own but also pair nicely with a glass of cold milk or a warm cup of tea or coffee. For a fun lunchbox treat, pack them alongside a fresh fruit cup or a little note for an extra smile.
Store cookies in an airtight container at room temperature for up to 3 days. If you want to keep them longer, they freeze beautifully — just layer with parchment paper between cookies and thaw at room temperature before serving.
Reheating isn’t necessary, but if you prefer a soft, just-baked feel, pop them in a 300°F (150°C) oven for 3-5 minutes. Be careful not to melt the frosting!
Over time, the flavors mellow and blend nicely, so if you prepare a batch in advance, the cookies actually taste even better after a day or two. Just keep them well sealed.
Nutritional Information & Benefits
On average, one frosted sugar cookie contains approximately 180-220 calories, depending on the size and amount of frosting. They have about 9 grams of fat, 25 grams of carbohydrates, and 2 grams of protein.
While sugar cookies are an indulgence, this recipe uses real butter and cream cheese, which provide a bit of calcium and vitamin A. Using real vanilla extract adds flavor without artificial ingredients.
This recipe can be adapted for dietary needs, like gluten-free or vegan, making it accessible for more people to enjoy. Just remember, these are a treat — perfect for special moments like the first day back to school.
From a wellness perspective, I believe treats like this have a place in a balanced diet, especially when they bring joy and create memories. And honestly, nothing beats that warm, buttery bite after a long day.
Conclusion
These perfect frosted back to school sugar cookies with cute decorations are more than just a recipe — they’re a way to mark the start of a new chapter with sweetness and fun. Whether you’re a seasoned baker or just getting started, this recipe is forgiving, approachable, and rewarding.
Feel free to make it your own — swap colors, shapes, or flavors to match your family’s style. I love how these cookies bring a little sparkle to hectic mornings and an excuse to slow down and enjoy the moment.
Give them a try and let me know how your decorating went. I’m always excited to hear what creative twists you add or how these cookies fit into your back-to-school traditions. Here’s to a sweet year ahead!
FAQs
Can I make the sugar cookie dough ahead of time?
Absolutely! The dough can be made and refrigerated for up to 3 days or frozen for up to 3 months. Just thaw before rolling and cutting.
How do I prevent frosting from melting on warm cookies?
Make sure cookies are completely cooled before frosting. Warm cookies cause the frosting to soften and lose shape.
What’s the best way to get bright, vibrant frosting colors?
Use gel-based food coloring instead of liquid. Gels provide richer color without thinning your frosting.
Can I use this recipe for other occasions besides back to school?
Yes, the dough and frosting are versatile. Just change up the shapes and decorations for birthdays, holidays, or any celebration.
How do I store decorated sugar cookies to keep them fresh?
Store in an airtight container at room temperature for up to 3 days. For longer storage, freeze with parchment paper between layers.
Also, if you love treats with a similar sweet vibe, you might enjoy the delicious cherry chocolate brownies or the moist pink velvet bundt cake with creamy vanilla glaze—both perfect for satisfying those sweet cravings any time of year.
Pin This Recipe!
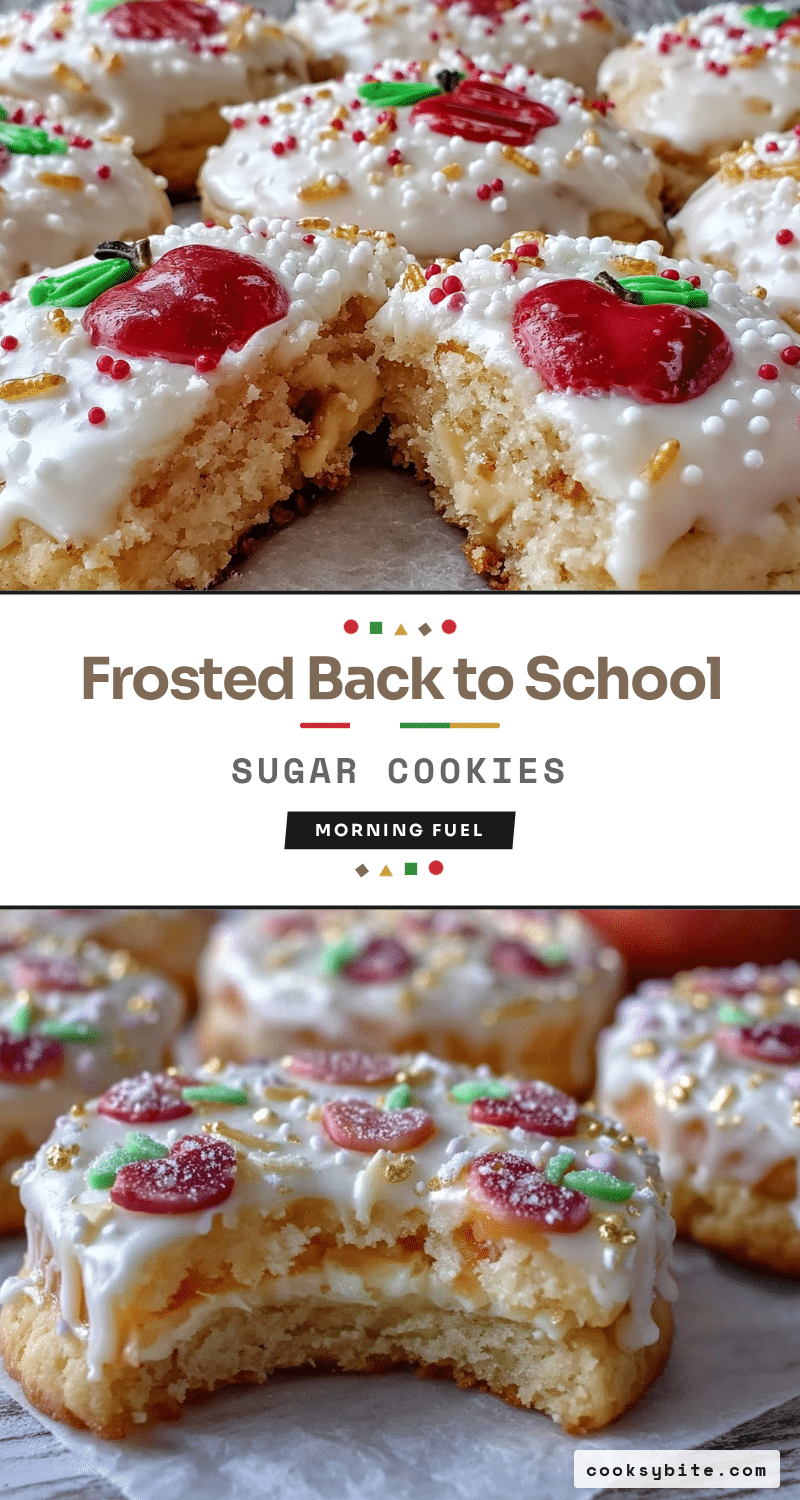
Perfect Frosted Back to School Sugar Cookies
These soft, buttery sugar cookies are decorated with smooth cream cheese frosting and colorful back-to-school themed designs, perfect for celebrating the start of the school year.
- Prep Time: 15 minutes
- Cook Time: 12 minutes
- Total Time: 1 hour 37 minutes
- Yield: 24 servings 1x
- Category: Dessert
- Cuisine: American
Ingredients
- 2 ¾ cups (345g) all-purpose flour
- 1 teaspoon baking powder
- ½ teaspoon salt
- 1 cup (227g) unsalted butter, softened
- 1 ½ cups (300g) granulated sugar
- 1 large egg, room temperature
- 2 teaspoons pure vanilla extract
- Optional: 1 tablespoon whole milk
- 4 ounces (115g) cream cheese, softened
- ½ cup (113g) unsalted butter, softened
- 3 cups (360g) powdered sugar, sifted
- 1 teaspoon vanilla extract
- 1–2 tablespoons milk or heavy cream
- Food coloring gels
- Sprinkles, edible markers, and small piping tips for decoration
Instructions
- Mix dry ingredients: whisk together flour, baking powder, and salt in a medium bowl.
- Cream butter and sugar: beat softened butter and sugar on medium speed until light and fluffy, about 3-4 minutes.
- Add egg and vanilla: beat in egg and vanilla extract until just combined.
- Combine dry and wet ingredients: gradually add dry ingredients to wet mixture, mixing on low until incorporated. Add milk if dough feels dry.
- Chill dough: wrap dough in plastic and chill for 30-60 minutes.
- Preheat oven to 350°F (175°C) and prepare baking sheets with parchment paper or silicone mats.
- Roll and cut dough: roll dough to ¼-inch thickness on floured surface, cut shapes with themed cookie cutters, and place on baking sheets about 1 inch apart.
- Bake cookies for 10-12 minutes until edges are slightly golden but centers remain pale.
- Cool cookies completely on wire racks before frosting.
- Prepare frosting: beat cream cheese and butter until creamy, gradually add powdered sugar and vanilla, then add milk or cream until spreadable.
- Color frosting with gels as desired and decorate cookies using piping bags and tips.
- Let frosting set for 1 hour before storing or packing.
Notes
Chill dough to prevent spreading and keep shapes. Use gel-based food coloring for vibrant frosting. Cool cookies completely before frosting to avoid melting. Store in airtight container at room temperature up to 3 days or freeze with parchment paper between layers.
Nutrition
- Serving Size: 1 cookie
- Calories: 200
- Sugar: 15
- Sodium: 100
- Fat: 9
- Saturated Fat: 5
- Carbohydrates: 25
- Protein: 2
Keywords: sugar cookies, back to school, frosted cookies, decorated cookies, easy sugar cookies, cream cheese frosting, kid-friendly dessert