“Are you brave enough to try the eyeball cheese balls?” my friend whispered as she handed me the tiniest, creepiest snack from her Halloween spread. Honestly, I was skeptical at first. I’d always thought Halloween food meant sugary chaos or last-minute store-bought junk. But that night changed everything. We’d decided to throw a last-minute get-together, and with little time and lots of enthusiasm, I threw together what I now call the perfect Halloween charcuterie board with spooky snacks.
The magic wasn’t just in the eerie shapes or the fun names; it was about surprising my guests with unexpected flavors wrapped in spooky creativity. There were gummy worms crawling through creamy dips, little “mummy” sausages wrapped in puff pastry, and dark olives masquerading as sinister eyeballs. It felt like a playful challenge to make something both delicious and hauntingly fun.
Since then, I’ve been obsessed with crafting this board, tweaking snacks and presentation to make it just right. It’s become my go-to for Halloween parties, and honestly, every time I set it out, I catch someone sneaking bites before the official start. It’s not just about the food—it’s that moment when spooky meets savory, and everyone’s smiles get a little wider. And if you trust me on this, your Halloween spread will be the talk of the night, too.
Why You’ll Love This Recipe
Putting together the perfect Halloween charcuterie board with spooky snacks is more than just a party trick—it’s a fun way to bring people together over food that’s both tasty and themed.
- Quick & Easy: The entire board comes together in under an hour, so no stressing on party day.
- Simple Ingredients: No need for specialty stores; most items are pantry staples or easily found at any grocery.
- Perfect for Halloween Parties: Whether it’s kids, adults, or that awkward mix, these snacks hit the right spooky note without being too scary or too plain.
- Crowd-Pleaser: I’ve hosted multiple gatherings where this board disappeared fast—kids love the fun shapes, adults appreciate the flavor combos.
- Unbelievably Delicious: From creamy cheeses to salty cured meats and sweet candied treats, the textures and flavors are a delight.
This isn’t just a collection of random snacks slapped together. There’s a bit of technique in balancing salty, sweet, crunchy, and creamy elements, and a playful twist in how each item looks. For example, making “spider web” cream cheese dip with a simple toothpick swirl adds that wow factor without the fuss. I’ve also found that layering colors—think black olives, bright orange cheese, and deep red meats—makes the board pop visually. And let’s be honest, it’s the kind of recipe that makes you close your eyes after the first bite and grin because it’s comfort food with a Halloween twist.
What Ingredients You Will Need
This recipe uses simple, wholesome ingredients to deliver bold flavor and satisfying texture without the fuss. You’ll find most of these in your pantry or local store, and substitutions are easy depending on your preferences.
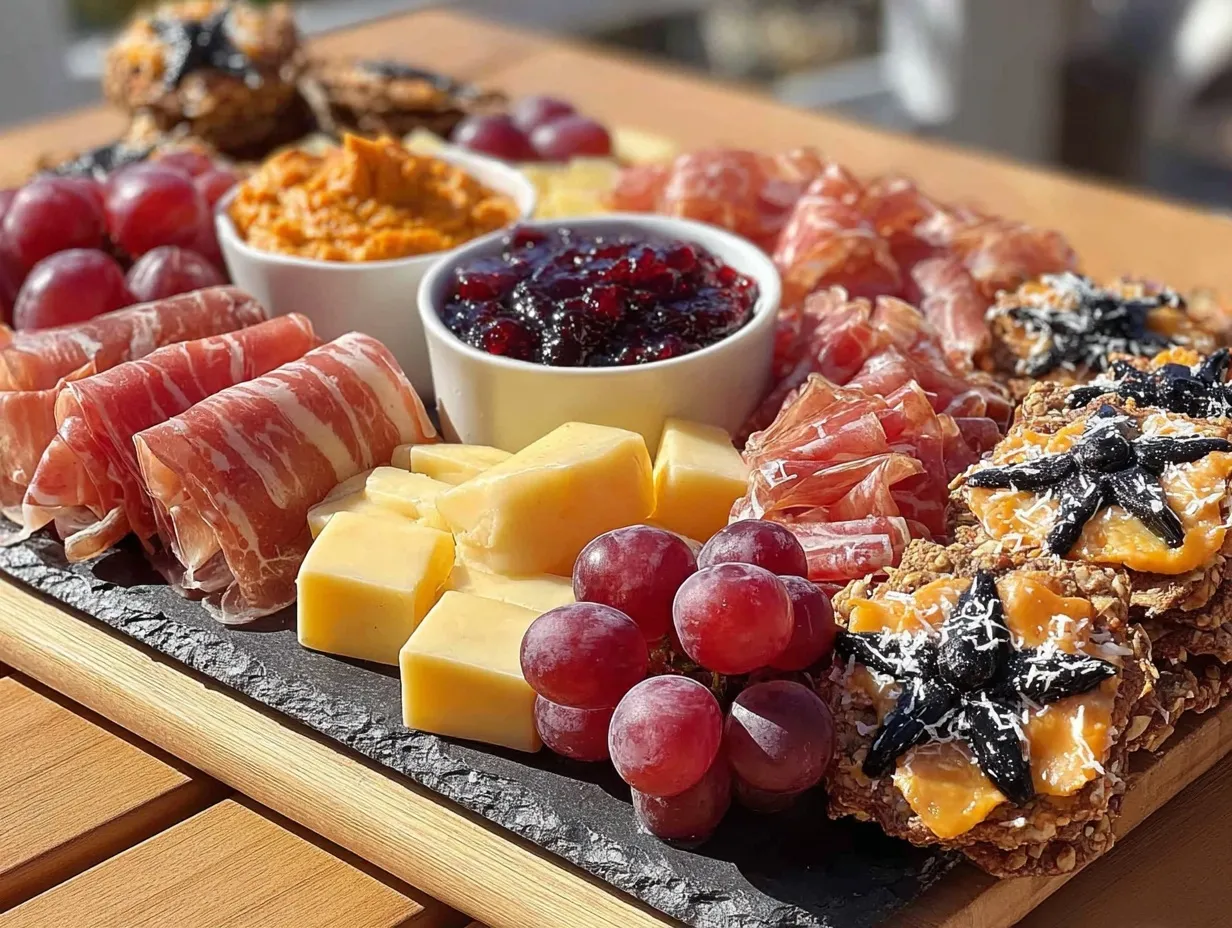
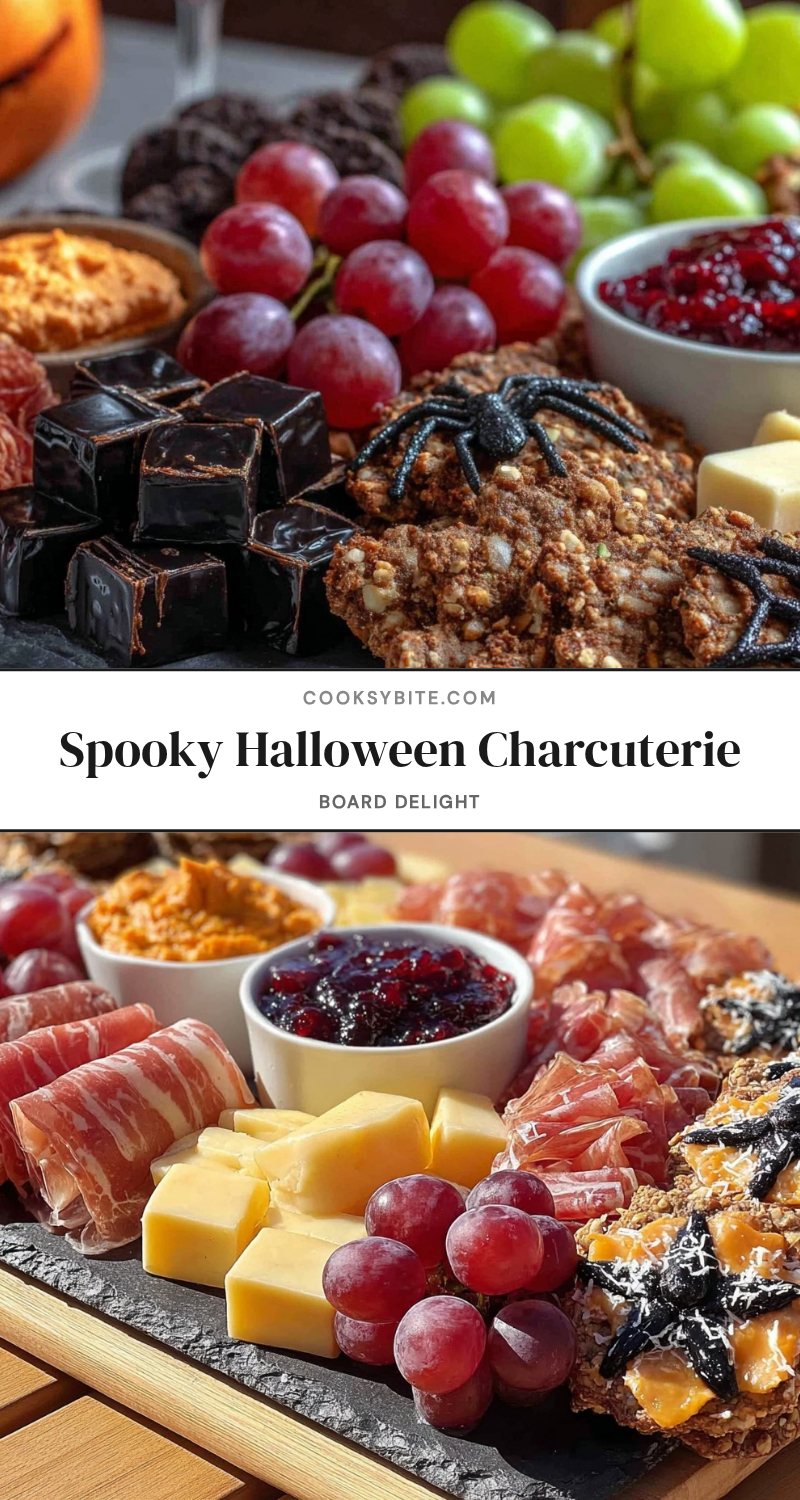
- Cured Meats: Sliced salami, pepperoni, and prosciutto (choose your favorite brands; I often use Applegate natural meats for quality and flavor).
- Cheeses:
- Sharp cheddar, cut into cubes or small triangles (for that bright orange pop)
- Black wax gouda or aged gouda (adds a deep color and smooth taste)
- Cream cheese for dips and “eyeball” cheese balls (use full-fat for best creaminess)
- Mozzarella balls (bocconcini) for “eyeballs” or “ghosts”
- Crackers & Bread: Variety of crackers (multigrain, water crackers) and sliced baguette (toasted)
- Fresh Produce:
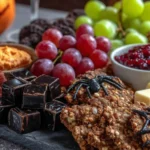
- Red grapes (for “witches’ fingers” or just color contrast)
- Celery sticks and baby carrots (great for dipping)
- Green and black olives (black olives are perfect for “eyeballs”)
- Cherry tomatoes (adds bright red bursts)
- Spooky Snacks & Garnishes:
- Gummy worms and candy eyeballs (for creepy-crawly effect)
- Pretzel sticks (great for “bones” or “witch broomsticks”)
- Sun-dried tomatoes (adds a slightly sweet, chewy texture)
- Fresh herbs like rosemary or thyme (for garnish and aroma)
- Specialty Items:
- Puff pastry sheets (if you want to make mummies or wrapped snacks)
- Honey or fig jam (for spreading or dipping)
For substitutions, almond flour crackers work well for gluten-free guests, and dairy-free cream cheese is a good swap if needed. In the fall, you can swap red grapes for sliced apples or pears for a seasonal touch. I often recommend choosing firm, small-curd cottage cheese if you want to add a creamy, dollop-style element to the board.
Equipment Needed
Assembling the perfect Halloween charcuterie board doesn’t require fancy equipment, but a few tools make the process smoother and more fun.
- Large wooden or slate board: This is your canvas. I prefer wooden boards with natural grain—it adds warmth to the spooky theme.
- Sharp knives: For slicing meats and cheeses neatly. A serrated knife helps with crusty bread.
- Small bowls and ramekins: For dips, olives, and gummy worms. They keep things tidy and visually appealing.
- Cheese knives and spreaders: To make serving easier for guests.
- Toothpicks or small skewers: Handy for “eyeball” cheese balls or for picking up small bites.
- Baking sheet and parchment paper: If you plan to bake puff pastry “mummies” or other baked snacks.
If you don’t have a large board, a clean baking tray lined with parchment works too. For budget-conscious cooks, even a large cutting board or countertop space with parchment can serve as a display area. I’ve tried silicone mats under my boards to keep them from slipping—a simple trick that saves frustration during setup.
Preparation Method
- Prep your ingredients: Start by slicing all cured meats into bite-sized pieces (about 1/4-inch thick slices). Cut cheeses into cubes or small triangles (approximately 1-inch pieces). Wash and dry fresh produce thoroughly.
- Make the “eyeball” cheese balls: Combine 8 oz (225 g) cream cheese with a handful of finely chopped olives and herbs. Roll into 1-inch balls and press a sliced black olive on top to mimic an eyeball. Chill while you prepare the rest.
- Prepare puff pastry mummies (optional): Thaw 1 sheet of puff pastry (about 8 oz/225 g). Cut into 1-inch strips. Wrap pre-cooked mini sausages or cocktail wieners in strips, leaving gaps for “eyes.” Bake at 375°F (190°C) for 12-15 minutes or until golden. Add small dots of mustard or ketchup for eyes once cooled.
- Arrange dips and spreads: Place cream cheese dip or honey in small bowls and set them around the board.
- Arrange larger items first: Lay out meat slices and cheese blocks evenly, leaving space between clusters for crackers and veggies. Group similar colors together for visual impact.
- Add crackers and bread: Place crackers in small piles or fan them out around the board edges. Toast baguette slices lightly if desired.
- Add fresh produce and garnishes: Fill empty spaces with grapes, olives, cherry tomatoes, celery sticks, and baby carrots. Sprinkle fresh rosemary sprigs or thyme for aroma and color.
- Place spooky snacks: Scatter gummy worms climbing out of dips, place puff pastry mummies near the bread, and position “eyeball” cheese balls on toothpicks standing upright.
- Final touches: Add pretzel sticks as “bones” or “witch broomsticks” and sun-dried tomatoes for bursts of color. Adjust spacing for balance and appeal.
- Serve: Let the board sit at room temperature for 15 minutes before serving to bring out flavors.
Tip: If you find your cheeses are too cold and hard to cut, let them sit out for 10 minutes before slicing. For best results, chill the “eyeball” cheese balls while assembling the rest to keep their shape firm. If your puff pastry mummies aren’t crisping up evenly, rotate the baking tray halfway through baking.
Cooking Tips & Techniques
Honestly, the art of a Halloween charcuterie board is as much about the look as the taste. Here are some tips I’ve learned the hard way:
- Balance flavors: Don’t overload on one type of meat or cheese. Mixing sharp, creamy, salty, and sweet elements keeps guests interested.
- Keep textures varied: Crunchy crackers, creamy dips, chewy meats, and fresh crisp veggies make every bite exciting.
- Use fresh herbs: Rosemary and thyme don’t just look pretty—they add subtle fragrance that enhances the overall experience.
- Mind portion sizes: Small cubes and bite-sized pieces prevent overwhelm and encourage tasting.
- Don’t overcrowd the board: Leave some negative space so each element stands out; it’s visually more appealing and easier to serve.
- Prepare some items ahead: Cheese balls and puff pastry mummies can be made the day before and stored in airtight containers.
- When baking puff pastry snacks: Brush with egg wash for golden color, but keep an eye on the oven to avoid burning.
- Multitasking: While your puff pastry bakes, prep veggies and slice meats to save time.
I once forgot to chill the cream cheese before rolling the eyeball balls, and they ended up too soft to hold shape. Lesson learned: chilling is key. Also, I recommend using a serrated knife for cutting bread to keep slices neat without squishing. These little details make a difference.
Variations & Adaptations
The perfect Halloween charcuterie board is versatile—you can easily customize it based on dietary needs or seasonal ingredients.
- Vegetarian Version: Replace meats with marinated roasted vegetables, grilled halloumi cheese, and additional fresh or pickled veggies. Add nuts like spiced pecans for crunch.
- Gluten-Free: Use gluten-free crackers and bread alternatives. Most cheeses, meats, and fresh produce are naturally gluten-free.
- Kid-Friendly: Swap spicy meats for milder options like turkey pepperoni. Add more sweet treats like mini pumpkin-shaped sugar cookies or candy corns (sparingly).
- Seasonal Twist: Swap grapes for crisp apple slices or pear wedges. Add roasted pumpkin seeds or caramelized pecans for fall flair.
- Creative Presentation: Use themed serving dishes like mini cauldrons or skull-shaped bowls for dips. You can even make “witch hats” using mini bell peppers stuffed with cream cheese.
Personally, I tried a version with smoked salmon instead of cured meats once. It gave an unexpected but delicious smoky depth that guests loved. Also, if you want a sweet surprise, adding pink champagne jello shots nearby adds a festive adult twist to the spread.
Serving & Storage Suggestions
Serve your Halloween charcuterie board at room temperature to bring out the best flavors and textures. If you’re setting it up in advance, take it out about 15 minutes before guests arrive.
For presentation, I like to place the board in the center with small plates and napkins around so everyone can graze easily. Pair it with seasonal drinks like mulled cider or simple sparkling water with a splash of cranberry for color.
If you have leftovers, cover the board tightly with plastic wrap and refrigerate. Most items keep well for up to 2 days, but crackers and puff pastry snacks are best eaten fresh to avoid sogginess. To reheat puff pastry mummies, pop them in a 350°F (175°C) oven for 5-7 minutes to regain crispness.
Interesting bit: flavors meld a bit overnight, especially in dips and cheese balls, making the board even tastier the next day (if it lasts that long!).
Nutritional Information & Benefits
This Halloween charcuterie board offers a balanced mix of protein, healthy fats, and fiber, depending on your ingredient choices.
| Ingredient | Approximate Calories per Serving | Key Nutrients |
|---|---|---|
| Cured Meats (1 oz / 28 g) | 70-90 | Protein, iron, B vitamins |
| Cheese (1 oz / 28 g) | 100-110 | Calcium, protein, fat-soluble vitamins |
| Fresh Produce (1/2 cup) | 25-40 | Fiber, vitamin C, antioxidants |
| Crackers (3 pieces) | 70-100 | Carbohydrates, fiber (varies) |
Key health benefits come from including fresh veggies and herbs—rosemary, for example, is known for anti-inflammatory properties. Choosing natural, nitrate-free meats and full-fat cheeses can offer richer flavor and fewer additives. This recipe is naturally gluten-free if you use gluten-free crackers and can be adapted for low-carb diets by swapping crackers for extra veggies or nuts.
Conclusion
This perfect Halloween charcuterie board with spooky snacks is a fun, delicious way to bring a little magic (and mystery) to your holiday gathering. It’s flexible enough to suit all kinds of tastes and levels of effort, and honestly, it’s just plain fun to assemble and share. I love how it turns an ordinary snack time into a festive moment where everyone’s curiosity and appetite get hooked at the same time.
Whether you’re hosting a big party or just want a festive treat for family night, this board lets you customize and get creative without stress. And if you do try it out, I’d love to hear how you made it your own—drop a comment or share your spooky tweaks. After all, the best part of food is how it brings us together, even on the eeriest of nights.
FAQs
What’s the best way to keep the cheese balls from falling apart?
Make sure the cream cheese is well chilled before rolling, and add finely chopped olives or herbs to help bind them. Refrigerate until ready to serve.
Can I prepare the board ahead of time?
Yes! Most components like sliced meats, cheese, and dips can be prepped a day ahead. Assemble the board a few hours before serving for the freshest look.
What are some easy kid-friendly spooky snack ideas?
Try mini “mummy” hot dogs wrapped in puff pastry, gummy worms nestled in dips, and cheese cut into fun shapes using Halloween-themed cookie cutters.
How do I keep crackers from getting soggy?
Place crackers on the board last, away from moist ingredients, and avoid covering the entire board with wrap if possible. Serve them in separate bowls if needed.
Are there any good drink pairings for this Halloween charcuterie board?
Absolutely! Try sparkling apple cider, mulled wine, or even a batch of red wine chocolate cake for dessert to keep the spooky vibe going strong.
Pin This Recipe!
Perfect Halloween Charcuterie Board Ideas with 10 Spooky Snacks to Impress
A fun and spooky Halloween charcuterie board featuring a mix of savory and sweet snacks that are quick to assemble and perfect for parties.
- Prep Time: 20 minutes
- Cook Time: 15 minutes
- Total Time: 35 minutes
- Yield: 8 servings
- Category: Appetizer
- Cuisine: American
Ingredients
- Sliced salami, pepperoni, and prosciutto
- Sharp cheddar cheese, cut into cubes or small triangles
- Black wax gouda or aged gouda
- Cream cheese (full-fat) for dips and eyeball cheese balls
- Mozzarella balls (bocconcini)
- Variety of crackers (multigrain, water crackers)
- Sliced baguette, toasted
- Red grapes
- Celery sticks
- Baby carrots
- Green and black olives
- Cherry tomatoes
- Gummy worms
- Candy eyeballs
- Pretzel sticks
- Sun-dried tomatoes
- Fresh herbs like rosemary or thyme
- Puff pastry sheets (optional for mummies)
- Honey or fig jam
Instructions
- Slice all cured meats into bite-sized pieces about 1/4-inch thick.
- Cut cheeses into cubes or small triangles approximately 1 inch in size.
- Wash and dry fresh produce thoroughly.
- Make eyeball cheese balls by combining 8 oz cream cheese with finely chopped olives and herbs, roll into 1-inch balls, press a sliced black olive on top, and chill.
- Prepare puff pastry mummies (optional): thaw 1 sheet of puff pastry, cut into 1-inch strips, wrap pre-cooked mini sausages or cocktail wieners leaving gaps for eyes, bake at 375°F for 12-15 minutes until golden, add mustard or ketchup dots for eyes once cooled.
- Arrange dips and spreads like cream cheese dip or honey in small bowls around the board.
- Lay out meat slices and cheese blocks evenly, grouping similar colors together.
- Place crackers in small piles or fan them out around the board edges; toast baguette slices if desired.
- Fill empty spaces with grapes, olives, cherry tomatoes, celery sticks, and baby carrots; sprinkle fresh rosemary or thyme for aroma and color.
- Scatter gummy worms climbing out of dips, place puff pastry mummies near bread, and position eyeball cheese balls on toothpicks standing upright.
- Add pretzel sticks as bones or witch broomsticks and sun-dried tomatoes for color bursts; adjust spacing for balance.
- Let the board sit at room temperature for 15 minutes before serving to enhance flavors.
Notes
Chill cream cheese before rolling eyeball balls to keep shape firm. Rotate baking tray halfway when baking puff pastry mummies for even crisping. Let cheeses sit out 10 minutes before slicing if too cold. Prepare some items ahead to save time. Avoid overcrowding the board for visual appeal and ease of serving.
Nutrition
- Serving Size: Approximately 1/8th
- Calories: 250
- Sugar: 3
- Sodium: 450
- Fat: 18
- Saturated Fat: 7
- Carbohydrates: 12
- Fiber: 2
- Protein: 10
Keywords: Halloween charcuterie, spooky snacks, party appetizers, cheese board, Halloween party food, easy Halloween snacks