I want focaccia right now. Not tomorrow, not after a trip to the store. Right now. And I have flour, water, salt, and a bubbly sourdough starter that’s practically begging to be used. But I don’t have time for kneading, and honestly, my arms don’t have the energy for it anyway. That’s the moment this recipe was born—a lazy Sunday afternoon where I refused to leave the house but craved that crackly, golden, olive-oil-crusted bread that makes everything feel a little more Italian. It started with a shrug and ended with my hands covered in olive oil, pressing dimples into the most gorgeous, pillowy dough I’d ever made. No stand mixer, no muscle fatigue, just patience and a warm spot on the counter. This is the focaccia that proves you don’t need to work hard to eat well—you just need to work smart.
The secret, of course, is time. This no-knead sourdough focaccia uses the magic of a long, slow fermentation to build structure and flavor while you do absolutely nothing. The starter does all the heavy lifting, creating those airy, irregular bubbles and that signature tangy depth that commercial yeast just can’t replicate. Fresh rosemary and a generous glug of good olive oil turn it into something that smells like a bakery in Tuscany. And the best part? You don’t need to be a bread expert. If you can stir and wait, you can make this. It’s the kind of recipe that makes you feel like you’ve cheated the system—because you kind of have.
I’ve made this for casual weeknight dinners alongside a simple salad, and I’ve brought it to parties where it disappeared before the main course. It’s forgiving, foolproof, and honestly, it might be the most satisfying thing you’ll bake all year. Let’s get those fingers oily.
Why You’ll Love This Recipe
This isn’t just another bread recipe. It’s the one you’ll come back to again and again, and here’s why it stands out from the crowd.
- No Kneading Required: Seriously. No stand mixer, no workout for your arms. Just a spatula, a bowl, and a little patience. The stretchy, airy crumb comes entirely from the long fermentation, not from elbow grease.
- Deep, Tangy Sourdough Flavor: The slow fermentation gives this focaccia a complex, slightly sour taste that you just can’t get with instant yeast. It’s authentic, it’s rustic, and it’s incredibly satisfying.
- Perfectly Crispy & Airy: That golden, crackling crust with a soft, pillowy interior full of irregular holes? That’s the focaccia of your dreams. The high hydration dough creates steam pockets that make every bite light and chewy.
- Simple Pantry Ingredients: Flour, water, salt, olive oil, rosemary, and your active sourdough starter. That’s it. No fancy equipment, no specialty flours, no trips to a gourmet market.
- Incredibly Versatile: Serve it as a side with soup or salad, use it for sandwiches, tear it apart for dipping in olive oil and balsamic, or just eat it warm from the oven with butter. It’s a crowd-pleaser every single time.
This recipe is different because it’s built for real life. It doesn’t demand a perfect schedule or a perfectly maintained starter. It works with your rhythm, fitting into your day whether you mix it in the morning and bake it at night, or start it before bed and finish it the next afternoon. It’s the kind of comfort food that doesn’t stress you out—it just makes you happy.
What Ingredients You Will Need
This recipe uses simple, humble ingredients to create something truly extraordinary. The quality of each component matters here, so choose wisely. You likely already have most of these in your pantry.
- Bread Flour (500g): I prefer King Arthur Bread Flour for its high protein content (about 12.7%), which creates a stronger gluten network and a better crumb structure. All-purpose flour will work in a pinch, but the texture will be slightly less chewy and the holes less dramatic.
- Water (400g, lukewarm): Use filtered or bottled water if your tap water is heavily chlorinated, as chlorine can inhibit fermentation. The water should feel warm to the touch—around 90-95°F (32-35°C)—to wake up the starter.
- Active Sourdough Starter (150g, bubbly and doubled): This is the heart of the recipe. Your starter should be fed 4-8 hours before mixing and be at its peak activity—full of bubbles and smelling fruity and tangy. A sluggish starter will result in a dense, flat focaccia.
- Fine Sea Salt (10g): Don’t skimp on salt. It controls fermentation, strengthens the gluten, and enhances flavor. I use fine sea salt because it dissolves more evenly than coarse kosher salt in this high-hydration dough.
- Extra Virgin Olive Oil (about 1/4 cup + more for the pan and topping): This is not the time for a cheap, flavorless oil. Use a good-quality extra virgin olive oil with a peppery, fruity finish. It’s a major flavor component, and you’ll taste the difference. I love California Olive Ranch or a good Greek brand.
- Fresh Rosemary (2-3 sprigs, leaves stripped and roughly chopped): Fresh is non-negotiable here. Dried rosemary is too woody and sharp. The fresh herb softens during baking and releases its fragrant oils into the olive oil, creating that classic focaccia aroma.
- Flaky Sea Salt (for finishing, like Maldon): A sprinkle of flaky salt right before baking adds a delightful crunch and a burst of salinity that contrasts beautifully with the rich olive oil.
Ingredient Tips: If your starter is feeling a little sluggish, try feeding it twice in the 12 hours before you start this recipe to really boost its activity. And if you’re out of bread flour, you can substitute all-purpose flour, but expect a slightly softer, less structured crumb—still delicious, just different.
Equipment Needed
One of the best things about this recipe is how little equipment it requires. If you have a bowl and a baking sheet, you’re most of the way there.
- Large Mixing Bowl: A standard 4-quart bowl is perfect. You need enough room to mix the dough without flour flying everywhere.
- Rubber Spatula or Dough Scraper: For mixing and folding the sticky dough. A bowl scraper is a lifesaver for high-hydration doughs.
- Digital Kitchen Scale: I cannot stress this enough. Baking by weight is far more accurate than using cups. A scale ensures consistent results every single time. A $15 scale from Amazon will change your baking life.
- 9×13-inch Baking Pan or 10-inch Cast Iron Skillet: A metal baking pan conducts heat well and creates a crispier bottom crust. A cast iron skillet holds heat beautifully and gives you a gorgeous, rustic look. Both work wonderfully.
- Plastic Wrap or a Clean Shower Cap: For covering the dough during its long rise. A reusable shower cap is my favorite trick—it stretches right over the bowl and creates a perfect seal.
- Cooling Rack: Essential for letting the focaccia cool properly so the bottom stays crisp instead of steaming and getting soggy.
Budget-Friendly Tip: Don’t have a 9×13 pan? A rimmed baking sheet works just fine. The focaccia will be slightly thinner and wider, but it will still be delicious. And if you don’t have a cooling rack, just use a clean kitchen towel to let the bread cool—it works in a pinch.
Preparation Method
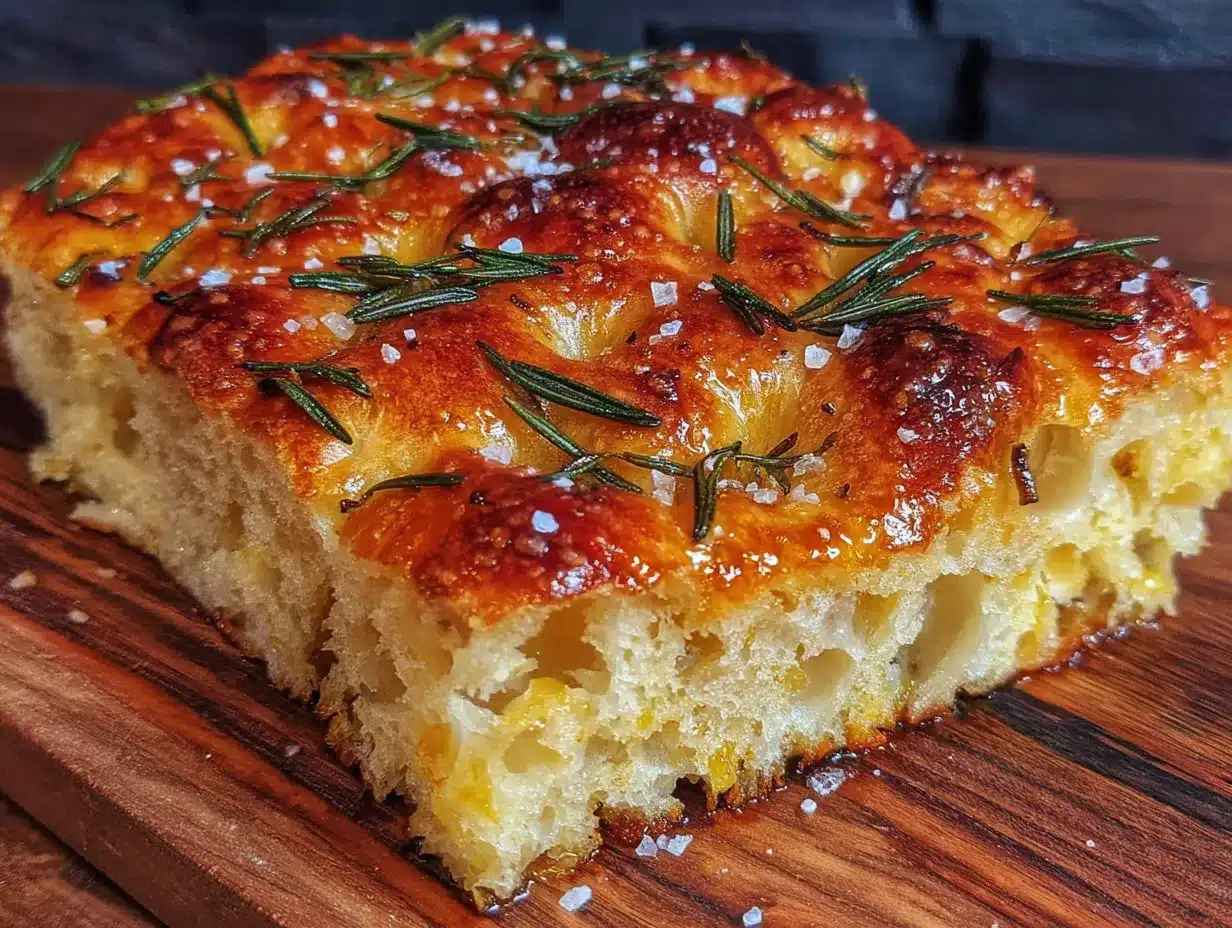
This process is all about patience, not effort. The dough does the work; you just guide it along. Here’s how it comes together.
- Mix the Dough (5 minutes): In your large mixing bowl, combine the 500g bread flour and 10g fine sea salt. Whisk them together to distribute the salt evenly. In a separate measuring cup, combine 400g lukewarm water and 150g of your active, bubbly sourdough starter. Stir until the starter is mostly dissolved into the water. Pour the wet ingredients into the dry ingredients and use your rubber spatula to mix until no dry flour remains. The dough will be very sticky and shaggy—that’s exactly what you want. Cover the bowl with plastic wrap or a shower cap and let it rest for 30 minutes. This is called the autolyse, and it allows the flour to fully hydrate and begin developing gluten naturally.
- Perform the First Set of Stretch and Folds (30 minutes apart): After the 30-minute rest, wet your hands slightly (this prevents sticking) and grab one corner of the dough. Gently stretch it up as high as it will go without tearing, then fold it over the top of the dough to the opposite side. Rotate the bowl 90 degrees and repeat this stretch and fold. Do this four times total, working your way around the bowl. Cover the bowl again and let it rest for another 30 minutes. Repeat this entire process three more times (a total of 4 sets of stretch and folds over 2 hours). You’ll notice the dough becoming smoother, stronger, and less sticky with each fold. This is how we build strength without kneading.
- Bulk Fermentation (8-12 hours at room temperature): After the last set of folds, cover the bowl tightly and let it sit at room temperature (around 70-75°F / 21-24°C) for 8-12 hours. The dough should at least double in volume, become very bubbly, and smell wonderfully sour and yeasty. The surface will look slightly domed and jiggly when you gently shake the bowl. If your kitchen is cold, it might take the full 12 hours; if it’s warm, check it at 8 hours. Time is a guideline; look for the visual cues.
- Prepare the Pan and Cold Retard (Optional but Recommended): Generously coat your 9×13-inch baking pan with 2-3 tablespoons of olive oil. Pour the dough out into the pan. It will be very loose and bubbly—don’t try to deflate it. Gently coax it into the corners of the pan using oiled hands or a spatula. If the dough resists, let it rest for 15-20 minutes and then try again. Cover the pan tightly with plastic wrap and place it in the refrigerator for at least 8 hours, or up to 24 hours. This cold retard step deepens the flavor and makes the dough much easier to handle. If you’re in a hurry, you can skip the fridge and let it rise at room temperature for another 2-3 hours, until it’s puffy and fills the pan.
- Dimple and Proof (1-2 hours): When you’re ready to bake, remove the pan from the refrigerator (if you did the cold retard) and let it sit at room temperature for 1-2 hours, until the dough has warmed up and looks puffy and alive. Preheat your oven to 425°F (220°C) with a rack in the middle. Drizzle another 1-2 tablespoons of olive oil over the top of the dough. Now for the fun part: using your fingertips, press deep dimples all across the surface of the dough, all the way down to the bottom of the pan. Don’t be shy—this is what creates those iconic focaccia craters that hold the oil and rosemary. Sprinkle the chopped fresh rosemary and a generous pinch of flaky sea salt evenly over the top.
- Bake to Golden Perfection (25-30 minutes): Place the pan on the middle rack of your preheated oven. Bake for 25-30 minutes, until the focaccia is deep golden brown on top and sounds hollow when you tap it on the bottom. The edges should be crispy and caramelized from the olive oil. If the top is browning too quickly but the bottom isn’t done, tent it loosely with foil for the last 5-10 minutes. Let it cool in the pan on a wire rack for 10 minutes, then carefully transfer it to the rack to cool completely. I know it’s hard, but try to wait at least 20 minutes before slicing—the texture sets as it cools, and you’ll get a much better crumb.
Sensory Cue: When you dimple the dough, it should feel like a soft, squishy pillow that holds your fingerprint. The oil should pool in the little wells you create. When it comes out of the oven, it should be so fragrant with rosemary and olive oil that your whole kitchen smells like a trattoria.
Cooking Tips & Techniques
I’ve made this recipe more times than I can count, and I’ve learned a few things the hard way. Here are my best tips to help you nail it on your first try.
- Don’t Skip the Autolyse: That initial 30-minute rest after mixing is not optional. It gives the flour time to absorb the water and start developing gluten naturally. Skipping it means a weaker dough and a denser crumb. Trust the process.
- Wet Hands Are Your Friend: High-hydration dough is sticky. Instead of adding more flour (which makes the bread tough), just wet your hands with a little water before handling it. The dough will release from your skin instantly, making the stretch and folds a breeze.
- Use a Thermometer for Your Water: If your water is too hot (over 110°F / 43°C), it can kill the beneficial bacteria in your sourdough starter. Too cold, and the fermentation will be sluggish. Aim for that sweet spot of 90-95°F (32-35°C) for a happy, active dough.
- Don’t Rush the Bulk Fermentation: This is the most common mistake. The dough needs to be truly bubbly, jiggly, and doubled in size before you move on. A young, under-fermented dough will result in a flat, dense focaccia. When in doubt, give it another hour. I once let mine go for 14 hours on a cool day, and it was the best batch I ever made.
- Oil Is Not Just for Flavor—It’s for Structure: Be generous with the olive oil in the pan. It fries the bottom of the dough as it bakes, creating that incredible, crackly crust. Don’t be afraid of it. The focaccia will absorb what it needs.
My Biggest Failure: The first time I made this, I was impatient. I skipped the cold retard, rushed the bulk fermentation, and ended up with a sad, flat, gummy focaccia that tasted more like a dense pancake than bread. It was a hard lesson, but it taught me that sourdough rewards patience. Give it the time it needs, and it will reward you with the best bread of your life.
Variations & Adaptations
This focaccia is a beautiful blank canvas. Once you’ve mastered the basic recipe, feel free to play around with flavors and textures. Here are a few of my favorite variations.
- Garlic & Herb Focaccia: Before dimpling the dough, press 4-5 thinly sliced garlic cloves into the surface along with the rosemary. The garlic roasts and sweetens in the oven, becoming soft and buttery. Add a sprinkle of dried oregano or thyme for an extra layer of flavor.
- Roasted Tomato & Olive Focaccia: After dimpling, press halved cherry tomatoes and pitted Kalamata olives into the dough. The tomatoes burst and caramelize, creating little pockets of sweetness, while the olives add a briny, salty punch. This variation is stunning on a charcuterie board.
- Everything Bagel Focaccia: Skip the rosemary and top the dimpled dough with a generous sprinkle of everything bagel seasoning (sesame seeds, poppy seeds, dried garlic, dried onion, and salt). It’s addictive and perfect for breakfast with cream cheese.
- Gluten-Free Adaptation: While not identical, you can make a gluten-free version using a 1:1 gluten-free all-purpose flour blend (like Bob’s Red Mill). The dough will be more like a batter and won’t need the stretch and folds. Just mix, let it rise in the pan, and bake. The texture will be more tender and less chewy, but still delicious.
My Personal Favorite: I love adding caramelized onions to the dough. I slowly cook two large sliced onions in olive oil until they’re deep golden and jammy, let them cool, and then press them into the dough before baking. The sweet, savory flavor is absolutely irresistible.
Serving & Storage Suggestions
Focaccia is at its absolute best the day it’s made, but it’s still wonderful for a day or two after. Here’s how to serve and store it for maximum enjoyment.
How to Serve: Serve this focaccia warm or at room temperature. It’s incredible on its own, but it really shines when paired with a dipping station of good olive oil, balsamic vinegar, and a sprinkle of black pepper. It’s also the perfect bread for sandwiches—try it with prosciutto, fresh mozzarella, and arugula for a lunch that feels fancy. I love tearing off a piece and dipping it into a bowl of tomato soup or using it to soak up the juices from a braised chicken dish.
Storage Instructions: Store leftover focaccia in an airtight container or wrapped tightly in plastic wrap at room temperature for up to 2 days. Do not refrigerate it—the fridge will dry it out and make it stale. If you need to keep it longer, freeze it.
Freezing Instructions: Wrap the cooled focaccia tightly in plastic wrap, then in a layer of aluminum foil. Freeze for up to 3 months. To reheat, unwrap it and place it directly on the oven rack at 350°F (175°C) for 10-15 minutes, until it’s warm and the crust is crispy again. You can also reheat individual slices in a toaster oven.
Reheating Tip: A microwave will make focaccia rubbery and sad. Always use an oven or toaster oven to revive that beautiful, crackly crust. A quick 5-minute blast at 350°F is all it takes.
Flavor Development: Interestingly, the flavor of this focaccia actually mellows and becomes more balanced on the second day. The sharp sourdough tang softens, and the olive oil flavor becomes more integrated. It’s still delicious, just different.
Nutritional Information & Benefits
While focaccia is a treat, it does offer some surprising benefits, especially when made with a long-fermented sourdough starter.
Estimated Nutritional Values (per serving, based on 12 servings):
- Calories: ~220
- Carbohydrates: 35g
- Protein: 6g
- Fat: 7g (mostly from healthy olive oil)
- Fiber: 1g
- Sodium: 380mg
Health Benefits: The long fermentation process of sourdough breaks down phytic acid, a compound in grains that can inhibit mineral absorption. This makes the nutrients in the flour—like iron, zinc, and magnesium—more bioavailable. Sourdough also has a lower glycemic index than bread made with commercial yeast, meaning it causes a slower, more gradual rise in blood sugar. The olive oil is rich in heart-healthy monounsaturated fats and antioxidants. And fresh rosemary is packed with anti-inflammatory compounds.
Dietary Considerations: This recipe is vegetarian and vegan (no dairy or eggs). For a gluten-free option, see the variations section above. The main allergen is wheat gluten.
Personal Wellness Perspective: I love that this bread is made with intention. It takes time, but it’s not complicated. It’s a reminder that good food doesn’t need to be processed or full of additives. It’s just flour, water, salt, and patience—and that feels good to eat.
Conclusion
This no-knead rosemary sourdough focaccia is more than just a recipe—it’s a ritual. It’s the perfect project for a slow weekend, a way to use up that bubbly starter, and a guaranteed way to fill your home with an irresistible aroma. The crust is crackly, the inside is pillowy, and the flavor is complex and deeply satisfying. It’s the kind of bread that makes you slow down and appreciate the simple things.
I honestly believe this is the easiest way to make incredible sourdough bread. No kneading, no complicated shaping, no steam injection. Just a little patience and a lot of olive oil. I hope you give it a try and make it your own—add your favorite toppings, experiment with different herbs, and don’t be afraid to get your hands messy. That’s where the magic happens.
If you make this focaccia, I’d love to hear about it! Leave a comment below and tell me how it turned out, or share a photo of your creation. And if you’re looking for another show-stopping bread to try, check out my recipe for decadent red wine chocolate cake for a sweet companion to this savory loaf. Happy baking, friends!
Frequently Asked Questions
Can I use active dry yeast instead of sourdough starter?
Yes, you can! To make a yeast version, omit the 150g of sourdough starter. Use 1 teaspoon (4g) of active dry yeast dissolved in 400g of lukewarm water with 1 teaspoon of sugar. Let it sit for 5-10 minutes until frothy, then proceed with the recipe. The flavor will be less tangy, and the fermentation time will be much shorter (about 2-3 hours for bulk fermentation). The texture will still be excellent.
Why is my focaccia dense and not airy?
This usually happens for one of three reasons: your sourdough starter wasn’t active enough, the bulk fermentation was too short, or you handled the dough too roughly. Make sure your starter is very bubbly and doubled before you start. Give the dough the full 8-12 hours to rise at room temperature. And when you transfer it to the pan, be gentle—don’t punch it down or deflate those precious gas bubbles.
Can I make this focaccia in a cast iron skillet?
Absolutely! A 10-inch cast iron skillet is perfect for this recipe. The skillet holds heat beautifully and creates an exceptionally crispy bottom crust. Just make sure to generously oil the skillet before adding the dough. You may need to reduce the baking time by a few minutes, as cast iron conducts heat more efficiently.
Do I have to do the cold retard in the fridge?
No, it’s optional, but highly recommended. The cold retard deepens the sourdough flavor and makes the dough much easier to handle and dimple. If you’re short on time, you can skip the fridge and let the dough rise in the pan at room temperature for 2-3 hours after the bulk fermentation, until it’s puffy and fills the pan. The flavor will be milder, but the texture will still be great.
How do I know when my sourdough starter is ready to use?
Your starter is ready when it has at least doubled in volume, is full of bubbles (both large and small), and has a pleasant, fruity, slightly tangy smell. It should look active and alive. A good test is the “float test”: drop a small spoonful of starter into a glass of water. If it floats, it’s ready. If it sinks, it needs more time to ferment.
Pin This Recipe!
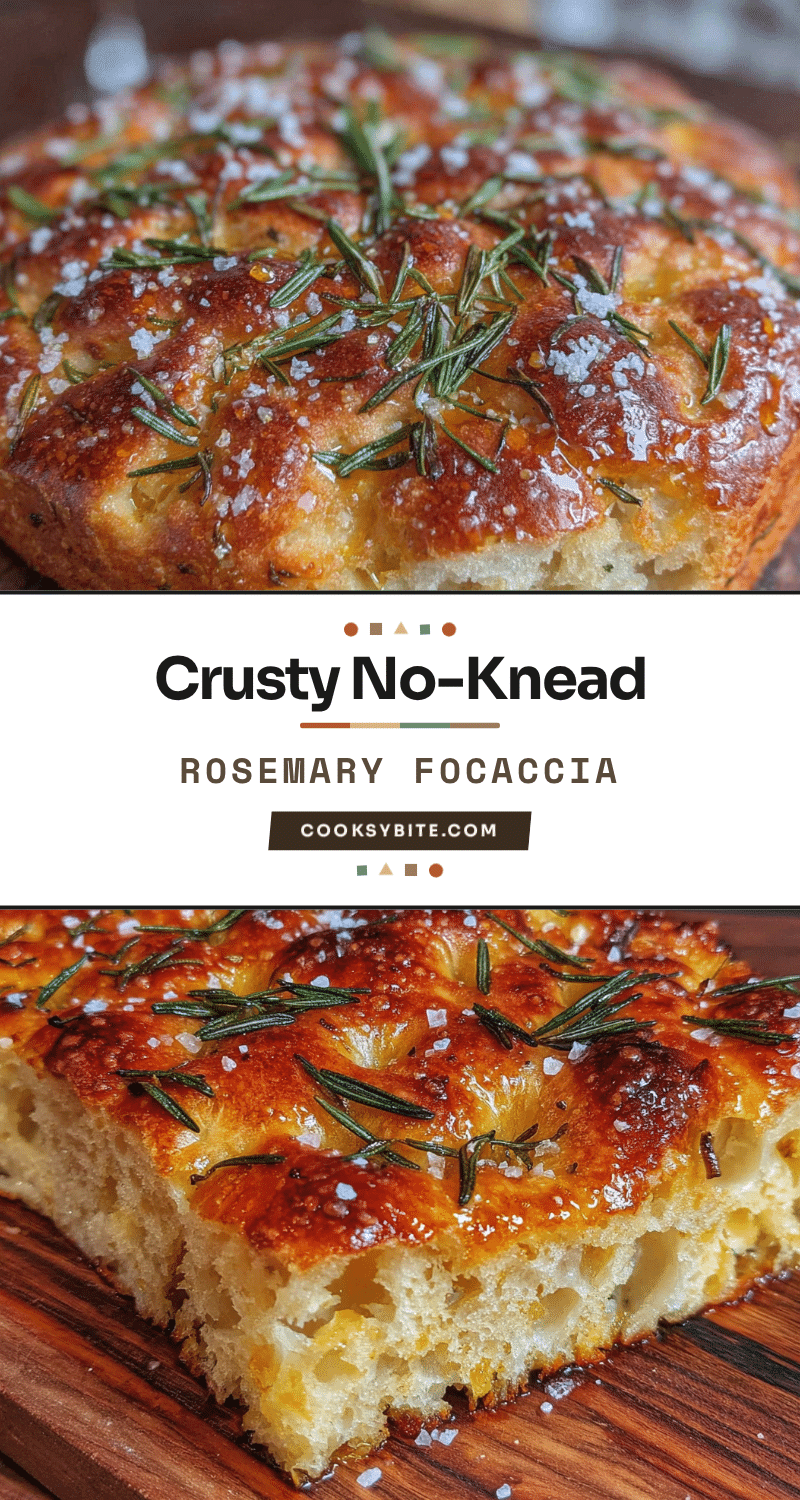
Perfect No-Knead Rosemary Sourdough Focaccia Recipe (Easy!)
This no-knead sourdough focaccia uses a long, slow fermentation to build structure and flavor with minimal effort. Fresh rosemary and good olive oil create a crackly, golden crust and pillowy interior that tastes like a bakery in Tuscany.
- Prep Time: 15 minutes
- Cook Time: 30 minutes
- Total Time: 8 hours 45 minutes (includes inactive fermentation)
- Yield: 12 servings 1x
- Category: Bread
- Cuisine: Italian
Ingredients
- 500g bread flour (about 4 cups)
- 400g lukewarm water (about 1 3/4 cups)
- 150g active sourdough starter (about 2/3 cup)
- 10g fine sea salt (about 1 1/2 teaspoons)
- 1/4 cup extra virgin olive oil, plus more for pan and topping
- 2–3 sprigs fresh rosemary, leaves stripped and chopped
- Flaky sea salt (like Maldon) for finishing
Instructions
- Mix the Dough: In a large bowl, whisk together 500g bread flour and 10g fine sea salt. In a separate cup, combine 400g lukewarm water and 150g active sourdough starter; stir until starter is mostly dissolved. Pour wet into dry and mix with a rubber spatula until no dry flour remains. Cover and let rest 30 minutes (autolyse).
- Perform Stretch and Folds: After 30 minutes, wet your hands. Grab one corner of the dough, stretch it up, and fold it over the opposite side. Rotate bowl 90° and repeat. Do 4 folds total. Cover and rest 30 minutes. Repeat this process 3 more times (total of 4 sets over 2 hours).
- Bulk Fermentation: Cover bowl tightly and let sit at room temperature (70-75°F) for 8-12 hours, until dough has at least doubled in volume, is bubbly, and jiggly.
- Prepare Pan and Cold Retard (Optional): Generously coat a 9×13-inch baking pan with 2-3 tablespoons olive oil. Gently pour dough into pan; coax into corners with oiled hands. Cover tightly and refrigerate for at least 8 hours (up to 24) for deeper flavor. If skipping, let rise at room temperature 2-3 hours until puffy.
- Dimple and Proof: Remove pan from fridge (if used) and let sit at room temperature 1-2 hours until puffy. Preheat oven to 425°F (220°C). Drizzle 1-2 tablespoons olive oil over dough. Use fingertips to press deep dimples all over the surface. Sprinkle with chopped rosemary and flaky sea salt.
- Bake: Place pan on middle rack and bake 25-30 minutes until deep golden brown and hollow-sounding when tapped. If browning too quickly, tent with foil. Cool in pan on wire rack 10 minutes, then transfer to rack to cool completely (at least 20 minutes before slicing).
Notes
For best results, use an active, bubbly starter. The cold retard step is optional but deepens flavor. If using all-purpose flour instead of bread flour, expect a slightly softer crumb. Do not refrigerate leftovers; store at room temperature for up to 2 days or freeze for up to 3 months.
Nutrition
- Serving Size: 1 slice (1/12 of rec
- Calories: 220
- Sodium: 380
- Fat: 7
- Saturated Fat: 1
- Carbohydrates: 35
- Fiber: 1
- Protein: 6
Keywords: sourdough focaccia, no-knead bread, rosemary focaccia, easy focaccia recipe, sourdough bread, Italian bread, homemade focaccia


