I want crispy, salty, caramelized squash rings right now, and I have everything except the patience to deep-fry. That’s the thought that hit me last October, standing in front of my farmer’s market haul with a beautiful delicata squash staring back at me. I had just spent twenty minutes scrolling through recipes that all seemed to end with a greasy stovetop mess and a lingering smell of oil that would haunt my kitchen for days. No thank you.
Honestly, I almost gave up and just roasted the squash in chunks like I always do. But then I remembered that bag of panko breadcrumbs hiding in the back of my pantry, and the lightbulb went off. Why couldn’t I get that same satisfying crunch from the oven? It felt like a challenge my stubborn side couldn’t resist.
The first batch came out okay—crispy in some spots, a little soggy in others. The second batch was better. By the third attempt, I had cracked the code. The secret wasn’t a fancy technique or some expensive ingredient. It was all about how you prep the squash and the order you add things to the coating. These 10-minute crispy oven-roasted delicata squash rings turned into my favorite fall side dish, and honestly, I haven’t looked back since.
There’s something about the way the edges get golden and almost caramelized while the inside stays tender. It’s the kind of recipe that makes you feel like you’re eating something indulgent, even though you’re really just eating perfectly roasted vegetables. That first bite—crunch, then sweetness, then a little salt—it gets me every single time.
So here’s the thing. This recipe isn’t complicated, and it doesn’t need a million ingredients. It just works. And once you try it, you’ll understand why I couldn’t stop making it until I got it right.
Why You’ll Love This Recipe
Let me tell you why this one’s a keeper. I’ve tested this recipe at least a dozen times across different ovens, different squash sizes, and even different breadcrumb brands. It’s been through the wringer, and it comes out crispy every single time.
- Quick & Easy: From start to finish, you’re looking at about 10 minutes of active prep time. The oven does the rest of the work. Perfect for those nights when you need a vegetable side dish that doesn’t feel like a chore.
- Simple Ingredients: You probably have everything you need already. Panko breadcrumbs, olive oil, salt, pepper, and a little garlic powder. That’s it. No fancy grocery store runs required.
- Perfect for Fall Gatherings: These squash rings are a hit at Thanksgiving, Friendsgiving, or any cozy dinner party. They look impressive on a platter, but they’re secretly one of the easiest things you’ll make.
- Crowd-Pleaser: I’ve served these to kids who swear they hate squash and adults who usually skip the vegetable platter. Empty plate, every time. The crispy coating makes all the difference.
- Unbelievably Delicious: The texture is what gets you. Crunchy on the outside, soft and sweet on the inside. It’s comfort food that happens to be good for you.
What makes this recipe different from all the other roasted squash recipes out there? It’s the technique. Most recipes just toss the squash in oil and roast it, which gives you soft, caramelized pieces—delicious, sure, but not crispy. By adding a light panko coating and using high heat, you get that satisfying crunch without any deep-frying. It’s not just another version of roasted squash. It’s the version you’ll actually crave.
This is the kind of side dish that makes you close your eyes after the first bite. It’s simple, it’s satisfying, and it turns a humble fall vegetable into something truly special. Perfect for impressing guests without the stress, or just making a Tuesday night dinner feel a little more memorable.
What Ingredients You Will Need
This recipe uses simple, wholesome ingredients to deliver that perfect crispy texture and sweet, nutty flavor. Most of these are pantry staples, which makes this recipe incredibly accessible.
- Delicata squash (2 medium-sized) — Look for squash that feels heavy for its size with firm, unblemished skin. You don’t need to peel delicata squash, which is one of the best things about it. The skin is thin and completely edible, and it gets wonderfully tender when roasted. I prefer organic squash when I can find it, especially since we’re eating the skin.
- Panko breadcrumbs (1 cup) — Regular breadcrumbs won’t give you the same crunch. Panko is key here because its larger, flakier texture creates that light, airy coating. I’ve used both plain and seasoned panko, and both work great. If you’re gluten-free, look for gluten-free panko—it works just as well.
- Grated Parmesan cheese (¼ cup, finely grated) — This adds a savory, salty depth that complements the squash’s natural sweetness. I recommend using the finely grated kind from a can or jar, not the fresh shredded stuff. The fine texture helps it stick to the squash better. You can skip it for a dairy-free version, but you’ll lose some of that umami flavor.
- Olive oil (2 tablespoons) — Extra virgin olive oil works great, but you can also use avocado oil for a higher smoke point. The oil helps the coating crisp up and brown evenly. Don’t skimp on this—the coating needs enough oil to get golden.
- Garlic powder (1 teaspoon) — Adds a subtle savory note without overwhelming the squash. Fresh garlic can burn at high temperatures, so stick with powder here.
- Salt (½ teaspoon, plus more for sprinkling) — I use fine sea salt for the coating and a little flaky salt at the end for texture. Kosher salt works too, just adjust the quantity slightly.
- Black pepper (¼ teaspoon, freshly ground) — Freshly ground pepper makes a difference here. It adds a gentle warmth that pairs beautifully with the squash.
- Optional: Smoked paprika (½ teaspoon) — This is my secret ingredient. It adds a subtle smoky flavor that makes the squash rings taste almost like they came from a campfire. Totally optional, but highly recommended.
- Optional: Fresh parsley (for garnish) — A little green at the end makes the dish look prettier, but it’s not necessary for flavor.
Equipment Needed
You don’t need much for this recipe, which is part of its charm. Here’s what you’ll need:
- Baking sheet (half-sheet pan, 18×13 inches) — A rimmed baking sheet works best to catch any stray crumbs. I prefer light-colored aluminum pans because they distribute heat evenly. Dark pans can cause the bottoms to brown too quickly.
- Parchment paper or a silicone baking mat — This is non-negotiable for crispy results. The paper prevents sticking and makes cleanup a breeze. Plus, it helps the coating crisp up without burning.
- Sharp knife — A good chef’s knife makes slicing the squash into even rings much easier. Dull knives can slip on the tough skin.
- Cutting board — Any sturdy cutting board works. I prefer a wooden one for squash because it’s gentler on the knife blade.
- Mixing bowls (2 medium-sized) — One for the coating mixture and one for tossing the squash rings with oil.
- Measuring spoons — For precise seasoning. I’ve eyeballed it before, and it’s not the same.
- Optional: Wire cooling rack — If you want extra-crispy rings, place a wire rack on top of the baking sheet. This allows hot air to circulate all around the squash, preventing soggy bottoms. It’s a game-changer if you have one.
Preparation Method
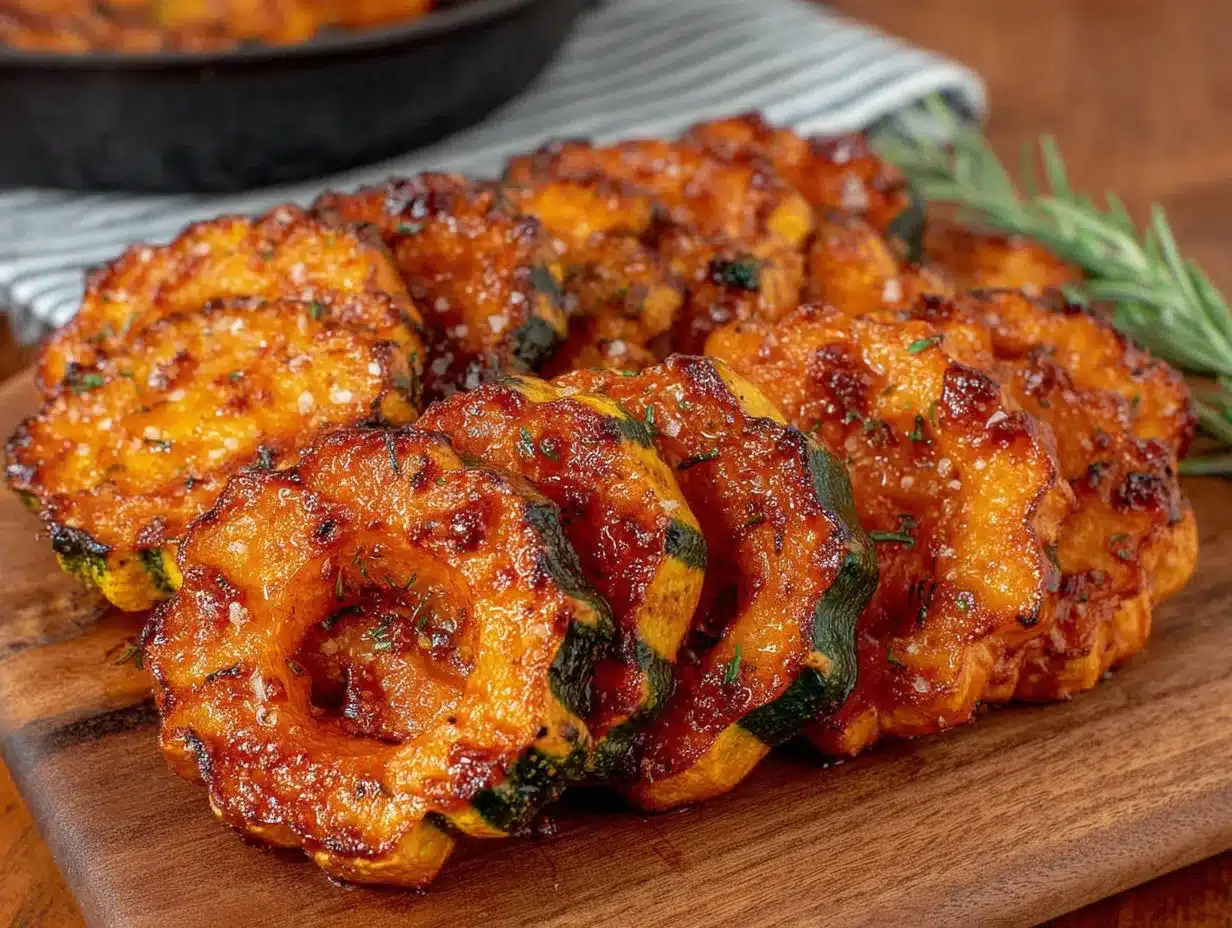
Let’s get cooking. This method is straightforward, but a few key steps make all the difference between soggy squash and perfectly crispy rings.
- Preheat your oven to 425°F (220°C). This high temperature is crucial for getting that golden, crispy exterior. Don’t rush this step—a properly preheated oven ensures even cooking from the moment the squash goes in. While the oven heats up, line your baking sheet with parchment paper or a silicone mat.
- Prepare the squash. Wash the delicata squash thoroughly under cold water and pat it dry. The skin is edible, so you want it clean. Using a sharp knife, trim off both ends of the squash—about ¼ inch from each end. Then, slice the squash crosswise into ½-inch thick rings. If you encounter seeds in the center, use your fingers or a small spoon to gently pop them out. Don’t worry about getting every single seed; a few left behind won’t hurt. You should get about 12-15 rings per squash, depending on its size.
- Set up your coating station. In one medium bowl, combine the panko breadcrumbs, grated Parmesan cheese, garlic powder, smoked paprika (if using), salt, and black pepper. Stir everything together until the seasonings are evenly distributed. In another bowl, add the olive oil.
- Coat the squash rings. Working in batches, add a few squash rings to the bowl with olive oil. Use your hands to gently toss them until each ring is lightly coated in oil. Don’t soak them—just a light, even coating. Then, transfer the oiled rings to the bowl with the panko mixture. Toss gently until each ring is completely coated on both sides. Press the coating gently onto the rings to help it adhere. The Parmesan helps the panko stick, so don’t be shy.
- Arrange on the baking sheet. Place the coated squash rings in a single layer on the prepared baking sheet. Make sure they’re not touching each other—crowding the pan will trap steam and prevent crisping. If you have more rings than fit in one layer, use a second baking sheet or bake in batches. For extra crispy results, place a wire rack on the baking sheet and arrange the rings on top. This allows hot air to circulate underneath.
- Bake for 10-12 minutes. Place the baking sheet on the middle rack of your preheated oven. Bake for 10 minutes, then check for doneness. The rings should be golden brown on the bottom and edges. If they need more time, flip each ring carefully with a spatula and bake for another 2-3 minutes. The total cooking time is usually 12-15 minutes, depending on your oven and the thickness of your rings. You’re looking for deep golden brown spots on the coating.
- Cool slightly and serve. Remove the baking sheet from the oven and let the squash rings rest for 2-3 minutes. This allows the coating to set and become even crispier. Transfer to a serving platter, sprinkle with a little flaky salt if you have it, and garnish with fresh parsley if desired. Serve immediately while they’re still hot and crispy.
Pro tip: If your coating seems to be browning too quickly but the squash isn’t tender yet, tent the baking sheet loosely with foil for the last few minutes. This prevents burning while allowing the squash to finish cooking through.
Cooking Tips & Techniques
I’ve made this recipe enough times to learn a few things the hard way. Here are the tips that’ll save you from my mistakes.
Don’t skip the drying step. Wet squash rings are the enemy of crispy coatings. After washing the squash, make sure you pat it completely dry with a clean kitchen towel or paper towels. Any excess moisture will steam the coating instead of crisping it. I learned this lesson after my first batch came out looking pale and sad.
The oil coating matters more than you think. Too little oil, and the panko will burn before the squash is tender. Too much oil, and you’ll end up with greasy, soggy rings. The trick is to use just enough oil to lightly coat the squash—about 1 tablespoon per squash. Toss the rings in the oil until they glisten, but there’s no pooling oil at the bottom of the bowl.
Flip halfway through for even crisping. I know it’s tempting to just let them bake without touching them, but flipping the rings halfway through ensures both sides get that beautiful golden crust. Use a thin metal spatula to flip them gently—the coating can be fragile when it’s still hot.
Watch your oven like a hawk. Every oven runs a little differently. My friend’s oven runs hot, and her squash rings are done in 10 minutes flat. Mine takes a full 14 minutes. Start checking at the 10-minute mark and adjust from there. The visual cue you’re looking for is deep golden brown with darker spots on the edges.
Don’t overcrowd the pan. This is the number one mistake people make. If the rings are touching, they’ll steam each other. Leave at least ½ inch of space between each ring. If you have to use two baking sheets, do it. The extra few minutes of cleanup are worth it for perfectly crispy results.
Eat them immediately. These squash rings are best straight out of the oven. They’ll stay crispy for about 10-15 minutes, then start to soften as they cool. If you’re serving them at a party, time your baking so they come out right before you’re ready to eat.
Variations & Adaptations
One of the best things about this recipe is how adaptable it is. Here are some variations I’ve tried and loved.
Spicy version: Add ¼ teaspoon of cayenne pepper or red pepper flakes to the panko mixture. The heat pairs beautifully with the sweet squash. I made this version for a game day party, and it disappeared faster than the regular ones.
Herb-infused coating: Mix in 1 tablespoon of dried herbs like oregano, thyme, or rosemary with the panko. The herbaceous notes complement the squash’s earthy sweetness. I love using a blend of dried Italian herbs for a Mediterranean twist.
Gluten-free adaptation: Substitute the panko with gluten-free panko or crushed pork rinds for a low-carb option. Both work beautifully. If using pork rinds, crush them into fine crumbs and mix with the Parmesan. The texture is slightly different but still incredibly crispy.
Dairy-free version: Omit the Parmesan cheese and add an extra tablespoon of nutritional yeast for a cheesy flavor without the dairy. You can also use dairy-free breadcrumbs. The coating won’t be quite as crunchy, but it’s still delicious.
Air fryer method: If you have an air fryer, this recipe adapts beautifully. Preheat the air fryer to 375°F (190°C). Arrange the coated squash rings in a single layer in the basket (work in batches if needed). Cook for 8-10 minutes, flipping halfway through. The air fryer gives an even crispier result with slightly less oil.
Sweet variation: For a dessert-like twist, skip the garlic and Parmesan, and add 1 tablespoon of brown sugar and ½ teaspoon of cinnamon to the panko mixture. The result is a sweet, crunchy treat that tastes like a healthier version of fried dough. I’ve served these with a drizzle of maple syrup for brunch, and they were a hit.
Serving & Storage Suggestions
These crispy squash rings are best enjoyed fresh from the oven, but here’s how to serve and store them for the best experience.
Serving temperature: Serve these rings hot, straight from the oven. They’re at their peak crispiness within the first 10 minutes. If you’re serving them at a buffet or party, consider keeping them warm in a low oven (200°F) on a wire rack for up to 20 minutes. This helps maintain some crispiness without overcooking them.
Presentation ideas: Arrange the rings on a large wooden board or platter in a circular pattern, slightly overlapping. Sprinkle with flaky sea salt and fresh parsley for a pop of color. A small bowl of dipping sauce in the center makes for a beautiful presentation. I like serving them with a side of garlic aioli, ranch dressing, or a simple lemon-garlic yogurt sauce.
Complementary dishes: These squash rings pair beautifully with roasted chicken, grilled steak, or pan-seared fish. They’re also fantastic alongside a hearty salad or as part of a grain bowl. For a fall-themed dinner, serve them with roasted turkey and cranberry sauce. They even work as a topping for burgers or sandwiches—trust me on this one.
Storage instructions: If you have leftovers (which is rare in my house), let them cool completely, then store them in an airtight container in the refrigerator for up to 3 days. The coating will soften during storage, but they’ll still taste great.
Reheating methods: The best way to reheat these rings is in the oven or air fryer. Preheat your oven to 350°F (175°C) and spread the rings on a baking sheet. Bake for 5-7 minutes until heated through and crispy again. In an air fryer, reheat at 350°F for 3-4 minutes. Avoid the microwave—it will turn them into soggy, sad versions of their former selves.
How flavors develop: Interestingly, the flavors actually meld together nicely after a day in the fridge. The garlic and Parmesan infuse the squash more deeply, and the sweetness becomes more pronounced. They’re not as crispy, but they’re still delicious cold or at room temperature—almost like a squash salad topping.
Nutritional Information & Benefits
Let’s talk about what makes this recipe not just delicious, but actually good for you. Delicata squash is a nutritional powerhouse, and this preparation keeps it relatively light.
Estimated nutritional values per serving (about 6 rings):
- Calories: 185
- Total Fat: 9g
- Saturated Fat: 2g
- Cholesterol: 5mg
- Sodium: 320mg
- Total Carbohydrates: 24g
- Dietary Fiber: 4g
- Sugars: 6g
- Protein: 6g
Health benefits of key ingredients: Delicata squash is rich in vitamin A (from beta-carotene), vitamin C, and potassium. It’s also a good source of fiber, which supports digestive health. The skin contains additional fiber and antioxidants. Panko breadcrumbs provide quick energy, while Parmesan adds a small amount of calcium and protein. Olive oil contributes healthy monounsaturated fats, which are good for heart health.
Dietary considerations: This recipe is naturally vegetarian and can be made gluten-free with GF panko. For a vegan version, omit the Parmesan and use nutritional yeast. It’s also relatively low in calories compared to many side dishes, making it a great option for those watching their intake.
Potential allergens: This recipe contains dairy (Parmesan cheese) and gluten (panko breadcrumbs). Adjust accordingly for dietary restrictions.
Personal wellness perspective: I love that this recipe lets me enjoy a satisfying, crunchy side dish without feeling heavy or guilty afterward. It’s proof that eating vegetables doesn’t have to be boring or bland. The combination of fiber, healthy fats, and protein makes it a well-rounded addition to any meal.
Conclusion
These crispy oven-roasted delicata squash rings have become a staple in my kitchen, and I have a feeling they’ll become one in yours too. They’re simple enough for a weeknight dinner, impressive enough for a holiday table, and versatile enough to pair with almost any main dish.
What I love most about this recipe is how it transforms a humble fall vegetable into something you actually crave. It’s not just a side dish—it’s the kind of food that makes you look forward to eating your vegetables. The crispy coating, the tender, sweet interior, the subtle savory notes from the Parmesan and garlic—it all comes together in a way that feels both comforting and special.
I encourage you to make this recipe your own. Play with the seasonings, try different dipping sauces, or experiment with the variations I’ve shared. Cooking is supposed to be fun, and this recipe is the perfect canvas for your creativity.
If you give these squash rings a try, I’d love to hear how they turned out. Leave a comment below and let me know your favorite variation, or tag me in your photos if you share them online. Happy cooking, and here’s to many crispy, delicious meals ahead!
Frequently Asked Questions
Can I use other types of squash for this recipe?
Absolutely! While delicata squash is ideal because of its edible skin and sweet flavor, you can substitute it with acorn squash or butternut squash. Just keep in mind that you’ll need to peel butternut squash before slicing, and acorn squash has a slightly tougher skin that’s best removed. The cooking time may also vary slightly depending on the squash variety.
Why did my coating fall off the squash rings?
This usually happens for one of two reasons: the squash rings were too wet, or they weren’t pressed firmly enough into the coating. Make sure you pat the squash rings completely dry after washing them, and press the panko mixture gently but firmly onto each ring. The Parmesan helps the coating stick, so don’t skip it if you can help it.
Can I prepare these squash rings ahead of time?
You can prep the squash rings up to the coating step and refrigerate them for up to 4 hours before baking. Arrange them on the baking sheet, cover loosely with plastic wrap, and keep them in the fridge. Bake them straight from the refrigerator, adding 2-3 minutes to the cooking time. I don’t recommend baking them fully ahead of time, as they lose their crispiness quickly.
How do I prevent the squash rings from getting soggy?
The key to crispy squash rings is high heat, proper spacing on the baking sheet, and not overloading them with oil. Make sure your oven is fully preheated to 425°F, leave space between each ring, and use just enough oil to lightly coat the squash. Using a wire rack on the baking sheet also helps air circulate underneath for even crisping.
What dipping sauces go well with these squash rings?
The possibilities are endless! I love serving them with garlic aioli, spicy ranch dressing, honey mustard, or a simple lemon-garlic yogurt sauce. For a fall-themed twist, try a maple-Dijon dip or a chipotle-lime crema. Even ketchup works in a pinch—no judgment here. If you’re looking for more party food inspiration, check out these perfect pink champagne jello shots for a fun pairing.
Pin This Recipe!

10-Minute Crispy Oven-Roasted Delicata Squash Rings

Crispy, salty, caramelized squash rings made in the oven without deep-frying. A quick and easy fall side dish with a satisfying crunch.
- Prep Time: 10 minutes
- Cook Time: 12-15 minutes
- Total Time: 22-25 minutes
- Yield: 4 servings 1x
- Category: Side Dish
- Cuisine: American
Ingredients
- 2 medium delicata squash
- 1 cup panko breadcrumbs
- ¼ cup finely grated Parmesan cheese
- 2 tablespoons olive oil
- 1 teaspoon garlic powder
- ½ teaspoon salt, plus more for sprinkling
- ¼ teaspoon freshly ground black pepper
- ½ teaspoon smoked paprika (optional)
- Fresh parsley for garnish (optional)
Instructions
- Preheat your oven to 425°F (220°C). Line a baking sheet with parchment paper or a silicone mat.
- Wash the delicata squash thoroughly and pat dry. Trim off both ends, then slice crosswise into ½-inch thick rings. Remove seeds with your fingers or a small spoon.
- In a medium bowl, combine panko breadcrumbs, Parmesan cheese, garlic powder, smoked paprika (if using), salt, and black pepper. In another bowl, add the olive oil.
- Working in batches, toss a few squash rings in the olive oil until lightly coated. Transfer to the panko mixture and toss until completely coated on both sides. Press gently to help the coating adhere.
- Arrange the coated squash rings in a single layer on the prepared baking sheet, ensuring they are not touching. For extra crispiness, place a wire rack on the baking sheet and arrange rings on top.
- Bake for 10-12 minutes, then check for doneness. Flip each ring carefully with a spatula and bake for another 2-3 minutes if needed, until deep golden brown.
- Remove from the oven and let rest for 2-3 minutes. Transfer to a serving platter, sprinkle with flaky salt and garnish with fresh parsley if desired. Serve immediately.
Notes
For best results, pat squash rings completely dry before coating. Do not overcrowd the pan to ensure crispiness. If coating browns too quickly, tent loosely with foil. Serve immediately for maximum crunch.
Nutrition
- Serving Size: About 6 rings
- Calories: 185
- Sugar: 6
- Sodium: 320
- Fat: 9
- Saturated Fat: 2
- Carbohydrates: 24
- Fiber: 4
- Protein: 6
Keywords: delicata squash, crispy squash rings, oven-roasted squash, fall side dish, easy vegetable recipe, panko crusted squash


