That first sticky-sweet smack of peanut butter on my fingers — the kind that makes you lick your thumb without thinking — still takes me straight to my aunt’s tiny kitchen in Nashville. I was maybe ten, sitting on a wobbly stool while she rolled these little balls of peanut butter, oats, and honey between her palms like she was making magic. She called them “pick-me-ups,” and she’d pack them in wax paper for road trips, afternoon slumps, or those moments when you just needed something that felt like a hug but didn’t require turning on the oven. I remember watching her work, the way she’d toss in a handful of chocolate chips without measuring, the way she’d taste the dough from her finger and nod like it passed some secret test. I never asked for the recipe. I just watched.
Years later, standing in my own kitchen with a bunch of spotty bananas and a jar of peanut butter that was down to its last few scoops, I found myself doing the exact same thing. No recipe card. No measuring spoons. Just that memory guiding my hands. And honestly? That first bite took me right back to that sticky stool in Nashville. These Easy Peanut Butter Banana Energy Bites aren’t fancy. They’re not complicated. But they’re the kind of thing you make when you need a win — a quick, no-bake, five-minute win that actually tastes like something. I’ve made them a hundred times since, tweaking the texture, swapping ingredients based on what’s in the pantry, and they’ve never let me down. They’re forgiving like that. They don’t care if you’re precise. They just want to be eaten.
So here’s the thing: this isn’t a recipe you’ll stress over. It’s a recipe you’ll memorize, then make your own. That’s the beauty of it. And once you roll your first batch, you’ll understand why I still make them the way my aunt did — by feel, by memory, and by the simple truth that some things don’t need improving.
Why You’ll Love This Recipe
Let me be real with you — I’ve tested a lot of energy bite recipes over the years. Some turned out too dry, some fell apart, and some just didn’t taste worth the effort. These Easy Peanut Butter Banana Energy Bites are the ones that stuck. Here’s why they’ll stick for you too:
- Ready in 5 Minutes: No oven, no stove, no waiting. You mix, you roll, you eat. Perfect for those mornings when you’re running late or those afternoons when the 3 PM slump hits hard.
- Simple Ingredients: You probably have everything in your kitchen right now. Oats, peanut butter, banana, honey, maybe a few chocolate chips. No weird health food store finds required.
- Perfect for Meal Prep: Make a batch on Sunday and grab them all week. They keep beautifully in the fridge and actually get better after a day or two as the flavors meld together.
- Kid-Approved: My niece calls them “cookie dough balls” and honestly, she’s not wrong. They have that same soft, chewy texture without any of the guilt.
- Endlessly Customizable: You can swap the peanut butter for almond butter, add shredded coconut, throw in some flax seeds, or go wild with dark chocolate chunks. The base recipe is just a starting point.
What makes these different from every other energy bite recipe out there? It’s the banana. Most recipes use dates or honey alone for sweetness, but the banana adds a natural creaminess and moisture that keeps these bites soft without being mushy. Plus, it cuts down on added sugar. I’ve made versions with just honey and they’re good, but the banana version? That’s the one I keep coming back to. It’s the one that makes you close your eyes after the first bite and think, “Yeah, that’s it.”
These bites aren’t just a snack — they’re a solution. For busy mornings, post-workout refueling, road trips, or those moments when you need something sweet but don’t want to derail your day. They’re comfort food that actually works with your body, not against it.
What Ingredients You Will Need
This recipe uses simple, wholesome ingredients that work together to create a soft, chewy, naturally sweet energy bite without any refined sugar or complicated steps. Most of these are pantry staples, which is exactly how I like my recipes — accessible and forgiving.
- 1 large ripe banana, mashed (about ½ cup) — The riper the banana, the sweeter your bites will be. I’m talking spotty, almost-too-soft-for-eating bananas. That’s the sweet spot. If your banana isn’t quite ripe enough, the bites won’t be as sweet and the texture might be slightly firmer.
- ½ cup creamy peanut butter — I use natural peanut butter with no added sugar or oil for the best texture. If you’re using a brand that’s very stiff (like the kind with oil separation), stir it well before measuring. Crunchy peanut butter works too if you want a little texture, but creamy gives you that smooth, cohesive dough.
- ¼ cup honey or maple syrup — Honey gives a classic flavor, but maple syrup adds a subtle warmth that pairs beautifully with the banana. Both work. If you’re vegan, go with maple syrup. If you want a lower-sugar option, you can reduce this to 2 tablespoons, but the bites won’t be as sweet and the texture will be slightly less sticky.
- 1 cup old-fashioned rolled oats — Quick oats work in a pinch, but old-fashioned oats give you a better texture. They hold their shape and provide that satisfying chewiness. Steel-cut oats are too hard for this recipe — don’t use them unless you want a jaw workout.
- ⅓ cup mini chocolate chips — Regular chocolate chips work too, but mini ones distribute more evenly throughout the dough. I prefer dark chocolate chips for balance, but milk chocolate or semi-sweet are both great. If you’re watching sugar, try sugar-free chocolate chips or cacao nibs.
- ¼ cup ground flaxseed or chia seeds (optional) — This adds fiber, omega-3s, and helps bind the mixture. I usually add flaxseed because it’s what I always have on hand, but chia seeds work beautifully too. If you skip this, the bites will still hold together, just slightly less firmly.
- ¼ teaspoon vanilla extract — A small addition that makes a big difference. It rounds out the flavors and adds that “baked goods” aroma even though nothing is baked. Don’t skip it if you can help it.
- Pinch of salt — If your peanut butter is unsalted, definitely add this. Salt heightens all the flavors and keeps the sweetness from being one-dimensional.
That’s it. Seven ingredients, most of which you probably already have. No trips to specialty stores, no expensive superfood powders, no complicated prep. Just real food that comes together in minutes.
Equipment Needed
You don’t need much for this recipe, which is honestly one of my favorite things about it. Here’s what you’ll want to have on hand:
- Mixing bowl — Any medium-sized bowl will do. I prefer glass or stainless steel because they don’t hold onto odors, but a ceramic bowl works fine too.
- Fork or potato masher — For mashing the banana. A fork works perfectly; just mash until smooth with no large lumps. A potato masher is faster if you have one.
- Spatula or wooden spoon — For mixing everything together. A silicone spatula is my go-to because it scrapes the sides well, but a sturdy wooden spoon gets the job done.
- Measuring cups and spoons — Standard set for accuracy. I’ve made these by eye before and they still worked, but measuring ensures consistent results every time.
- Baking sheet or plate — To hold the rolled bites while you shape them. Line it with parchment paper if you want easy cleanup.
- Small cookie scoop or melon baller (optional) — This makes portioning the dough a breeze and gives you evenly sized bites. If you don’t have one, just use a tablespoon measure or your hands. Trust me, your hands work great.
I’ve made these in a hotel room with a plastic bowl and a fork before. They turned out just fine. Don’t overthink the equipment — if you have a bowl and a spoon, you’re good to go.
Preparation Method
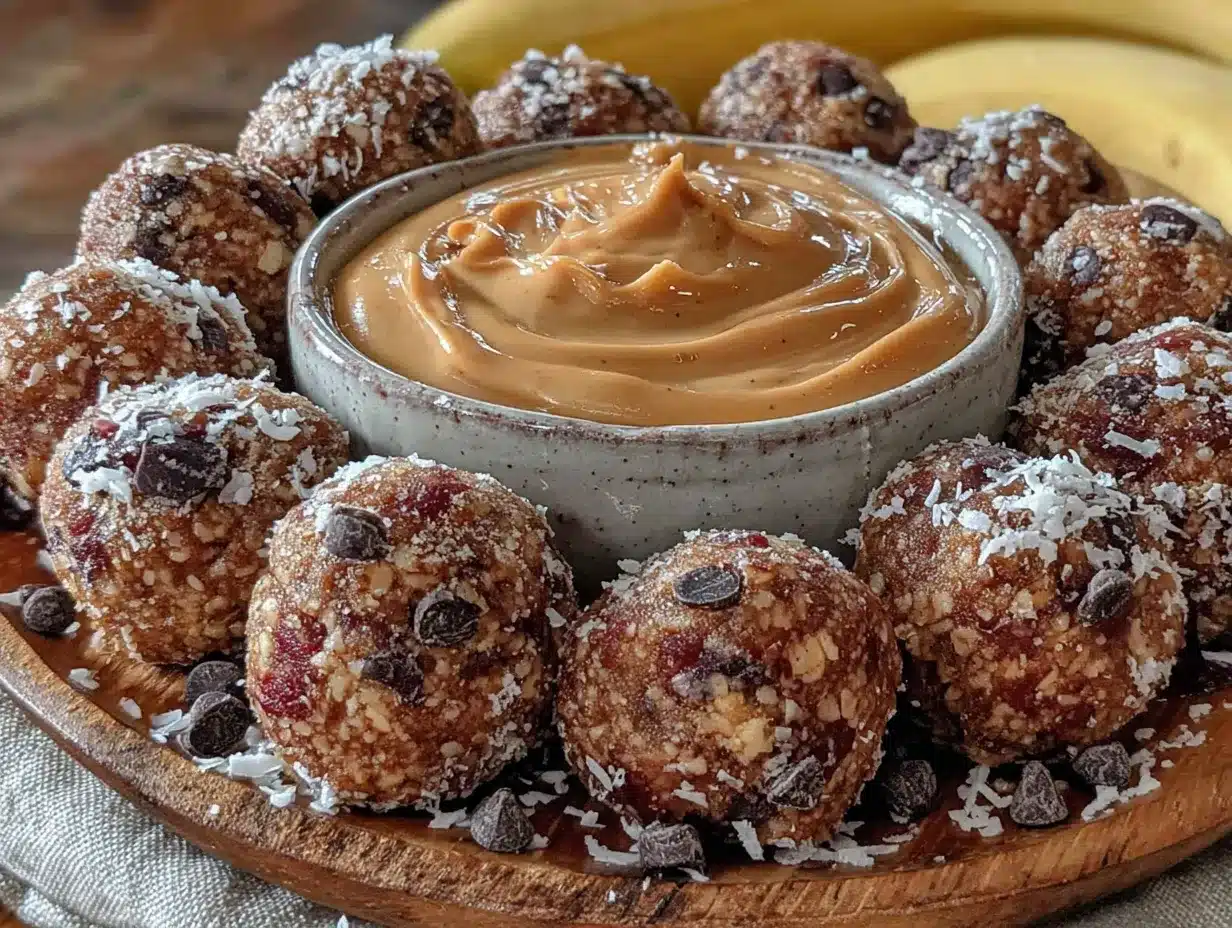
Alright, let’s get rolling — literally. This is the easiest part, and I promise you’ll be snacking in under ten minutes.
- Mash the banana. Peel your ripe banana and place it in a medium mixing bowl. Use a fork to mash it thoroughly until it’s smooth with no large chunks. You want a consistency similar to baby food — not completely liquid, but very soft. This usually takes about 30 seconds of mashing. If your banana is really ripe, it’ll practically mash itself.
- Add the wet ingredients. Spoon in the peanut butter, honey (or maple syrup), and vanilla extract. Stir everything together with your spatula until the mixture is smooth and well combined. The peanut butter might resist at first, but keep stirring — it’ll come together. You’re looking for a uniform, thick paste at this point. Give it a taste. Go ahead. I do every time.
- Mix in the dry ingredients. Add the rolled oats, ground flaxseed (if using), and a pinch of salt. Stir until everything is evenly distributed. The mixture will be thick and slightly sticky — that’s exactly what you want. If it feels too wet, add another tablespoon of oats. If it feels too dry and crumbly, add a teaspoon of honey or a splash of milk. The dough should hold together when pressed between your fingers.
- Fold in the chocolate chips. Sprinkle the mini chocolate chips over the dough and fold them in gently. Don’t overmix at this stage — you want the chips distributed evenly without breaking them up. If you’re adding any other mix-ins (shredded coconut, dried fruit, nuts), now’s the time to fold them in too.
- Chill the dough (optional but recommended). Pop the bowl in the fridge for 10-15 minutes. This makes the dough firmer and easier to roll. If you’re in a hurry, you can skip this step, but your bites will be stickier and slightly harder to shape. I usually chill it while I clean up the dishes — multitasking at its finest.
- Roll into bites. Using a small cookie scoop or a tablespoon, portion out the dough and roll it between your palms to form smooth balls. Aim for about 1-inch in diameter — roughly the size of a golf ball. You should get 12-14 bites from this recipe. If the dough sticks to your hands, lightly wet your palms with water or rub a tiny bit of oil on them.
- Place on a lined baking sheet. As you roll each bite, place it on a baking sheet or plate lined with parchment paper. Space them out so they don’t stick together.
- Chill to set. Refrigerate the bites for at least 30 minutes before serving. This allows them to firm up and hold their shape. If you can wait that long, that is. I usually sneak one right away and pretend I didn’t.
And that’s it. You just made a batch of healthy, delicious energy bites in about five minutes of active work. The hardest part is not eating all of them before they make it to the fridge.
Cooking Tips & Techniques
After making these Easy Peanut Butter Banana Energy Bites more times than I can count, I’ve picked up a few tricks that make the process even smoother. Here’s what I’ve learned the hard way so you don’t have to.
Use really ripe bananas. I cannot stress this enough. The brown-spotted, almost-too-soft-to-eat bananas are perfect for this recipe. They’re naturally sweeter and mash more easily, which means you need less added sweetener. If your bananas are still yellow and firm, you can speed up the ripening process by baking them at 300°F for 15-20 minutes until the skins turn black. Let them cool before using.
Don’t overmix the dough. I know it’s tempting to keep stirring until everything looks perfectly uniform, but overmixing can make the oats break down too much and result in a gummy texture. Mix just until combined, then stop. A few streaks of peanut butter or a slightly uneven distribution of chocolate chips is totally fine — it adds character.
Wet your hands for easier rolling. This was a game-changer for me. If the dough sticks to your palms, just run your hands under cold water and shake off the excess. The thin layer of water prevents sticking without adding any moisture to the dough. You can also rub a drop of coconut oil on your hands for the same effect.
Adjust consistency on the fly. The humidity level of your kitchen, the moisture content of your banana, and the brand of peanut butter can all affect the final texture. If your dough feels too wet, add oats one tablespoon at a time. If it’s too dry and crumbly, add a teaspoon of honey or a splash of milk. The dough should feel like soft cookie dough — pliable but not sticky.
Make a double batch. Trust me on this one. These bites disappear fast. I always double the recipe and keep a batch in the fridge for the week. They’re perfect for grabbing on your way out the door, packing in lunchboxes, or having on hand when that afternoon sugar craving hits. If you’re looking for another quick treat to meal prep, these mini lemon blueberry cheesecakes are also great for make-ahead snacking.
One mistake I made early on: I used natural peanut butter that had separated and didn’t stir it well enough. The oil content was off, and my bites turned out greasy and wouldn’t hold together. Lesson learned. Always stir your natural peanut butter thoroughly before measuring.
Variations & Adaptations
One of the best things about this recipe is how flexible it is. I’ve made so many versions over the years, and honestly, I don’t think I’ve ever had a bad batch. Here are some of my favorite variations to keep things interesting.
Nut-Free Version: Swap the peanut butter for sunflower seed butter or WowButter. The flavor will be slightly different, but the texture works beautifully. Just note that sunflower seed butter can turn green when combined with baking soda (not an issue here since we’re not baking), and it has a stronger flavor that pairs well with the banana.
Vegan Version: Use maple syrup instead of honey, and make sure your chocolate chips are dairy-free. Most dark chocolate chips are naturally vegan, but always check the label. The recipe works exactly the same way — no adjustments needed.
Protein-Packed Version: Add a scoop of your favorite vanilla or chocolate protein powder. You’ll need to increase the wet ingredients slightly to compensate — add an extra tablespoon of peanut butter or a splash of milk. Start with ¼ cup of protein powder and adjust from there. This version is perfect for post-workout refueling.
Tropical Twist: Swap the chocolate chips for dried pineapple or mango, and add ¼ cup of shredded coconut. The combination of banana, coconut, and tropical fruit is absolutely divine and feels like a mini vacation in every bite.
Low-Sugar Version: Use a very ripe banana (for natural sweetness), reduce the honey to 1 tablespoon, and use sugar-free chocolate chips or cacao nibs. The bites will be less sweet but still satisfying, especially if you’re used to lower-sugar snacks.
Spiced Version: Add ½ teaspoon of cinnamon, ¼ teaspoon of nutmeg, and a pinch of ginger to the dough. The warm spices complement the banana and peanut butter beautifully, making these feel more like a cozy fall treat. I made this version during a chilly October afternoon and it was gone within two days.
If you’re in the mood for something a little more indulgent but still easy, these cherry chocolate brownies are another favorite in my kitchen — rich, fudgy, and perfect for when you want a full dessert experience.
Serving & Storage Suggestions
These Easy Peanut Butter Banana Energy Bites are best served chilled, straight from the fridge. The cold temperature keeps them firm and chewy, which is exactly the texture you want. If you let them sit at room temperature for too long, they’ll soften and become a bit sticky — still delicious, just messier to eat.
How to serve them: I love grabbing a couple of these on my way out the door for a quick breakfast, or packing them in lunchboxes for a midday treat. They’re also fantastic after a workout — the combination of carbs from the oats and banana with protein from the peanut butter makes for excellent recovery fuel. For a fun presentation at a party or brunch, arrange them on a platter with fresh fruit and maybe a side of yogurt for dipping. They’re always a hit.
Storage instructions: Keep your energy bites in an airtight container in the refrigerator. They’ll stay fresh for up to 5 days, though honestly, they never last that long in my house. If you want to keep them longer, you can freeze them for up to 3 months. Just place them in a single layer on a baking sheet to freeze solid, then transfer to a freezer-safe bag or container. Thaw them in the fridge overnight or at room temperature for about 15 minutes before eating.
How flavors develop: Here’s something interesting — these bites actually taste better the next day. The flavors meld together as they sit, and the oats absorb some of the moisture from the banana, creating a more uniform texture. I always try to make them a day ahead if I’m serving them for an event. The difference is subtle, but noticeable.
Reheating tip: You don’t need to reheat these, but if you want a slightly softer texture, let them sit at room temperature for 10-15 minutes before eating. Or, if you’re feeling adventurous, pop one in the microwave for about 10 seconds. It won’t be hot, but it’ll be soft and almost doughy — a completely different but equally delicious experience.
For another no-bake treat that keeps beautifully, check out these fluffy strawberry mousse cups — they’re light, creamy, and perfect for warm weather when you don’t want to turn on the oven.
Nutritional Information & Benefits
I’m not a nutritionist, but I do pay attention to what goes into my body, and these energy bites make me feel good about what I’m eating. Here’s a rough breakdown per bite (based on 12 bites per batch):
| Nutrient | Amount Per Bite |
|---|---|
| Calories | 145 |
| Protein | 5g |
| Carbohydrates | 18g |
| Fiber | 3g |
| Sugar | 9g |
| Fat | 7g |
| Saturated Fat | 2g |
| Sodium | 85mg |
Health benefits worth noting: The oats provide slow-release energy and fiber to keep you full longer. The peanut butter offers protein and healthy fats that support heart health. Bananas are packed with potassium, which helps with muscle function and recovery. And the flaxseed (if you add it) delivers omega-3 fatty acids and extra fiber. These aren’t just empty calories — they’re fuel that actually works with your body.
Dietary considerations: This recipe is naturally vegetarian and can be made vegan by swapping honey for maple syrup. It’s also gluten-free if you use certified gluten-free oats. For nut-free, use sunflower seed butter. The main allergen to watch for is peanuts, but that’s easily swapped.
I love that I can feel good about eating these — and even better about feeding them to my family. They’re the kind of snack that doesn’t come with a side of guilt.
Conclusion
There’s something special about a recipe that asks so little of you but gives so much in return. These Easy Peanut Butter Banana Energy Bites are exactly that — simple, forgiving, and genuinely delicious. They don’t require fancy equipment, hard-to-find ingredients, or hours in the kitchen. Just a bowl, a spoon, and about five minutes of your time.
What I love most about this recipe is how it’s become a staple in my life. I make them when I’m busy, when I’m tired, when I need something quick to grab between meetings, or when I just want a little sweetness without going overboard. They’ve traveled with me on road trips, fueled me through long workdays, and even made appearances at potlucks where they disappeared faster than I expected.
Now it’s your turn. Give these a try, and don’t be afraid to make them your own. Swap the chocolate chips for dried cranberries. Add a sprinkle of cinnamon. Use almond butter instead of peanut. The recipe is just a starting point — the real magic happens when you make it yours.
I’d love to hear how they turn out for you. Drop a comment below and let me know what variations you tried, or tag me in your photos if you share them online. And if you’re looking for more easy, no-bake recipes, don’t forget to browse the full recipe collection for more inspiration. Happy snacking!
Frequently Asked Questions
Can I use quick oats instead of old-fashioned oats?
Yes, you can. Quick oats will give you a softer, more uniform texture since they’re more finely processed. The bites will hold together just as well, but they won’t have the same chewy texture that old-fashioned oats provide. Both work, so use what you have.
How long do these energy bites last in the fridge?
They’ll stay fresh in an airtight container in the refrigerator for up to 5 days. In my experience, they actually taste best on days 2 and 3, after the flavors have had time to meld together. Just make sure your container is sealed tight to prevent them from drying out or absorbing other fridge odors.
Can I freeze these energy bites?
Absolutely. Freeze them in a single layer on a baking sheet until solid, then transfer to a freezer-safe bag or container. They’ll keep for up to 3 months. Thaw them in the fridge overnight, or let them sit at room temperature for about 15 minutes before eating. They’re great to have on hand for busy mornings.
My dough is too sticky to roll. What should I do?
If your dough is too sticky, pop it in the fridge for 15-20 minutes to firm up. If it’s still sticky after chilling, add more oats one tablespoon at a time until the dough holds together when pressed. You can also lightly wet your hands with water or rub a tiny bit of oil on your palms before rolling — this prevents sticking without changing the dough consistency.
Can I make these without a banana?
Yes, but the texture will be different. You can substitute the banana with ¼ cup of unsweetened applesauce or 3 tablespoons of date paste. Both will add natural sweetness and moisture, though the banana flavor will be missing. If you want to skip the banana entirely, try using ⅓ cup of creamy peanut butter and ⅓ cup of honey, then adjust the oats as needed for the right consistency.
Pin This Recipe!
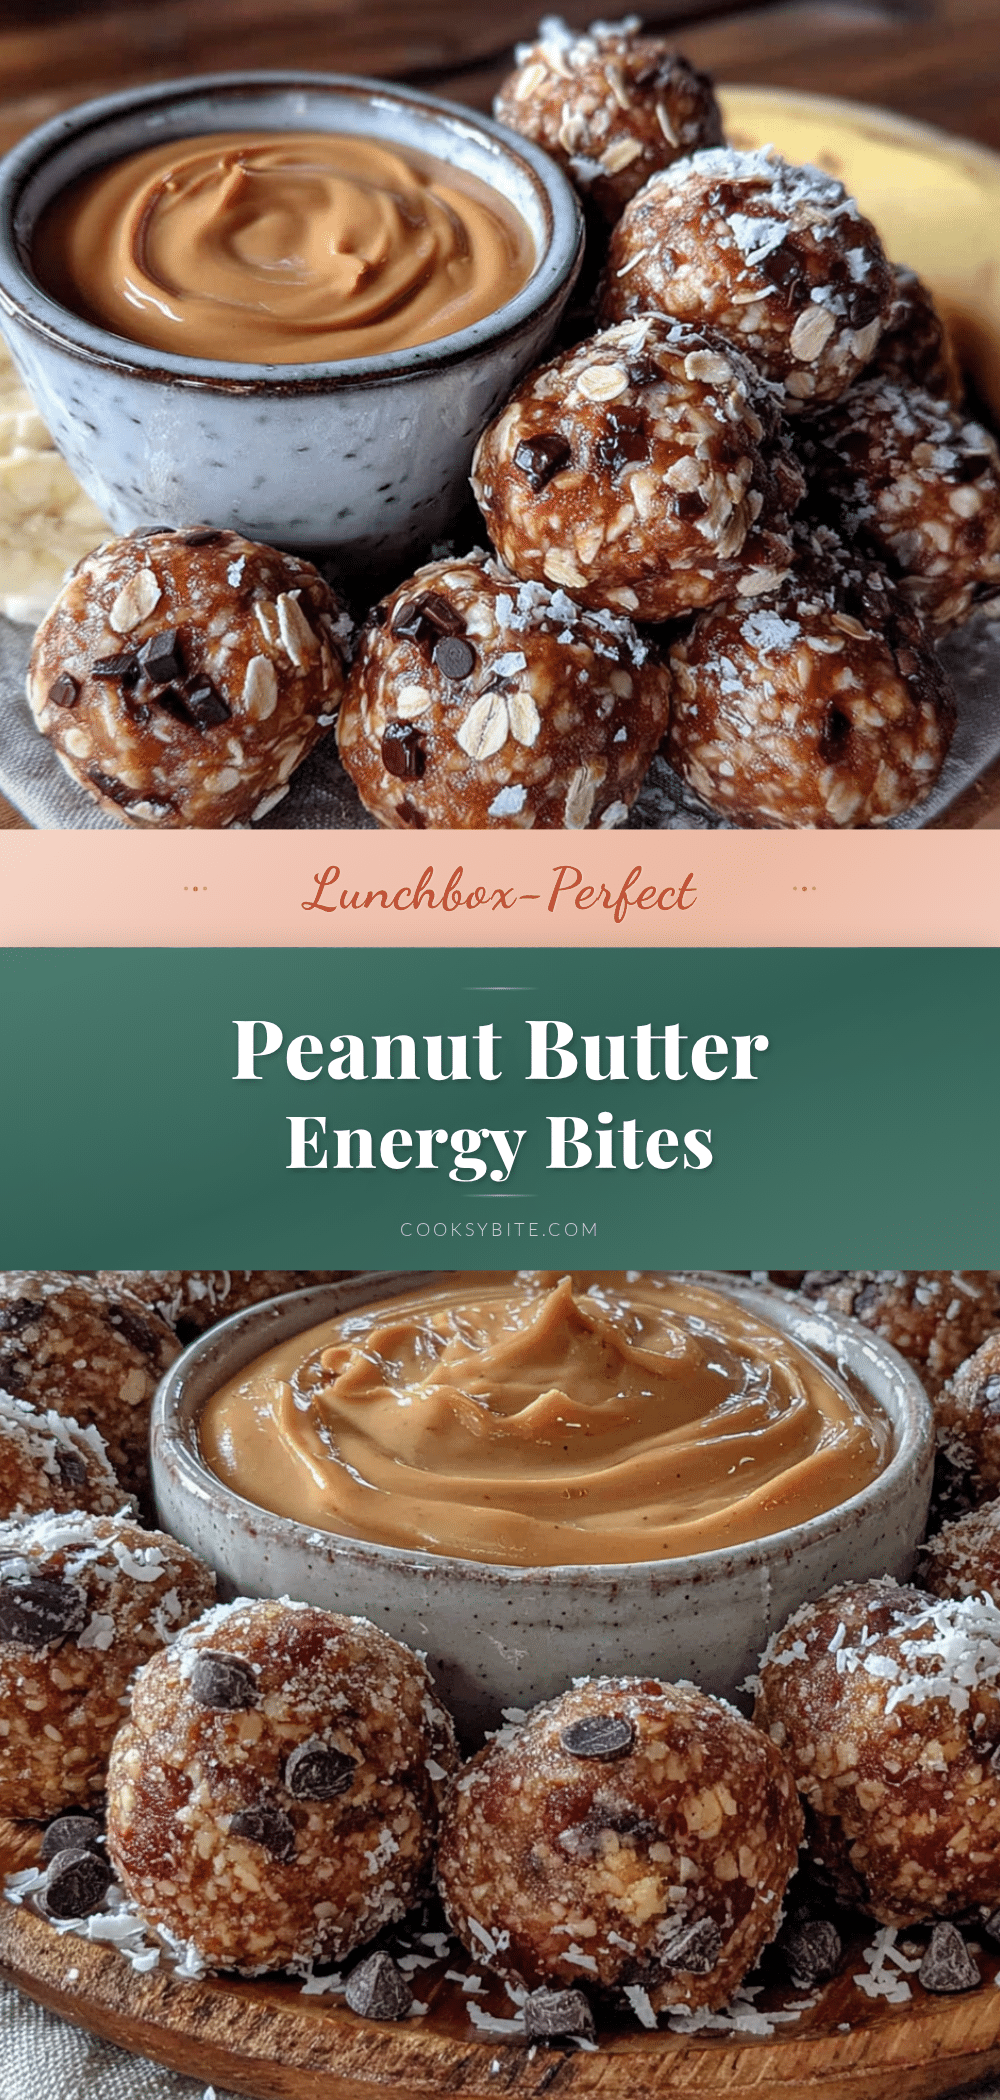
Easy Peanut Butter Banana Energy Bites: 5-Minute Recipe
These no-bake energy bites combine ripe banana, peanut butter, oats, and chocolate chips for a quick, healthy snack ready in just 5 minutes. Perfect for meal prep, post-workout refueling, or a sweet treat without the guilt.
- Prep Time: 5 minutes
- Cook Time: 0 minutes
- Total Time: 5 minutes
- Yield: 12-14 bites 1x
- Category: Snack
- Cuisine: American
Ingredients
- 1 large ripe banana, mashed (about ½ cup)
- ½ cup creamy peanut butter
- ¼ cup honey or maple syrup
- 1 cup old-fashioned rolled oats
- ⅓ cup mini chocolate chips
- ¼ cup ground flaxseed or chia seeds (optional)
- ¼ teaspoon vanilla extract
- Pinch of salt
Instructions
- Mash the banana in a medium mixing bowl until smooth with no large chunks.
- Add the peanut butter, honey (or maple syrup), and vanilla extract. Stir until smooth and well combined.
- Mix in the rolled oats, ground flaxseed (if using), and a pinch of salt. Stir until evenly distributed. The mixture should be thick and slightly sticky.
- Fold in the mini chocolate chips gently until evenly distributed.
- Chill the dough in the refrigerator for 10-15 minutes (optional but recommended for easier rolling).
- Using a small cookie scoop or tablespoon, portion out the dough and roll into 1-inch balls (about 12-14 bites).
- Place the rolled bites on a parchment-lined baking sheet or plate.
- Refrigerate for at least 30 minutes to set before serving.
Notes
Use very ripe bananas for natural sweetness. If dough is too sticky, chill for 15-20 minutes or add more oats. If too dry, add a teaspoon of honey or milk. Wet hands with water or oil for easier rolling. Bites taste even better the next day as flavors meld.
Nutrition
- Serving Size: 1 bite
- Calories: 145
- Sugar: 9
- Sodium: 85
- Fat: 7
- Saturated Fat: 2
- Carbohydrates: 18
- Fiber: 3
- Protein: 5
Keywords: energy bites, peanut butter banana, no-bake, healthy snack, meal prep, gluten-free, vegetarian


