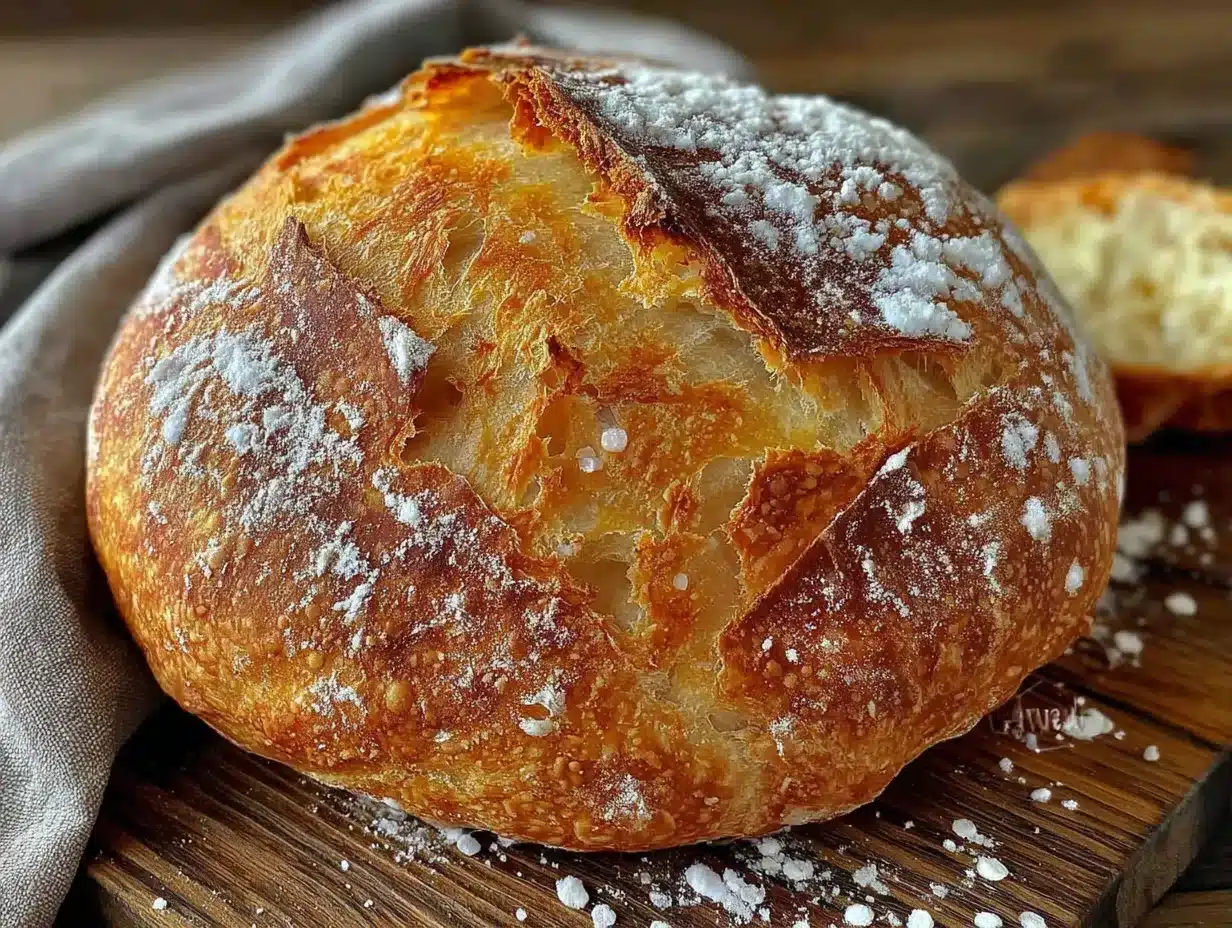
That first crackle of the crust as you slice through it — the sound that stops you mid-motion, knife suspended, because you know what’s coming next. The steam rises in a slow curl, carrying that tangy, toasty scent that fills your whole kitchen and makes you close your eyes for just a second. It still takes me straight to that gray Sunday afternoon when I pulled my very first sourdough loaf from the oven, not sure if it would work, half-expecting a brick.
I’d been feeding my starter for weeks — named it, talked to it, watched it bubble and fall like some kind of kitchen pet. And honestly? I was scared to bake with it. What if it flopped? What if all that flour and patience led to something dense and sad? But that first loaf — imperfect, a little lopsided, with a ear that barely cracked — changed something in me. It was chewy and open and tasted like nothing I’d ever made before. Not because I was talented, but because sourdough does the work. You just have to trust it.
This homemade sourdough starter bread with no yeast needed is the recipe I wish I’d had back then. It’s forgiving, it’s rewarding, and it turns simple flour and water into something that feels almost magical. Not complicated — just patient. And once you get the hang of it, you’ll never look at store-bought bread the same way again.
Why You’ll Love This Recipe
Let me tell you why this sourdough bread recipe has earned a permanent spot in my weekly rotation. After dozens of bakes, some glorious and some hilariously flat, I’ve dialed in exactly what works.
- No commercial yeast needed — Your starter does all the heavy lifting. It’s wild fermentation at its finest, and the flavor is so much deeper than anything from a packet.
- Simple ingredients — Flour, water, salt, and your active starter. That’s it. No fancy additives or hard-to-find specialty flours.
- Perfect for beginners — I’ve made every mistake you can imagine (overproofed, underproofed, baked a loaf that looked like a frisbee), and I’ll show you how to avoid them.
- Crowd-pleaser — Every time I bring a loaf to a gathering, people ask for the recipe. It’s the kind of bread that disappears before the soup is even served.
- Incredible texture and flavor — That tangy, slightly nutty taste with a chewy crumb and crackling crust? Pure comfort food that makes you slow down and savor each bite.
This isn’t just another bread recipe — it’s the one that taught me to trust my hands and my instincts. The kind that makes you feel like a real baker, even on your first try. And honestly, there’s something deeply satisfying about knowing you created that beautiful loaf from nothing but flour, water, and time.
What Ingredients You Will Need
This recipe uses simple, wholesome ingredients to deliver that signature sourdough flavor and satisfying texture without any fuss. Most of these are probably already in your pantry.
For the Starter (if you don’t have one yet)
- Whole wheat flour — 100g (about ¾ cup). I prefer King Arthur for its consistent protein content. The whole wheat gives the starter a head start with natural yeasts.
- All-purpose flour — 100g (about ¾ cup). Unbleached is best here; bleached flour can slow down fermentation.
- Filtered water — 200g (about 1 cup), lukewarm. Tap water with chlorine can inhibit your starter’s activity, so filtered or bottled is safer.
For the Bread Dough
- Active sourdough starter — 100g (about ½ cup). Make sure it’s bubbly and doubled in size, ideally fed 4-6 hours before mixing.
- Bread flour — 500g (about 4 cups). Higher protein content gives you that chewy, open crumb structure. I’ve used Gold Medal and Bob’s Red Mill with great results.
- Filtered water — 350g (about 1½ cups), at room temperature.
- Fine sea salt — 10g (about 2 teaspoons). Don’t skip this — salt controls fermentation and strengthens the gluten structure.
For Dusting and Shaping
- Rice flour — A small amount for dusting your banneton or proofing basket. It doesn’t absorb moisture like wheat flour, so your dough won’t stick.
- All-purpose flour — For your work surface during shaping.
A quick note on flour: I’ve tested this with all-purpose flour alone, and while it works, the crumb is denser. Bread flour really makes a difference in achieving that bakery-style open crumb. If you’re gluten-sensitive, I’ve had decent results with a 50/50 blend of brown rice flour and tapioca starch, though the texture is definitely different — more cake-like than chewy.
Equipment Needed
You don’t need a professional bakery setup, but a few key tools make the process much smoother.
- Digital kitchen scale — This is non-negotiable for sourdough. Measuring by weight is way more accurate than cups, and consistency matters here.
- Dutch oven — A 5-6 quart enameled cast iron pot works perfectly. It traps steam and gives you that gorgeous crispy crust. Lodge and Le Creuset are both excellent, but I started with a $30 Dutch oven from a discount store and it worked fine.
- Banneton proofing basket — Optional but helpful. A mixing bowl lined with a floured kitchen towel works just as well.
- Bench scraper — Makes handling sticky dough so much easier. A plastic dough scraper costs about $5 and is worth every penny.
- Lame or sharp knife — For scoring the dough before baking. A razor blade works perfectly if you don’t have a lame.
- Parchment paper — For transferring the dough into the hot Dutch oven without burning yourself.
I’ll be honest — my first few loaves were baked in a regular oven with a pan of water on the bottom rack for steam. It worked, but the crust wasn’t as dramatic. The Dutch oven method is a game-changer, and I wish someone had told me that from the start.
Preparation Method
This process takes about 24 hours from start to finish, but most of that is hands-off time. The actual active work is maybe 30 minutes total. Here’s how it breaks down.
Day 1: Feed Your Starter
- Morning (8:00 AM) — Discard all but 50g of your starter. Add 100g bread flour, 100g whole wheat flour, and 200g lukewarm filtered water. Stir well, cover loosely, and let it sit at room temperature.
- Check by afternoon (4:00 PM) — Your starter should be bubbly, doubled, and smell pleasantly sour. If it’s not active yet, wait another 2-4 hours. A spoonful should float in water when it’s ready.
Day 1 Evening: Mix the Dough
- Autolyse (6:00 PM) — In a large bowl, combine 500g bread flour and 350g water. Mix until no dry flour remains. Cover and let rest for 30 minutes. This lets the flour absorb water and starts gluten development naturally.
- Add starter and salt (6:30 PM) — Sprinkle 100g active starter and 10g salt over the dough. Wet your hands and squeeze everything together until fully incorporated. The dough will be shaggy and sticky — that’s normal.
- Bulk fermentation begins (7:00 PM) — Cover the bowl and let it rest. Over the next 3-4 hours, you’ll perform 4 sets of stretch and folds every 30 minutes.
Stretch and Fold Technique
- Wet your hands slightly to prevent sticking.
- Grab one side of the dough, stretch it up, and fold it over the center.
- Rotate the bowl 90 degrees and repeat. Do this 4 times total (one full rotation).
- Cover and rest for 30 minutes, then repeat.
- After 4 sets, the dough should feel smoother and more elastic. It should dome slightly and show small bubbles on the surface.
Overnight Cold Proof
- Shape the dough (10:00 PM) — Lightly flour your work surface. Turn the dough out gently. Fold the left side to the center, then the right, then roll it up from the bottom. Cup your hands around it and pull it toward you to create surface tension.
- Place seam-side up in a floured banneton or lined bowl. Cover tightly with plastic wrap or a shower cap.
- Refrigerate overnight (8-12 hours). Cold proofing develops flavor and makes the dough easier to handle.
Day 2: Bake
- Preheat (6:00 AM) — Place your Dutch oven in the oven and preheat to 500°F (260°C). Let it heat for at least 30 minutes.
- Score the dough — Remove the dough from the fridge. Turn it out onto a piece of parchment paper. Using a lame or sharp knife, make a single deep slash about ¼ inch deep along the top. This controls where the bread expands.
- Bake covered — Carefully transfer the dough (on the parchment) into the hot Dutch oven. Cover and bake at 450°F (230°C) for 25 minutes.
- Bake uncovered — Remove the lid and bake for another 20-25 minutes until deep golden brown. The internal temperature should reach 200-210°F (93-99°C).
- Cool completely — Transfer to a wire rack and resist the urge to slice for at least 1 hour. The crumb is still setting inside, and cutting too early will make it gummy.
Cooking Tips & Techniques
I’ve learned these lessons the hard way, so you don’t have to.
Temperature matters more than you think. If your kitchen is cold (below 70°F), bulk fermentation can take 6-8 hours instead of 3-4. I once left my dough in a drafty spot and came back to a flat, lifeless mess. Now I use my oven with the light on — it stays around 78°F and works perfectly.
Don’t skip the autolyse. That 30-minute rest before adding starter and salt makes the dough easier to work with and improves the crumb structure. I’ve tested skipping it, and the difference is noticeable — the dough is stickier and harder to shape.
Watch for the jiggle test. After bulk fermentation, your dough should feel airy and jiggle slightly when you shake the bowl. If it feels dense and stiff, it needs more time. If it’s spreading flat and looks deflated, you’ve overproofed it. That sweet spot takes practice, but you’ll learn to recognize it.
My biggest failure? I once forgot to score the dough before baking. The bread exploded sideways, creating a massive crack that looked like a geological fault line. It still tasted good, but it was ugly. Score deeply and confidently — it’s the baker’s signature.
Use rice flour for dusting. Regular flour can make the dough stick to the banneton, especially during long cold proofs. Rice flour doesn’t absorb moisture the same way, so your dough releases cleanly every time.
Variations & Adaptations
Once you’ve mastered the basic loaf, the possibilities are endless. Here are a few variations I’ve tried and loved.
Seeded sourdough — Add 50g of mixed seeds (sunflower, pumpkin, sesame) during the first stretch and fold. Toast them lightly first for more flavor. The seeds add crunch and make the bread feel extra special.
Whole wheat sourdough — Replace 200g of bread flour with whole wheat flour. You’ll need to add an extra 20-30g of water since whole wheat absorbs more moisture. The flavor is nuttier and more rustic.
Herb and garlic sourdough — Add 2 tablespoons of dried rosemary or thyme and 3 cloves of minced garlic during the final stretch and fold. This version is incredible with olive oil for dipping or alongside a bowl of tomato soup.
Gluten-free adaptation — Use a 50/50 blend of brown rice flour and tapioca starch, plus 1 teaspoon of xanthan gum. The texture is denser and more cake-like, but the flavor is still fantastic. Just be prepared for a shorter bulk fermentation — gluten-free doughs ferment faster.
I’ve also experimented with adding 50g of grated cheddar and a pinch of cayenne during shaping. It makes an incredible grilled cheese sandwich — the sourdough tang pairs beautifully with sharp cheese.
Serving & Storage Suggestions
This bread is best served warm, but let it cool completely first. That hour of waiting is torture, I know, but it’s essential for the crumb structure.
Serving ideas:
- Slice thick and toast it — the contrast between the crispy crust and soft interior is heaven.
- Serve with good butter and flaky sea salt. That’s it. You don’t need anything else.
- Use it for avocado toast, bruschetta, or the best grilled cheese of your life.
- Dip it in olive oil and balsamic vinegar for a simple appetizer.
Storage:
- Store cut-side down on a wooden cutting board at room temperature for up to 3 days. The crust stays crisp this way.
- For longer storage, wrap tightly in plastic wrap and freeze for up to 3 months. Slice before freezing so you can pull out individual pieces.
- To refresh day-old bread, spritz it with water and bake at 350°F for 5-7 minutes. It comes back to life almost like fresh-baked.
The flavor actually improves after day one — the sourness deepens and the texture becomes more complex. I often bake two loaves so we can enjoy one fresh and one the next day.
Nutritional Information & Benefits
One slice (about 60g) of this sourdough bread contains approximately:
- Calories: 150
- Protein: 5g
- Carbohydrates: 30g
- Fiber: 2g
- Fat: 1g
The health benefits of sourdough are worth noting. The long fermentation process breaks down phytic acid, making the minerals in the flour more bioavailable. It also creates prebiotics that support gut health. Many people with mild gluten sensitivities find sourdough easier to digest than conventional bread — though it’s not gluten-free unless you use alternative flours.
The natural fermentation also lowers the bread’s glycemic index compared to yeasted breads, meaning it won’t spike your blood sugar as dramatically. For me, that means I can enjoy a slice without that heavy, sluggish feeling afterward.
Conclusion
This homemade sourdough starter bread with no yeast needed is more than a recipe — it’s a practice in patience and trust. It’s the bread that taught me to slow down, to pay attention to small changes in texture and timing, and to find joy in the process, not just the result.
I’ve baked this loaf for birthday dinners, quiet Sunday mornings, and everything in between. It never gets old. The first slice is always a little emotional — that steam, that crackle, that tangy aroma that fills the room. If you’ve never made sourdough before, I hope you give it a try. Start with a simple starter, feed it for a week, and then bake this bread. You might surprise yourself.
I’d love to hear how your first loaf turns out. Drop a comment below and tell me about your baking adventure — the triumphs, the disasters, the moments that made you laugh. And if you loved this recipe, share it with a friend who needs a little more homemade goodness in their life.
Frequently Asked Questions
Why didn’t my sourdough bread rise?
This usually happens when your starter isn’t active enough. Make sure it’s bubbly and doubling within 4-6 hours of feeding before you use it. Also check your bulk fermentation time — cold kitchens slow things down significantly.
Can I use all-purpose flour instead of bread flour?
Yes, but the crumb will be denser and less open. Bread flour has higher protein content, which creates stronger gluten networks and a chewier texture. If you only have all-purpose, add an extra stretch and fold to help develop the gluten.
How do I know when my dough is properly proofed?
Look for the jiggle test — the dough should feel airy and wobble slightly when you shake the bowl. It should also have visible bubbles on the surface and feel puffy, not dense. The poke test works too: gently press your finger into the dough; if it springs back slowly, it’s ready.
Can I speed up the sourdough process?
You can use a warmer spot (around 80°F) to speed bulk fermentation, but don’t rush the cold proof. That overnight rest in the fridge develops the tangy flavor and makes the dough easier to handle. Some things are worth waiting for.
My bread turned out gummy inside. What went wrong?
This usually means you cut into it too soon. Let the bread cool completely — at least 1 hour, ideally 2. The crumb continues to set as it cools. If it’s still gummy after proper cooling, your dough might have been overproofed or your oven temperature was too low.
Pin This Recipe!
Best Homemade Sourdough Starter Bread Recipe (No Yeast)

This forgiving and rewarding sourdough bread recipe uses no commercial yeast, just your active starter, to create a tangy, chewy loaf with a crackling crust. Perfect for beginners, it turns simple flour and water into something magical.
- Prep Time: 30 minutes
- Cook Time: 45 minutes
- Total Time: 24 hours (includes fermentation and proofing)
- Yield: 1 loaf (about 12 slices) 1x
- Category: Bread
- Cuisine: American
Ingredients
- 100g whole wheat flour (about ¾ cup)
- 100g all-purpose flour (about ¾ cup)
- 200g filtered water (about 1 cup), lukewarm
- 100g active sourdough starter (about ½ cup), bubbly and doubled
- 500g bread flour (about 4 cups)
- 350g filtered water (about 1½ cups), room temperature
- 10g fine sea salt (about 2 teaspoons)
- Rice flour for dusting
- All-purpose flour for work surface
Instructions
- Day 1 Morning: Feed your starter. Discard all but 50g of starter. Add 100g bread flour, 100g whole wheat flour, and 200g lukewarm filtered water. Stir well, cover loosely, and let sit at room temperature until bubbly and doubled (about 8 hours).
- Day 1 Evening (6:00 PM): Autolyse. In a large bowl, combine 500g bread flour and 350g water. Mix until no dry flour remains. Cover and let rest for 30 minutes.
- Add starter and salt (6:30 PM): Sprinkle 100g active starter and 10g salt over the dough. Wet your hands and squeeze everything together until fully incorporated.
- Bulk fermentation begins (7:00 PM): Cover the bowl and let it rest. Over the next 3-4 hours, perform 4 sets of stretch and folds every 30 minutes. Wet your hands slightly, grab one side of the dough, stretch it up, and fold it over the center. Rotate the bowl 90 degrees and repeat 4 times total. Cover and rest 30 minutes between sets.
- Shape the dough (10:00 PM): Lightly flour your work surface. Turn the dough out gently. Fold the left side to the center, then the right, then roll it up from the bottom. Cup your hands around it and pull it toward you to create surface tension.
- Place seam-side up in a floured banneton or lined bowl. Cover tightly with plastic wrap or a shower cap. Refrigerate overnight (8-12 hours).
- Day 2 (6:00 AM): Preheat your Dutch oven in the oven to 500°F (260°C) for at least 30 minutes.
- Remove dough from fridge. Turn it out onto a piece of parchment paper. Using a lame or sharp knife, make a single deep slash about ¼ inch deep along the top.
- Carefully transfer the dough (on the parchment) into the hot Dutch oven. Cover and bake at 450°F (230°C) for 25 minutes.
- Remove the lid and bake for another 20-25 minutes until deep golden brown. Internal temperature should reach 200-210°F (93-99°C).
- Transfer to a wire rack and cool completely for at least 1 hour before slicing.
Notes
Temperature matters: if your kitchen is below 70°F, bulk fermentation can take 6-8 hours. Use your oven with the light on to maintain around 78°F. Don’t skip the autolyse—it improves crumb structure. Use rice flour for dusting to prevent sticking. Score deeply and confidently to control expansion. Let bread cool completely before slicing to avoid gummy texture.
Nutrition
- Serving Size: 1 slice (about 60g)
- Calories: 150
- Sodium: 200
- Fat: 1
- Carbohydrates: 30
- Fiber: 2
- Protein: 5
Keywords: sourdough bread, no yeast bread, homemade sourdough, artisan bread, sourdough starter bread, easy sourdough recipe


