Best Homemade Sourdough Starter Bread Recipe (No Yeast)
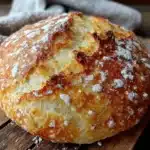
This forgiving and rewarding sourdough bread recipe uses no commercial yeast, just your active starter, to create a tangy, chewy loaf with a crackling crust. Perfect for beginners, it turns simple flour and water into something magical.
- Prep Time: 30 minutes
- Cook Time: 45 minutes
- Total Time: 24 hours (includes fermentation and proofing)
- Yield: 1 loaf (about 12 slices) 1x
- Category: Bread
- Cuisine: American
Ingredients
Scale
- 100g whole wheat flour (about ¾ cup)
- 100g all-purpose flour (about ¾ cup)
- 200g filtered water (about 1 cup), lukewarm
- 100g active sourdough starter (about ½ cup), bubbly and doubled
- 500g bread flour (about 4 cups)
- 350g filtered water (about 1½ cups), room temperature
- 10g fine sea salt (about 2 teaspoons)
- Rice flour for dusting
- All-purpose flour for work surface
Instructions
- Day 1 Morning: Feed your starter. Discard all but 50g of starter. Add 100g bread flour, 100g whole wheat flour, and 200g lukewarm filtered water. Stir well, cover loosely, and let sit at room temperature until bubbly and doubled (about 8 hours).
- Day 1 Evening (6:00 PM): Autolyse. In a large bowl, combine 500g bread flour and 350g water. Mix until no dry flour remains. Cover and let rest for 30 minutes.
- Add starter and salt (6:30 PM): Sprinkle 100g active starter and 10g salt over the dough. Wet your hands and squeeze everything together until fully incorporated.
- Bulk fermentation begins (7:00 PM): Cover the bowl and let it rest. Over the next 3-4 hours, perform 4 sets of stretch and folds every 30 minutes. Wet your hands slightly, grab one side of the dough, stretch it up, and fold it over the center. Rotate the bowl 90 degrees and repeat 4 times total. Cover and rest 30 minutes between sets.
- Shape the dough (10:00 PM): Lightly flour your work surface. Turn the dough out gently. Fold the left side to the center, then the right, then roll it up from the bottom. Cup your hands around it and pull it toward you to create surface tension.
- Place seam-side up in a floured banneton or lined bowl. Cover tightly with plastic wrap or a shower cap. Refrigerate overnight (8-12 hours).
- Day 2 (6:00 AM): Preheat your Dutch oven in the oven to 500°F (260°C) for at least 30 minutes.
- Remove dough from fridge. Turn it out onto a piece of parchment paper. Using a lame or sharp knife, make a single deep slash about ¼ inch deep along the top.
- Carefully transfer the dough (on the parchment) into the hot Dutch oven. Cover and bake at 450°F (230°C) for 25 minutes.
- Remove the lid and bake for another 20-25 minutes until deep golden brown. Internal temperature should reach 200-210°F (93-99°C).
- Transfer to a wire rack and cool completely for at least 1 hour before slicing.
Notes
Temperature matters: if your kitchen is below 70°F, bulk fermentation can take 6-8 hours. Use your oven with the light on to maintain around 78°F. Don’t skip the autolyse—it improves crumb structure. Use rice flour for dusting to prevent sticking. Score deeply and confidently to control expansion. Let bread cool completely before slicing to avoid gummy texture.
Nutrition
- Serving Size: 1 slice (about 60g)
- Calories: 150
- Sodium: 200
- Fat: 1
- Carbohydrates: 30
- Fiber: 2
- Protein: 5
Keywords: sourdough bread, no yeast bread, homemade sourdough, artisan bread, sourdough starter bread, easy sourdough recipe