“Are you sure lavender belongs in dessert?” my friend asked skeptically as I whisked egg whites late one evening. I wasn’t so sure myself at first—lavender always felt a little too fancy or floral, maybe even a bit intimidating. But honestly, that quiet night in became the starting point for what turned out to be one of my favorite recipes: Crispy Honey Lavender Pavlova Cookie Cups with Fresh Berries.
I was experimenting with pavlova, trying to get that delicate crisp shell and marshmallow-soft inside, but wanted something with a twist beyond the usual vanilla or lemon zest. The honey added a subtle sweetness and depth, while the lavender gave it an unexpected, cozy aroma that reminded me of spring meadows and afternoon teas. When I topped these little cups with fresh berries, it felt like a small celebration in every bite.
What really surprised me was how easy it was to whip up these pavlova cookie cups—no complicated steps, just patience with the egg whites and a little love in folding in the lavender and honey. The first time I brought these to a small gathering, everyone kept asking for the recipe, especially after pairing it with a simple glass of sparkling wine. It’s funny how a late-night kitchen experiment can turn into a recipe that friends expect at every get-together.
These pavlova cookie cups stuck with me because they’re not just pretty faces; they’re a perfect blend of texture and flavor that feels thoughtful but never fussy. If you’re like me, someone who enjoys baking but doesn’t want to spend hours fussing, you’ll appreciate how this recipe offers a touch of elegance without the stress. It’s a little sweet moment that feels like a reward, whether you’re winding down after a long day or impressing guests without breaking a sweat.
Why You’ll Love This Crispy Honey Lavender Pavlova Cookie Cups Recipe
After making these pavlova cookie cups more times than I can count (honestly, probably three times in a single week during my “obsession phase”), I’ve nailed down why they’re such a winner:
- Quick & Easy: You can have these crispy honey lavender pavlova cookie cups ready in about 45 minutes, perfect for those spontaneous dessert cravings or a last-minute treat.
- Simple Ingredients: Nothing fancy here—just pantry staples like egg whites and sugar, plus honey and culinary lavender, which you might already have or easily find at your local market.
- Perfect for Special Occasions: These cookie cups make an elegant addition to brunches, garden parties, or even casual dinners, fitting right in with other treats like the pink velvet bundt cake or the strawberry mousse cups.
- Crowd-Pleaser: Both kids and adults seem to love the light crunch paired with fresh juicy berries—plus, the honey-lavender combo always sparks conversations.
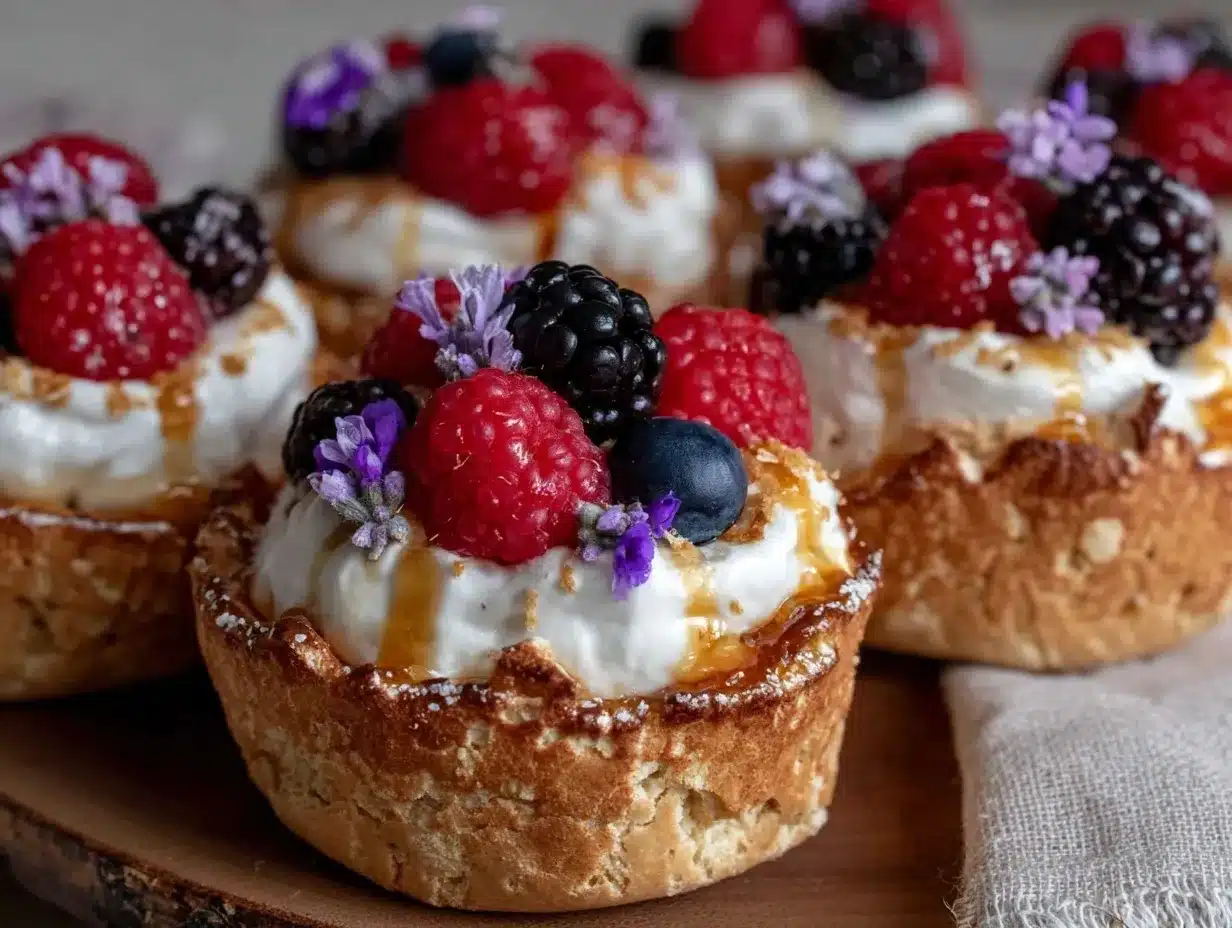
- Unbelievably Delicious: The crisp exterior gives way to a tender, marshmallow-like inside, with floral notes that feel both soothing and sophisticated.
Unlike other pavlova recipes that can sometimes be temperamental or overly sweet, this one strikes the perfect balance thanks to the honey’s natural sweetness and the subtle herbal undertone from the lavender. It’s not just another pavlova—it’s a recipe I trust to impress without a ton of fuss, and that makes it special.
What Ingredients You Will Need
This recipe uses simple, wholesome ingredients to deliver bold flavor and satisfying texture without the fuss. Most of these are pantry staples, with the addition of culinary lavender and fresh berries for that unique touch.
- Egg whites – large, at room temperature (this helps with maximum volume when whipping)
- Granulated sugar – superfine is best if you have it (helps create a smooth, glossy meringue)
- Honey – raw or mild-flavored (adds natural sweetness and a subtle floral depth)
- Culinary lavender buds – dried and finely chopped (make sure it’s food-grade lavender to avoid bitterness)
- Vanilla extract – pure and high quality (for warmth and aroma)
- Fresh berries – a mix of strawberries, blueberries, raspberries, or blackberries (seasonal and bursting with freshness)
- Lemon juice – a teaspoon, freshly squeezed (adds brightness and balances sweetness)
Pro tip: I recommend using Sky Valley honey if you can find it—it’s mild enough to not overpower the lavender, but rich in flavor. For the lavender, look for small-bud varieties; they tend to be less woody and more fragrant.
If you want to switch things up, you can swap the fresh berries for stone fruits like peaches or nectarines in summer, or even pomegranate seeds for a winter twist. And if you’re concerned about sugar, reducing it slightly won’t ruin the structure but might affect the crispness a bit.
Equipment Needed
Making these pavlova cookie cups doesn’t require fancy gadgets, but here’s what you’ll want on hand:
- Electric mixer or stand mixer: To whip the egg whites to stiff peaks. You can do it by hand, but it’s a workout and takes longer.
- Baking sheet: Preferably rimmed, lined with parchment paper or a silicone baking mat to prevent sticking.
- Mixing bowl: Clean, dry, and free of grease—glass or metal works best to get those egg whites fluffy.
- Spoon or piping bag: For shaping the pavlova cups on the baking sheet. A piping bag gives a neater look, but a spoon works just fine.
- Fine sieve or small strainer: If you want to dust a bit of powdered sugar or sift the lavender buds for an even texture.
I’ve tried using a hand mixer and a stand mixer for this recipe, and honestly, the stand mixer saves a lot of elbow grease and airier results. But if you’re on a budget, a hand mixer works great too—just be patient. Also, keeping your mixing bowl and beaters cold helps stabilize the egg whites faster, a trick I picked up after several less-than-stellar batches.
Preparation Method
- Preheat your oven to 250°F (120°C) and line a baking sheet with parchment paper or a silicone mat. This low temperature helps the pavlova dry out slowly, giving it that perfect crisp shell.
- Beat the egg whites: In a clean, dry bowl, whisk 4 large egg whites until soft peaks form (about 2-3 minutes). Make sure no yolk sneaks in, or the whites won’t whip properly.
- Gradually add sugar: Add 1 cup (200g) granulated sugar slowly, one tablespoon at a time, while continuing to beat. This can take 7-10 minutes. The mixture should become glossy and hold stiff peaks.
- Fold in honey and lavender: Gently fold 2 tablespoons of honey and 1 teaspoon of finely chopped culinary lavender buds into the meringue using a spatula. Be careful not to deflate the egg whites.
- Add vanilla and lemon juice: Stir in 1 teaspoon vanilla extract and 1 teaspoon fresh lemon juice for flavor balance and to stabilize the meringue.
- Shape the pavlova cups: Use a spoon or piping bag to mound the mixture into 6-8 individual cups on the prepared baking sheet. Create a small hollow in the center of each for the berry topping.
- Bake low and slow: Place the baking sheet in the oven and bake for 60-70 minutes. The pavlova should feel dry and crisp on the outside but still have a slight chew inside.
- Cool completely: Turn off the oven and leave the pavlova inside with the door slightly ajar for another hour. This cooling step prevents cracking.
- Top with fresh berries: Just before serving, fill each pavlova cup with a mixture of fresh berries. You can toss the berries with a little honey or lemon zest for extra zing.
Note: If you find the pavlova cracking too much, try increasing the oven temperature by 10°F (5°C) or baking for a slightly shorter time next batch. It’s a bit of trial and error but trust me, worth it.
Cooking Tips & Techniques
Getting pavlova just right can be tricky, but these tips from my kitchen trials might save you some headaches:
- Use room temperature eggs: Cold egg whites won’t whip as well, so take them out 30 minutes before starting.
- Clean equipment: Any grease or moisture in your mixing bowl or beaters can prevent stiff peaks. Wipe them down with a little vinegar or lemon juice if unsure.
- Slow sugar addition: Adding sugar too fast can deflate the egg whites or leave a grainy texture. Patience pays off here.
- Don’t rush the drying: Baking at a low temperature allows the pavlova to dry out without browning or cracking excessively.
- Cool in the oven: Leaving the pavlova to cool slowly inside the oven avoids sudden temperature changes that cause cracks.
- Fold gently: When adding honey and lavender, be gentle to keep the airy texture intact—if you overmix, the pavlova will be dense.
Once, I mistakenly used regular lavender instead of culinary, and the flavor turned quite bitter—lesson learned to always check labels! Also, multitasking with the berry prep while the pavlova bakes saves time and keeps everything fresh.
Variations & Adaptations
Feel free to tweak this recipe to fit your kitchen mood or dietary needs:
- Flavor swaps: Try substituting lavender with dried rose petals or lemon thyme for a different floral note.
- Sweetener alternatives: Replace honey with maple syrup for a vegan-friendly pavlova (though the flavor will be earthier).
- Gluten-free and low-carb: This recipe is naturally gluten-free since it uses egg whites and sugar, but for a low-carb version, experiment with erythritol sweeteners, keeping in mind texture differences.
- Cooking methods: If you prefer, bake the pavlova cups in a convection oven at 225°F (110°C) for a slightly quicker dry-out time.
- Berry variations: Swap fresh berries with passion fruit pulp or kiwi slices for a tropical twist.
One time, I added a dollop of mascarpone mixed with a bit of honey inside the pavlova cups before the berries—totally indulgent and a hit at a small dinner party. It paired beautifully with the floral notes and crushed the usual dessert routine.
Serving & Storage Suggestions
These pavlova cookie cups shine best when served fresh and at room temperature, letting the crisp shell and soft center meet the juicy berries perfectly. They look charming on a white platter or delicate dessert plates, making them an instant table centerpiece.
Pair them with a light sparkling wine or a cup of herbal tea to complement the floral notes. If you want a more decadent pairing, try alongside a rich dessert like the red wine chocolate cake with berries for a layered dessert experience.
To store, keep the pavlova cups in an airtight container at room temperature for up to 24 hours—longer storage risks sogginess. If you want to prepare ahead, bake and cool the pavlova cups, then store them separately from the berries for up to 2 days. Assemble right before serving.
Reheat is not recommended since the delicate texture changes easily. However, the flavors tend to mellow and become more harmonious if you let the assembled pavlova rest for about 30 minutes at room temp.
Nutritional Information & Benefits
Each pavlova cookie cup (without toppings) roughly contains:
| Calories | 120 kcal |
|---|---|
| Carbohydrates | 28g |
| Protein | 3g |
| Fat | 0.1g |
| Sugar | 24g |
The fresh berries add fiber, vitamins C and K, and antioxidants, while honey provides trace minerals and enzymes that are more wholesome than refined sugar. Lavender is known for its calming properties, which might make this dessert feel like a little stress-relief bonus!
This recipe is naturally gluten-free and can be adapted for vegan diets with a few swaps. Just keep in mind that the texture may vary slightly with sugar alternatives or non-honey sweeteners.
Conclusion
These Crispy Honey Lavender Pavlova Cookie Cups with Fresh Berries are a charming way to bring a little magic to your dessert table without fuss or fancy techniques. They’re delicate but sturdy, floral but sweet, and just the right amount of special to make everyday moments feel a bit more celebratory.
What I love most is how forgiving the recipe is and how much room there is to make it your own—whether you swap in your favorite berries or add a creamy twist. I hope you find this recipe as comforting and delightful as I do, especially when you need a sweet pause in the chaos or a gentle wow for guests.
Feel free to share your own twists or questions below—I’d love to hear how your pavlova cookie cups turn out or what flavors you try next. Happy baking!
FAQs About Crispy Honey Lavender Pavlova Cookie Cups
Can I use regular lavender from the garden?
Only use culinary-grade lavender buds labeled for food use. Regular garden lavender may be too strong or bitter and could contain pesticides.
How do I prevent my pavlova from cracking?
Cool your pavlova slowly in the oven with the door slightly open after baking to avoid sudden temperature changes that cause cracks.
Can I make the pavlova cups ahead of time?
Yes! Bake and cool the cups up to 2 days before serving. Store them in an airtight container separately from any toppings to keep crisp.
What’s the best way to whip egg whites for pavlova?
Use room temperature eggs and a clean, dry bowl. Beat at medium-high speed, adding sugar slowly once soft peaks form until stiff and glossy peaks develop.
Are pavlova cookie cups gluten-free?
Yes, this recipe doesn’t use any flour or gluten ingredients, making it naturally gluten-free and suitable for many dietary needs.
Pin This Recipe!
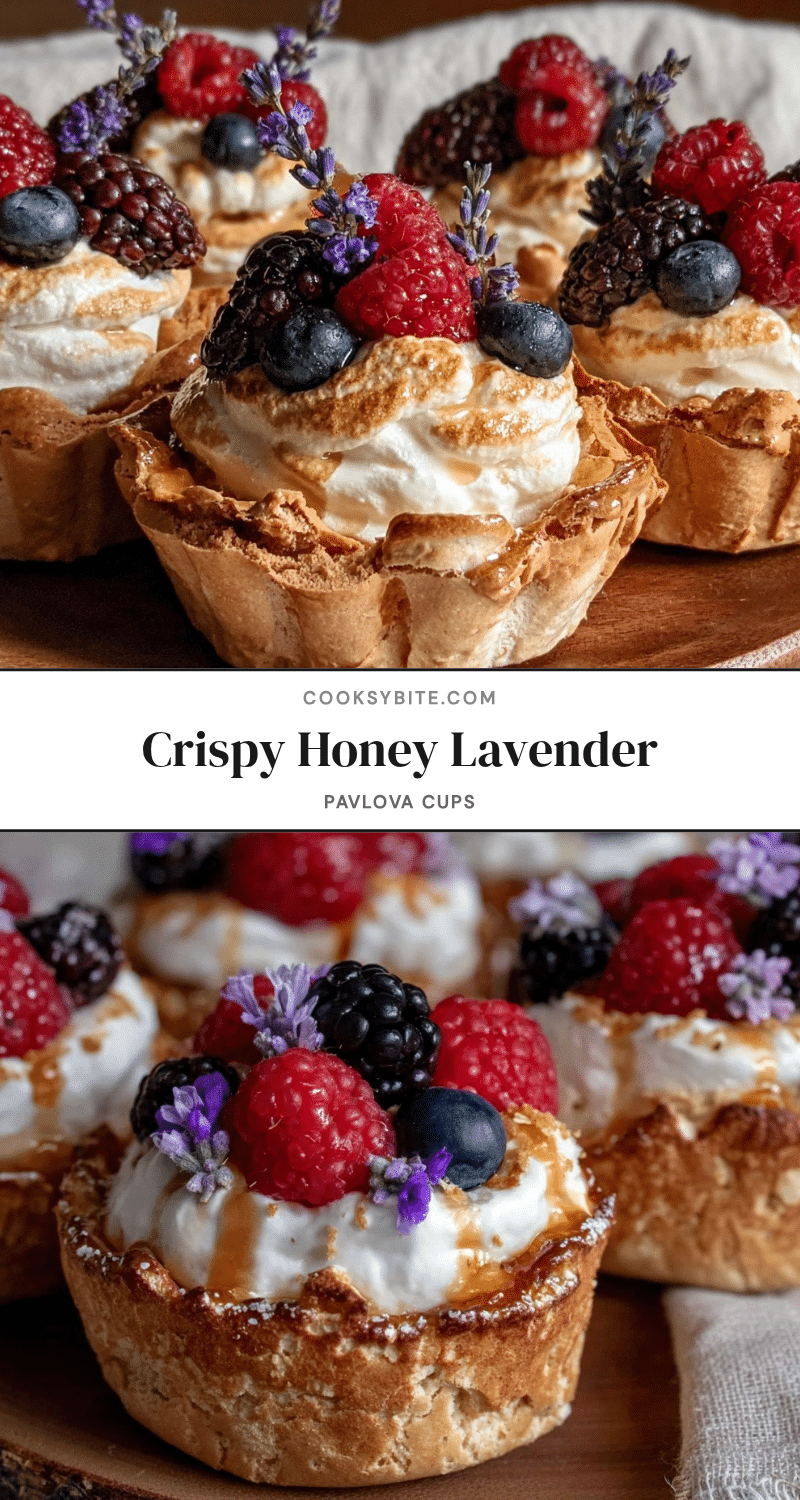
Crispy Honey Lavender Pavlova Cookie Cups with Fresh Berries

Delicate pavlova cookie cups with a crispy shell and marshmallow-soft inside, flavored with honey and culinary lavender, topped with fresh berries for a light, elegant dessert.
- Prep Time: 15 minutes
- Cook Time: 1 hour 10 minutes
- Total Time: 1 hour 25 minutes
- Yield: 6-8 servings 1x
- Category: Dessert
- Cuisine: Australian/New Zealand
Ingredients
- 4 large egg whites, room temperature
- 1 cup (200g) granulated sugar, superfine preferred
- 2 tablespoons honey (raw or mild-flavored)
- 1 teaspoon culinary lavender buds, dried and finely chopped
- 1 teaspoon pure vanilla extract
- 1 teaspoon fresh lemon juice
- Fresh berries (strawberries, blueberries, raspberries, or blackberries), for topping
Instructions
- Preheat your oven to 250°F (120°C) and line a baking sheet with parchment paper or a silicone mat.
- In a clean, dry bowl, whisk 4 large egg whites until soft peaks form (about 2-3 minutes).
- Gradually add 1 cup (200g) granulated sugar, one tablespoon at a time, while continuing to beat until the mixture is glossy and holds stiff peaks (7-10 minutes).
- Gently fold in 2 tablespoons honey and 1 teaspoon finely chopped culinary lavender buds using a spatula, being careful not to deflate the egg whites.
- Stir in 1 teaspoon vanilla extract and 1 teaspoon fresh lemon juice.
- Use a spoon or piping bag to mound the mixture into 6-8 individual cups on the prepared baking sheet, creating a small hollow in the center of each.
- Bake for 60-70 minutes until the pavlova feels dry and crisp on the outside but slightly chewy inside.
- Turn off the oven and leave the pavlova inside with the door slightly ajar for another hour to cool completely.
- Just before serving, fill each pavlova cup with a mixture of fresh berries. Optionally toss berries with a little honey or lemon zest.
Notes
Use room temperature eggs for maximum volume. Add sugar slowly to avoid deflating egg whites. Cool pavlova slowly in the oven with door ajar to prevent cracking. Use culinary-grade lavender to avoid bitterness. Pavlova cups can be baked and cooled up to 2 days ahead and stored separately from toppings to maintain crispness.
Nutrition
- Serving Size: 1 pavlova cookie cup
- Calories: 120
- Sugar: 24
- Fat: 0.1
- Carbohydrates: 28
- Protein: 3
Keywords: pavlova, honey, lavender, pavlova cookie cups, fresh berries, dessert, gluten-free, elegant dessert, easy pavlova


