“You forgot your coffee again?” my roommate’s voice floated from the kitchen, barely masking the morning chaos. That’s when I realized I couldn’t keep relying on caffeine alone to power through those frantic mornings. Honestly, mornings in my place are a whirlwind—keys misplaced, shoes nowhere to be found, and the eternal search for a quick bite. That’s when I stumbled onto these easy make-ahead breakfast burritos, almost by accident during one bleary-eyed Sunday. I was trying to prep something that could survive an entire week in the freezer without turning into a sad, soggy mess. I didn’t expect much, just something edible to grab on the go.
Turns out, these burritos are a little miracle wrapped in a tortilla. I remember the first morning I pulled one out, microwaved it while brushing my teeth, and took a bite before rushing out the door. The mix of fluffy eggs, melty cheese, and a little kick from the salsa made me pause—a rare moment of calm amid the rush. These burritos stuck with me because they’re more than just breakfast; they’re a tiny reset button for hectic days, a little homemade comfort you can hold in your hands when the world’s spinning too fast. If you’ve ever wished for a breakfast that’s both fuss-free and satisfying, this recipe might just be your new best friend.
Why You’ll Love This Recipe
This easy make-ahead breakfast burritos recipe has been through the trial-by-fire of real, chaotic mornings and came out a winner every time. You know those recipes that promise quick meals but never quite deliver? These do. Here’s why they’ve earned a permanent spot in my freezer:
- Quick & Easy: Ready in under 30 minutes, so you spend less time prepping and more time doing (or not doing) whatever you need in the morning.
- Simple Ingredients: No fancy or hard-to-find items here—think classic eggs, cheese, and some veggies you probably already have.
- Perfect for Busy Mornings: Whether you’re rushing to work, school, or just juggling a million things at once, these burritos are made with your schedule in mind.
- Crowd-Pleaser: Family-approved and kid-friendly, so you can make a batch and keep everyone fueled.
- Unbelievably Delicious: The combo of fluffy eggs, melty cheese, and savory fillings hits that comfort-food spot every single time.
What sets this recipe apart? It’s the little details—like folding the burritos just right so they don’t fall apart, and using a blend of sharp cheddar and pepper jack cheese for that perfect melty, spicy twist. Plus, the option to add salsa or keep it simple makes it customizable for your taste buds. Honestly, it’s the kind of recipe you’ll find yourself making over and over because it just fits into your life seamlessly. And if you’re looking for more easy, crowd-pleasing dishes, you might enjoy the delicious cherry chocolate brownies or the moist pink velvet bundt cake I’ve also shared.
Ingredients You Will Need
This recipe calls for simple, wholesome ingredients that come together to deliver bold flavor and satisfying texture without the fuss. Most of these are pantry staples or fresh staples you can swap depending on what’s in your fridge.
- Large eggs (6, room temperature) – The base that makes the burritos fluffy and filling.
- Milk or cream (¼ cup / 60 ml) – Adds richness and keeps eggs moist.
- Cheddar cheese, shredded (1 cup / 100 g) – Sharp and melty, I prefer Cabot brand for a nice tang.
- Pepper jack cheese, shredded (½ cup / 50 g) – Optional, for a little spicy kick.
- Cooked breakfast sausage or bacon (1 cup / 150 g, chopped) – Adds savory depth; turkey sausage works, too.
- Bell peppers, diced (½ cup / 75 g) – Fresh and sweet, but you can swap with onions or zucchini.
- Onion, finely chopped (¼ cup / 40 g) – For a subtle aromatic touch.
- Flour tortillas, large size (6-8) – Soft but sturdy tortillas hold everything together; Mission brand works great.
- Salsa (½ cup / 120 ml) – Choose your heat level; I usually go mild for a family-friendly version.
- Olive oil or butter (1 tbsp / 15 ml) – For sautéing veggies.
- Salt and pepper to taste – Essential for balanced flavor.
You can easily make this gluten-free by swapping the tortillas for corn or gluten-free wraps. For a vegetarian take, skip the sausage and add black beans or sautéed mushrooms instead. These small swaps keep the recipe flexible and ready for any pantry situation.
Equipment Needed
- Non-stick skillet or frying pan: For cooking eggs and sautéing veggies. A 10-inch pan is ideal.
- Mixing bowl: To whisk eggs and milk together.
- Wooden spoon or spatula: For stirring eggs gently to keep them fluffy.
- Measuring cups and spoons: For precise ingredient amounts.
- Aluminum foil or parchment paper: To wrap burritos for freezing and reheating.
- Freezer-safe container or ziplock bags: For storage.
If you don’t have a non-stick skillet, a well-seasoned cast iron pan works just as well but requires a bit more attention to avoid sticking. I’ve found that a silicone spatula is gentler when folding the eggs, preserving that soft texture. Budget-wise, most of these tools are common kitchen basics, so no need to buy special gear.
Preparation Method
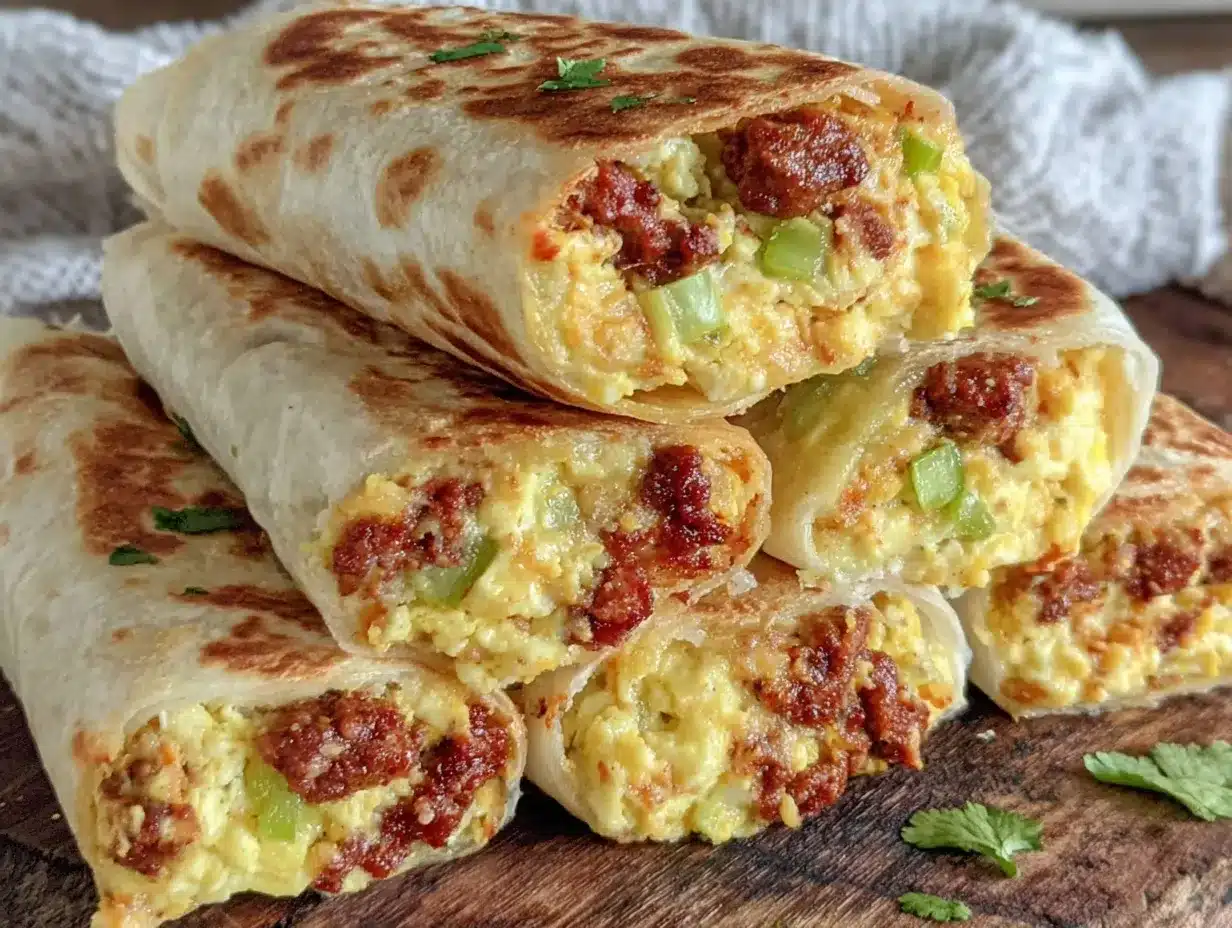
- Cook the sausage and veggies (10 minutes): Heat 1 tablespoon of olive oil in your skillet over medium heat. Add the chopped onion and bell peppers, sautéing until softened and fragrant (about 5 minutes). Toss in the cooked sausage or bacon pieces and warm through for another 3-4 minutes. Season lightly with salt and pepper. Transfer this mixture to a bowl and set aside.
- Scramble the eggs (5-7 minutes): In a mixing bowl, whisk together the 6 large eggs and ¼ cup of milk until blended. Pour into the same skillet (wipe it clean or use a fresh pan) over medium-low heat. Stir gently and continuously with a wooden spoon or spatula, cooking until the eggs are softly set but still moist. Remove from heat immediately to avoid overcooking.
- Assemble burritos (10-15 minutes): Warm the tortillas slightly in the microwave or on a dry skillet to make them pliable. Spoon a generous amount of scrambled eggs onto each tortilla’s center, followed by the sausage-veggie mix. Sprinkle with a blend of cheddar and pepper jack cheese (about 2-3 tablespoons per burrito). Add a spoonful of salsa if you like a little extra zing.
- Fold and wrap: Fold the sides of each tortilla over the filling, then roll from the bottom up to form a secure burrito. Wrap each burrito tightly in aluminum foil or parchment paper to keep everything intact.
- Freeze or store: Place wrapped burritos in a freezer-safe container or ziplock bag. Label with the date. They’ll keep well for up to 3 months.
- Reheat and enjoy: When you’re ready to eat, unwrap the burrito, place it on a microwave-safe plate, and heat for 2-3 minutes, flipping halfway through. If you prefer oven reheating, pop the foil-wrapped burrito in a 350°F (175°C) oven for about 20 minutes.
Pro tip: If your eggs start to dry out while reheating, a quick dab of salsa or a small drizzle of olive oil can bring back moisture and flavor. Also, don’t overfill your burritos — they’re easier to wrap and reheat perfectly when not bursting at the seams.
Cooking Tips & Techniques
Scrambled eggs are the heart of this recipe, and getting them just right took me a couple of tries. The trick is low and slow cooking to keep them creamy—not rubbery or dry. Stirring constantly but gently helps maintain that soft texture. I’ve learned that adding milk or cream isn’t just about richness—it actually slows the cooking process and keeps the eggs tender longer.
When assembling burritos, warming the tortillas briefly is a game-changer. Cold tortillas crack and tear, which is a mess no one wants. Also, folding burritos properly helps keep the filling inside, especially after freezing. I fold the sides first, then roll tightly from the bottom, like wrapping a little gift.
Freezing burritos individually wrapped prevents freezer burn and keeps flavors fresh. From experience, reheating in the microwave is fastest but uneven heat can dry out the edges, so flipping halfway through solves that. Oven reheating takes longer but gives a nice, even warm-up with a slightly crisp tortilla.
One mistake I made early on was overstuffing the burritos; they became unwieldy and messy. Patience with portion control pays off big time. Also, using a mix of cheeses elevates the flavor profile and helps bind the ingredients together for a satisfying bite every time.
Variations & Adaptations
This recipe is pretty flexible, which is why I keep coming back to it. Here are some ways to make it your own:
- Vegetarian version: Replace sausage with sautéed mushrooms, black beans, or roasted sweet potatoes for a hearty, meatless option.
- Spice it up: Add diced jalapeños or a dash of hot sauce to the eggs or salsa for an extra kick.
- Different proteins: Try shredded chicken, ham, or chorizo instead of sausage for a flavor twist.
- Gluten-free: Use corn tortillas or gluten-free wraps; just warm them carefully to avoid cracking.
- Dairy-free: Swap cheese for a plant-based alternative and use coconut or almond milk in your eggs.
Personally, I once made a batch with sweet potato, black beans, and a sprinkle of smoked paprika. It added a nice earthy sweetness that balanced the savory eggs perfectly. Feel free to experiment—this recipe welcomes your tweaks.
Serving & Storage Suggestions
These breakfast burritos are best served hot, fresh from the microwave or oven. I like to pair them with a side of fresh fruit or a simple green salad for a balanced meal. A cold glass of orange juice or a cup of strong coffee rounds it out nicely.
For storage, keep the burritos wrapped tightly in foil or parchment and place them in a freezer-safe bag or container. They’ll stay good in the freezer for up to 3 months. In the fridge, consume within 3-4 days if you don’t freeze them.
Reheating is easiest in the microwave, but if you want a bit of crispiness on the outside, heat the burrito wrapped in foil in the oven at 350°F (175°C) for 15-20 minutes. If you store them in the freezer, thaw overnight in the fridge before reheating for best results.
Flavors actually deepen when frozen burritos are reheated, making them taste surprisingly fresh. Just remember to add salsa or avocado after reheating to keep those fresh notes bright.
Nutritional Information & Benefits
Each burrito contains approximately 300-350 calories, depending on your filling choices. Eggs provide high-quality protein and essential nutrients like vitamin D and choline. The addition of bell peppers and onions adds fiber and antioxidants, supporting digestion and overall health.
This recipe can easily fit into gluten-free, low-carb (with alternative tortillas), or dairy-free diets with simple swaps. It’s a balanced breakfast with protein, fat, and some carbs to keep you satisfied through a busy morning.
From a wellness perspective, having a homemade breakfast like this helps avoid the sugar crashes and artificial ingredients often found in store-bought options. Plus, you control what goes in, so it’s both nourishing and comforting.
Conclusion
Easy make-ahead breakfast burritos are the kind of recipe that earns a permanent spot in your kitchen routine. They save you from scrambling not just eggs but your whole morning. What I love most is how customizable they are—you can make them your own with handfuls of different fillings and still get that satisfying, hearty bite every time.
Feel free to tweak the ingredients, add your favorite hot sauce, or try swapping in different cheeses. The recipe is forgiving and friendly, just like breakfast should be. If you try these burritos, I’d love to hear how you make them your own—drop a comment or share your favorite tweaks!
And when you’re in the mood for something sweet to balance your savory mornings, the fluffy strawberry mousse cups might just hit the spot perfectly.
FAQs
Can I make these breakfast burritos vegan?
Absolutely! Use scrambled tofu or chickpea flour “eggs,” plant-based sausage, and dairy-free cheese alternatives. Just adjust cooking times slightly for tofu.
How long do the burritos last in the freezer?
They keep well up to 3 months when wrapped tightly and stored in an airtight container to avoid freezer burn.
Can I prepare these burritos ahead and refrigerate instead of freezing?
Yes, they can be stored in the fridge for 3-4 days, but freezing is better for longer storage and preserving freshness.
What’s the best way to reheat the burritos?
Microwaving is fastest—heat for 2-3 minutes, flipping halfway through. For a crispier tortilla, reheat wrapped in foil in a 350°F (175°C) oven for 15-20 minutes.
Can I add other fillings like potatoes or beans?
Definitely! Roasted potatoes, beans, or sautéed veggies all work great and add extra texture and flavor to your burritos.
Pin This Recipe!
Easy Make-Ahead Breakfast Burritos Recipe for Busy Mornings You’ll Love

These easy make-ahead breakfast burritos combine fluffy eggs, melty cheese, and savory fillings for a quick, satisfying meal perfect for busy mornings. They freeze well and reheat easily, making them a convenient and delicious breakfast option.
- Prep Time: 10 minutes
- Cook Time: 15 minutes
- Total Time: 25 minutes
- Yield: 6-8 burritos 1x
- Category: Breakfast
- Cuisine: American
Ingredients
- 6 large eggs (room temperature)
- 1/4 cup (60 ml) milk or cream
- 1 cup (100 g) shredded cheddar cheese
- 1/2 cup (50 g) shredded pepper jack cheese (optional)
- 1 cup (150 g) cooked breakfast sausage or bacon, chopped
- 1/2 cup (75 g) diced bell peppers
- 1/4 cup (40 g) finely chopped onion
- 6–8 large flour tortillas
- 1/2 cup (120 ml) salsa
- 1 tablespoon (15 ml) olive oil or butter
- Salt and pepper to taste
Instructions
- Heat 1 tablespoon of olive oil in a skillet over medium heat. Add chopped onion and bell peppers, sauté until softened and fragrant, about 5 minutes.
- Add cooked sausage or bacon pieces to the skillet and warm through for 3-4 minutes. Season lightly with salt and pepper. Transfer mixture to a bowl and set aside.
- In a mixing bowl, whisk together 6 large eggs and 1/4 cup milk until blended.
- Pour egg mixture into the same skillet over medium-low heat. Stir gently and continuously with a wooden spoon or spatula, cooking until eggs are softly set but still moist. Remove from heat immediately.
- Warm tortillas slightly in the microwave or on a dry skillet to make them pliable.
- Spoon scrambled eggs onto the center of each tortilla, followed by the sausage-veggie mixture.
- Sprinkle with a blend of cheddar and pepper jack cheese (2-3 tablespoons per burrito). Add a spoonful of salsa if desired.
- Fold the sides of each tortilla over the filling, then roll from the bottom up to form a secure burrito.
- Wrap each burrito tightly in aluminum foil or parchment paper.
- Place wrapped burritos in a freezer-safe container or ziplock bag. Label with the date and freeze for up to 3 months.
- To reheat, unwrap burrito and microwave on a microwave-safe plate for 2-3 minutes, flipping halfway through. Alternatively, reheat wrapped in foil in a 350°F (175°C) oven for 15-20 minutes.
Notes
Cook eggs low and slow to keep them creamy and soft. Warm tortillas before assembling to prevent cracking. Fold burritos tightly to avoid filling falling out. For reheating, flipping halfway in microwave prevents drying. Add salsa or olive oil after reheating to restore moisture. Burritos freeze well up to 3 months. For gluten-free, use corn or gluten-free tortillas. For vegetarian, replace sausage with mushrooms or beans.
Nutrition
- Serving Size: 1 burrito
- Calories: 300350
- Sugar: 3
- Sodium: 600
- Fat: 20
- Saturated Fat: 8
- Carbohydrates: 20
- Fiber: 2
- Protein: 15
Keywords: breakfast burritos, make-ahead breakfast, easy breakfast, freezer meals, quick breakfast, eggs, sausage, cheese, busy mornings


