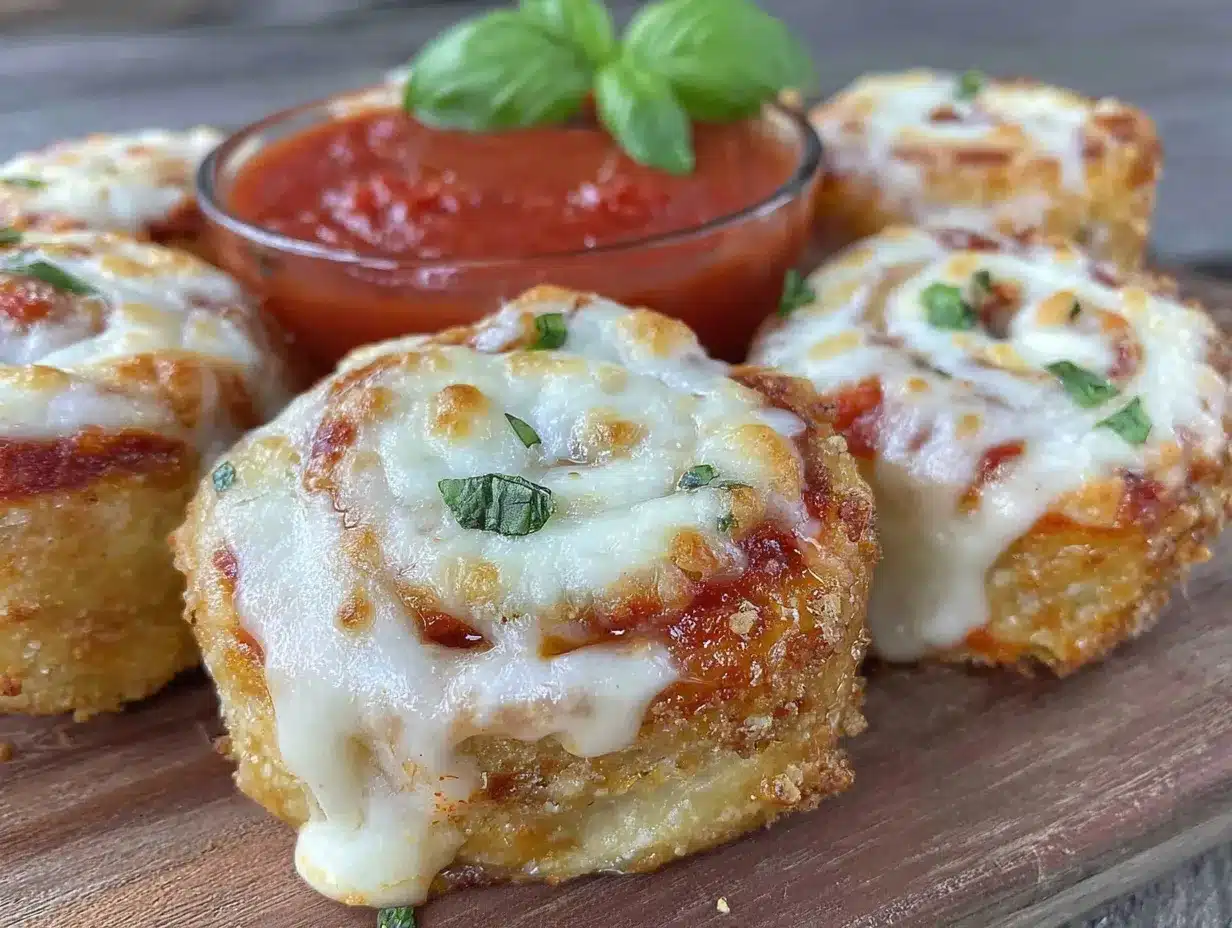
Third time this week, and the kitchen smells exactly like melted mozzarella and tangy tomato sauce again. The dough was a little stretchier this time — maybe I finally got the rolling right after all those attempts. Honestly, it’s borderline ridiculous how these pizza roll-ups have taken over my evenings. Something about the way that gooey mozzarella stretches as you bite in, paired with that crispy, golden exterior, just keeps pulling me back. I found myself making these every Friday night for a whole month, trying tiny tweaks like swapping pepperoni for sausage or adding just a pinch more oregano. Each batch felt like chasing a perfect snapshot of comfort. No fancy pizza oven, no hours of waiting for dough to rise—just fast, satisfying bites that freeze well and heat up even better.
What’s wild is that the recipe stayed pretty simple the whole time. I mean, you just need basic pizza dough, some mozzarella, and your favorite sauce, but somehow these roll-ups manage to feel like a little celebration every time. There’s a kind of magic in how something so easy can keep you coming back — maybe because they’re perfect for quick snacks, unexpected guests, or even a rushed weeknight when you barely have time to think about dinner. They’re just the kind of freezer-friendly snack that feels like you put in way more effort than you actually did. And that, honestly, is why these pizza roll-ups stuck around in my routine — they’re the snack that makes you pause, smile, and maybe even sneak one (or three) before anyone else knows.
Why You’ll Love This Recipe
Okay, let me tell you why these Easy Pizza Roll-Ups with Mozzarella have earned a permanent spot in my freezer and my kitchen heart:
- Quick & Easy: You can whip these up in under 30 minutes — great for those nights when time is not on your side but hunger is.
- Simple Ingredients: No need for a special shopping trip; you probably have everything in your pantry or fridge right now.
- Perfect for Snack Time: Whether it’s a kid’s after-school craving or an adult’s late-night nibble, these roll-ups hit the spot every time.
- Freezer-Friendly: Make a batch ahead and freeze — then pop them in the oven whenever snack attack strikes.
- Crowd-Pleaser: They’re always the first to disappear at parties or casual get-togethers (I once brought them alongside a sparkling pink champagne jello shot — total hit).
- Unbelievably Delicious: The melty mozzarella with a hint of herbs inside a crisp golden wrap? It’s like mini pizza pockets of happiness.
What sets these apart? For me, it’s the balance — the dough is just thin enough to get crispy but still soft inside, the mozzarella melts perfectly without oozing everywhere, and the sauce is seasoned just right (I sneak in a little garlic powder and Italian herbs). This isn’t your average frozen pizza roll-up; it’s a thoughtfully tweaked recipe born from obsessive testing. Plus, the freezer-friendly aspect means you’re always ready for snack emergencies without sacrificing flavor. Honestly, it’s like pizza’s best friend, hanging out in your freezer, ready to rescue you at a moment’s notice.
What Ingredients You Will Need
This recipe sticks to simple, wholesome ingredients that pull together into a comforting, satisfying snack without fuss. Most of these are pantry staples, making it easy to prepare anytime. Here’s what you’ll need:
- Pizza dough: About 1 pound (450 g), store-bought or homemade (I usually grab Bob’s Red Mill for consistent results)
- Mozzarella cheese: 8 ounces (225 g), shredded or sliced (fresh mozzarella works great but dries out faster, so shredded is my go-to)
- Marinara or pizza sauce: ½ cup (120 ml), smooth and flavorful (homemade or your favorite jarred brand; I like to add a pinch of extra Italian seasoning)
- Pepperoni slices: 20-30 slices, optional but highly recommended for that classic pizza vibe
- Olive oil: 1 tablespoon (15 ml), for brushing the roll-ups before baking
- Italian seasoning: 1 teaspoon (2 g), for extra flavor in the dough or sauce
- Garlic powder: ½ teaspoon (1 g), optional, but it adds a subtle kick
- Salt: A pinch, especially if using store-bought dough that’s low on salt
- Flour: For dusting your surface (about 2 tablespoons / 15 g), helps with rolling the dough smoothly
Feel free to swap pepperoni with cooked sausage crumbles or veggies like bell peppers and mushrooms for a twist. If dairy’s a concern, mozzarella can be replaced with a dairy-free cheese alternative, though the texture may differ a bit. For gluten-free options, almond or cauliflower crust dough works too, but keep an eye on baking time as they might brown faster.
Equipment Needed
- Baking sheet: A standard 9×13 inch (23×33 cm) sheet works perfectly — if you don’t have one, a rimmed cookie sheet is fine too.
- Mixing bowl: For handling the dough and tossing ingredients.
- Rolling pin: Essential for getting the dough thin enough for that crispy yet tender texture. If you’re out, a clean wine bottle can work in a pinch.
- Pastry brush: For brushing olive oil on the roll-ups — but your fingers can manage if you’re in a rush.
- Sharp knife or pizza cutter: To slice the dough into neat rectangles for rolling.
- Cooling rack: Optional but great for letting the roll-ups cool without getting soggy.
I’ve tried this recipe with a pizza stone, but honestly, the baking sheet gives a more even crisp for these roll-ups. Also, if you keep your rolling pin lightly floured, it prevents sticking and frustration. I once tried a silicone rolling pin, but it didn’t give me the same smooth stretch as wood does.
Preparation Method
- Preheat your oven: Set it to 400°F (200°C). Make sure the rack is in the middle for even baking. This usually takes about 10 minutes.
- Prepare your dough: Lightly flour your work surface and roll out the pizza dough to roughly a 12×10 inch (30×25 cm) rectangle. Aim for about 1/8 inch (3 mm) thickness — thin, but not paper-thin. The dough should feel soft and springy, not sticky. If it’s too elastic and snapping back, let it rest 5 minutes before trying again.
- Spread the sauce: Evenly spread ½ cup (120 ml) of marinara or pizza sauce over the dough, leaving a ½ inch (1.25 cm) border on all sides. The sauce should be thick enough to stick but not so wet that it soaks through the dough.
- Add cheese and pepperoni: Sprinkle 8 ounces (225 g) of shredded mozzarella evenly over the sauce, then layer with pepperoni slices (or your chosen toppings). Avoid piling too thickly — you want the roll to seal well.
- Season: Lightly sprinkle Italian seasoning and a pinch of garlic powder over the toppings for an extra flavor pop.
- Roll it up: Starting from the long edge closest to you, carefully roll the dough into a tight log shape. Use gentle pressure to keep it snug but avoid squeezing out the filling.
- Slice the roll: Using a sharp knife or pizza cutter, slice the log into 1-inch (2.5 cm) thick pieces. You should get about 12-14 roll-ups.
- Arrange on the baking sheet: Line your baking sheet with parchment paper or lightly grease it, then place the roll-ups cut side down, spaced about 1 inch (2.5 cm) apart.
- Brush with olive oil: Lightly brush the tops with 1 tablespoon (15 ml) of olive oil. This helps create a golden, crispy finish.
- Bake: Pop the tray in the oven and bake for 15-18 minutes, or until the roll-ups are golden brown and cheese is bubbling inside. Keep an eye at the 12-minute mark to avoid burning.
- Cool and serve: Let the roll-ups cool on a rack for 5 minutes before eating. This helps the cheese set slightly — trust me, you’ll avoid molten cheese explosions this way!
- Freezing option: To freeze, place the unbaked roll-ups on a tray lined with parchment paper, freeze until firm (about 2 hours), then transfer to a freezer-safe bag. Bake from frozen, adding 5 extra minutes to baking time.
Pro tip: If your dough is resisting rolling or shrinking back, give it a 10-minute breather under a damp towel. That little rest makes all the difference. Also, slicing with a serrated knife can be cleaner if your dough is sticky.
Cooking Tips & Techniques
There’s a bit of an art to making pizza roll-ups that don’t turn into a cheesy mess or a doughy blob. Here are some of the tricks I’ve picked up the hard way:
- Don’t overload the filling: Less is more here — too much sauce or cheese and the roll-ups won’t seal properly or bake evenly.
- Use room temperature dough: Cold dough is tough to roll and can snap back. Let it warm up for 30 minutes if needed.
- Brush oil before baking: This step is crucial for a crispy crust. Skipping it results in a dull, pale finish.
- Watch your oven temperature: Every oven is different—if your roll-ups brown too fast on top but aren’t cooked inside, try lowering the temperature to 375°F (190°C) and baking a bit longer.
- Consider lining the baking sheet: Parchment paper or a silicone mat saves cleanup and prevents sticking.
- Multitasking tip: While the roll-ups bake, you can prep a quick dessert like these fluffy strawberry mousse cups to round out your snack time.
One time, I skipped the olive oil brush (thought it was optional) — big mistake. The crust turned out dry and tough, which made me appreciate this simple step more than ever. Also, I learned not to slice the roll-ups too thick; otherwise, the middle stays doughy. Keeping them around an inch thick hits that perfect balance of crispy edges and melty centers.
Variations & Adaptations
These pizza roll-ups are super versatile — here are some ways I’ve switched things up depending on mood, season, or dietary needs:
- Vegetarian version: Skip the pepperoni and add sautéed mushrooms, spinach, or roasted red peppers inside. It’s just as satisfying, especially with extra mozzarella.
- Spicy kick: Add red pepper flakes to the sauce or sprinkle some cayenne on the dough before rolling for a little heat.
- Different cheese blends: Try mixing mozzarella with provolone or sharp cheddar for a more complex flavor.
- Gluten-free dough: Use a store-bought gluten-free pizza dough or make your own almond flour-based dough — just keep an eye on bake time and texture.
- Cooking method variation: These roll-ups also work great air-fried at 375°F (190°C) for 10-12 minutes, turning halfway, for an extra-crispy finish.
Personally, I once tried a version with pesto sauce instead of marinara — weirdly addictive, but a bit messy to roll. Definitely one to try if you’re feeling adventurous. It reminded me how much a simple sauce swap can transform a familiar recipe.
Serving & Storage Suggestions
These pizza roll-ups are best served warm when the cheese is melty and the crust is crisp. I like to serve them with a side of extra marinara sauce for dipping — it just completes the experience. They’re perfect paired with a fresh green salad or even alongside some crunchy garlic bread for a full mini-pizza meal.
For storage, cool completely and keep in an airtight container in the fridge for up to 4 days. To reheat, pop them in a 350°F (175°C) oven for 8-10 minutes or microwave for 30-40 seconds if you’re in a hurry (though they won’t be as crispy).
If frozen, bake directly from the freezer at 400°F (200°C) for about 20-23 minutes until heated through and golden. Flavors actually deepen after a day in the fridge — the herbs and sauce meld beautifully, making leftovers even tastier.
Nutritional Information & Benefits
Each pizza roll-up (based on 12 pieces) contains approximately:
| Nutrient | Per Roll-Up |
|---|---|
| Calories | 120-140 kcal |
| Protein | 6-8 g |
| Fat | 6-8 g |
| Carbohydrates | 12-15 g |
| Calcium | About 15% DV |
The mozzarella provides a good dose of calcium and protein, making these snacks a bit more than just empty carbs. Using whole-grain or cauliflower-based dough can boost fiber and reduce carbs for those watching their intake. Just a heads up: they do contain dairy and gluten (unless using substitutes), so keep that in mind if you have allergies or sensitivities.
Conclusion
Easy Pizza Roll-Ups with Mozzarella have become my go-to for quick snacks that feel like a treat without the fuss. They’re approachable, forgiving, and perfect for batch cooking so you’re always ready for hungry moments. Whether you stick to the classic pepperoni or experiment with veggies and spices, these roll-ups invite you to make the recipe your own.
Personally, I love how they bring a little bit of comfort and nostalgia into busy evenings — like a mini pizza party that’s just waiting in the freezer. If you give them a try, I’d love to hear how you customize your roll-ups or what dips you pair them with. Sharing those tweaks always makes the kitchen feel a little warmer.
Happy rolling, baking, and snacking!
FAQs
Can I make these pizza roll-ups ahead of time?
Absolutely! You can prepare and slice the roll-ups, then freeze them on a tray before baking. When ready, bake from frozen, adding a few extra minutes to the cooking time.
What type of cheese works best for pizza roll-ups?
Mozzarella is classic because it melts beautifully and has a mild flavor. You can mix in provolone or cheddar for different tastes, but avoid cheeses that don’t melt well.
Can I use gluten-free dough?
Yes, gluten-free dough works fine but watch baking times carefully, as it may crisp faster or need less time to avoid drying out.
How do I prevent the roll-ups from getting soggy?
Don’t overload with sauce and cheese, and make sure to brush olive oil on the outside before baking. Let them cool on a rack to keep the crust crisp.
Are these pizza roll-ups kid-friendly?
Definitely! They’re a popular snack for kids and adults alike, and you can customize fillings to suit picky eaters.
Pin This Recipe!
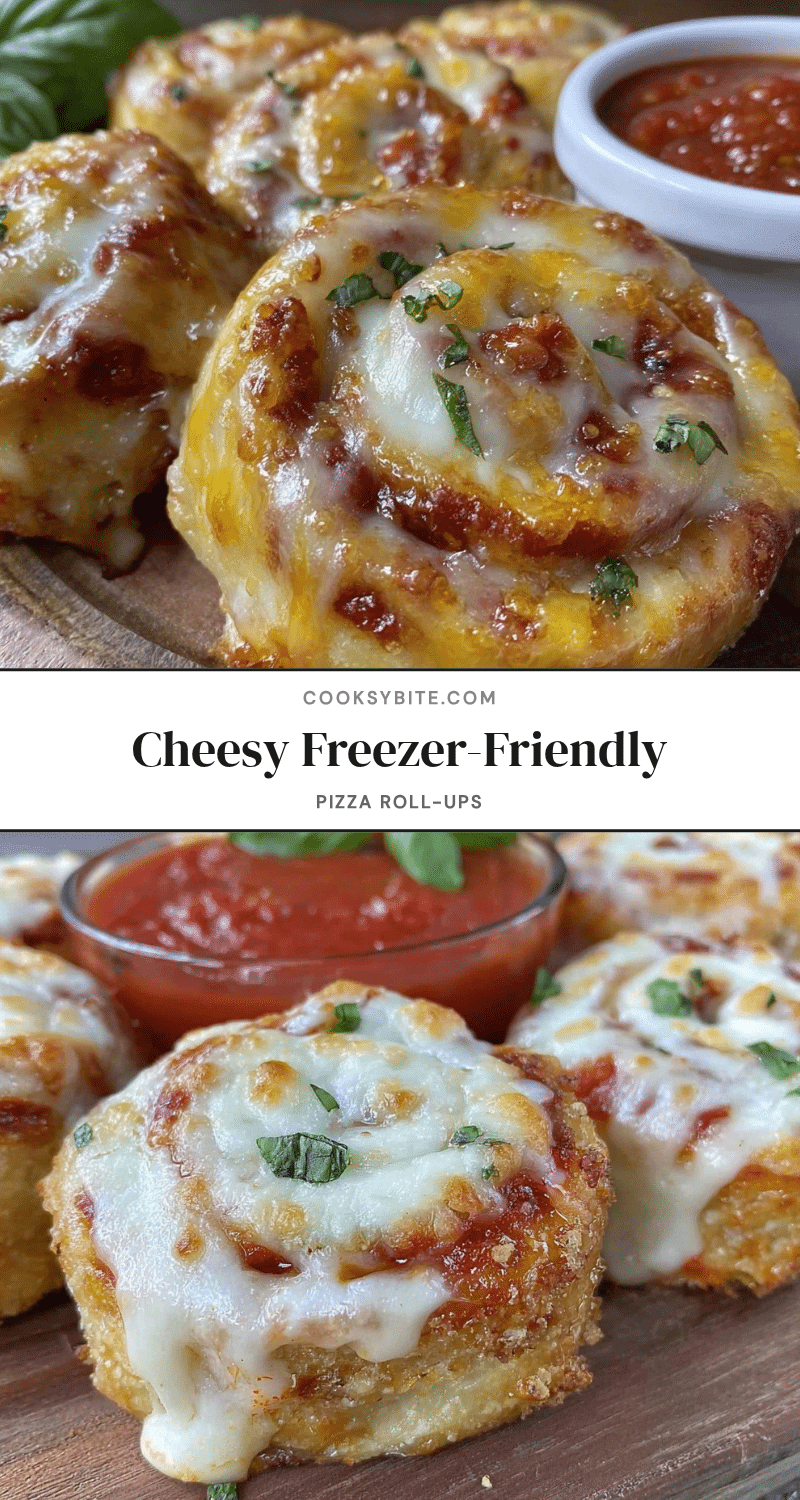
Easy Pizza Roll-Ups with Mozzarella

Quick and easy pizza roll-ups featuring stretchy mozzarella and tangy tomato sauce, perfect for snacks or freezer-friendly meals.
- Prep Time: 15 minutes
- Cook Time: 18 minutes
- Total Time: 33 minutes
- Yield: 12-14 roll-ups 1x
- Category: Snack
- Cuisine: Italian-American
Ingredients
- 1 pound (450 g) pizza dough, store-bought or homemade
- 8 ounces (225 g) mozzarella cheese, shredded or sliced
- ½ cup (120 ml) marinara or pizza sauce
- 20–30 pepperoni slices (optional)
- 1 tablespoon (15 ml) olive oil, for brushing
- 1 teaspoon (2 g) Italian seasoning
- ½ teaspoon (1 g) garlic powder (optional)
- Pinch of salt
- About 2 tablespoons (15 g) flour, for dusting surface
Instructions
- Preheat your oven to 400°F (200°C) and position the rack in the middle.
- Lightly flour your work surface and roll out the pizza dough to a 12×10 inch (30×25 cm) rectangle about 1/8 inch (3 mm) thick.
- Spread ½ cup (120 ml) of marinara or pizza sauce evenly over the dough, leaving a ½ inch (1.25 cm) border.
- Sprinkle 8 ounces (225 g) of shredded mozzarella evenly over the sauce, then layer with pepperoni slices or chosen toppings.
- Lightly sprinkle Italian seasoning and a pinch of garlic powder over the toppings.
- Roll the dough tightly from the long edge closest to you into a log shape.
- Slice the log into 1-inch (2.5 cm) thick pieces, yielding about 12-14 roll-ups.
- Line a baking sheet with parchment paper or lightly grease it, then place roll-ups cut side down, spaced about 1 inch (2.5 cm) apart.
- Brush the tops with 1 tablespoon (15 ml) olive oil.
- Bake for 15-18 minutes until golden brown and cheese is bubbling, checking at 12 minutes to avoid burning.
- Let the roll-ups cool on a rack for 5 minutes before serving.
- To freeze, place unbaked roll-ups on a parchment-lined tray, freeze until firm (about 2 hours), then transfer to a freezer-safe bag. Bake from frozen, adding 5 extra minutes to baking time.
Notes
Do not overload filling to avoid soggy roll-ups. Use room temperature dough for easier rolling. Brush olive oil before baking for a crispy crust. If dough shrinks back, let it rest 10 minutes under a damp towel. Slice about 1 inch thick for best texture. Gluten-free dough may require adjusted baking time. Air fryer option: 375°F (190°C) for 10-12 minutes, turning halfway.
Nutrition
- Serving Size: 1 roll-up
- Calories: 130
- Sugar: 2
- Sodium: 300
- Fat: 7
- Saturated Fat: 3.5
- Carbohydrates: 14
- Fiber: 1
- Protein: 7
Keywords: pizza roll-ups, mozzarella, freezer-friendly snacks, quick snacks, easy pizza recipe, pepperoni roll-ups