My three-year-old nephew is a notoriously picky eater. I figured a fruit skewer would be a fun, hands-on snack he’d maybe poke at for a minute. It took about thirty seconds of him proudly holding a completed skewer for that assumption to fall apart completely.
He didn’t just eat it. He devoured it. He asked for another. Then another. And then he started bossing everyone around about which color fruit should go where. Honestly, it was a little chaotic, but in the best way possible. The fruit was gone, the kids were happy, and the adults were all high-fiving each other like we’d just solved world hunger.
That’s the thing about these easy rainbow fruit skewers. They look like a party on a stick, but they’re secretly one of the simplest, most effective ways to get kids excited about eating whole fruit. There’s no complicated syrup, no fancy cuts, and no sugar needed. It’s just colorful fruit, arranged in a pattern that somehow makes everything taste better.
This isn’t a recipe you need to follow with precision. It’s more of a formula for fun. And once you see how quickly a plate of these disappears, you’ll understand why they’ve become my go-to for playdates, birthday parties, and those afternoons when you just need a healthy win.
Why You’ll Love This Recipe
Let’s be real. Getting kids to eat fruit can sometimes feel like a negotiation. These skewers side-step all that drama. They’re visually exciting, which is half the battle. Kids see a rainbow and their brain says “fun,” not “healthy.”
- Quick & Easy : You can have a whole platter of these ready in under 15 minutes. No cooking, no baking, no fuss. It’s the perfect last-minute snack for when you hear “Mom, I’m hungry!” for the fifth time.
- Simple Ingredients : This “recipe” is just fruit. Whatever is fresh, ripe, and colorful from your grocery store or farmer’s market. No special trips or expensive ingredients required.
- Perfect for Any Occasion : These are a hit at birthday parties, school events, summer barbecues, or just a rainy Tuesday afternoon. They’re also a fantastic way to get kids involved in the kitchen.
- Crowd-Pleaser : I have yet to meet a kid (or adult, for that matter) who can resist a rainbow fruit skewer. They’re universally loved, even by the pickiest eaters.
- Unbelievably Delicious : It’s just fruit, but there’s something about eating it off a stick that makes it taste ten times better. The combination of sweet and tart, soft and crunchy—it’s a texture and flavor party.
What makes this different from just handing a kid a bowl of fruit? It’s the experience. The act of creating a rainbow, the pride of making their own snack, the fun of eating it off a stick. It transforms a healthy choice into an exciting activity. It’s the kind of snack that makes you feel like a super-parent without any of the stress.
What Ingredients You Will Need
This recipe uses simple, fresh fruit to create a vibrant and delicious snack. The key is choosing fruit that’s ripe but still firm enough to stay on the skewer. You want it to be easy for little hands to handle.
- Red Fruit: Strawberries (hulled and halved if large), raspberries, or watermelon chunks. Strawberries are the classic choice for their shape and sweetness. (Look for bright red, fragrant berries for the best flavor.)
- Orange Fruit: Cantaloupe or honeydew melon (cut into 1-inch cubes), or mandarin orange segments. Cantaloupe holds its shape well and adds a lovely, sweet, and slightly firm texture. (I prefer using a melon baller for perfectly round, uniform pieces.)
- Yellow Fruit: Pineapple chunks (fresh is best, canned in juice works too), or yellow bell pepper (for a savory-sweet crunch). Fresh pineapple is a no-brainer here—its sweetness and acidity cut through the other fruits beautifully. (Pro tip: if using canned pineapple, make sure it’s packed in its own juice, not syrup.)
- Green Fruit: Green grapes, kiwi (peeled and sliced into rounds or wedges), or honeydew melon. Green grapes are the easiest option—no prep needed. They’re also a favorite with kids for their natural sweetness and fun pop-in-your-mouth shape.
- Blue/Purple Fruit: Blueberries, blackberries, or purple grapes. Blueberries are the perfect size and require zero prep. They add that crucial “cool” color that completes the rainbow. (For a deeper purple, use blackberries or purple grapes, halved.)
For the “Magic” Touch (Optional):
- Honey or Agave Nectar: A light drizzle can add extra sweetness for those who want it, but honestly, the fruit is usually sweet enough on its own.
- Coconut Flakes (Unsweetened): For a fun, tropical twist. Toast them lightly for extra flavor.
- Mini Marshmallows: A classic addition for a “fruit kebab” feel. Use the white ones for a clean look or pastel colors for a party vibe.
Substitution Guidance: The beauty of this recipe is its flexibility. If you can’t find a specific fruit, swap it for another in the same color family. For a tropical version, use mango for orange, papaya for yellow, and dragon fruit for pink. For a berry-focused skewer, use strawberries, raspberries, blueberries, and blackberries. The rainbow is your oyster!
Equipment Needed
You don’t need much for this, which is part of the appeal. Here’s a quick list of what you’ll need to get started.
- Wooden Skewers (6-8 inches): These are perfect for small hands. You can find them at any grocery store. Safety Note: Always soak wooden skewers in water for 15-20 minutes before using them with kids. This prevents splinters and makes them less likely to snap. For younger children, consider using short, blunt-ended plastic skewers or even sturdy toothpicks for a mini version.
- Cutting Board: A large, sturdy cutting board is essential for prepping all that fruit. I love my big wooden one, but a plastic one is fine too.
- Sharp Knife: A good, sharp paring knife or chef’s knife makes quick work of hulling strawberries and cutting melon. A dull knife is more dangerous than a sharp one, so keep it honed.
- Melon Baller (Optional): This is a fun tool that creates perfectly round, uniform melon balls. Kids love the shape, and it looks really professional on the skewer. It’s not necessary, but it’s a nice touch if you have one.
- Serving Platter: A large, flat platter or wooden board is perfect for presenting the finished skewers. A white platter makes the colors of the fruit really pop.
Preparation Method
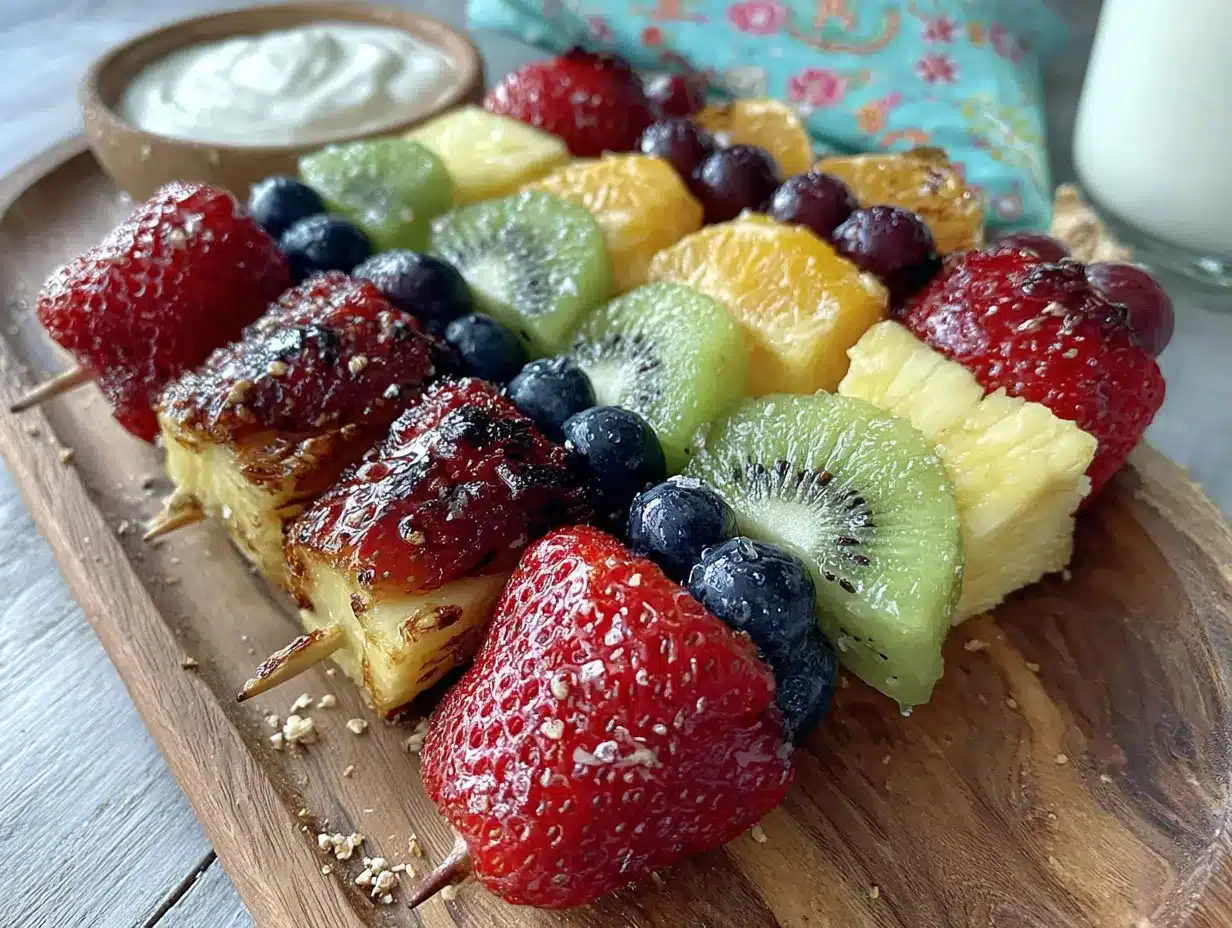
This is the fun part! Get the kids involved, put on some music, and make it a family activity. The process is simple, but the results are spectacular.
- Prep the Fruit (5 minutes): Wash all your fruit thoroughly. Hull the strawberries and cut them in half lengthwise if they are large. Peel and cut the melon into 1-inch cubes. Peel the kiwi and slice it into rounds, then cut the rounds into wedges. Leave the grapes and blueberries whole. If using pineapple, cut it into 1-inch chunks.
- Soak the Skewers (15 minutes, do this first): Place your wooden skewers in a shallow dish and cover them completely with water. Let them soak while you prep the fruit. This is a crucial step to prevent splinters and breakage.
- Assemble the Rainbow (10 minutes): Now for the main event! Lay out all your prepped fruit in small bowls or on a tray, organized by color. This makes it easy for little hands to grab what they need. Take a skewer and start threading the fruit in the order of the rainbow: red, orange, yellow, green, blue/purple.
- Threading Tips for Kids: For younger children, you can pre-thread the fruit onto the skewer and let them just arrange the order. For older kids, show them how to gently push the fruit onto the skewer, leaving a little space at the bottom for a “handle.” A good rule of thumb is to start with the softest fruit (like strawberries) and end with the firmest (like melon or pineapple) to keep everything secure.
- Repeat and Fill the Platter (5 minutes): Continue making skewers until you’ve used all your fruit. Arrange them on a large serving platter in a fan shape or in rows for a beautiful, eye-catching display. You can even create a “rainbow” pattern on the platter itself by grouping the skewers by color.
- Optional Drizzle (1 minute): If you’re using honey or agave, lightly drizzle it over the finished skewers just before serving. If using coconut flakes, sprinkle them on top. This adds a beautiful sheen and a touch of extra sweetness.
Sensory Cues: The fruit should look vibrant and glossy. When you bite into a strawberry, it should be juicy and sweet. The melon should be firm but give way easily. The grapes should pop in your mouth. The whole experience is a celebration of fresh, natural flavors and textures.
Cooking Tips & Techniques
I’ve learned a few things the hard way so you don’t have to. Here are my best tips for perfect rainbow fruit skewers every time.
- The “Fruit Firmness” Rule: Not all fruit is created equal. Soft fruits like strawberries and kiwi can get mushy if they’re too ripe. Harder fruits like melon and pineapple hold their shape perfectly. When assembling, alternate soft and firm fruits for the best texture and to prevent the skewer from becoming a wobbly mess.
- Don’t Overcrowd the Skewer: Leave a little space between each piece of fruit. This makes it easier for little hands to grab and eat, and it also looks more visually appealing. A good rule of thumb is to use 5-7 pieces of fruit per skewer.
- The “Handle” Hack: Always leave about an inch of empty space at the bottom of the skewer. This gives kids a clean place to hold it without getting sticky fingers all over the fruit. It also makes the skewer easier to pick up and eat.
- Make-Ahead Magic: You can prep the fruit up to 24 hours in advance. Store each type of fruit in a separate airtight container in the refrigerator. Assemble the skewers no more than 2-3 hours before serving to keep them looking fresh and vibrant.
- My Biggest Failure: I once tried to make these with overripe bananas. It was a disaster. They fell apart, turned brown, and made the whole skewer a sticky, unappetizing mess. Stick to firm, ripe fruit. Bananas are best left for smoothies or banana bread.
Variations & Adaptations
This recipe is a fantastic base for endless creativity. Here are a few of my favorite ways to change it up.
- Dairy-Free “Yogurt Dip”: For an extra special treat, serve the skewers with a side of dairy-free yogurt (coconut or soy-based) or a simple cashew cream. It adds a creamy, tangy element that kids love.
- Chocolate Drizzle: For a decadent dessert version, melt some dark chocolate (or dairy-free chocolate chips) and drizzle it over the finished skewers. Let it set in the fridge for a few minutes. This is a guaranteed crowd-pleaser for older kids and adults.
- The “Tropical Rainbow”: Swap out the standard fruits for a tropical twist. Use mango for orange, papaya for yellow, dragon fruit for pink, and star fruit for green. It’s a vibrant, exotic change of pace.
- Savory-Sweet Skewers: For a more grown-up appetizer, add cubes of sharp cheddar cheese or fresh mozzarella between the fruit. The salty-sweet combination is surprisingly addictive. You can even add a few fresh basil leaves for an herby kick.
- Frozen Fruit Skewers: On a hot day, use frozen grapes, frozen mango chunks, and frozen pineapple. They act like little fruit popsicles. Just be aware that they can be a bit harder to thread, so you might need to let them thaw for 5 minutes first.
Serving & Storage Suggestions
These skewers are best served fresh, but there are a few tricks to keep them looking their best.
- Serving Temperature: Serve these skewers chilled or at room temperature. They are perfect for a picnic, a birthday party, or a simple afternoon snack. I love arranging them on a large white platter for a beautiful, colorful display.
- Complementary Dishes: These skewers pair beautifully with other party-friendly treats. They are a fantastic, healthy addition to a dessert table alongside something like our decadent red wine chocolate cake for a grown-up party, or with our fluffy strawberry mousse cups for a completely fruit-forward dessert spread. They also go great with a glass of perfect pink champagne jello shots for a fun, adult-only brunch.
- Storage: If you have leftovers (which is rare!), store them in an airtight container in the refrigerator for up to 24 hours. The fruit may start to oxidize and lose its vibrant color after that. The watermelon and strawberries tend to get a bit watery, so they’re best eaten the same day.
- Reheating: Do not reheat these. They are best enjoyed cold or at room temperature.
- Flavor Development: The flavors of the fruit don’t really “develop” over time, but the fruit will become softer and juicier as it sits. This is fine for a few hours, but after a day, the texture starts to degrade.
Nutritional Information & Benefits
This is one of the healthiest “snacks” you can make. It’s essentially a fruit salad on a stick, packed with vitamins, fiber, and antioxidants.
- Estimated Values (per skewer, using 5-7 pieces of fruit): Calories: 60-100, Fat: 0g, Carbohydrates: 15-25g, Fiber: 2-4g, Sugar: 10-18g (natural), Protein: 1-2g. These are estimates and will vary based on the specific fruits used.
- Health Benefits: Each fruit brings its own superpowers. Strawberries are packed with Vitamin C. Blueberries are antioxidant powerhouses. Pineapple contains bromelain, an enzyme that aids digestion. Cantaloupe is rich in Vitamin A for healthy skin and eyes.
- Dietary Considerations: This recipe is naturally vegan, gluten-free, dairy-free, egg-free, and nut-free. It’s a safe and healthy option for almost any dietary restriction.
- Potential Allergens: None, unless you add optional toppings like coconut (tree nut). Always check the labels on any pre-cut or canned fruit for added sugars or preservatives.
- Personal Perspective: I love that this snack feels like a treat but is actually a powerhouse of nutrition. It’s a great way to get kids to eat a variety of fruits without a fight. It’s one of those rare foods that makes everyone feel good—kids, parents, and even the health-conscious adults.
Conclusion
These easy rainbow fruit skewers are more than just a snack. They are a fun, engaging activity that gets kids excited about healthy eating. They are a colorful centerpiece for any party or playdate. And they are a simple, no-stress way to feel like a kitchen hero.
The best part? There’s no “right” way to make them. Let the kids choose their favorite fruits, arrange them in their own order, and create their own masterpieces. The mess is minimal, the joy is maximum, and the memories are delicious. I encourage you to experiment with different fruit combinations and make this recipe your own.
For a complete party spread, these skewers pair wonderfully with our moist pink velvet bundt cake or our delicious cherry chocolate brownies. They add a fresh, healthy pop of color to any dessert table.
I’d love to hear about your rainbow creations! Share your photos, your favorite fruit combinations, and your kids’ reactions in the comments below. Happy snacking!
Frequently Asked Questions
Can I make these fruit skewers ahead of time?
Yes, you can! The best approach is to prep all the fruit up to 24 hours in advance and store each type in a separate airtight container in the fridge. Assemble the skewers no more than 2-3 hours before serving to keep them looking fresh and vibrant.
What if I don’t have wooden skewers?
No problem! You can use sturdy plastic skewers (often sold for appetizers), short bamboo sticks, or even clean, sturdy toothpicks for mini skewers. Just make sure whatever you use is safe for children and doesn’t have sharp edges.
Can I use frozen fruit?
You can, but it’s not ideal. Frozen fruit tends to be very soft and watery once it thaws, which can make the skewers messy and difficult to thread. If you do use frozen fruit, let it thaw completely and pat it dry with a paper towel before using.
How do I keep the fruit from turning brown?
A light squeeze of fresh lemon or lime juice over the cut fruit (especially apples, pears, and bananas) can help prevent oxidation. For this recipe, the fruits we recommend (berries, melon, grapes, kiwi) don’t brown quickly, so it’s usually not an issue.
Are these skewers safe for toddlers?
Yes, with supervision! For toddlers, use short, blunt-ended skewers or even sturdy toothpicks. Always supervise young children while they are eating to prevent any choking hazards. You can also serve the fruit pieces in a bowl without the skewer for the youngest eaters.
Pin This Recipe!
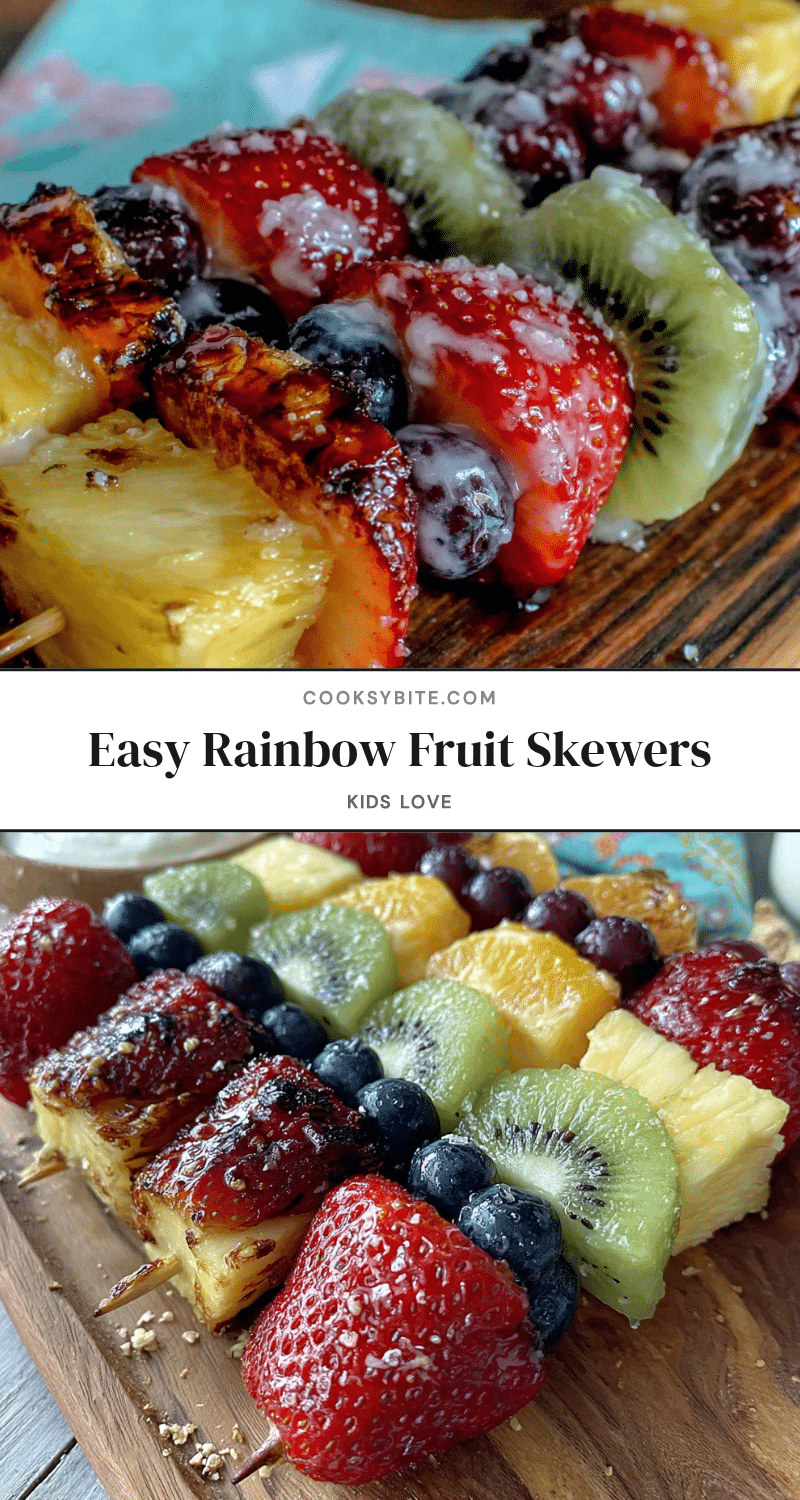
Easy Rainbow Fruit Skewers: Best Fun Snack for Kids
These easy rainbow fruit skewers are a fun, hands-on snack that gets kids excited about eating whole fruit. No complicated syrup, no fancy cuts, and no sugar needed—just colorful fruit arranged in a pattern that makes everything taste better.
- Prep Time: 15 minutes
- Cook Time: 0 minutes
- Total Time: 15 minutes
- Yield: 4 servings
- Category: Snack
- Cuisine: American
Ingredients
- Red Fruit: Strawberries (hulled and halved if large), raspberries, or watermelon chunks
- Orange Fruit: Cantaloupe or honeydew melon (cut into 1-inch cubes), or mandarin orange segments
- Yellow Fruit: Pineapple chunks (fresh is best, canned in juice works too), or yellow bell pepper
- Green Fruit: Green grapes, kiwi (peeled and sliced into rounds or wedges), or honeydew melon
- Blue/Purple Fruit: Blueberries, blackberries, or purple grapes
- Honey or Agave Nectar (optional)
- Coconut Flakes (unsweetened, optional)
- Mini Marshmallows (optional)
Instructions
- Prep the Fruit (5 minutes): Wash all fruit thoroughly. Hull strawberries and cut in half lengthwise if large. Peel and cut melon into 1-inch cubes. Peel kiwi and slice into rounds, then cut rounds into wedges. Leave grapes and blueberries whole. Cut pineapple into 1-inch chunks.
- Soak the Skewers (15 minutes, do this first): Place wooden skewers in a shallow dish and cover completely with water. Let them soak while you prep the fruit to prevent splinters and breakage.
- Assemble the Rainbow (10 minutes): Lay out all prepped fruit in small bowls or on a tray, organized by color. Take a skewer and thread fruit in rainbow order: red, orange, yellow, green, blue/purple.
- Threading Tips: For younger children, pre-thread fruit onto skewer and let them arrange the order. For older kids, show them how to gently push fruit onto the skewer, leaving a little space at the bottom for a handle. Start with softest fruit (like strawberries) and end with firmest (like melon or pineapple).
- Repeat and Fill the Platter (5 minutes): Continue making skewers until all fruit is used. Arrange on a large serving platter in a fan shape or rows for a beautiful display.
- Optional Drizzle (1 minute): If using honey or agave, lightly drizzle over finished skewers just before serving. If using coconut flakes, sprinkle on top.
Notes
Soak wooden skewers in water for 15-20 minutes before using to prevent splinters. For toddlers, use short, blunt-ended skewers or sturdy toothpicks. Prep fruit up to 24 hours in advance and store in separate airtight containers. Assemble skewers no more than 2-3 hours before serving. A light squeeze of lemon juice can prevent browning on fruits like apples or pears.
Nutrition
- Serving Size: 1 skewer (5-7 pieces
- Calories: 60100
- Sugar: 1018
- Carbohydrates: 1525
- Fiber: 24
- Protein: 12
Keywords: rainbow fruit skewers, fruit skewers for kids, healthy snack, easy fruit snack, rainbow snack, fruit kabobs, kid-friendly snack


