The kitchen clock read 9:47 PM, and the only thing I wanted was a warm chocolate chip cookie. Not a batch of twenty-four, not a project that involved chilling dough for hours, not a sink full of mixing bowls. Just one perfect, melty, chocolate-studded cookie. Maybe two. And I wanted it in twenty minutes, not tomorrow. This is the kind of craving that feels urgent and personal, like a secret you keep from everyone except yourself. I remember standing there in the quiet, the rest of the house dark, and thinking about how many recipes I had that started with the words “chill for at least two hours.” That night, I decided I didn’t need another recipe that assumed I had my life together. I needed one that understood I just wanted a cookie.
So I started pulling things out of the pantry. Butter that was already soft from sitting out all day. A single egg. Some brown sugar that was a little clumpy. I wasn’t testing anything official, I was just cooking the way you do when nobody is watching. I skipped the mixer, used a fork and a bowl, and threw the dough together in under five minutes. No chilling, no waiting, no fuss. I scooped two sad-looking balls onto a small baking sheet and slid them into the oven. Ten minutes later, I had exactly what I needed. The edges were golden, the centers were soft, and the chocolate was still a little molten. It was the kind of cookie that makes you close your eyes on the first bite, not because it’s fancy, but because it’s exactly right. That night, I wrote the recipe down on a sticky note. This is that cookie.
This is the kind of recipe you come back to when you don’t want to think too hard. It’s small-batch, so you’re not stuck with a mountain of cookies you’ll eat alone (or, let’s be honest, eat anyway). It requires no chill time, which means the only thing standing between you and a warm cookie is ten minutes in the oven. And it uses simple ingredients you probably already have. That late-night craving turned into something I’ve made dozens of times since, and I keep coming back to it because it works. No fuss, no waiting, just a really good cookie when you need one.
Why You’ll Love This Recipe
I’ve made a lot of cookies in my life. Some were spectacular, some were edible, and a few ended up in the trash when nobody was looking. This recipe sits firmly in the spectacular category, and I’m not just saying that because I wrote it. I’ve tested it more times than I care to admit, tweaking the butter ratio, adjusting the sugar, and baking it at different temperatures until it was just right. Here is why this one works so well.
- Quick & Easy: From start to finish, you’re looking at about 20 minutes. There is no mixer required, no complicated techniques, and no waiting around. This is the recipe you make when the craving hits hard and fast.
- Simple Ingredients: You probably have everything in your kitchen right now. Butter, sugar, an egg, flour, baking soda, salt, and chocolate chips. That’s it. No obscure ingredients, no trips to the specialty grocery store, no expensive vanilla bean paste (though you can use it if you want).
- Perfect for Late-Night Cravings: This is the recipe for those moments when you want something warm and sweet but don’t want to commit to a full baking project. It’s also great for when you’re cooking for one or two people and don’t need a dozen cookies staring at you from the counter.
- Crowd-Pleaser: I’ve brought these to small gatherings and watched people eat three in a row. They have that classic chocolate chip cookie texture that everyone loves, chewy edges with soft centers, and plenty of chocolate in every bite.
- Unbelievably Delicious: The secret here is the ratio of brown sugar to white sugar. It gives the cookies a deeper flavor and a softer texture, even without chilling the dough. The first time I made these, I couldn’t believe how good they turned out with so little effort.
This isn’t just another cookie recipe. It’s the one I turn to when I need something reliable, something that doesn’t require a lot of planning or cleanup. It’s comfort food in its purest form, warm, simple, and exactly what you want it to be.
What Ingredients You Will Need
This recipe uses simple, everyday ingredients to create cookies that taste like they came from a bakery. The magic is in the ratios and the technique, not in hard-to-find items. Here is everything you need and a few notes on how to make the most of each ingredient.
- Unsalted butter, melted (4 tablespoons / 57g): Melted butter is key here because it gives the cookies a chewy texture without needing to cream room-temperature butter with sugar. It also means you don’t have to wait for butter to soften, which is the whole point of a no-chill recipe. I use unsalted so I can control the salt level, but if you only have salted butter, just reduce the added salt by a pinch.
- Brown sugar, packed (¼ cup / 50g): Brown sugar is the star of this recipe. It adds moisture, a hint of molasses flavor, and that soft, chewy texture that makes these cookies so good. I use light brown sugar most of the time, but dark brown sugar works too and will give you a deeper, more caramel-like flavor.
- Granulated sugar (2 tablespoons / 25g): A small amount of white sugar helps the cookies spread just enough and adds a tiny bit of crispness to the edges. Don’t skip it, even though it seems like a small amount. The balance between brown and white sugar is what gives these cookies their perfect texture.
- Large egg yolk (1 yolk, about 18g): Using just the yolk instead of the whole egg is a little trick I learned from testing. The yolk adds richness and tenderness, while leaving out the white prevents the cookies from becoming cakey. You can use the leftover egg white for scrambled eggs or save it for another recipe.
- Vanilla extract (½ teaspoon / 2ml): A good vanilla extract makes a difference. I’m partial to pure vanilla extract, but imitation works fine too. If you want to get fancy, scrape a tiny bit of vanilla bean paste into the dough for those little specks of vanilla.
- All-purpose flour (½ cup plus 2 tablespoons / 75g): This is the backbone of the cookie. I use unbleached all-purpose flour, but bleached works the same. The key is to measure it correctly. Spoon the flour into your measuring cup and level it off with a knife. Scooping directly from the bag can pack the flour and give you too much, which leads to dry cookies.
- Baking soda (¼ teaspoon / 1g): Baking soda helps the cookies spread and gives them a nice golden color. Make sure your baking soda is fresh. If you can’t remember when you bought it, test it by dropping a little into vinegar. If it fizzes vigorously, it’s still good.
- Salt (¼ teaspoon / 1.5g): Salt isn’t just for flavor, it balances the sweetness and enhances the chocolate. I use fine sea salt, but table salt works too. If you use kosher salt, you might need a little more because the crystals are bigger.
- Semi-sweet chocolate chips (⅓ cup / 60g): Semi-sweet is my go-to because it’s not too sweet and not too bitter. You can use milk chocolate if you prefer a sweeter cookie, or dark chocolate if you like a more intense flavor. I’ve also used chopped chocolate bars here, which melt into puddles instead of staying in chip shapes. Both are delicious. For this recipe, I recommend a brand like Ghirardelli or Guittard for consistent quality.
Equipment Needed
This recipe is designed to be as low-fuss as possible, so you don’t need much equipment. Here is what you’ll need and a few notes on alternatives.
- Mixing bowl: A medium-sized bowl works best. I use a glass or ceramic bowl, but any bowl will do. You don’t need a stand mixer or even a hand mixer for this recipe. A bowl and a fork are all you really need.
- Whisk or fork: A whisk is great for mixing the wet ingredients together, but a fork works just as well. I’ve made these cookies with a fork more times than I can count, and they turn out perfectly every time.
- Rubber spatula or wooden spoon: For folding the dry ingredients into the wet mixture. A rubber spatula is my preference because it scrapes the bowl clean, but a wooden spoon works fine.
- Small cookie scoop or tablespoon: A cookie scoop makes portioning the dough easy and ensures your cookies are the same size. If you don’t have one, a regular tablespoon works. Just scoop the dough and shape it into a ball with your hands.
- Baking sheet: A small baking sheet is ideal for this recipe since you’re only making 4-6 cookies. I use a quarter-sheet pan, but any baking sheet works. If your baking sheet is dark, keep an eye on the cookies because they can brown faster.
- Parchment paper or silicone baking mat: Parchment paper prevents sticking and makes cleanup a breeze. A silicone baking mat works too. If you don’t have either, you can grease the baking sheet lightly with butter or cooking spray.
- Cooling rack: A cooling rack helps the cookies cool evenly and prevents the bottoms from getting soggy. If you don’t have one, you can let the cookies cool on the baking sheet for a few minutes, then transfer them to a plate.
Preparation Method
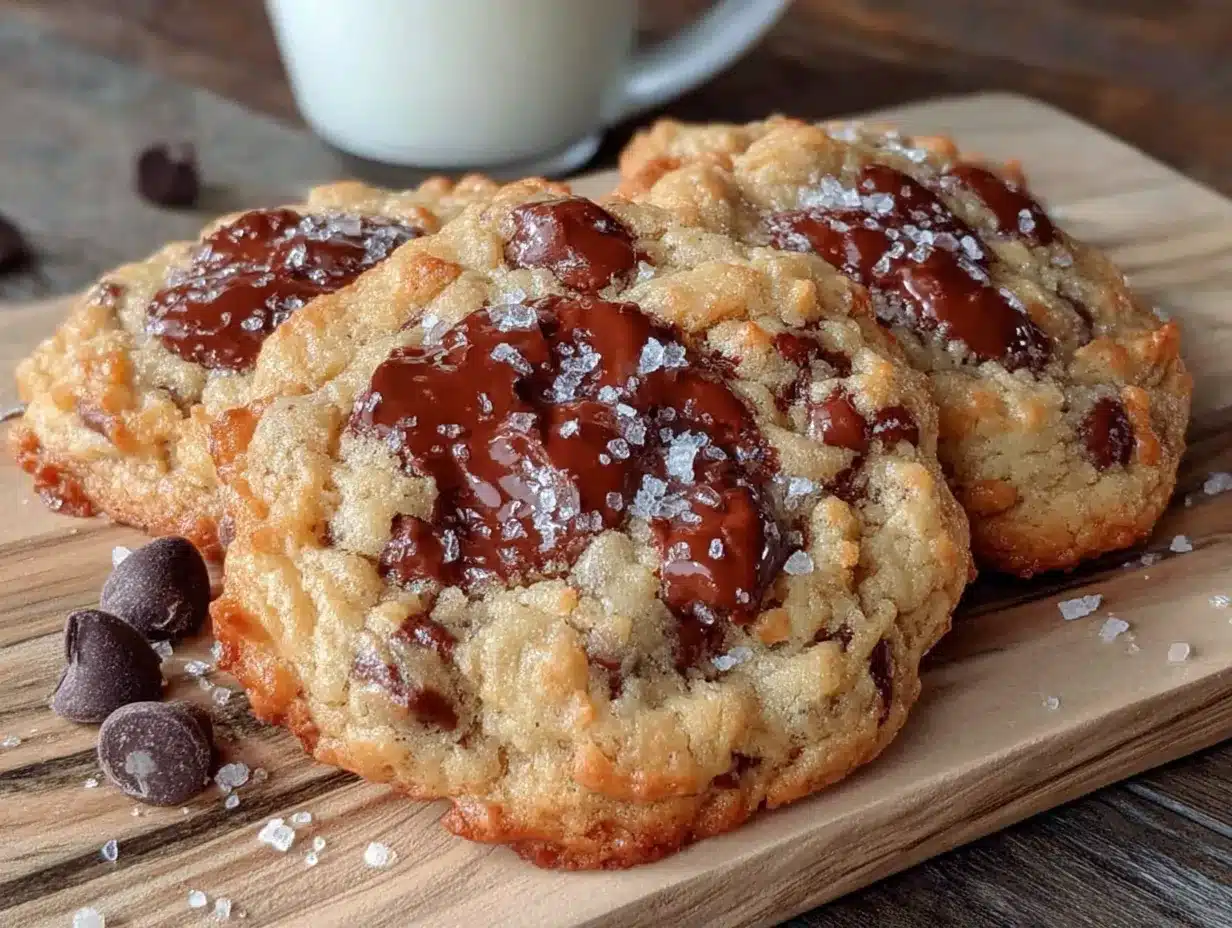
This is where the magic happens. The whole process takes about 15 minutes from start to oven, and the results are worth every second. Follow these steps carefully, and you’ll have perfect cookies every time.
- Preheat your oven to 350°F (175°C). Line a small baking sheet with parchment paper or a silicone baking mat. Preheating is important because you want the oven to be fully hot when the cookies go in. While the oven heats up, you can mix the dough.
- Melt the butter. Place 4 tablespoons of unsalted butter in a microwave-safe bowl and heat in 20-second intervals until melted. Alternatively, melt it in a small saucepan over low heat. Let it cool for a minute or two. You don’t want it to be hot when you add it to the sugar, but it should still be liquid.
- Mix the wet ingredients. In a medium mixing bowl, combine the melted butter, ¼ cup packed brown sugar, and 2 tablespoons granulated sugar. Whisk together until the mixture is smooth and the sugar has started to dissolve. It should look like a thick paste. Add 1 large egg yolk and ½ teaspoon vanilla extract. Whisk again until everything is well combined and the mixture is slightly lighter in color. This should take about 30 seconds.
- Add the dry ingredients. Sprinkle ½ cup plus 2 tablespoons all-purpose flour, ¼ teaspoon baking soda, and ¼ teaspoon salt over the wet mixture. Use a rubber spatula or wooden spoon to fold everything together until just combined. Do not overmix. You want to see a few streaks of flour still visible when you stop. Overmixing can make the cookies tough.
- Fold in the chocolate chips. Add ⅓ cup semi-sweet chocolate chips to the dough and fold them in gently. Make sure they are evenly distributed throughout the dough. If you want a few chips on top of the cookies for presentation, reserve a handful and press them into the dough balls later.
- Portion the dough. Use a small cookie scoop or a tablespoon to portion the dough into 4 to 6 equal-sized balls. For standard cookies, use about 1.5 tablespoons of dough per cookie. For smaller cookies, use about 1 tablespoon. Place the dough balls on the prepared baking sheet, spacing them about 2 inches apart. They will spread, so give them room.
- Bake the cookies. Place the baking sheet in the preheated oven and bake for 9 to 11 minutes. The cookies are done when the edges are golden brown and the centers look slightly underdone and puffy. They will continue to set as they cool, so don’t overbake them. If you like softer cookies, bake for 9 minutes. If you prefer crispier edges, bake for 11 minutes.
- Cool the cookies. Remove the baking sheet from the oven and let the cookies cool on the sheet for 5 minutes. This allows them to firm up without becoming hard. After 5 minutes, transfer the cookies to a cooling rack to cool completely. Or, if you’re like me, eat one while it’s still warm.
One thing I learned the hard way: don’t skip the cooling time on the baking sheet. The first time I made these, I tried to move them immediately and ended up with a cookie-shaped mess. They need those few minutes to set up properly. Trust me on this.
Cooking Tips & Techniques
Over the years, I’ve made every mistake you can imagine with cookies. I’ve baked them too long, used cold butter, forgotten the salt, and ended up with flat, sad discs more times than I’d like to admit. Here are the tips I wish someone had given me when I started making small-batch cookies.
Measure your flour correctly. This is the number one mistake people make with cookies. If you scoop your measuring cup directly into the flour bag, you can end up with up to 20% more flour than you need. Instead, spoon the flour into your measuring cup and level it off with the back of a knife. It takes an extra five seconds and makes a huge difference.
Don’t overmix the dough. Once you add the flour, mix only until it disappears. Overmixing develops gluten, which can make your cookies tough and dense. You want them to be tender and soft. A few streaks of flour are perfectly fine. They will disappear as you fold in the chocolate chips.
Use room temperature ingredients. Since we’re using melted butter, this is less of an issue, but your egg yolk should be at room temperature for best results. If you forgot to take it out of the fridge, place it in a bowl of warm water for 5 minutes. This helps it incorporate more smoothly into the dough.
Chill the dough if you have time. I know this recipe is called “No Chill Dough,” and it works perfectly without chilling. But if you have an extra 30 minutes, popping the dough balls in the fridge will give you slightly thicker, chewier cookies. It’s not necessary, but it’s an option if you want to experiment.
Bake one test cookie first. This is a trick I learned from professional bakers. If you’re unsure about your oven or your dough, bake a single cookie first to see how it spreads and browns. Adjust the baking time or dough size accordingly before baking the rest. It saves you from ruining an entire batch.
Let the cookies rest on the pan. I already mentioned this, but it’s worth repeating. The cookies need those 5 minutes on the hot baking sheet to finish setting. If you move them too soon, they will fall apart. Be patient. It’s worth it.
Variations & Adaptations
One of the best things about this recipe is how easy it is to customize. I’ve tried several variations over the years, and they’ve all been delicious. Here are a few ideas to get you started.
- Gluten-Free Version: Substitute the all-purpose flour with a good gluten-free flour blend that contains xanthan gum. I’ve used Bob’s Red Mill 1-to-1 Baking Flour with great results. The texture will be slightly different, but the cookies will still be soft and chewy.
- Vegan Adaptation: Use melted coconut oil or vegan butter in place of the butter. Replace the egg yolk with a flax egg (1 tablespoon ground flaxseed mixed with 2.5 tablespoons water, let sit for 5 minutes). Use dairy-free chocolate chips. The cookies will be a bit more delicate, but they still taste fantastic.
- Add Mix-Ins: Beyond chocolate chips, try adding chopped nuts like walnuts or pecans, shredded coconut, or dried cranberries. I once made a batch with white chocolate chips and macadamia nuts, and it was incredible. Just keep the total amount of mix-ins to about ⅓ cup so the dough doesn’t become overloaded.
- Flavor Twists: Add ¼ teaspoon of cinnamon or a pinch of nutmeg to the dry ingredients for a warm, spiced flavor. You can also add a teaspoon of instant espresso powder dissolved in the vanilla extract for a deeper chocolate flavor. It doesn’t make the cookies taste like coffee, it just makes the chocolate taste more chocolaty.
- Different Chocolate: Try using milk chocolate chips for a sweeter cookie, dark chocolate for a more intense flavor, or a chopped chocolate bar for melty puddles of chocolate. I’ve even used peanut butter chips mixed with semi-sweet chips, and it was a hit.
Serving & Storage Suggestions
These cookies are best served warm, straight from the oven, with a cold glass of milk or a hot cup of coffee. The contrast between the warm, melty chocolate and the cold milk is one of life’s simple pleasures. If you’re feeling fancy, you can serve them with a scoop of vanilla ice cream for a quick dessert that looks impressive with minimal effort. They also pair beautifully with a cup of hot cocoa or a glass of red wine for a grown-up treat. For a party, consider serving them alongside our decadent red wine chocolate cake for a chocolate lover’s dream spread.
For storage, place the cookies in an airtight container at room temperature. They will stay fresh for up to 3 days. After that, they start to dry out a bit, but they’re still good. To keep them soft, add a slice of bread to the container. The bread absorbs excess moisture and helps the cookies stay chewy. Replace the bread every day or two.
You can also freeze the baked cookies for up to 3 months. Place them in a single layer in a freezer-safe bag or container, with parchment paper between layers to prevent sticking. To thaw, let them sit at room temperature for about 15 minutes. For a warm cookie experience, pop them in a 300°F (150°C) oven for 5 minutes.
If you want to freeze the dough instead, portion it into balls and place them on a baking sheet in the freezer for about an hour. Once frozen, transfer the dough balls to a freezer-safe bag. You can bake them directly from frozen, just add 2 to 3 minutes to the baking time. This is perfect for when you want a single cookie without making a whole batch. I’ve done this many times, and it works beautifully.
Nutritional Information & Benefits
Let’s be honest, chocolate chip cookies are not health food. But they are comfort food, and there is a place for that in a balanced diet. Here is the estimated nutritional information for one cookie based on a batch of 6 cookies.
| Nutrient | Amount per Cookie |
|---|---|
| Calories | 220 |
| Total Fat | 12g |
| Saturated Fat | 7g |
| Cholesterol | 45mg |
| Sodium | 150mg |
| Total Carbohydrates | 27g |
| Dietary Fiber | 1g |
| Sugars | 17g |
| Protein | 3g |
While these cookies are a treat, the ingredients do offer some benefits. Dark chocolate is rich in antioxidants, and the butter provides a small amount of vitamin A. The brown sugar gives you a quick energy boost, and the flour provides some carbohydrates for fuel. If you’re looking for a slightly healthier option, you can reduce the sugar by a tablespoon or use dark chocolate chips with a higher cocoa content. But honestly, sometimes you just need a cookie, and that’s okay.
Conclusion
This recipe is proof that you don’t need a lot of time, a lot of ingredients, or a lot of effort to make something truly satisfying. These easy small-batch chocolate chip cookies are exactly what they promise to be, quick, simple, and incredibly delicious. They’ve become my go-to for late-night cravings, quiet afternoons, and those moments when I just need a little something sweet. I hope they become yours too.
I’d love to hear how these cookies turn out for you. Did you add any mix-ins? Did you bake them for 9 minutes or 11? Did you eat them all in one sitting? (No judgment here.) Leave a comment below and let me know. And if you’re looking for more small-batch dessert ideas, check out our mini lemon blueberry cheesecakes or our fluffy strawberry mousse cups for more sweet treats that are perfect for one or two people.
Happy baking, and remember, the best cookies are the ones you share, or don’t. I won’t tell.
Frequently Asked Questions
Can I double this recipe?
Absolutely. This recipe scales up easily. Simply double all the ingredients and bake in batches. Keep in mind that you may need to adjust the baking time slightly if you’re baking more cookies at once. Rotate the baking sheets halfway through for even baking.
Why did my cookies turn out flat?
Flat cookies usually mean the butter was too warm or the dough wasn’t mixed enough. Make sure your melted butter has cooled slightly before adding it to the sugar. Also, check that your baking soda is fresh. If it’s old, it won’t provide enough lift, and your cookies will spread too much.
Can I use margarine instead of butter?
You can, but the texture will be different. Margarine has a higher water content than butter, which can make cookies spread more and become crispier. For the best results, I recommend using real butter. If you must use margarine, choose a stick variety with at least 80% fat content.
How do I make these cookies softer?
For softer cookies, bake them for 9 minutes instead of 11. The centers should look slightly underdone when you take them out of the oven. They will continue to set as they cool. You can also add an extra tablespoon of brown sugar for more moisture.
Can I make these cookies with whole wheat flour?
You can substitute up to half of the all-purpose flour with whole wheat flour without changing the texture too much. Using 100% whole wheat flour will result in denser, heartier cookies. If you try this, add an extra tablespoon of butter to compensate for the dryness of whole wheat flour.
Pin This Recipe!

Easy Small-Batch Chocolate Chip Cookies: No Chill Dough

These quick and easy small-batch chocolate chip cookies require no chilling and are ready in about 20 minutes. Perfect for late-night cravings, they have chewy edges, soft centers, and plenty of melty chocolate.
- Prep Time: 10 minutes
- Cook Time: 10 minutes
- Total Time: 20 minutes
- Yield: 4-6 cookies 1x
- Category: Dessert
- Cuisine: American
Ingredients
- 4 tablespoons (57g) unsalted butter, melted
- 1/4 cup (50g) packed brown sugar
- 2 tablespoons (25g) granulated sugar
- 1 large egg yolk (about 18g)
- 1/2 teaspoon (2ml) vanilla extract
- 1/2 cup plus 2 tablespoons (75g) all-purpose flour
- 1/4 teaspoon (1g) baking soda
- 1/4 teaspoon (1.5g) salt
- 1/3 cup (60g) semi-sweet chocolate chips
Instructions
- Preheat your oven to 350°F (175°C). Line a small baking sheet with parchment paper or a silicone baking mat.
- Melt the butter in a microwave-safe bowl in 20-second intervals or in a small saucepan over low heat. Let cool for a minute or two.
- In a medium mixing bowl, combine the melted butter, brown sugar, and granulated sugar. Whisk until smooth and the sugar has started to dissolve, forming a thick paste.
- Add the egg yolk and vanilla extract. Whisk until well combined and slightly lighter in color, about 30 seconds.
- Sprinkle the flour, baking soda, and salt over the wet mixture. Fold with a rubber spatula or wooden spoon until just combined. Do not overmix; a few streaks of flour are fine.
- Fold in the chocolate chips until evenly distributed. Reserve a few chips to press onto the tops of the dough balls if desired.
- Portion the dough into 4 to 6 equal-sized balls using a small cookie scoop or tablespoon. Place them on the prepared baking sheet about 2 inches apart.
- Bake for 9 to 11 minutes, until the edges are golden brown and the centers look slightly underdone and puffy.
- Remove from the oven and let the cookies cool on the baking sheet for 5 minutes. Then transfer to a cooling rack to cool completely, or enjoy warm.
Notes
For softer cookies, bake for 9 minutes. For crispier edges, bake for 11 minutes. If you have time, chilling the dough balls for 30 minutes will yield slightly thicker, chewier cookies. Measure flour correctly by spooning it into the measuring cup and leveling off with a knife to avoid dry cookies.
Nutrition
- Serving Size: 1 cookie
- Calories: 220
- Sugar: 17
- Sodium: 150
- Fat: 12
- Saturated Fat: 7
- Carbohydrates: 27
- Fiber: 1
- Protein: 3
Keywords: small-batch chocolate chip cookies, no chill cookies, easy cookie recipe, quick cookies, late-night cookies


