“You really outdid yourself with these cake pops,” my neighbor said, eyes wide as she popped one of the bright red, white, and blue treats into her mouth. Honestly, I wasn’t expecting much when I first tossed together these Festive Firecracker Cake Pops with Patriotic Sprinkles. It started as a last-minute idea to bring something fun to our neighborhood Fourth of July block party. I had a leftover box of yellow cake mix and a bag of cream cheese frosting staring at me from the pantry, plus a handful of sprinkles in red, white, and blue. The thought of making cake pops felt a bit intimidating at first—rolling cake into balls and dipping them in melted chocolate? Sounds simple, but I worried about the mess and the timing.
But hey, sometimes the best recipes come from those “let’s see what happens” moments. I mixed, rolled, and dipped with a bit of skepticism, and what came out surprised me. These cake pops weren’t just cute—they were downright addictive. The crispy chocolate shell gave way to moist, creamy cake inside, all dotted with fun patriotic sprinkles that made each bite feel like a mini celebration. Since then, I’ve made these several times over the summer, each batch disappearing faster than the last.
It’s funny how a simple recipe can turn into a party favorite without much fuss. These cake pops stuck around because they’re easy, festive, and honestly, just plain fun to eat. If you’re looking to add a little sparkle to your next celebration (or just want a sweet treat that feels special without hours in the kitchen), you’re going to appreciate this one. Let me walk you through how to make these little firecracker delights—and why they might just become your go-to festive treat.
Why You’ll Love This Recipe
After testing these Festive Firecracker Cake Pops several times, I can tell you they hit a lot of sweet spots for busy cooks and dessert lovers alike. Here’s why they might quickly become a staple in your recipe box:
- Quick & Easy: From start to finish, these cake pops come together in about 45 minutes. Perfect for last-minute gatherings or when you need a festive dessert fast.
- Simple Ingredients: No need for specialty stores—most ingredients are pantry staples or easily found at any grocery store, like yellow cake mix, cream cheese frosting, and candy melts.
- Perfect for Celebrations: Whether it’s Independence Day, Memorial Day, or any patriotic-themed party, these pops bring fun and color to the table.
- Crowd-Pleaser: Kids and adults alike adore these. The bite-sized portions make them easy to enjoy without guilt or mess.
- Unbelievably Delicious: The balance of moist cake and smooth frosting inside a crisp candy shell is just right—plus, the sprinkles add a festive crunch and eye-catching flair.
This isn’t just another cake pop recipe—it’s one I’ve tweaked to get that perfect, firm yet tender texture without crumbling or melting too fast. I’ve found that using a good-quality cream cheese frosting (I like Philadelphia brand for that tangy smoothness) really makes the difference, keeping the cake moist but stable. And the patriotic sprinkles? They’re not just decoration; they give a sweet crunch that makes each bite a little celebration of its own.
Honestly, these cake pops have become my secret weapon when I want something that looks impressive but doesn’t cause stress. They’re the kind of treat you can whip up in a quiet kitchen moment and then watch them disappear at your next party.
What Ingredients You Will Need
This recipe uses simple, wholesome ingredients to deliver bold flavor and satisfying texture without the fuss. Most are pantry staples, and the pops come together with a few easy swaps if needed.
- For the Cake Base:
- Yellow cake mix (one box, about 15.25 oz / 432 g) – I recommend Duncan Hines for a classic vanilla flavor
- Large eggs (2, room temperature)
- Water (1 cup / 240 ml)
- Vegetable oil (1/3 cup / 80 ml)
- For the Frosting Mixture:
- Cream cheese frosting (1 cup / approx. 240 g) – you can use store-bought or homemade; the cream cheese adds tang and moisture
- For the Coating & Decoration:
- White candy melts (12 oz / 340 g) – these melt smoothly and set hard
- Red and blue candy melts (optional, 6 oz / 170 g each) for extra color variety
- Patriotic sprinkles (red, white, and blue mix) – I like the mix with stars and nonpareils for visual interest
- Short lollipop sticks (about 50 sticks) – sturdy but flexible
- Vegetable shortening (optional, 1 tbsp) to thin candy melts if needed
If you want a gluten-free version, swap the cake mix for a gluten-free yellow cake mix brand. For dairy-free, use dairy-free frosting and candy melts, and substitute eggs with flax eggs (2 tbsp ground flaxseed + 6 tbsp water, mixed and rested).
For a seasonal twist, you could swap patriotic sprinkles for festive colors like autumn hues or pastel tones for other holidays. The base recipe adapts easily.
Equipment Needed
- Standard 9×13-inch (23×33 cm) baking pan – for baking the cake
- Mixing bowls – one large for cake batter, one for mixing cake crumbs with frosting
- Handheld mixer or stand mixer – helps make the cake batter smooth and the frosting mixing easier
- Baking sheet lined with parchment paper or silicone mat – for chilling cake balls
- Microwave-safe bowls – to melt candy melts safely and evenly
- Lollipop sticks – short and sturdy for holding cake pops
- Styrofoam block or cake pop stand – to let cake pops dry upright
- Spoon or small cookie scoop (1-inch/2.5 cm diameter) – helps portion even cake balls
For melting candy melts, a microwave works great but a double boiler can be gentler and prevent scorching. I’ve tried both, and the microwave with 30-second bursts works fine if you stir well in between. If you don’t have a cake pop stand, a sturdy foam block or even a deep glass with holes poked in the lid can hold sticks upright.
Preparation Method
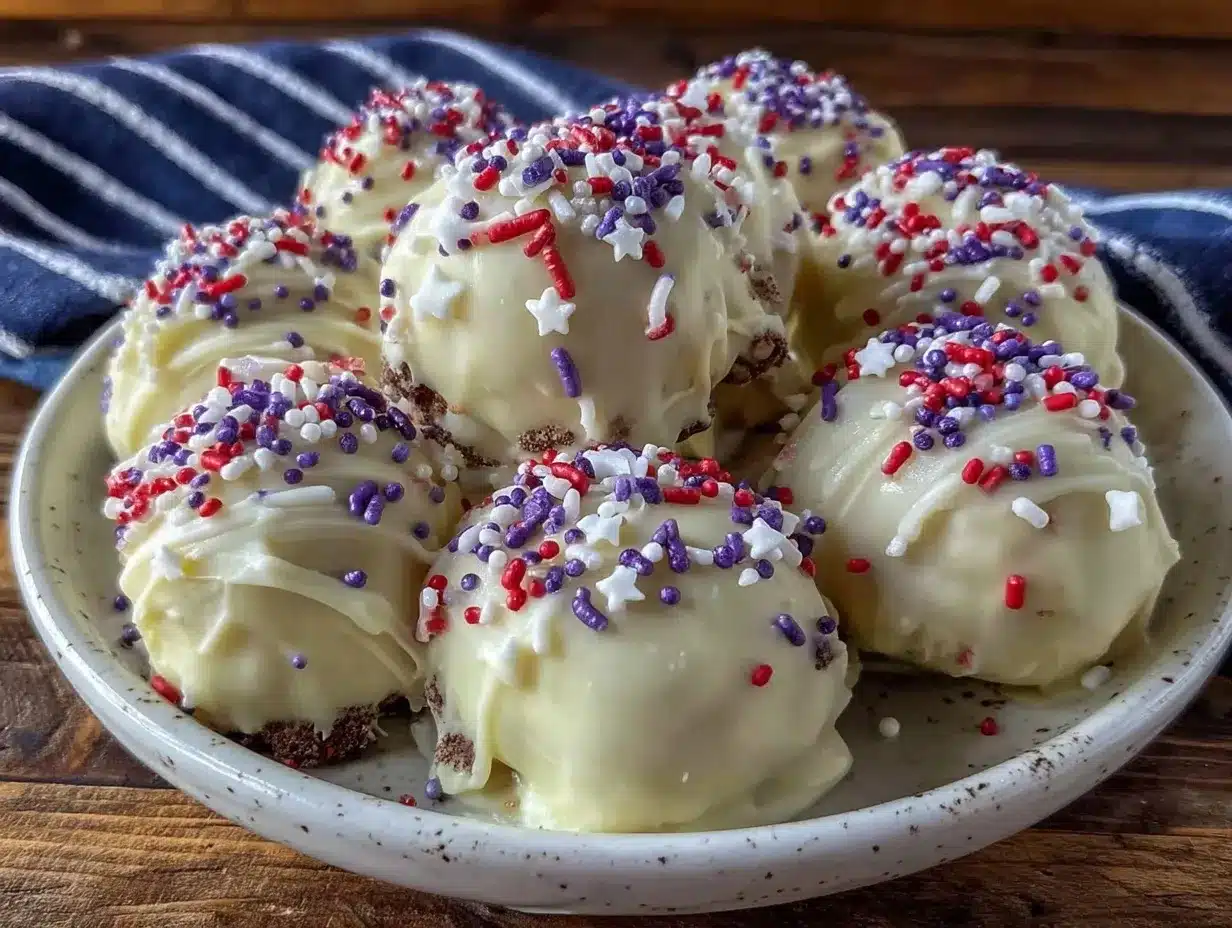
- Bake the Cake: Preheat your oven to 350°F (175°C). Prepare the 9×13-inch baking pan by greasing it lightly or lining with parchment paper. In a large bowl, combine the yellow cake mix, eggs, water, and vegetable oil. Beat with a mixer on medium speed for 2 minutes until smooth. Pour the batter evenly into the pan.
Bake for 30-35 minutes, or until a toothpick inserted in the center comes out clean. Let the cake cool completely in the pan on a wire rack (about 1 hour).
Tip: Make sure the cake is fully cooled; warm cake won’t bind well with the frosting. - Crumble & Mix: Once cooled, crumble the cake into fine crumbs using your hands or a fork in a large bowl. Add the cream cheese frosting and mix gently but thoroughly until the mixture holds together when pressed. You’re aiming for a dough-like consistency.
Warning: Add frosting slowly—you want it moist but not gooey. - Form Cake Balls: Use a cookie scoop or spoon to portion out the mixture into 1-inch (2.5 cm) balls. Roll each in your palms to smooth them out. Place them on a lined baking sheet.
Chill the cake balls in the refrigerator for at least 2 hours or freeze for 30 minutes to firm up.
Personal hack: Chilling overnight makes dipping much easier and less messy. - Prepare Candy Melts: Melt candy melts in microwave-safe bowls in 30-second intervals, stirring between each, until smooth. If too thick, stir in a teaspoon of vegetable shortening to thin.
Note: Keep melted candy warm by placing the bowl over a warm water bath if needed. - Assemble Cake Pops: Dip the tip of each lollipop stick into the melted candy and insert halfway into a cake ball (this acts as glue). Let set for 10 minutes.
Then, dip each cake ball into the melted candy melts, covering completely. Gently tap off excess.
While still wet, sprinkle the patriotic sprinkles generously over the top.
Place the sticks upright in a Styrofoam block or cake pop stand to dry for at least 30 minutes.
Pro tip: Work quickly but carefully—the candy sets fast!
These cake pops keep best refrigerated and are perfect to make a day ahead. The visual pop of red, white, and blue will surely wow your guests.
Cooking Tips & Techniques
Making cake pops can feel fiddly at first, but a few tricks make the process smoother. Here’s what I’ve learned from multiple batches of these festive treats:
- Consistency is Key: The cake and frosting mixture should feel like play dough—not too dry, not too sticky. If it’s crumbly, add a bit more frosting; if too wet, add more cake crumbs.
- Chill Thoroughly: Don’t skip chilling the cake balls. It helps prevent them from falling off the sticks during dipping and keeps the shape intact.
- Melting Candy: Melt candy melts slowly and stir often to avoid burning. Adding a small amount of vegetable shortening thins the coating, making it easier to dip.
- Dip with Care: Hold the lollipop stick near the cake ball (not the end) to avoid breaking the stick or dropping the pop. Tap off excess coating gently—too much can cause cracking when drying.
- Sprinkle Timing: Add sprinkles immediately after dipping before the coating hardens. This guarantees they stick well and look fresh.
- Storage Tips: Store cake pops in an airtight container in the fridge to keep them fresh. Bring to room temperature before serving for best flavor.
I once rushed and skipped chilling, and the cake pops fell apart mid-dip—lesson learned! Also, melting candy melts over a double boiler helped on a humid day when the coating was slow to set. Cooking is part art, part patience, and these tips keep you from common mishaps.
Variations & Adaptations
One of the best things about cake pops is how easy they are to customize. Here are a few variations to suit different tastes and occasions:
- Flavor Swaps: Use chocolate or red velvet cake instead of yellow for a richer flavor. You can even mix in a teaspoon of cinnamon or orange zest for a subtle twist.
- Coating Colors: Instead of just white candy melts, try dipping some pops in red or blue melts to create a colorful assortment. Drizzle contrasting colors on top for extra flair.
- Dietary Adaptations: For gluten-free, use a GF cake mix and dairy-free frosting. Vegan options work well with flax eggs and vegan candy melts, too.
- Seasonal Sprinkles: Swap patriotic sprinkles for themed colors depending on the holiday—green and red for Christmas, pastels for Easter, or metallics for New Year’s.
- Personal Favorite: I once added crushed freeze-dried strawberries on top of the sprinkles for a fresh pop of flavor and color—it was a hit at summer barbecues.
These tweaks let you tailor the cake pops to your event or dietary needs without losing the fun festive vibe.
Serving & Storage Suggestions
Serve these Festive Firecracker Cake Pops chilled or at room temperature for the best texture and flavor. They make a perfect handheld treat at parties, especially paired with cool drinks like lemonade or iced tea.
If you’re hosting a patriotic-themed gathering, display them upright in a decorative stand or a festive container filled with colorful tissue paper. They also work great as party favors when wrapped individually in cellophane tied with a ribbon.
To store, keep the cake pops in an airtight container in the refrigerator for up to 4 days. For longer storage, freeze them on a baking sheet first until firm, then transfer to a freezer-safe container for up to 2 months. Thaw overnight in the fridge before serving.
Reheating isn’t necessary, but bringing them to room temperature (about 20 minutes out of the fridge) softens the cake inside nicely. Over time, the candy shell keeps the cake moist, so leftovers taste just as good the next day.
Pairing these cake pops with other patriotic desserts, like mini lemon blueberry cheesecakes, can create a memorable spread. For a boozy twist, a batch of pink champagne jello shots adds a fun adult option alongside.
Nutritional Information & Benefits
Each cake pop contains roughly 150-170 calories, depending on size and frosting amount. While they’re an indulgence, using cream cheese frosting adds a touch of protein and tang that balances sweetness.
The key ingredients like eggs and milk in the cake provide essential nutrients such as vitamin D and calcium. Choosing quality sprinkles without artificial dyes or opting for natural coloring can make these treats a bit cleaner.
For those mindful of allergens, this recipe can be made gluten-free and dairy-free with suitable swaps, making it accessible for many diets. The portion-controlled size helps with moderation, too.
From a wellness perspective, having a treat that feels festive and satisfying can be part of a balanced approach to enjoying sweets without overdoing it. These cake pops let you celebrate with flavor and fun—without hours of prep or complicated ingredients.
Conclusion
In the end, these Festive Firecracker Cake Pops with Patriotic Sprinkles became more than just a quick dessert—they’re a little moment of joy on a stick. Whether you’re entertaining friends or just treating yourself, they bring a perfect mix of flavor, color, and fun.
Feel free to experiment with flavors, colors, and decorations to make them your own. I love how easy they are to customize and how they always bring smiles at gatherings. Plus, they pair beautifully with other delicious recipes like the decadent red wine chocolate cake if you’re looking to add a richer dessert to the menu.
Give these festive cake pops a try and share how you make them special in your kitchen—I’m always excited to hear about your favorite twists and moments with this recipe. Here’s to sweet celebrations and simple pleasures!
FAQs
Can I make these cake pops ahead of time?
Absolutely! Prepare and dip the cake pops up to 2 days ahead. Store them in the fridge in an airtight container. For longer storage, freeze and thaw overnight in the fridge before serving.
What if I don’t have candy melts? Can I use chocolate instead?
You can use white chocolate or colored chocolate melts, but candy melts are specially designed to harden with a smooth finish. If using chocolate, add a bit of vegetable shortening to help it set better.
How do I prevent the cake pops from falling off the sticks?
Make sure to chill the cake balls well before dipping. Also, dipping the stick tip into melted candy before inserting into the cake ball acts like glue and helps secure it.
Can I use homemade cake and frosting instead of boxed and store-bought?
Yes! Homemade cake and frosting work well, just ensure the cake is moist and the frosting isn’t too runny to hold the mixture together.
What’s the best way to store leftover cake pops?
Keep leftovers in an airtight container in the fridge for up to 4 days. Bring them to room temperature before serving for the best texture.
Pin This Recipe!
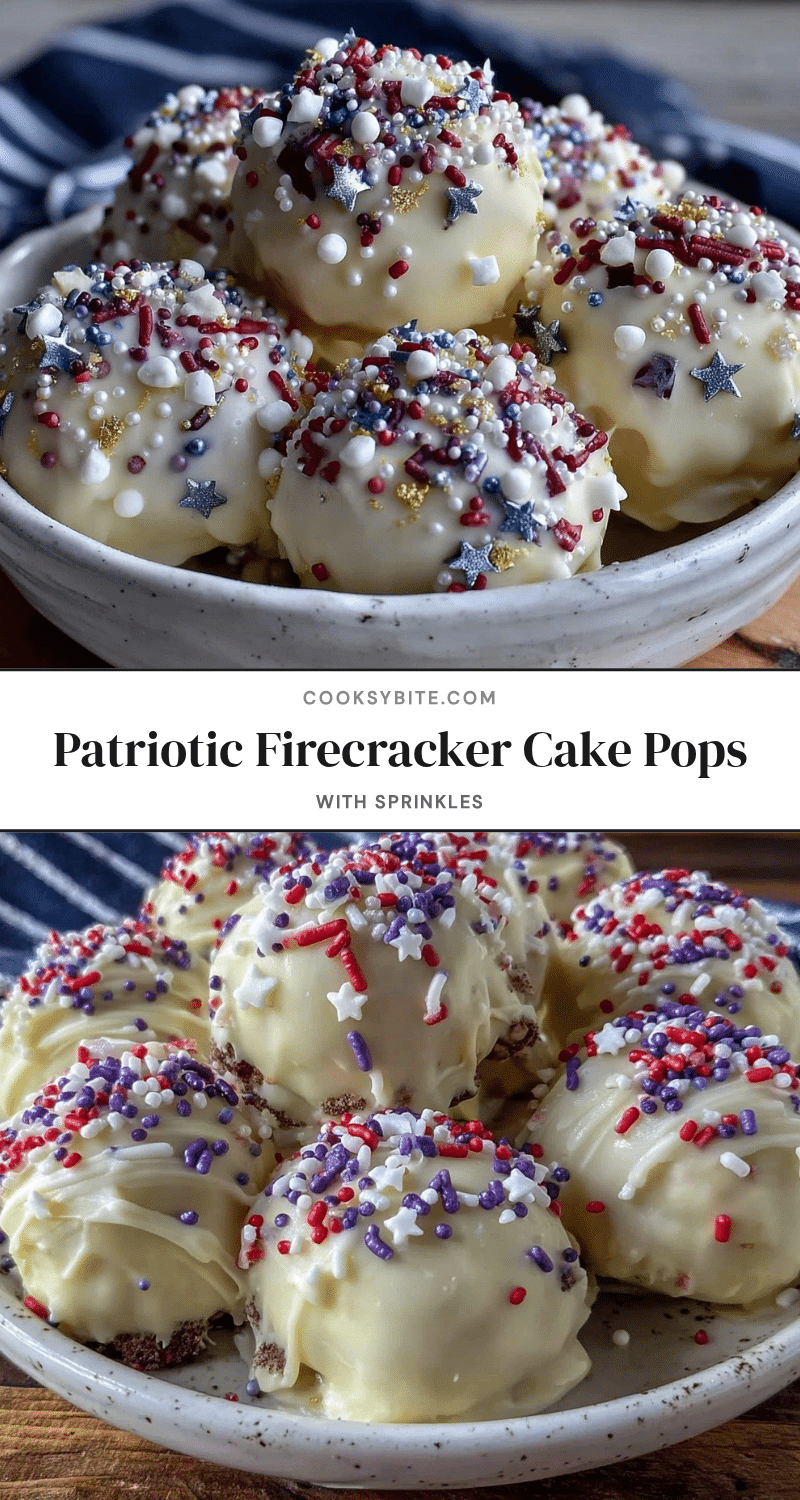
Festive Firecracker Cake Pops
These easy and festive cake pops feature a moist yellow cake mixed with cream cheese frosting, coated in a crisp candy shell and decorated with patriotic red, white, and blue sprinkles. Perfect for Fourth of July celebrations or any patriotic-themed party.
- Prep Time: 20 minutes
- Cook Time: 35 minutes
- Total Time: 1 hour 55 minutes
- Yield: About 50 cake pops 1x
- Category: Dessert
- Cuisine: American
Ingredients
- 1 box yellow cake mix (about 15.25 oz / 432 g), recommended Duncan Hines
- 2 large eggs, room temperature
- 1 cup water (240 ml)
- 1/3 cup vegetable oil (80 ml)
- 1 cup cream cheese frosting (approx. 240 g), store-bought or homemade
- 12 oz white candy melts (340 g)
- Optional: 6 oz red candy melts (170 g)
- Optional: 6 oz blue candy melts (170 g)
- Patriotic sprinkles (red, white, and blue mix with stars and nonpareils)
- About 50 short lollipop sticks
- Optional: 1 tbsp vegetable shortening (to thin candy melts if needed)
Instructions
- Preheat oven to 350°F (175°C). Grease or line a 9×13-inch baking pan with parchment paper.
- In a large bowl, combine yellow cake mix, eggs, water, and vegetable oil. Beat on medium speed for 2 minutes until smooth.
- Pour batter evenly into the prepared pan and bake for 30-35 minutes or until a toothpick inserted in the center comes out clean.
- Cool the cake completely in the pan on a wire rack (about 1 hour).
- Crumble the cooled cake into fine crumbs in a large bowl. Add cream cheese frosting gradually and mix until the mixture holds together like dough.
- Use a cookie scoop or spoon to form 1-inch (2.5 cm) balls. Roll smooth with palms and place on a lined baking sheet.
- Chill cake balls in the refrigerator for at least 2 hours or freeze for 30 minutes to firm up. Chilling overnight is recommended for easier dipping.
- Melt candy melts in microwave-safe bowls in 30-second intervals, stirring between each until smooth. Thin with vegetable shortening if too thick.
- Dip the tip of each lollipop stick into melted candy and insert halfway into a cake ball. Let set for 10 minutes.
- Dip each cake ball into melted candy melts, covering completely. Tap off excess coating gently.
- Sprinkle patriotic sprinkles immediately over the wet coating.
- Place cake pops upright in a Styrofoam block or cake pop stand to dry for at least 30 minutes.
- Store cake pops in an airtight container in the refrigerator for up to 4 days or freeze for longer storage.
Notes
Ensure the cake is fully cooled before mixing with frosting to prevent melting. Chill cake balls thoroughly to prevent falling off sticks during dipping. Melt candy melts slowly and stir often to avoid burning. Add vegetable shortening to thin candy melts if needed. Work quickly when dipping and sprinkling as candy sets fast. Store cake pops in an airtight container in the fridge and bring to room temperature before serving for best texture.
Nutrition
- Serving Size: 1 cake pop
- Calories: 160
- Sugar: 18
- Sodium: 110
- Fat: 7
- Saturated Fat: 3
- Carbohydrates: 24
- Fiber: 0.5
- Protein: 2
Keywords: cake pops, patriotic dessert, Fourth of July treats, easy cake pops, festive desserts, party treats, cream cheese frosting, candy melts


