My husband, who has never once in his life asked for a snack that didn’t involve cheese or chocolate, stood at the kitchen counter eating his third one before he said a word. “These are actually good,” he said, like he was admitting something he wasn’t entirely comfortable with. I had made a batch of these no-bake pumpkin protein balls mostly out of necessity—I had half a can of pumpkin puree staring at me from the fridge and a workout that afternoon that I really didn’t want to undo with a cookie. But watching him reach for another one, I realized this wasn’t just a “healthy snack that tastes like cardboard.” It was something I’d actually make again on purpose. The oats gave it that chewy, satisfying bite. The pumpkin made everything tender without being wet. And the protein powder? You couldn’t taste it, which is honestly the highest compliment a protein ball can get. I didn’t set out to create a recipe that would convert my snack-obsessed husband. But here we are. If you’re looking for a fall-flavored snack that actually keeps you full and doesn’t require turning on the oven, these pumpkin protein balls might just do the same for you.
Why You’ll Love This Recipe
- No-Bake & Ready in 15 Minutes : Mix, roll, and chill. That’s it. No oven, no stovetop, no waiting around for dough to rest. Perfect for those afternoons when hunger hits and you need something now.
- Simple, Whole-Food Ingredients : Rolled oats, pumpkin puree, nut butter, a little maple syrup, and protein powder. You probably have most of this in your pantry already. No weird ingredients you’ll never use again.
- Perfect for Meal Prep : Make a batch on Sunday and grab one every day for a quick breakfast, post-workout refuel, or afternoon pick-me-up. They actually get better after a day or two in the fridge.
- Kid-Approved (Seriously) : I tested these on my neighbor’s kids, who are notoriously picky. They asked for seconds. The pumpkin flavor is mild, and the sweetness is just right—not fake or artificial tasting.
- Naturally Gluten-Free & Dairy-Free : As long as you use certified gluten-free oats, these are safe for most dietary needs. No butter, no flour, no dairy at all.
What makes these different from every other protein ball recipe out there? It’s the texture. Most pumpkin protein balls end up either too dry or too sticky. I spent three batches getting the ratio right—enough oats to give structure, enough pumpkin for moisture, and just the right amount of nut butter to hold everything together without making it greasy. The result is a protein ball that’s chewy but not dense, sweet but not cloying, and pumpkin-spiced without tasting like a candle. It’s the kind of snack that makes you feel like you’re eating dessert, but your body knows it’s getting real fuel. Honestly, that’s the sweet spot.
What Ingredients You Will Need
This recipe uses simple, pantry-friendly ingredients that come together quickly. Each one plays a specific role in texture, flavor, or nutrition—so here’s what to grab and why it matters.
- Rolled Oats (1 cup / 100g) : Not quick oats. Rolled oats give these protein balls their signature chewy texture without turning into mush. I prefer Bob’s Red Mill or Quaker Old-Fashioned. If you need them gluten-free, look for certified gluten-free rolled oats.
- Pumpkin Puree (½ cup / 120g) : Make sure it’s 100% pure pumpkin, not pumpkin pie filling. The filling has added sugar and spices that will throw off the sweetness and texture. I use Libby’s—it’s consistent and widely available. If you have leftover puree from another recipe, this is a great way to use it up.
- Creamy Peanut Butter (⅓ cup / 80g) : Natural, unsweetened peanut butter works best here. The oils help bind the ingredients without adding extra sugar. If you’re allergic to peanuts, almond butter or cashew butter work beautifully too. Just avoid the really runny, separated kind—stir it well before measuring.
- Vanilla Protein Powder (¼ cup / 30g) : I use a plant-based vanilla protein powder from Orgain, but any vanilla or unflavored protein powder works. Whey protein will give a slightly different texture (a bit more dense), but it’s still delicious. If you don’t have protein powder, you can substitute with an extra ¼ cup of oat flour or almond flour—just note the protein content will be lower.
- Maple Syrup (3 tablespoons) : Pure maple syrup, not pancake syrup. It adds sweetness and helps with binding. Honey works as a substitute, but the flavor will be slightly different. For a sugar-free option, use monk fruit syrup or a few drops of liquid stevia—just reduce the liquid slightly.
- Pumpkin Pie Spice (1 teaspoon) : This is the flavor backbone. If you don’t have pumpkin pie spice, make your own: ½ teaspoon cinnamon, ¼ teaspoon nutmeg, ¼ teaspoon ginger, and a pinch of cloves. It’s not the same without it, honestly.
- Cinnamon (½ teaspoon) : Adds warmth and depth. I always add a little extra cinnamon because it pairs so well with pumpkin.
- Salt (¼ teaspoon) : Don’t skip this. Salt balances the sweetness and brings out the pumpkin flavor. If your peanut butter is salted, you can reduce this to a pinch.
- Mini Chocolate Chips (optional, ¼ cup / 45g) : Not essential, but highly recommended. The little bursts of chocolate make these feel like a treat. I use dark chocolate chips for a slightly less sweet option.
Equipment Needed
You don’t need much for this recipe, which is part of the appeal. Here’s what you’ll want on hand:
- Large Mixing Bowl : Any medium-to-large bowl will work. I prefer a glass or stainless steel bowl because they don’t retain odors.
- Spatula or Wooden Spoon : For mixing everything together. A silicone spatula makes scraping the bowl easier.
- Measuring Cups and Spoons : Accuracy matters here, especially with the pumpkin puree and nut butter. Too much pumpkin and the balls won’t hold together.
- Baking Sheet or Plate : For chilling the protein balls. Line it with parchment paper for easy removal.
- Cookie Scoop or Tablespoon : For portioning evenly. A 1-tablespoon cookie scoop makes perfectly uniform balls. If you don’t have one, just use a regular tablespoon and your hands.
- Parchment Paper : Helps prevent sticking during chilling. You can also use wax paper in a pinch.
- Food Processor (Optional) : If you want a finer texture, you can pulse the oats a few times before mixing. I prefer the chewiness of whole oats, so I skip this step.
Preparation Method
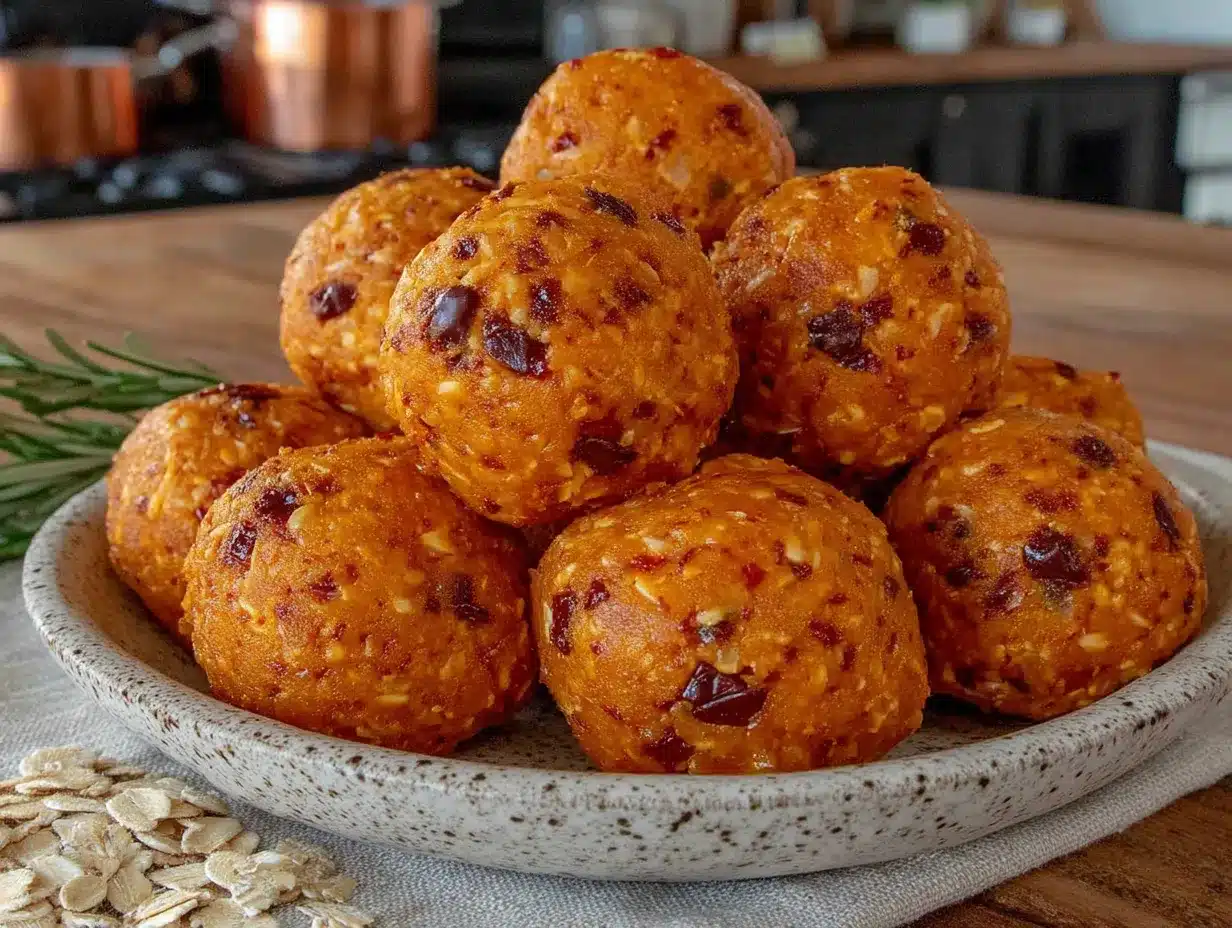
This comes together fast, so I like to have everything measured and ready before I start. Trust me, it makes the process smoother—especially if you’re doing this with kids helping or while multitasking.
- Prep your workspace. Line a baking sheet or large plate with parchment paper. Set it aside. You’ll need it later for chilling the balls.
- Combine the dry ingredients. In a large mixing bowl, add the rolled oats, protein powder, pumpkin pie spice, cinnamon, and salt. Whisk them together until evenly distributed. This ensures the spices are well incorporated and you don’t get a clump of cinnamon in one bite.
- Add the wet ingredients. Make a well in the center of the dry mixture. Add the pumpkin puree, peanut butter, and maple syrup. If you’re using chocolate chips, don’t add them yet—they’ll get crushed if you mix too aggressively.
- Mix until combined. Use a spatula or wooden spoon to stir everything together. Start slowly, folding the dry ingredients into the wet. The mixture will look crumbly at first—keep going. It should come together into a thick, slightly sticky dough. If it feels too dry (this can happen if your pumpkin puree is very thick), add 1 teaspoon of water at a time until it holds together. If it feels too wet, add a tablespoon more oats.
- Fold in the chocolate chips. Once the dough is uniform and holds together when pressed, gently fold in the mini chocolate chips. Stir just until they’re distributed—overmixing can break them apart.
- Chill the dough (optional but recommended). Pop the bowl in the fridge for 15-20 minutes. This firms up the dough and makes rolling much easier. If you’re in a hurry, you can skip this step, but the balls will be stickier and harder to shape.
- Roll into balls. Using a 1-tablespoon cookie scoop or a regular tablespoon, scoop out portions of the dough. Roll each portion between your palms to form a smooth ball. If the dough sticks to your hands, lightly dampen your palms with water or a tiny bit of oil. Place each ball on the parchment-lined baking sheet as you go.
- Chill to set. Transfer the baking sheet to the refrigerator and let the protein balls chill for at least 30 minutes. This allows them to firm up and hold their shape. If you can wait an hour, even better—the flavors meld together beautifully.
- Store properly. Once chilled, transfer the protein balls to an airtight container. Layer them with parchment paper if stacking to prevent sticking.
Pro tip from my third batch: If the dough feels too sticky to roll, don’t add more oats right away. Try chilling it first—sometimes the moisture just needs time to absorb. I learned this the hard way after adding too many oats and ending up with dry, crumbly balls that wouldn’t hold together.
Cooking Tips & Techniques
I’ve made enough batches of these to know where things can go wrong. Here’s what I’ve learned so you don’t have to repeat my mistakes.
Don’t overmix the dough. I know it’s tempting to keep stirring until everything is perfectly smooth, but overmixing can break down the oats and make the texture pasty. Mix just until everything is incorporated and the dough holds together when pressed.
Watch your pumpkin puree consistency. Not all pumpkin purees are created equal. Some brands are thicker than others. If yours seems watery, blot it with a paper towel before measuring. Too much moisture will make the balls fall apart. I learned this when I used a store-brand puree that was noticeably runnier than Libby’s—the first batch was a sticky, sad mess.
Use room temperature ingredients. Cold peanut butter is harder to mix. Let it sit out for 10-15 minutes before starting. Same goes for the pumpkin puree if it’s been in the fridge. Room temperature ingredients blend more evenly and create a smoother dough.
Chill before rolling if you have time. This is the single best tip I can give you. Chilled dough is infinitely easier to handle. The balls come out rounder, smoother, and less sticky. If you’re in a rush, you can roll them immediately, but expect a slightly messier process.
Roll with damp hands. If the dough sticks to your palms (which it will, especially if you skipped the chilling step), wet your hands slightly. Not soaking—just a light mist under the tap. The thin layer of water prevents sticking without adding extra moisture to the dough.
Let them rest overnight. These protein balls are good right away, but they’re amazing after a full night in the fridge. The oats soften slightly, the flavors deepen, and the texture becomes perfectly chewy. If you can plan ahead, make them the day before you want to eat them.
Variations & Adaptations
One of the best things about this recipe is how flexible it is. Here are some variations I’ve tried and loved:
Chocolate Pumpkin Protein Balls : Replace 1 tablespoon of the oats with unsweetened cocoa powder. The chocolate-pumpkin combo is surprisingly good—kind of like a healthier version of a brownie. I add an extra tablespoon of maple syrup to balance the bitterness of the cocoa.
Nut-Free Version : Swap the peanut butter for sunflower seed butter or tahini. Both work beautifully, though tahini gives a slightly earthier flavor. If using sunflower seed butter, add a pinch of extra salt—sunflower butter can taste flat without it.
High-Protein Boost : Add an extra scoop of protein powder and reduce the oats by 2 tablespoons. You’ll need to add 1-2 teaspoons of water or milk to compensate for the extra dry ingredients. This version is great for post-workout recovery—each ball packs about 8-9 grams of protein.
Low-Sugar Option : Skip the maple syrup entirely and use 2 tablespoons of unsweetened applesauce plus a few drops of liquid stevia. The applesauce adds moisture without the sugar. The texture will be slightly softer, so chill them longer before rolling.
Pumpkin-Free Version : Substitute the pumpkin puree with mashed sweet potato or butternut squash puree. The flavor will be different (less pumpkin-spiced, more earthy), but the texture stays the same. I’ve done this with leftover roasted sweet potato and it worked perfectly.
Spiced Chai Variation : Replace the pumpkin pie spice with 1 teaspoon of chai spice blend (cinnamon, cardamom, ginger, cloves). Add a pinch of black pepper for that authentic chai kick. This version is surprisingly good with the chocolate chips—like a chai latte in snack form.
Serving & Storage Suggestions
These pumpkin protein balls are versatile enough to fit into any part of your day. Here’s how I like to serve and store them.
Serve chilled or at room temperature. Straight from the fridge, they’re firm and chewy—perfect for packing in a lunchbox. At room temperature, they soften slightly and the flavors become more pronounced. I prefer them cold, but my husband likes them after they’ve sat out for 10 minutes.
Great for on-the-go snacking. Toss a few in a reusable container or zip-top bag for a quick breakfast, post-workout refuel, or afternoon pick-me-up. They won’t melt or get messy, so they’re ideal for hiking, road trips, or busy days at the office.
Pair with coffee or tea. These protein balls are sweet enough to complement a cup of black coffee or unsweetened tea. The pumpkin spice notes pair especially well with chai, cinnamon tea, or a vanilla latte. If you’re feeling fancy, serve them alongside a fluffy strawberry mousse cup for a balanced dessert spread.
Refrigerator storage. Store in an airtight container in the refrigerator for up to 7 days. Place parchment paper between layers to prevent sticking. They actually get better after a day or two as the flavors meld together.
Freezer storage. These freeze beautifully. Arrange the protein balls in a single layer on a baking sheet and freeze for 1-2 hours until solid. Transfer to a freezer-safe bag or container. They’ll keep for up to 3 months. Thaw in the refrigerator overnight or at room temperature for 15-20 minutes before eating. I always keep a batch in the freezer for busy weeks.
Flavor development over time. Day one: good. Day two: better. Day three: perfect. The oats absorb moisture from the pumpkin and maple syrup, creating a softer, more cohesive texture. If you can resist eating them all on the first day, you’ll be rewarded.
Nutritional Information & Benefits
Here’s the approximate nutritional breakdown for one protein ball (based on 12 servings, using the recipe as written without chocolate chips):
| Nutrient | Amount per Ball |
|---|---|
| Calories | 115 |
| Protein | 6g |
| Carbohydrates | 14g |
| Fiber | 3g |
| Fat | 5g |
| Sugar | 5g |
These numbers will vary based on your protein powder, nut butter, and whether you add chocolate chips. The chocolate chip version adds about 20 calories and 3g of sugar per ball.
Health benefits worth noting: Pumpkin is packed with vitamin A (great for eye health and immunity), fiber (keeps you full), and antioxidants. Rolled oats provide complex carbohydrates for sustained energy—perfect for fueling a workout or getting through a long afternoon. The protein powder adds muscle-repairing protein, while peanut butter contributes healthy fats that support brain function. This is a snack that actually works with your body, not against it.
Dietary considerations: This recipe is naturally gluten-free (use certified GF oats), dairy-free, and refined sugar-free. It’s vegetarian and can be made vegan by using plant-based protein powder and maple syrup. The only potential allergen is peanuts (from the peanut butter), but that’s easily swapped for sunflower seed butter or almond butter.
Conclusion
These healthy no-bake pumpkin protein balls with oats have become a staple in my kitchen for one simple reason: they actually work. They taste good, they keep me full, and they don’t require any special effort or equipment. No oven, no complicated steps, no weird ingredients I’ll never use again. Just real food, mixed together, rolled into balls, and ready when I need them.
I love that I can customize them based on what I have in the pantry—swap the peanut butter for almond butter, add chocolate chips when I’m craving something sweet, or skip the maple syrup when I want a lower-sugar option. They’re forgiving, adaptable, and genuinely delicious. If you’re new to making protein balls, this is a great place to start. If you’re a seasoned pro, I think you’ll appreciate the texture and flavor balance here.
I’d love to hear how yours turn out. Did you add chocolate chips? Try a different nut butter? Make a variation that surprised you? Drop a comment below and let me know—I read every single one, and your feedback helps me create better recipes. And if you’re looking for more easy, wholesome snacks, check out our full recipe collection for more inspiration. Happy snacking, friends!
Frequently Asked Questions
Can I make these without protein powder?
Absolutely. Replace the ¼ cup of protein powder with an extra ¼ cup of oat flour or almond flour. The texture will be slightly less dense, but they’ll still hold together. You can also use ground flaxseed or chia seeds for added fiber and omega-3s. Just note that the protein content will be lower—about 3-4g per ball instead of 6g.
Why are my protein balls falling apart?
This usually happens for one of three reasons: too much pumpkin puree, not enough nut butter, or the dough wasn’t chilled long enough. If your pumpkin puree seemed watery, try blotting it with a paper towel before measuring next time. You can also add an extra tablespoon of oats or a teaspoon of flaxseed meal to help bind the mixture. And don’t skip the chilling step—30 minutes in the fridge makes a big difference.
Can I use quick oats instead of rolled oats?
You can, but the texture will be different. Quick oats are more finely processed, so they absorb moisture faster and create a softer, almost mushy texture. Rolled oats give these protein balls their signature chewy bite. If you only have quick oats, reduce the maple syrup by 1 tablespoon to compensate for the faster absorption. The balls will still taste great—they’ll just be less chewy.
How long do these last at room temperature?
These protein balls are best stored in the refrigerator, but they can sit at room temperature for up to 4-6 hours without issue. If you’re packing them for a lunchbox or a day out, they’ll be fine. Just don’t leave them in a hot car or direct sunlight—the nut butter can soften and the balls may lose their shape. For longer storage, always keep them chilled.
Can I double this recipe?
Yes, and I do it all the time. The recipe doubles and triples beautifully. Just make sure your mixing bowl is large enough to accommodate everything. The only thing to watch is the chilling time—a larger batch of dough may need an extra 10-15 minutes in the fridge to firm up enough for rolling. I usually make a double batch on Sunday and freeze half for later. They’re a lifesaver on busy mornings.
Pin This Recipe!
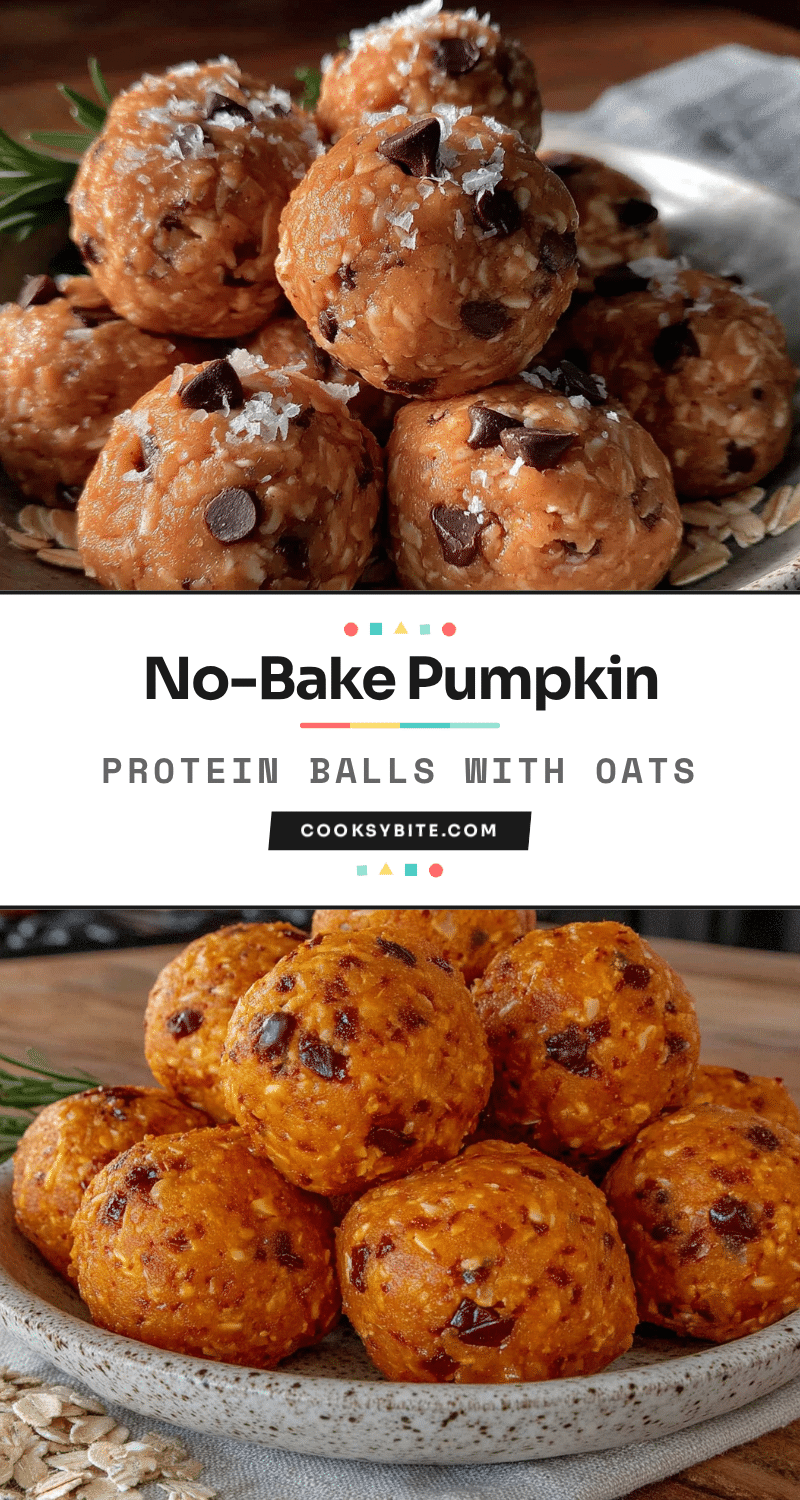
Healthy No-Bake Pumpkin Protein Balls with Oats

These no-bake pumpkin protein balls are a quick, wholesome snack made with oats, pumpkin puree, peanut butter, and protein powder. They’re chewy, naturally sweetened, and perfect for meal prep or a post-workout refuel.
- Prep Time: 15 minutes
- Cook Time: 0 minutes
- Total Time: 45 minutes (includes chilling)
- Yield: 12 servings 1x
- Category: Snack
- Cuisine: American
Ingredients
- 1 cup (100g) rolled oats
- ½ cup (120g) pumpkin puree (100% pure, not pie filling)
- ⅓ cup (80g) creamy peanut butter (natural, unsweetened)
- ¼ cup (30g) vanilla protein powder
- 3 tablespoons pure maple syrup
- 1 teaspoon pumpkin pie spice
- ½ teaspoon cinnamon
- ¼ teaspoon salt
- ¼ cup (45g) mini chocolate chips (optional)
Instructions
- Line a baking sheet or large plate with parchment paper and set aside.
- In a large mixing bowl, whisk together rolled oats, protein powder, pumpkin pie spice, cinnamon, and salt.
- Make a well in the center and add pumpkin puree, peanut butter, and maple syrup. Stir with a spatula until a thick, slightly sticky dough forms. If too dry, add 1 teaspoon of water at a time; if too wet, add 1 tablespoon more oats.
- If using, gently fold in mini chocolate chips until evenly distributed.
- For easier rolling, chill the dough in the refrigerator for 15-20 minutes (optional but recommended).
- Using a 1-tablespoon cookie scoop or spoon, portion the dough and roll into smooth balls. Dampen hands slightly if sticky.
- Place balls on the prepared baking sheet and refrigerate for at least 30 minutes to set.
- Transfer to an airtight container and store in the refrigerator for up to 7 days, or freeze for up to 3 months.
Notes
For best texture, chill the dough before rolling. If the dough is too sticky, chill it first before adding more oats. These protein balls improve after a day in the fridge as flavors meld. For a nut-free version, use sunflower seed butter or tahini. For a low-sugar option, replace maple syrup with unsweetened applesauce and liquid stevia.
Nutrition
- Serving Size: 1 protein ball
- Calories: 115
- Sugar: 5
- Sodium: 85
- Fat: 5
- Saturated Fat: 1
- Carbohydrates: 14
- Fiber: 3
- Protein: 6
Keywords: pumpkin protein balls, no-bake protein balls, healthy pumpkin snack, gluten-free snack, dairy-free snack, meal prep snack


