“You seriously brought that whole monster cookie ice cream cake to the party? No way!” That’s what my friend Jenna gasped the first time I showed up with this Ultimate Monster Cookie Ice Cream Cake with Peanut Butter Fudge. Honestly, I wasn’t even sure how it would turn out. I had been fiddling with leftover cookie dough and ice cream one late evening, trying to whip up something fun for a last-minute birthday celebration. The kitchen was a mess, and I’m pretty sure I had fudge smeared on my cheek at some point (don’t ask how). But the way everyone kept sneaking bites and asking for the recipe made me realize this accidental creation might be a keeper.
What really hooked me was how the crunchy, chewy monster cookie bits played against the creamy, dreamy peanut butter fudge and ice cream layers. It’s one of those desserts where every bite feels like a small celebration all on its own. I never thought peanut butter fudge and monster cookies would be best friends, but here we are. And trust me, after making it a handful of times (okay, maybe more), I finally nailed the balance so it’s not too sweet or heavy but just right for sharing… or sneaking a slice at midnight when no one’s looking.
So if you’re the type who loves a dessert that’s a little wild, a little nostalgic, and totally satisfying, this Ultimate Monster Cookie Ice Cream Cake with Peanut Butter Fudge might just become your secret weapon for impressing guests or treating yourself without much fuss. Plus, it’s a great excuse to break out the ice cream scoop and get a little messy in the kitchen—because life’s too short for boring desserts.
Why You’ll Love This Recipe
This recipe isn’t just a throw-together dessert. It’s been tested over numerous family gatherings, casual hangouts, and even impromptu celebrations where I needed something fast but unforgettable. Here’s why it’s worth your time:
- Quick & Easy: You can assemble the whole cake in under 30 minutes, perfect for those spontaneous dessert cravings or last-minute parties.
- Simple Ingredients: No need to hunt down obscure stuff—most of these ingredients are pantry staples or easy to find at your local store.
- Perfect for Celebrations: Whether it’s a birthday, summer barbecue, or just a cozy night in, this cake fits right in and wows every crowd.
- Crowd-Pleaser: Kids love the colorful monster cookie chunks, while adults appreciate the rich peanut butter fudge and creamy ice cream combo.
- Unbelievably Delicious: The texture contrast between crunchy cookies, smooth fudge, and icy cream makes every forkful a delight.
What really sets this Ultimate Monster Cookie Ice Cream Cake with Peanut Butter Fudge apart is the peanut butter fudge layer. I spent some time tweaking the fudge to make it silky but firm enough to hold the cake together without overpowering the monster cookie flavors. Also, blending the cookie pieces right into the ice cream layers helps create a consistent texture throughout, so you’re never just biting into a single cookie chunk or a plain ice cream scoop—it’s all perfectly balanced.
This isn’t just another ice cream cake; it’s your go-to when you want to serve something playful yet indulgent. Honestly, it’s the kind of dessert that makes you pause, savor, and maybe even close your eyes for a second—that kind of comforting, nostalgic goodness.
What Ingredients You Will Need
This recipe uses straightforward, wholesome ingredients to bring together bold flavors and playful textures without fuss. Most are pantry staples, but if you want to swap or upgrade, I’ve included tips below.
- For the Monster Cookie Base:
- 1 ½ cups monster cookie mix (usually includes oats, M&Ms, chocolate chips, and nuts) – you can buy a pre-made mix or chop up your favorite store-bought monster cookies
- ½ cup unsalted butter, melted (adds richness and helps bind the base)
- 2 tbsp brown sugar, packed (for a touch of caramel sweetness)
- For the Ice Cream Layers:
- 1 quart vanilla ice cream (about 1 liter), softened slightly for easy spreading – I like Ben & Jerry’s for creaminess; feel free to use a dairy-free brand if needed
- 1 cup monster cookie pieces (reserve some for topping)
- For the Peanut Butter Fudge:
- 1 cup creamy peanut butter (natural, no-stir preferred for smoothness)
- ½ cup unsalted butter
- 1 ½ cups powdered sugar, sifted (for smooth texture)
- 2–3 tbsp heavy cream (adjust for fudge consistency)
- 1 tsp vanilla extract (adds depth)
- For Garnish:
- Extra monster cookie pieces or mini M&Ms for colorful topping
- Optional: a drizzle of melted chocolate or caramel sauce
If you want a gluten-free version, look for gluten-free oats and cookie mixes or make your own with gluten-free flours. For a vegan twist, swap the ice cream for coconut-based and use a dairy-free peanut butter fudge made with coconut oil and powdered sugar alternatives.
Equipment Needed
- 9×5-inch loaf pan or similar-sized springform pan (for layering the cake)
- Mixing bowls (medium and large)
- Electric mixer or sturdy whisk (for smooth fudge)
- Rubber spatula (to spread ice cream evenly)
- Measuring cups and spoons (for accuracy)
- Plastic wrap or foil (to cover and freeze the cake)
If you don’t have a springform pan, a loaf pan lined with parchment paper works just fine. I’ve tried both, and the springform makes unmolding easier, but the loaf pan is a budget-friendly option that still holds the shape well.
For the fudge, an electric mixer helps get that creamy texture faster, but a vigorous hand whisking works if you’re patient. Also, I learned the hard way that a silicone spatula is best for scraping the bowl clean without wasting any delicious fudge.
Preparation Method
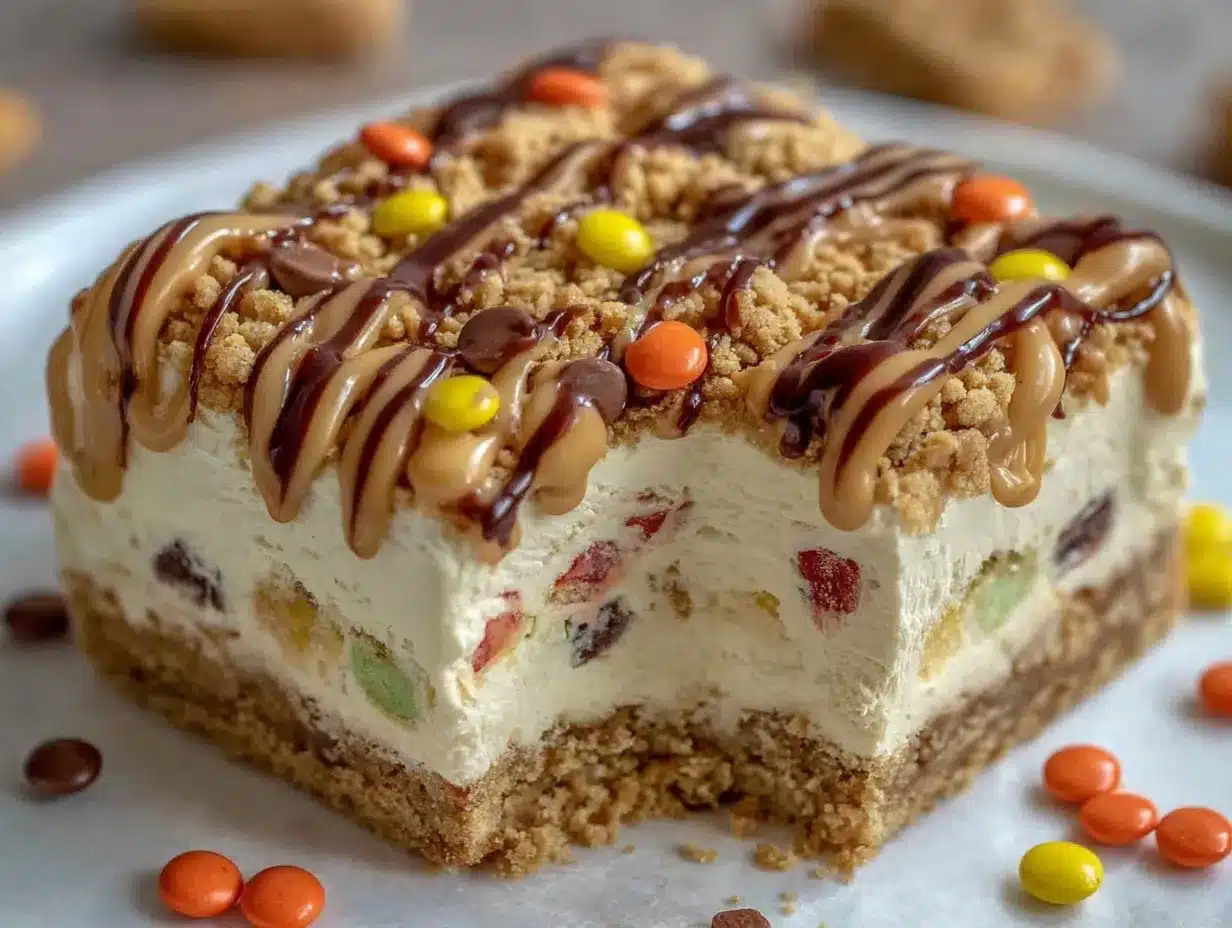
- Prepare the Monster Cookie Base: Preheat your oven to 350°F (175°C). In a medium bowl, mix the melted butter, brown sugar, and monster cookie mix until moistened. Press this mixture firmly into the bottom of your pan to create a compact base. Bake for 10-12 minutes until golden and set. Let it cool completely to avoid melting the ice cream later.
- Make the Peanut Butter Fudge: In a medium bowl, beat the peanut butter and butter together until smooth. Gradually add powdered sugar and vanilla extract, alternating with heavy cream, until the fudge is thick but spreadable. If it feels too stiff, add a teaspoon of cream at a time. Set aside at room temperature.
- Prepare the Ice Cream Layers: Allow the vanilla ice cream to soften for about 10 minutes. Fold in the reserved monster cookie pieces gently to keep some texture. Spread half of this mixture evenly over the cooled cookie base, smoothing the top with a spatula.
- Add the Peanut Butter Fudge Layer: Dollop the peanut butter fudge over the ice cream layer and gently spread it out. It doesn’t have to be perfectly smooth; a rustic look adds charm. You can swirl it lightly into the ice cream if you like a marbled effect.
- Top with Remaining Ice Cream: Spread the rest of the monster cookie ice cream over the fudge layer. Sprinkle extra cookie pieces or mini M&Ms on top for color and crunch.
- Freeze the Cake: Cover the pan tightly with plastic wrap or foil and freeze for at least 4 hours, preferably overnight, to set fully.
- Serving: To serve, let the cake sit at room temperature for 10 minutes for easier slicing. Use a sharp knife warmed in hot water for clean cuts.
Pro tip: If the fudge layer feels too soft after freezing, let the cake sit out for a few minutes before slicing to avoid squishing. Also, pressing the cookie base firmly makes a big difference in texture and prevents it from crumbling when serving.
Cooking Tips & Techniques
One thing I’ve learned is that timing is everything with ice cream cakes. Don’t wait too long to assemble once the ice cream softens — it should be pliable but not melting. Keeping everything chilled helps maintain those sharp layers.
When mixing the fudge, start low and slow with the powdered sugar to avoid clumps. I once dumped it all in at once, and let’s just say I had a mini sugar explosion in the bowl. Also, using a good-quality peanut butter that’s creamy but not overly oily creates the best consistency.
Another trick is to gently fold the cookie pieces into the ice cream rather than stirring vigorously. You want those chunks intact for texture contrast, not broken bits.
For cutting, a hot knife is key—dip it in hot water, wipe dry, then slice. This prevents the ice cream from tearing and keeps the cake’s layers neat.
Lastly, a quick note on storage: keep the cake tightly wrapped to avoid freezer burn and off-flavors. If you want to prep ahead, you can freeze it for up to a week, but fresh is always best.
Variations & Adaptations
- Chocolate Lover’s Twist: Swap vanilla ice cream for chocolate or swirl in some chocolate fudge within the layers for a richer version.
- Nut-Free Version: Use seed butter (like sunflower seed butter) in place of peanut butter for the fudge and omit nuts in the monster cookie mix to accommodate allergies.
- Seasonal Flair: Add chopped dried cranberries or festive sprinkles to the ice cream for holiday occasions, or swap monster cookie pieces with ginger snaps for a spiced touch.
- Low-Sugar Option: Use a sugar-free peanut butter and a no-sugar-added ice cream, adjusting powdered sugar in the fudge accordingly.
- Personal Favorite: I once mixed a swirl of salted caramel sauce into the peanut butter fudge—totally addictive and a fun surprise in every bite.
Additionally, if you don’t want to freeze the whole cake, you can make smaller individual parfait-style servings using the same layers in cups. It’s great for portion control and presentation.
Serving & Storage Suggestions
Serve this Ultimate Monster Cookie Ice Cream Cake chilled but not rock-hard—about 10 minutes at room temperature helps soften it just enough. For an extra special touch, add a drizzle of warm caramel or chocolate sauce on top right before serving.
This cake pairs beautifully with a robust coffee or a chilled glass of milk to balance the sweetness. If you’re hosting a party, it’s a fantastic contrast to lighter desserts like fluffy mousse cups or lemon blueberry cheesecakes.
To store, keep the cake tightly wrapped in plastic wrap or foil in the freezer. It stays fresh up to one week, though the flavors and texture are best within the first few days. When reheating leftovers (if any!), a few minutes at room temperature or a quick blast with a warm knife will revive the layers nicely.
Interestingly, the flavors meld even more after a day, making the peanut butter fudge taste richer and the cookie bits softer but still pleasantly chewy—a little patience pays off!
Nutritional Information & Benefits
While this cake is definitely a treat, it packs some nutritional perks thanks to its ingredients. The oats and nuts in the monster cookie base provide fiber and healthy fats, while peanut butter contributes protein and heart-healthy monounsaturated fats.
Estimated per serving (based on 12 servings): approximately 350 calories, with 12g fat, 45g carbs, and 6g protein. It’s not low-calorie by any means, but it’s a satisfying dessert that combines indulgence with some wholesome ingredients.
If you have dietary restrictions, easy swaps like dairy-free ice cream or gluten-free cookies can make this recipe work for you. Just be mindful of peanut allergies and substitute accordingly.
Conclusion
This Ultimate Monster Cookie Ice Cream Cake with Peanut Butter Fudge is one of those recipes that feels like a little celebration every time you make it. It’s playful, indulgent, and surprisingly straightforward, which makes it perfect for all kinds of occasions—or just because you deserve a treat.
Feel free to tweak it to match your tastes or dietary needs—it’s forgiving and adaptable. Honestly, I love how it brings people together, whether it’s a casual family gathering or a festive party. And if you like desserts with texture, flavor bursts, and a bit of nostalgia, this cake will probably become a favorite in your recipe box.
Give it a try, and I’d love to hear how you customize your version or what moments you celebrate with it. Baking (and freezing) this cake is a fun little adventure, and the smiles it brings are worth every sticky spoonful.
FAQs
- Can I make this cake ahead of time?
- Absolutely! This ice cream cake freezes well and can be made up to a week in advance. Just keep it tightly wrapped to maintain freshness.
- What if I don’t have monster cookie mix?
- You can create your own mix by combining oats, chocolate chips, M&Ms, and chopped nuts. Alternatively, use your favorite cookie chunks.
- Can I use a different nut butter for the fudge?
- Yes, almond or cashew butter can work, but the flavor and texture might vary slightly. For nut allergies, try sunflower seed butter.
- How do I slice the cake neatly?
- Use a sharp knife warmed in hot water, then wiped dry. Let the cake sit at room temperature for about 10 minutes before cutting to soften layers.
- Is there a dairy-free version?
- Yes, swap out the ice cream for dairy-free coconut or almond milk-based ice cream and make the fudge with dairy-free butter alternatives.
For more dessert inspiration that pairs well with this cake, you might enjoy the fluffy strawberry mousse cups or the mini lemon blueberry cheesecakes—both fun and crowd-pleasing options for your next gathering.
Pin This Recipe!
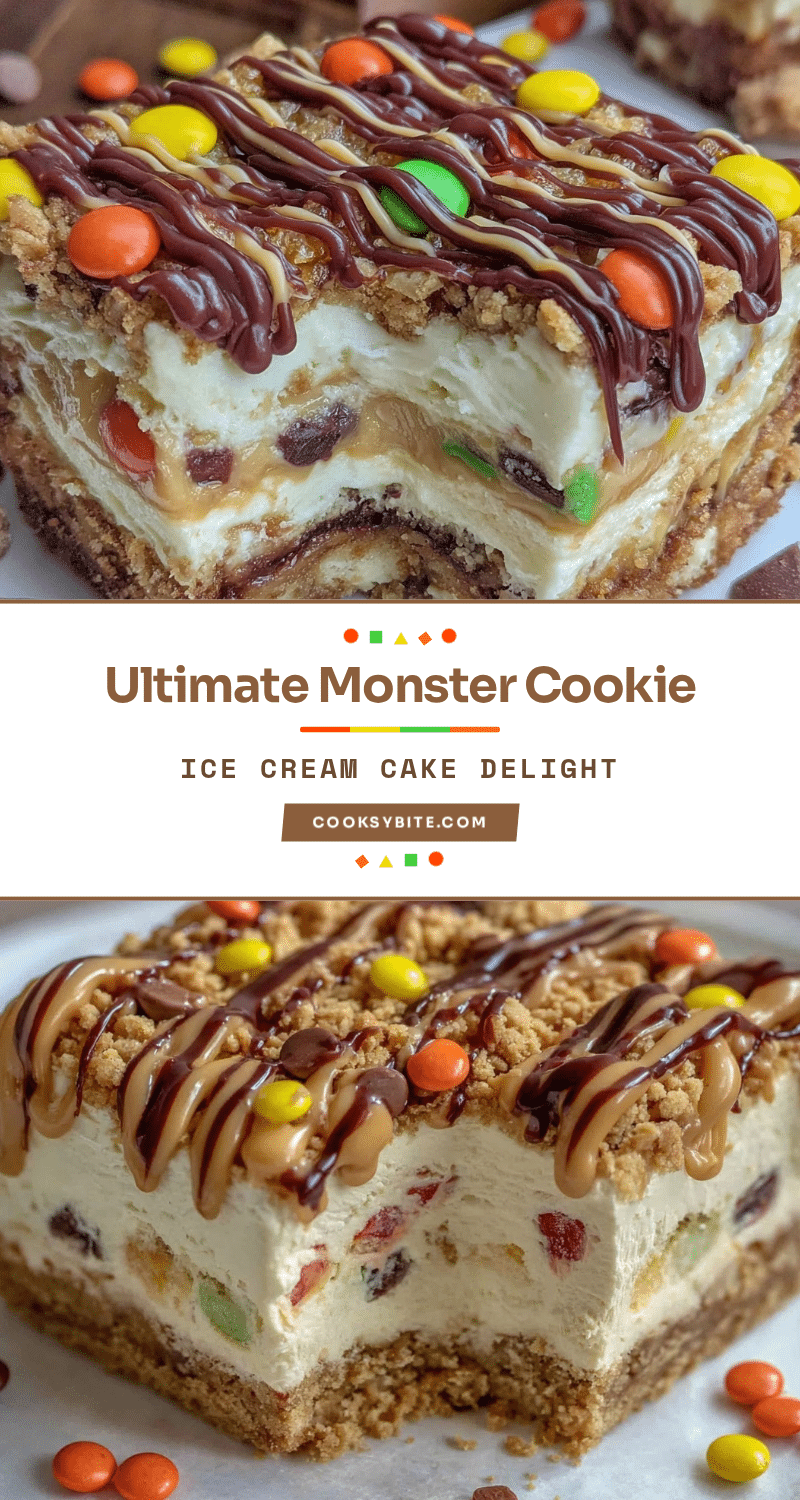
Ultimate Monster Cookie Ice Cream Cake with Easy Peanut Butter Fudge
A playful and indulgent ice cream cake featuring crunchy monster cookie bits, creamy peanut butter fudge, and smooth vanilla ice cream layers. Perfect for celebrations or a nostalgic treat.
- Prep Time: 20 minutes
- Cook Time: 12 minutes
- Total Time: 4 hours 32 minutes
- Yield: 12 servings 1x
- Category: Dessert
- Cuisine: American
Ingredients
- 1 ½ cups monster cookie mix (oats, M&Ms, chocolate chips, nuts)
- ½ cup unsalted butter, melted
- 2 tbsp brown sugar, packed
- 1 quart vanilla ice cream, softened
- 1 cup monster cookie pieces (reserve some for topping)
- 1 cup creamy peanut butter (natural, no-stir preferred)
- ½ cup unsalted butter
- 1 ½ cups powdered sugar, sifted
- 2–3 tbsp heavy cream
- 1 tsp vanilla extract
- Extra monster cookie pieces or mini M&Ms for topping
- Optional: melted chocolate or caramel sauce for drizzle
Instructions
- Preheat oven to 350°F (175°C). In a medium bowl, mix melted butter, brown sugar, and monster cookie mix until moistened. Press firmly into bottom of pan. Bake 10-12 minutes until golden and set. Cool completely.
- In a medium bowl, beat peanut butter and butter until smooth. Gradually add powdered sugar and vanilla extract, alternating with heavy cream, until fudge is thick but spreadable. Set aside at room temperature.
- Allow vanilla ice cream to soften about 10 minutes. Fold in reserved monster cookie pieces gently. Spread half over cooled cookie base, smoothing top with spatula.
- Dollop peanut butter fudge over ice cream layer and gently spread out. Optionally swirl fudge lightly into ice cream for marbled effect.
- Spread remaining monster cookie ice cream over fudge layer. Sprinkle extra cookie pieces or mini M&Ms on top.
- Cover pan tightly with plastic wrap or foil and freeze at least 4 hours or overnight to set fully.
- To serve, let cake sit at room temperature for 10 minutes. Use a sharp knife warmed in hot water for clean cuts.
Notes
Use a hot knife warmed in hot water for clean slicing. Press cookie base firmly to prevent crumbling. Keep cake tightly wrapped to avoid freezer burn. Can be made up to a week ahead. For gluten-free or vegan versions, use appropriate substitutions.
Nutrition
- Serving Size: 1 slice (1/12th of c
- Calories: 350
- Sugar: 30
- Sodium: 150
- Fat: 12
- Saturated Fat: 5
- Carbohydrates: 45
- Fiber: 3
- Protein: 6
Keywords: monster cookie, ice cream cake, peanut butter fudge, easy dessert, party dessert, no bake, layered cake


